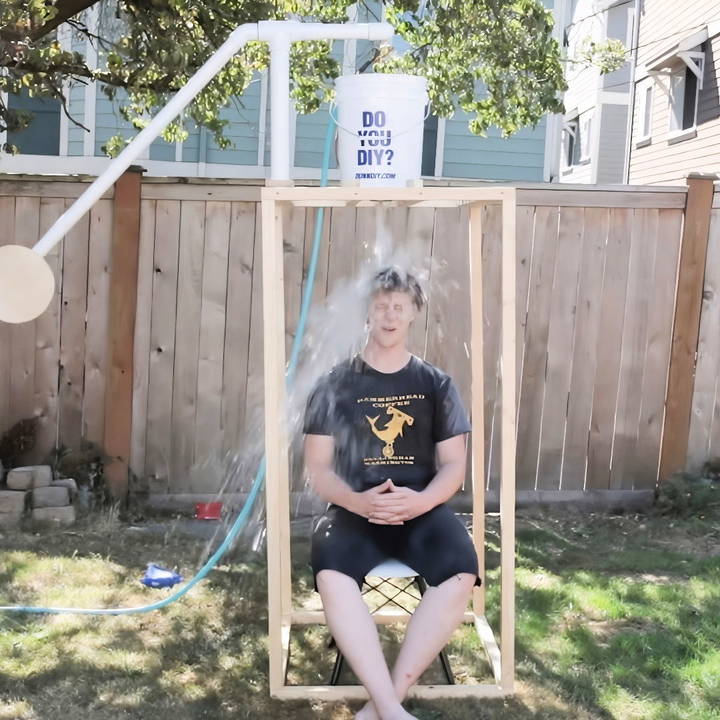
If you've ever been to a summer carnival, you've probably seen a dunk tank. It's that fun, sometimes nerve-wracking attraction where you get the chance to dunk someone in water by hitting a target. Now imagine having one in your backyard, ready for hot afternoons or themed parties. Sounds fun, right? Let me walk you through how to build your own DIY dunk tank.
Materials You'll Need
Before getting started, let's gather everything. Here's what you'll need:
- Plywood (for the bucket platform and trigger)
- A 5-gallon bucket (for holding water)
- PVC pipes (various sizes: 1.5-inch, 2-inch, and 3/4-inch)
- A flapper valve and PVC cap (to control water flow)
- A hose adapter
- A ball float (to regulate water height)
- Bungee cord and plumber's tape (for support)
- Lumber (for building the frame)
- A drill, screws, and silicone sealant
I learned the hard way that getting high-quality PVC pipes can save you headaches later—don't skimp on these!
Step by Step Instructions
Learn how to build a DIY dunk tank with our step-by-step instructions. From cutting plywood to finishing touches, Build a fun and functional dunk tank at home!
Step 1: Cutting the Plywood and Preparing the Bucket
To start, use the bucket as a template and cut a circle in the plywood. This will serve as the base for the bucket. Then, grab a hole saw and drill a hole in the bottom of your bucket—make sure it's about 3 1/4 inches, which is perfect for the flapper valve to fit.
- Pro Tip: When I did this, I used a jigsaw to smooth out the edges of the plywood. It ensures everything fits nicely when you start putting it together.
After cutting, use silicone sealant to attach the flapper valve and PVC cap to the bottom of the bucket. This is crucial to keep the water from leaking out unexpectedly. Let everything sit and dry for a while.
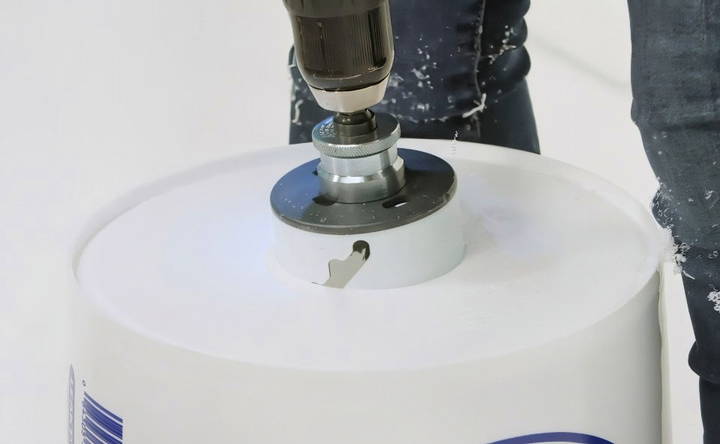
Step 2: Assembling the Float Valve
Now that the bucket is prepped, it's time to install the float valve, which is what controls how much water goes into the bucket. You'll want to drill another hole—this time in the rim of the bucket—so you can attach the rod and ball float. Don't forget to connect the hose adapter, too, as this will regulate the water.
During my first attempt, I struggled with leaks, so I suggest being generous with the silicone sealant around the holes. It helps prevent any unwanted water flow.
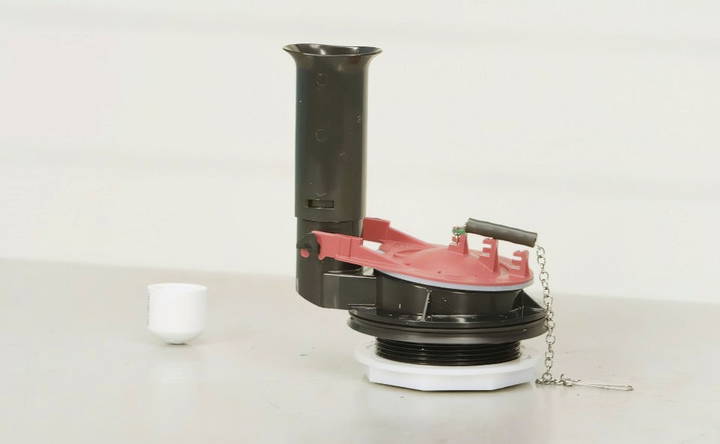
Step 3: Building the Dunk Tank Axis
This step can seem tricky, but it's quite simple once you break it down. You'll need to cut a 2-inch PVC pipe to 1 3/8 inches deep, and fit it into a T-joint, allowing the pipe to rotate smoothly. This forms the axis that will hold your dunk tank's target.
Next, attach a 45-degree elbow to another length of pipe and thread it through the T-joint. Make sure this rotates freely without falling out. If you're like me and hate re-doing work, make sure everything is flush and properly aligned before moving on.
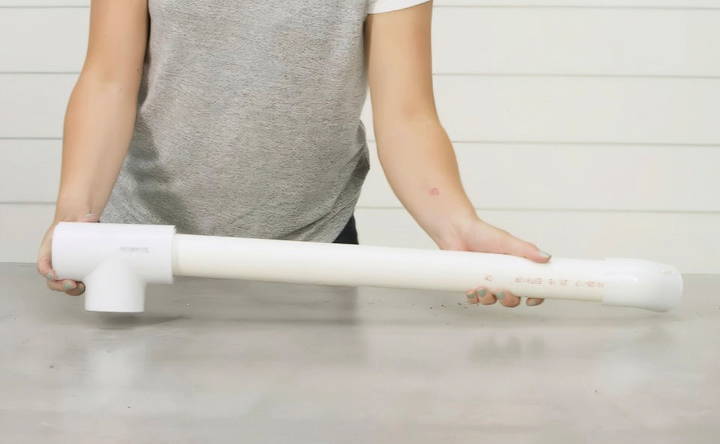
Step 4: Building the Trigger
The dunk tank's trigger is where the magic happens—it's what sends the person into the water. You'll need more PVC pipes for this, starting with an 8 1/2-inch section that fits into a coupling. Attach an elbow and a 10-inch piece of pipe, then connect a longer 48-inch section on the opposite side.
- Personal Insight: Here's where I got stuck initially—getting the pieces to fit snugly can take some elbow grease. Use plumber's tape for extra security. Once you've connected all the pieces, you should have a lever system that moves freely.
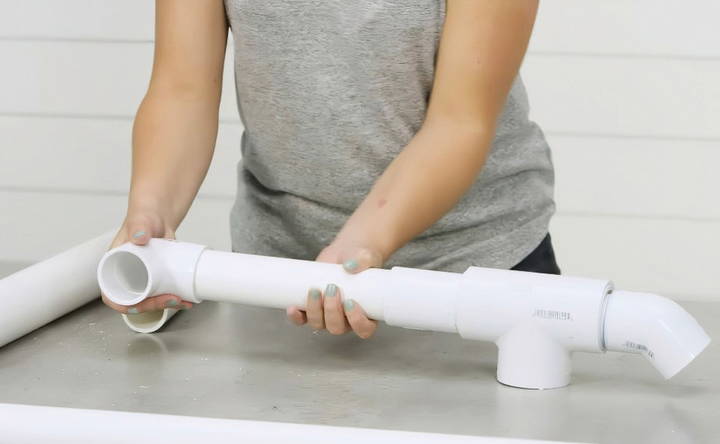
Step 5: Constructing the Frame
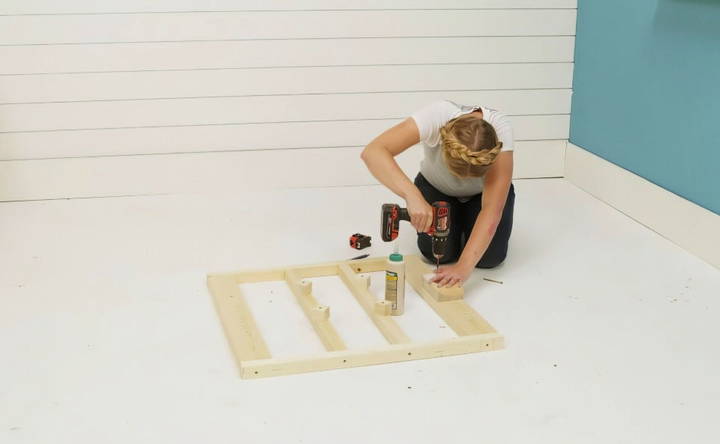
Now that you've built the trigger and prepared the bucket, it's time to build the frame that holds everything together. Start by cutting your lumber to size. The frame consists of a top and bottom square made from 2x4s, with two middle supports for extra stability.
I recommend drilling holes at a steady pace. I learned through trial and error that rushing this part can lead to crooked assembly or worse—cracked wood. Use clamps if you have them, as they help hold everything in place while you work.
Once the frame is built, attach the bucket to the center of the top frame using small blocks to hold it securely in place. For the bottom frame, attach the long 2x4 pieces to connect the top and bottom, ensuring stability.
Step 6: Attaching the Target
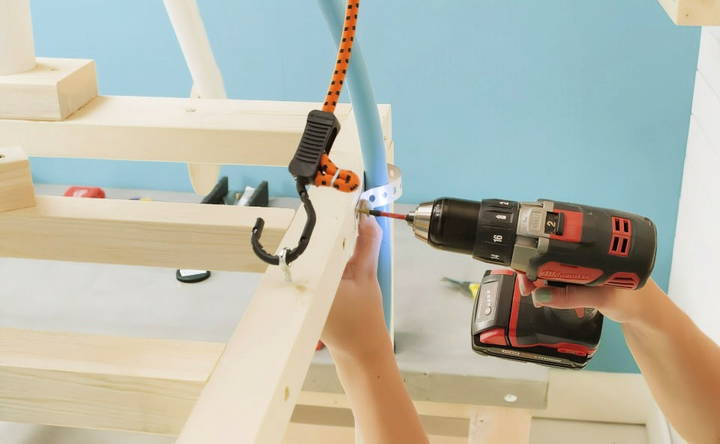
Remember that plywood circle you cut at the beginning? It's time to attach it to the PVC trigger arm. Using plumber's tape and screws, secure the plywood to the end of the arm, ensuring it's sturdy. This becomes the target that people will aim for to dunk someone in the tank.
When I did this, I found that half-inch screws worked best for keeping the plywood in place without cracking it.
Step 7: Finishing Touches
Now, we're almost there! With everything in place, attach a string from the flapper chain through a small hole at the back of the bucket. This string will pull the flapper open when someone hits the target.
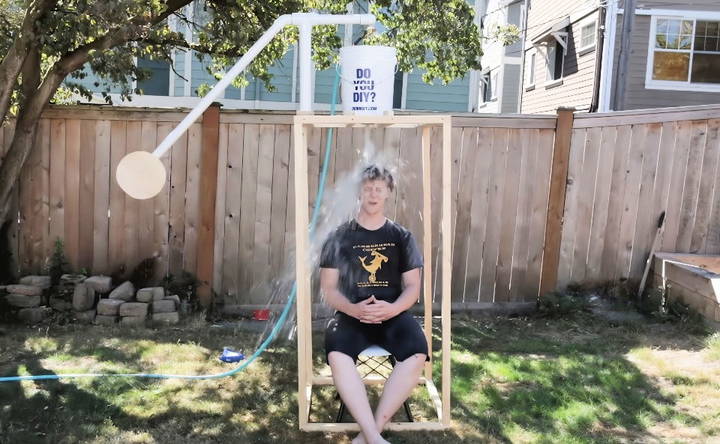
For extra tension, attach a bungee cord from the stand to the PVC arm so it snaps back into place after each dunk. Adjust the float valve to your desired water level, attach the hose to the adapter, and turn on the water. You now have a fully functioning dunk tank!
- My Last Tip: Make sure to test it a few times before inviting your friends or family to try it. You'll want to adjust the water level and ensure everything is working smoothly. The last thing you want is for the dunk tank to fail when someone's about to get dunked!
Customization Ideas
Customizing your DIY dunk tank can make it more fun and engaging for any event. Here are some easy-to-follow ideas to personalize your dunk tank:
Theming
- Event Themes: Match the dunk tank to the theme of your event. For a carnival, use bright colors and circus patterns. For a beach party, add palm trees and beach balls.
- Seasonal Themes: Decorate according to the season. For summer, use sunflowers and sunglasses. For Halloween, add spooky decorations like fake cobwebs and pumpkins.
Personalization
- Names and Logos: Add names or logos to the dunk tank. Use waterproof paint or stickers to personalize it for birthdays, company events, or fundraisers.
- Custom Colors: Paint the dunk tank in your favorite colors or match it to your event's color scheme. Use outdoor paint to ensure it lasts.
Interactive Features
- Scoreboard: Attach a scoreboard to keep track of successful dunks. This adds a competitive element and makes it more exciting.
- Sound Effects: Add a waterproof speaker to play sound effects when someone gets dunked. Choose funny sounds or cheers to enhance the experience.
Decorations
- Banners and Signs: Hang banners or signs around the dunk tank. Use them to give instructions or just to add some flair.
- Lights: Add waterproof LED lights to make the dunk tank stand out, especially for evening events. Choose colors that match your theme.
Practical Additions
- Comfortable Seating: Add a cushioned seat for the person getting dunked. This makes it more comfortable and enjoyable.
- Easy Access: Install a small ladder or steps to make it easier to get in and out of the dunk tank. Ensure it's sturdy and safe.
Eco-Friendly Options
- Recycled Materials: Use recycled or upcycled materials for decorations. This is not only eco-friendly but also adds a unique touch.
- Water Conservation: Set up a system to recycle the water used in the dunk tank. This can be as simple as using a pump to filter and reuse the water.
By incorporating these customization ideas, you can make your DIY dunk tank more appealing and enjoyable for everyone.
Troubleshooting Guide
Even with the best plans, issues can arise with your DIY dunk tank. Here's a helpful guide to troubleshoot common problems:
Common Issues and Solutions
Explore common water fountain issues and solutions, including leaks, trigger mechanism failures, unstable structures, water quality, and difficulty in dunking.
Leaks
- Problem: Water is leaking from the tank.
- Solution: Check all seams and joints for gaps. Use waterproof sealant or tape to fix any leaks. Ensure all connections are tight and secure.
Trigger Mechanism Failures
- Problem: The dunk mechanism isn't working.
- Solution: Inspect the trigger for any obstructions or damage. Lubricate moving parts with a waterproof lubricant. Test the mechanism multiple times to ensure it's functioning smoothly.
Unstable Structure
- Problem: The dunk tank feels wobbly or unstable.
- Solution: Ensure the tank is on a flat, stable surface. Check all bolts and screws, tightening them as needed. Add extra support or braces if necessary.
Water Quality Issues
- Problem: The water becomes dirty or cloudy quickly.
- Solution: Use a water filter or pump to keep the water clean. Change the water regularly, especially during long events. Consider using a pool cover when the tank is not in use to keep debris out.
Difficulty in Dunking
- Problem: The target is hard to hit, or the seat doesn't release properly.
- Solution: Adjust the target size or sensitivity. Ensure the seat release mechanism is not too tight. Test and adjust the tension as needed.
Maintenance Tips
- Regular Inspections: Inspect the dunk tank before and after each use. Look for any signs of wear and tear, and address them promptly.
- Proper Storage: Store the dunk tank in a cool, dry place. Disassemble it if possible to save space and prevent damage.
- Routine Cleaning: Clean the tank with mild soap and water after each use. Avoid harsh chemicals that could damage the materials.
Use this guide to keep your DIY dunk tank working well. For unresolved issues, seek help from online forums or DIY communities.
FAQs About DIY Dunk Tank
Discover answers to common questions about DIY dunk tanks, from setup to safety tips, ensuring a fun and successful project.
A DIY dunk tank is a homemade version of the popular carnival game where a person sits on a collapsible seat above a tank of water. When a target is hit, the seat collapses, dunking the person into the water. It's a fun activity for parties, fundraisers, and events.
Safety is crucial. Ensure all parts are securely fastened and the seat mechanism works correctly. Use non-slip materials for the seat and steps. Always have an adult supervise the dunk tank during use and ensure the water is clean and at a safe depth.
Building a DIY dunk tank can take anywhere from a few hours to a couple of days, depending on your experience and the complexity of the design. Planning and gathering all materials beforehand can speed up the process.
Yes, DIY dunk tanks are great for fundraising events. Charge participants a fee to throw balls at the target. Ensure you have a safe and organized setup to handle the crowd and manage the event smoothly.
Yes, if building a dunk tank seems too challenging, you can rent one from party supply companies. This can be a convenient option, especially for one-time events.
Final Thoughts
Building a DIY dunk tank is a fun and rewarding project that's perfect for summer parties. From my own experience, it's a great way to combine creativity with practicality. Just take your time with each step, double-check the connections, and make sure everything is secure. Before you know it, you'll have your very own dunk tank, ready for all the fun to begin!


