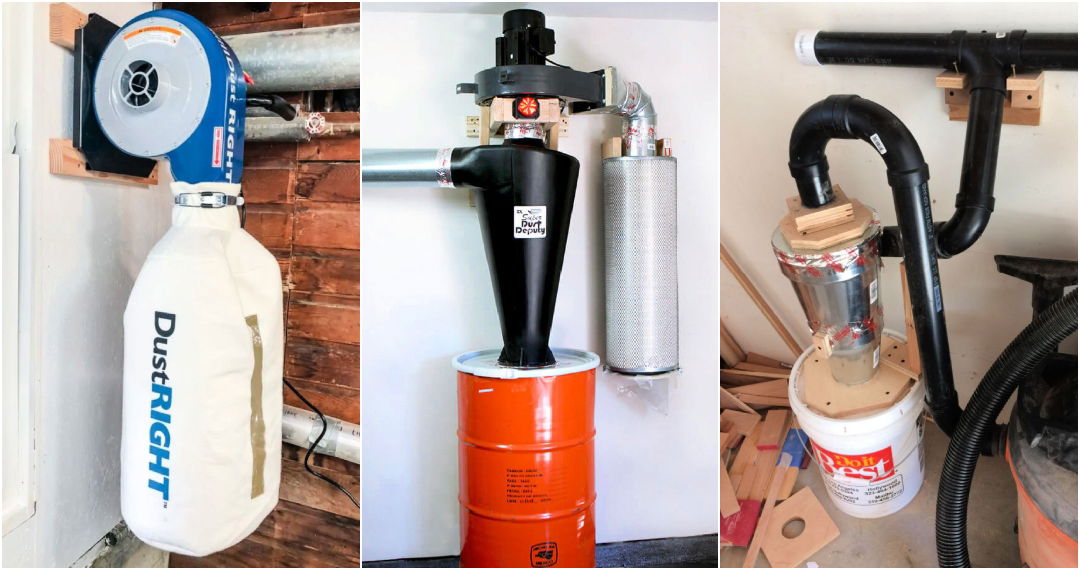
Building a homemade DIY dust collector system was a game-changer for my workshop. I realized the need for a dust collector after constantly dealing with sawdust and debris. The process started by researching materials and designs that were simple to make. I found most instructions didn't need fancy tools, just some basic items that I already had lying around.
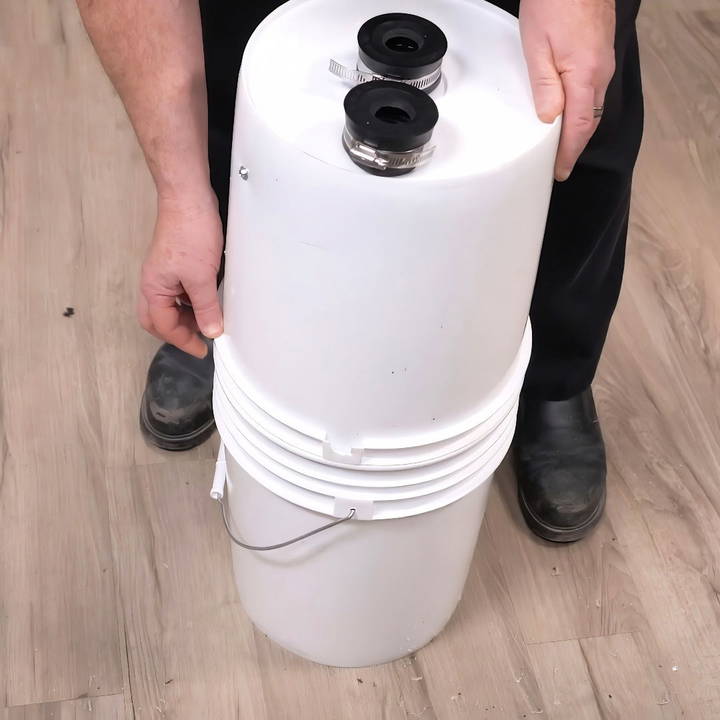
Building my DIY dust collector turned out to be easier than expected. Connecting a powerful vacuum to a mesh filter did the job remarkably well. The cleaner space made my workshop safer and more pleasant to work in. These tips and tricks can help you make your DIY dust collector system to improve your workspace, as I did.
Materials Needed
- Two Buckets: One serves as the base, and the other as the top section.
- Plumbing Fittings: Inch and a half ABS couplings, 90-degree elbow, 45-degree elbow.
- Cordless Drill: For making holes in the buckets.
- Hole Saw: To make precise openings for the couplings.
- Jigsaw: For cutting the top lip off one of the buckets.
- Side Cutters (Tin Snips): To remove the bucket handle.
- Utility Knife: To clean up rough edges.
- Tube Pipe Caps and Clamps: To tighten the fittings.
- Marker: To mark where to drill.
- Screws: To secure the fittings inside the bucket.
Step by Step Instructions
Learn how to build a DIY dust collector with our step-by-step instructions, from preparing buckets to testing the final assembly. Perfect for any home workshop!
Step 1: Preparing the Buckets
- Removing the Handle: First, I removed the handle from one of the buckets using a pair of side cutters. Tin snips work equally well for this task.
- Cutting the Top Lip: Next, I had to cut off the upper lip of the bucket, which would become the top section of the dust collector. Using a jigsaw, I carefully made this cut. Remember to wear your safety gear—a pair of goggles and gloves—to protect yourself during this step.
- Smoothing the Edges: After cutting, I noticed the edges were a bit rough. I used my utility knife to smoothen them. This involves running the knife around the top inside and outside edges of the bucket, making a slight bevel.
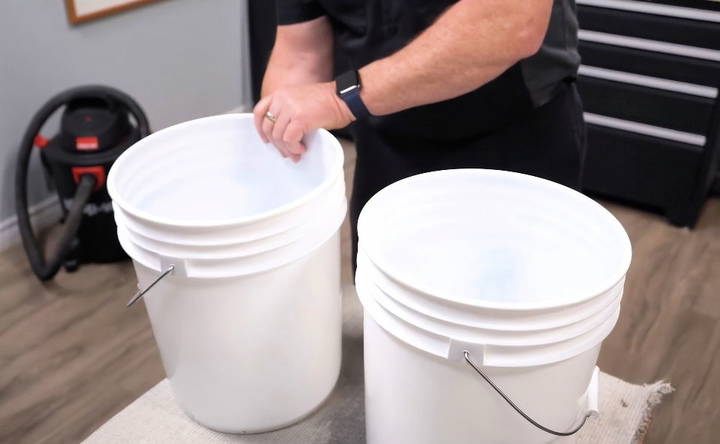
Step 2: Connecting the Buckets
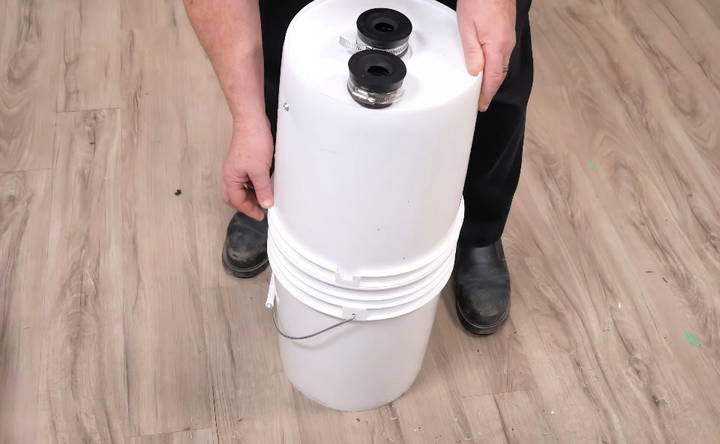
- Building a Friction Fit: With the edges cleaned up, I placed the top section (the bucket with the cut-off lip) into the base bucket. The fit should be snug, making a friction fit but not too tight.
Step 3: Marking and Drilling Holes
- Identifying Hose Connection Points: The next step is to figure out where to attach our hoses. The hose from the shop vac goes in the center of the base bucket, while the pickup hose connects to the outer edge in the lowest part of the bucket's base waves.
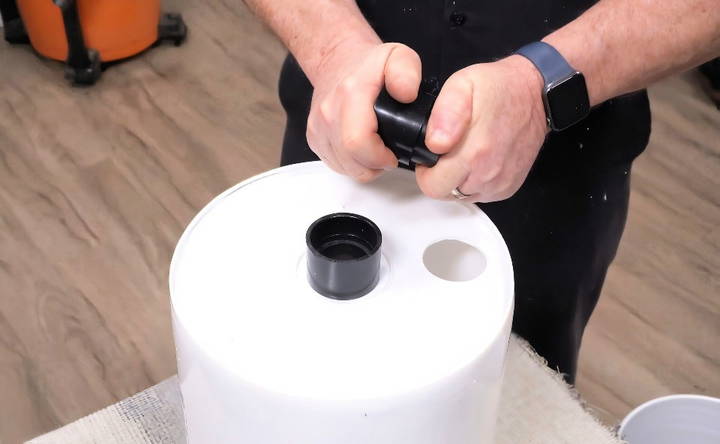
- Marking and Drilling: I placed an ABS coupling on the marked spot for the pickup hose about half an inch from the edge and marked the center. Using a cordless drill and a hole saw, I drilled the hole at this mark. I repeated the process for the shop vac hose hole in the center.
Step 4: Assembling the Plumbing Fittings
- Preparing the Couplings: For the first connection (shop vac hose), I inserted a smaller piece into the ABS coupling and pushed it tight together. I then brought it up from the inside of the bucket and inserted the other piece on top.
- Secondary Connection for Pickup Hose: For the second connection (pickup hose), I combined pieces to form an elbow inside the bucket. This involved connecting a 90-degree elbow to a 45-degree elbow. This assembly was arranged such that the material collected would be funneled into the container efficiently.
Step 5: Securing the Assembly
- Attaching and Securing the Fittings: I put the assembled piece into the drilled hole, ensuring the elbow was touching the side of the bucket. I then measured where to place the screw to secure it in place. After marking, I inserted the screw, securing the fitting firmly.
Step 6: Preparing and Attaching the End Caps
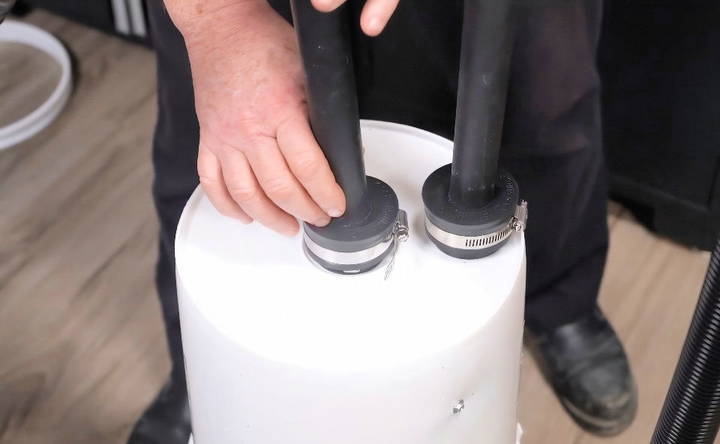
- Final Adjustments: I put pipe caps over our fittings, tightening them with clamps. Then, using the hole saw, I drilled holes in each cap for the hoses. These holes were slightly smaller than the hose diameter to ensure a tight fit.
Step 7: Testing the Dust Collector
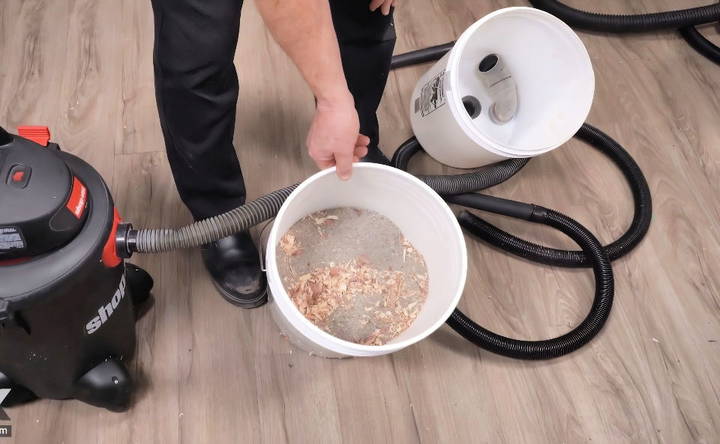
With everything assembled, I fitted the top bucket back onto the base, inserted the hoses—one connected to the shop vac and the other serving as the pickup—and powered it up.
- Evaluating Performance: After cleaning the floor, I checked the dust collector. Most of the debris was in the collector, with very little making it to the shop vac. The system proved to be quite effective!
Lessons Learned
- Quality of Buckets: Use sturdy buckets as the ones I used started to collapse under suction when filled.
- Better Quality Hose: Initially, the inexpensive hose I used made a lot of noise. Investing in a better quality hose will make the system quieter.
- Right Shop Vac: You don't need a powerful shop vac. A smaller one with good suction works well with this system.
Advanced Tips for Optimizing Dust Collection Efficiency
Building an efficient dust collection system is crucial for maintaining a clean and safe workshop environment. Here are some advanced tips to help you optimize your DIY dust collector's performance:
Maximize Airflow
- Ensure that the paths for air travel are as straight as possible. Bends and turns can reduce airflow significantly.
- Use wider pipes or hoses when feasible. Larger diameters allow for better air movement and can handle more dust particles.
Seal Leaks
- Check all connections and seams for leaks. Even small gaps can decrease suction power.
- Use sealants or tape specifically designed for ductwork to ensure airtight seals.
Upgrade Filters
- Consider using a pleated filter instead of a bag. Pleated filters have more surface area, which improves airflow and filtration.
- Clean or replace filters regularly to maintain peak performance.
Use Dust Separators
- Add a cyclone or other type of pre-separator. This device spins the air and uses centrifugal force to separate larger particles from the airstream before they reach the filter.
- Separators can extend the life of your filter and improve suction.
Monitor Performance
- Install a vacuum gauge to monitor the system's suction power. This will help you identify when maintenance is needed.
- Pay attention to changes in noise and suction; these can indicate clogs or leaks.
Regular Maintenance
- Empty the dust collection bin before it gets too full. A full bin can restrict airflow and reduce efficiency.
- Inspect the system regularly for wear and tear, especially if you're working with abrasive materials.
Follow these tips to maintain an efficient DIY dust collector. It keeps your workspace clean, air quality high, and tools dust-free, enhancing their lifespan.
Troubleshooting Common Issues
When working with a DIY dust collector, you might encounter a few hiccups along the way. Here's a straightforward guide to solving some common problems:
Loss of Suction
- Check for Clogs: Inspect the hoses and pipes for blockages. Sawdust and larger debris can get stuck and impede airflow.
- Examine the Filter: A dirty filter can reduce suction. Clean or replace it if necessary.
Excessive Noise
- Tighten Loose Parts: Vibrations can cause parts to loosen. Tighten any screws or fittings that seem loose.
- Inspect for Damage: Look for any cracks or holes in the system that could be causing extra noise.
Dust Escaping the System
- Seal Leaks: Use duct tape or silicone caulk to seal any leaks in the system.
- Improve Collection Bin Seal: Make sure the lid of the dust bin is secure and airtight.
Overheating Motor
- Clear Ventilation Path: Ensure the motor has proper ventilation. Overheating can occur if the motor can't cool down.
- Reduce Load: If you're using a shop vac, it may not be designed for continuous use. Give it breaks to prevent overheating.
Static Electricity Build-up
- Ground the System: Static can be a problem, especially in dry environments. Run a grounding wire along the system to a proper ground.
Inefficient Dust Separation
- Adjust the Separator: If you're using a cyclone separator, make sure it's properly aligned and the internal pathways are clear.
- Check Airflow Speed: Too much or too little airflow can affect separation. Adjust the fan speed if possible.
Monitor and address issues to maintain an efficient dust collection system. Regular maintenance prevents problems. Stay observant for a well-performing DIY dust collector.
FAQs About DIY Dust Collector
Discover essential FAQs about DIY dust collectors. Get tips, steps, and tools needed for an effective dust collection system in your workshop.
A DIY dust collector is a system you create yourself to remove dust and debris from your workspace. Building one is beneficial because it improves air quality, keeps your workspace clean, and can be cost-effective compared to commercial systems. It’s also customizable to fit your specific needs.
A DIY dust collector typically uses a fan or vacuum to make suction, which pulls in dusty air. The air then passes through a filter, which traps the dust particles, and the clean air is expelled back into the room or outside. Some systems also include a separator to remove larger debris before it reaches the filter.
Yes, with the right design and materials, a DIY dust collector can be just as effective as a commercial one. It’s important to ensure that your system has enough suction power and the proper filtration to handle the amount of dust produced in your workspace.
Safety is paramount when dealing with dust collection. Ensure that your system is well-constructed to avoid leaks and that electrical components are properly insulated. Regularly check and clean your system to prevent fire hazards from dust accumulation.
Regular maintenance of your DIY dust collector is crucial for its longevity and efficiency. Here's what you should do:
Clean the filter regularly to ensure proper airflow and dust capture.
Inspect all hoses and connections for leaks or damage and repair them as needed.
Empty the dust bin or separator frequently to prevent overfilling and potential blockages.
Check the fan or vacuum motor for signs of wear and perform necessary maintenance as per the manufacturer's instructions.
Review your setup periodically to make sure it still meets your needs and adjust as necessary.
Final Thoughts
Building a DIY dust collector is doable and cost-effective. All it takes is some simple household items and a bit of time. If you're into DIY projects and want a cleaner workspace, try building this dust collector. If you have any specific DIY projects you'd like to see, please leave a comment below!


