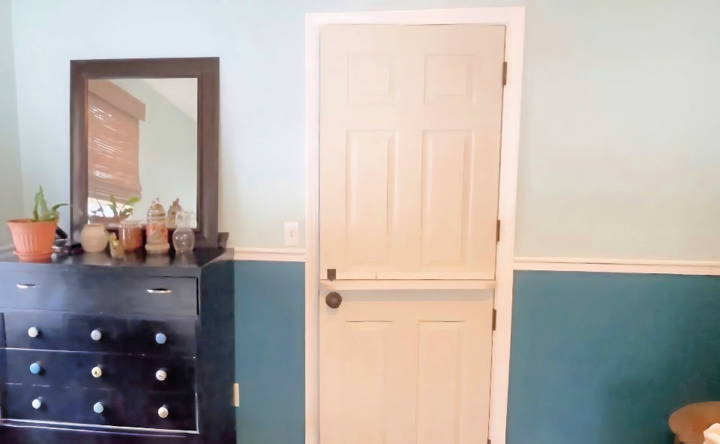
Building a DIY Dutch Door was such a rewarding project for me. I love how it gives a unique character to any room. This task not only refreshed my space but also taught me valuable home improvement skills. I started with a solid wooden door, cutting it precisely in half and adding proper hinges. The process was much simpler than I imagined, and the result was fantastic.
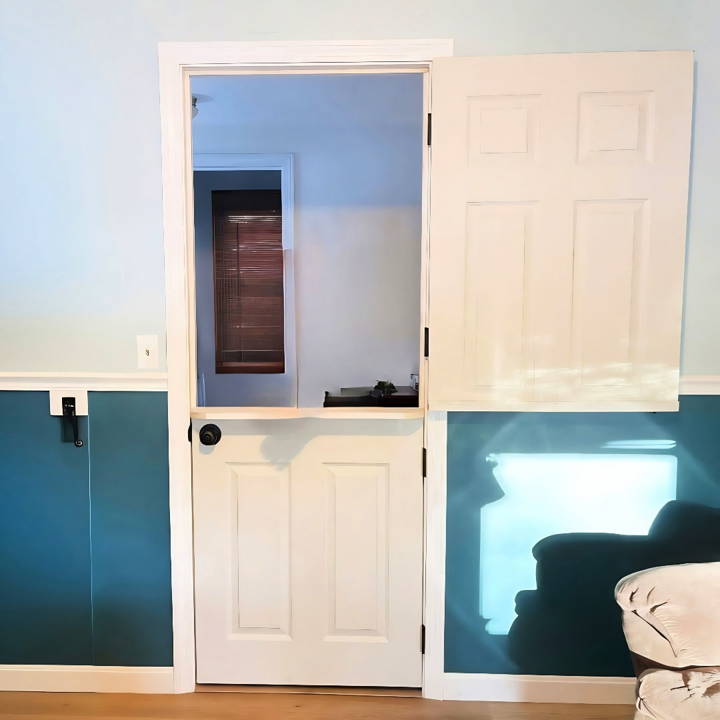
If you have basic tools like a saw, screwdriver, and measuring tape, you can transform an ordinary door into a beautiful Dutch door. The steps are straightforward, and the materials are easy to find.
I assure you, with some patience and effort, you too can achieve this stylish touch for any entrance in your home. Try it yourself and enjoy the satisfaction of your DIY Dutch door.
Materials Needed and Their Purpose
- Door Slab: The primary component, choosing the right size and style is crucial.
- Hinges (4): Ensuring smooth operation of both halves of the door.
- Router and Router Bit: For making the recesses for the hinges to sit in.
- Circular Saw: For cutting the door into two parts.
- Finish Nails (16 gauge): To secure the parts without being too obtrusive.
- Painter's Tape: To avoid splinters while cutting.
- Wood Filler: For making the door solid where it's been cut, and for any imperfections.
- Primer and Paint: To give the door a finished look.
- Tools: Measuring tape, pencil, square, and safety equipment.
Each material plays a vital role in the construction and aesthetics of the Dutch door, ensuring that the finished product is both appealing and functional.
Step by Step Instructions
Learn how to make a DIY Dutch door with our step-by-step guide! Follow easy instructions from preparing to finishing touches for a perfect DIY project.
Step 1: Preparing the Door
I started with a solid door slab that matched the dimensions I needed. It's important to have a clear vision of where the door will split. For my project, the door was divided roughly into two equal parts to allow for a balanced look.
Step 2: Measuring and Marking for Hinges
Precision is key; I carefully measured and marked where the hinges would go, ensuring they aligned perfectly on both halves of the door. This step requires patience and accuracy.
Step 3: Cutting the Door
Using a circular saw, I cut the door into two separate pieces. To prevent splintering, I applied painter's tape along the cutting line. This trick really worked, leaving a clean edge.
Step 4: Routing for Hinges
The router was used to build recesses for the hinges on both the door and frame. I took my time to ensure the depth and size were just right, as snug-fitting hinges are critical for smooth operation.
Step 5: Securing the Hinges and Assembling the Door
After routing, I attached the hinges to the door pieces and then to the frame. This was a pivotal moment as I saw the door take shape and the halves swing independently for the first time.
Step 6: Finishing Touches
The final steps involved some wood crafting; the hollow core door required support at the cut edge, so I inserted a solid piece of wood and secured it. Then, I sanded the door, applied primer, and finally, painted it to match our home's aesthetic.
Step 7: Enjoying the Dutch Door
Installing the door was immensely satisfying. The top opened with a gentle push, letting in a breeze while the bottom half stayed securely shut, precisely what we wanted.
Challenges and Solutions
Every DIY project has challenges. Ensuring the door was square and fitting it to our home's quirks required patience and accurate measuring. To prevent paint chipping, using plenty of primer helped.
Customization Ideas
Customizing a Dutch door can be a delightful project that adds personality and flair to your home. Here are some creative ideas to make your Dutch door truly yours:
- Paint and Color: Choose a color that stands out and makes your Dutch door a focal point. Bright colors can add a cheerful touch, while darker hues can lend sophistication. Don't be afraid to go bold!
- Hardware and Accessories Selecting the right hardware can enhance both the look and functionality of your Dutch door. Consider classic wrought iron for a traditional look or sleek brushed nickel for a modern twist. Add a unique door knocker or decorative hinges to make a statement.
- Shelves and Storage A shelf on the lower section of your Dutch door isn't just decorative; it's also practical. Use it to hold plants, keys, or mail. Ensure it's securely attached and properly sealed to withstand the elements if your door is exposed.
- Glass and Screens: Incorporating glass panels can brighten up your space while maintaining privacy with frosted or stained glass options. During warmer months, a screen on the top half can keep bugs out while letting the breeze in.
- Artistic Touches Personalize your door with artistic elements like stenciling, decals, or even a hand-painted mural. These can be great conversation starters and show off your personal style.
- Pet-Friendly Features: If you have pets, consider installing a pet door on the bottom half. This allows your furry friends to come and go as they please without compromising the door's integrity.
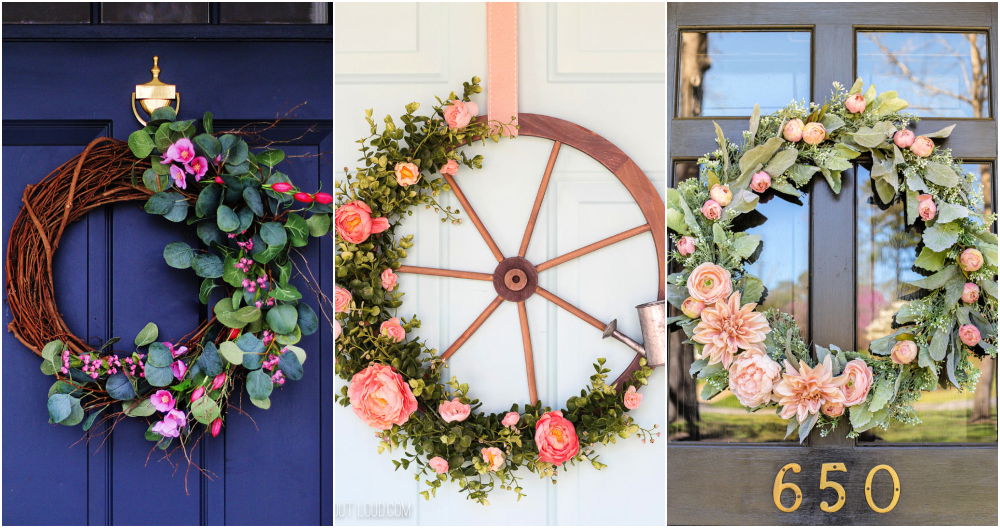
- Seasonal Decor: Embrace the seasons by decorating your Dutch door accordingly. Wreaths, garlands, and seasonal motifs can be easily swapped out throughout the year.
- Security Upgrades: While customizing, don't forget about security. High-quality deadbolts and a peephole can provide peace of mind without detracting from the door's charm.
Enhance your Dutch door's look and functionality with these customization tips. Balance creativity and practicality to make a door that suits your style and needs.
Design Considerations
When it comes to integrating a Dutch door into your home, thoughtful design is key. Here's a guide to help you make informed choices that blend form and function seamlessly.
- Material Matters The material of your Dutch door affects not only its appearance but also its durability and maintenance requirements. While wood is a traditional choice that offers a classic look, it may require more upkeep. Alternatives like fiberglass or steel can provide greater resilience against the elements, especially in harsh weather conditions.
- Style and Aesthetics The style of your Dutch door should complement your home's architecture. Whether you prefer a traditional look with a solid bottom and glass on top, a contemporary design with bold colors, or a farmhouse style that resembles barn doors, there's a Dutch door to suit your taste.
- Hardware Selection Choosing the right hardware is crucial for both security and style. Hinges, locks, and Dutch door bolts should be sturdy and reliable. At the same time, they can add a decorative touch—think brass handles for a nautical theme or wrought iron for a rustic feel.
- Color Choices The color of your Dutch door can make a significant impact. Whether you opt for paint or stain, select a shade that reflects your personal style and enhances your home's curb appeal. Light, breezy colors like seafoam green or sky blue can evoke a coastal vibe, while bolder hues might set a more modern tone.
- Energy Efficiency An often-overlooked aspect of Dutch door design is energy efficiency. Since the top half can open independently, it's important to ensure that the lower door closes tightly to prevent drafts. In colder climates, consider additional insulation to minimize heat loss.
- Practicality and Function The split design of Dutch doors offers practical advantages, such as improved ventilation and a safe way to interact with visitors. However, it's essential to consider the door's location and how it will be used daily to maximize its benefits.
- Customization: Your Dutch door can be tailored to your needs. Whether it's adding a shelf for convenience or installing a pet door for your furry friends, customization can enhance the door's functionality and reflect your lifestyle.
Building the ideal Dutch door requires balancing aesthetics, practicality, and performance. This ensures a door that looks great meets your needs and is durable.
Troubleshooting Common Issues
Dutch doors, with their split design, can sometimes present unique challenges. Here's a straightforward guide to solving some of the most common issues you might encounter with your Dutch door.
- Sticking or Difficulty in Opening/Closing If your Dutch door is sticking or not opening and closing smoothly, it could be due to changes in humidity and temperature, causing the wood to swell or warp. To fix this, you may need to adjust the hinges or sand down the areas where the door is sticking. Always check for loose screws on the hinges and tighten them if necessary.
- Creaking Hinges Creaking may occur because the hinges are carrying the weight of two separate door halves. Lubricating the hinges with a silicone-based spray can help. If the creaking persists, inspect the hinges for wear and tear and consider replacing them if they are damaged.
- Gaps and Insulation Issues Over time, the door and frame may warp, leading to gaps that affect the insulation. Weather stripping can be applied to seal these gaps and improve energy efficiency. For larger gaps, you may need to realign the door or replace the frame.
- Dirt and Dust Accumulation Regular cleaning is essential for maintaining the smooth operation of your Dutch door. Dirt and dust can accumulate in the tracks and moving parts, so a routine wipe-down with a damp cloth can prevent build-up and potential problems.
- Lock and Latch Problems If the lock or latch isn't functioning properly, it could be due to misalignment between the top and bottom halves of the door. Check the alignment and adjust the strike plate if needed. If parts are worn out, replacing the lockset or latch assembly may be necessary.
Promptly addressing these issues ensures your Dutch door remains charming and practical. Regular maintenance and some troubleshooting preserve its integrity and functionality.
Safety and Security
Ensuring the safety and security of your home is paramount when installing a Dutch door. While they offer convenience and style, it's important to address their unique security considerations.
- Structural Integrity Due to their split design, Dutch doors have more potential weak points than a standard door. It's crucial to ensure that both halves of the door are solid and well-constructed. Opt for thick, durable materials and robust frames to enhance security.
- Hardware Considerations A Dutch door requires more hardware, such as hinges, handles, and latches, which need regular maintenance to function correctly. Ensure that all hardware is of high quality and properly installed to withstand daily use.
- Locking Mechanisms The doorknob and lock are typically on the lower half of the door. For added security, install a deadbolt on the top half as well. This dual-lock system can prevent unauthorized entry when the top half is open.
- Weather and Warping Changes in weather can cause Dutch door frames to warp, potentially making gaps. Regularly check the door for any signs of warping and address them promptly. Weather stripping can help seal gaps and maintain the door's integrity.
- Visibility and Interaction One of the benefits of a Dutch door is the ability to interact with visitors without fully opening the door. This feature can enhance security by allowing you to see and communicate with someone outside while keeping a barrier in place.
- Additional Security Features Consider adding extra security features such as a peephole, security cameras, or motion-sensor lights near the door. These can deter potential intruders and give you a better view of your doorstep.
To ensure Dutch doors are secure, reinforce them with quality hardware, regular maintenance, and extra safety measures. This will keep them a charming and safe entry to your home.
FAQs About How to Make a Dutch Door
Discover answers to common queries and step-by-step guidance in our FAQs on how to make a DIY dutch door that is perfect for DIY enthusiasts.
A Dutch door, also known as a half door, is a door that is split horizontally allowing the top half to open independently from the bottom half. This type of door is practical for keeping pets and small children inside while still allowing air and light to flow through the top half when opened.
It's important to start with the right type of door. A solid wood door is ideal because it can be cut and modified without affecting its integrity. Avoid using doors made of steel, fiberglass, or with a hollow core, as these materials are not suitable for making a Dutch door.
Yes, you can install a Dutch door by yourself, but it’s recommended to have at least one other person to assist you. The process involves precise cutting, aligning, and attaching hardware, which can be challenging to manage alone. If you’re not experienced with DIY projects, consider seeking help from someone who is.
Maintaining a Dutch door is similar to caring for any wooden door. Regularly check the hinges and hardware to ensure they are secure and functioning properly. Keep the door clean and touch up paint or finish as needed to protect the wood. If your door has a weather seal, inspect it periodically and replace it if it becomes worn out.
Dutch doors require additional hardware compared to standard doors, such as extra hinges and a latch or bolt to secure the two halves. Ensure that the door frame is sturdy enough to support the door and that the floor is level to prevent alignment issues. If you're adding a shelf or glass panels, make sure you have the right tools and materials for those modifications.
Conclusion
I'm sharing this so you can confidently start your DIY Dutch Door project. With clear steps and simple tools, you'll see just how accessible and fun it can be.


