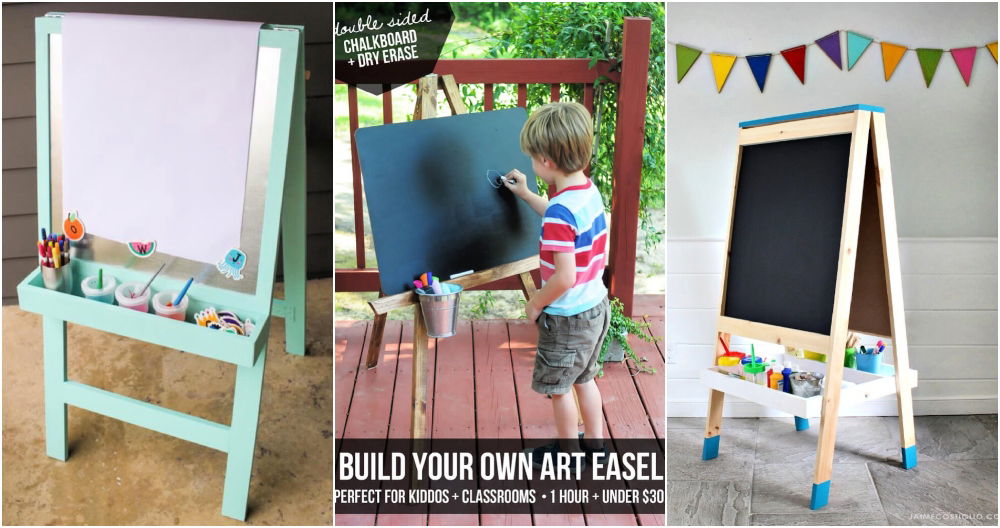
Making my own DIY easel was a project I will always remember. I cherish how something that seemed challenging at first turned out to be simple and fun. The process taught me how satisfying and rewarding making something with my own hands can be. Every time I paint now, I feel a connection to the easel, making my creative time even more special.
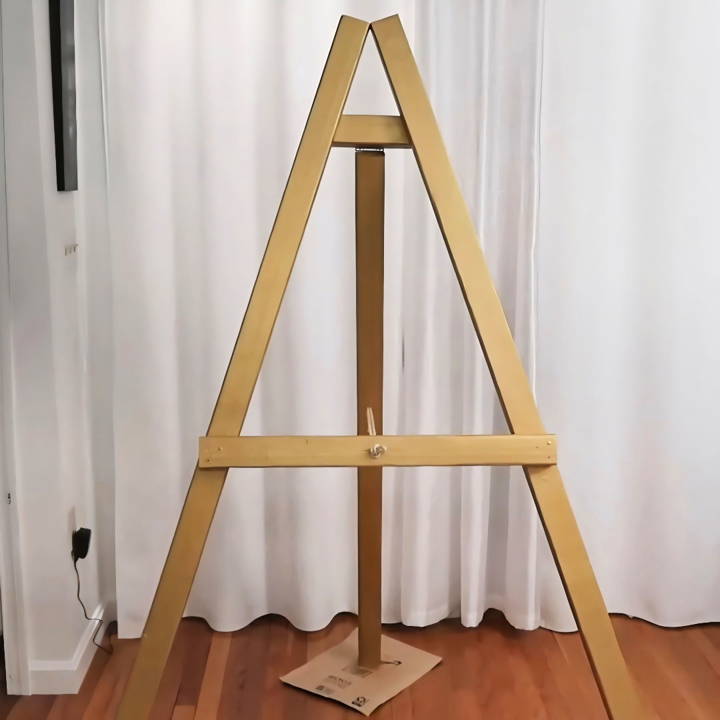
When I first thought about making an easel, I searched for simple guides. Step-by-step instructions helped me understand the materials and tools needed. Each step was clear and made it easy to follow along.
Building your own easel not only saves money but also gives you a sense of achievement and personalization in your art space. I'm helping with this guide to ensure your project runs smoothly.
Materials Needed:
- Wooden Boards: We need three pieces, each eight feet long. I chose the dimensions for durability and support, but go with what feels right for your project.
- Tape Measure & Marker: Essential for accurate measurements and marks, ensuring all our cuts are precise.
- Strong Rope: I found one that seemed robust enough without being too bulky, perfect for keeping the easel adjustable and stable.
- Hinge: A single three-inch hinge was sufficient for the size of my easel but adjusted according to your easel's dimensions.
- Saw: To cut the wood to the needed lengths.
- Drill and Screws: To assemble the pieces securely together.
- Sander: This is used to smooth out all surfaces to avoid any splinters.
- Level: A key tool to ensure our easel stands tall and straight.
- Paint (Optional): I chose gold to match the wedding's theme.
Step by Step Instructions
Learn how to build your own DIY easel step-by-step. Perfect for artists and crafters looking for a budget-friendly, personalized art stand.
Step One: Cutting the Wood
After marking the necessary measurements on the wood, I cut two pieces to six feet and one to five feet, with the remaining wood allocated for smaller cuts needed for assembly. Precision here is key, so take your time!
Step Two: Sanding Down
Before assembly, I sanded all the pieces to ensure a smooth finish. This step is crucial if you plan to paint or stain your easel later on.
Step Three: Assembling the Frame
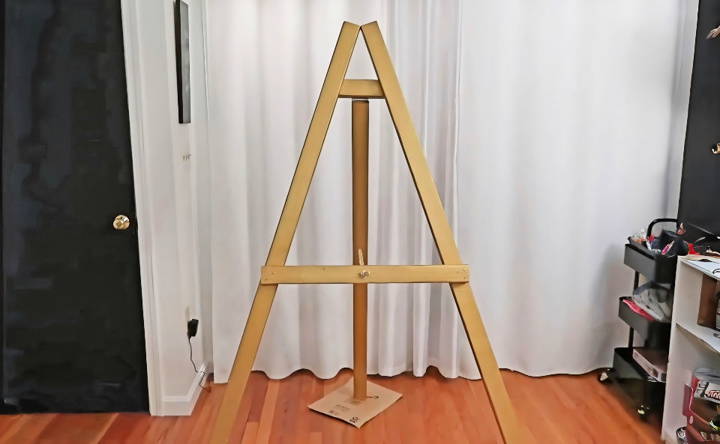
Using screws, I attached the two six-foot pieces in an 'A' shape formation to the five feet piece, making the main support of the easel. This step required some adjustments to ensure stability and balance.
Step Four: Securing the Hinge and Rope
Adding the hinge was slightly intimidating, but it was essential for the top part of the easel. The rope was secured at the back to prevent the easel from collapsing inward, a simple but effective solution.
Step Five: Adjustments for Stability
Despite my efforts, the easel was initially not level. I had to re-position some screws and make sure everything was perfectly aligned. A level became my best friend during this process.
Step Six: The Final Touches
I decided to drill holes along the front legs to add adjustable pegs, allowing flexibility in display options. After some fine-tuning, it was time for painting. The golden hue gave it the final touch of elegance I was hoping for.
Reflections and Recommendations:
- Always Double-Check Measurements: A small mistake can lead to bigger headaches later on.
- Invest in Quality Materials: Your easel's durability largely depends on the materials you choose at the start.
- Level as You Go: Ensure your structure is level at each step of assembly to prevent any instability.
- Be Prepared to Adjust: Even with the best-laid plans, you might have to tweak your approach as you go. Stay flexible and creative.
Customization Ideas for Your DIY Easel
When building your own easel, customization is key to making it truly yours. Here are some ideas to personalize your easel and make it more functional for your art:
Adjustable Canvas Holders
- Why it's useful: It allows you to work on different sizes of canvases and panels.
- How to do it: Install sliding holders or clamps that can be moved up and down the easel's legs.
Magnetic Tool Strip
- Why it's useful: It keeps your tools within reach and organized.
- How to do it: Attach a magnetic strip along the easel's frame to hold metal tools like scissors and palette knives.
Collapsible Design
- Why it's useful: It makes the easel portable and easy to store.
- How to do it: Use hinges and foldable sections so you can collapse the easel when not in use.
Integrated Lighting
- Why it's useful: Ensures good lighting at work, regardless of the room's lighting.
- How to do it: Fix LED strips or a flexible lamp to the top or sides of the easel.
Tool Shelf
- Why it's useful: It provides space for your paints, brushes, and other materials.
- How to do it: Add a horizontal shelf or tray across the easel's legs at a comfortable height.
Paper Roll Holder
- Why it's useful: Convenient for quick sketching or working with paper.
- How to do it: Mount a roll holder under the canvas area that allows you to pull and tear off paper easily.
Dry-Erase Board
- Why it's useful: Great for planning compositions or jotting down notes.
- How to do it: Attach a small whiteboard to the side of the easel.
Stability Enhancements
- Why it's useful: Prevents the easel from wobbling while you work.
- How to do it: Add rubber feet or a weighted base to keep the easel steady.
Customize the easel to fit your workflow and art needs. Use these ideas as starting points—be creative and adjust them to match your style.
Advanced Techniques for Easel Making
Enhancing your DIY easel with advanced techniques can significantly improve its functionality and durability. Here's a detailed guide on incorporating some sophisticated features:
Counterbalance System
- Purpose: To adjust the easel's angle effortlessly, regardless of the canvas weight.
- Implementation: Install a counterweight on the back of the easel, connected by a pulley system to the canvas holder. This allows for smooth and easy adjustments.
Integrated Drawer System
- Purpose: To store and organize art supplies within easy reach.
- Implementation: Build a set of shallow drawers into the easel's base. Use smooth-sliding rails for easy opening and closing.
Convertible Easel Design
- Purpose: To switch between a standard upright easel and a horizontal drafting table.
- Implementation: Incorporate a hinge mechanism at the midpoint of the easel's legs, allowing it to lay flat. Secure the position with locking braces.
Adjustable Leg Heights
- Purpose: To work comfortably, whether sitting or standing.
- Implementation: Add telescopic legs with locking mechanisms. This will enable you to adjust and secure the easel at various heights.
Canvas Edge Protectors
- Purpose: To prevent damage to the canvas edges.
- Implementation: Attach soft silicone or rubber strips along the canvas holders. This provides a gentle grip without harming the canvas.
Easel Mobility Kit
- Purpose: To move the easel around easily.
- Implementation: Fix sturdy wheels to the easel's base, with at least two that lock to keep the easel in place when in use.
Tool Docking Station
- Purpose: To have a dedicated spot for frequently used tools.
- Implementation: Build a docking area with custom-shaped slots for tools like brushes, palette knives, and erasers.
Lightweight Reinforcement
- Purpose: To ensure the easel is both strong and light.
- Implementation: Use carbon fiber or aluminum reinforcements at critical stress points. This maintains strength without adding excessive weight.
By applying these advanced techniques, your easel will not only be more versatile but also a pleasure to use.
FAQs About Building Your Own Easel
Discover essential tips and answers to common questions about building your own easel. Save money and build a customized artist's tool today!
Yes, there are many plans available that cater to beginners. These plans often include detailed diagrams and step-by-step instructions to guide you through the process. You can find tutorials that require minimal tools and materials, making it a great project for first-time builders.
Customizing your easel can involve adjusting the height, the angle of the painting surface, or adding features like a shelf for your art supplies. Many DIY guides offer tips on how to make these adjustments. For example, you can choose to add a tray or make your easel foldable for easy storage.
Absolutely! You can upcycle materials like cardboard boxes or wooden pallets to build an easel. There are guides available that show you how to make functional easels using these inexpensive materials. This not only saves money but also gives a new purpose to items that might otherwise be discarded.
There are numerous resources online that provide free DIY easel plans. These plans come with comprehensive instructions, including blueprints and visual guides, to help you build your easel. Websites like DIY Crafts and YouTube channels dedicated to woodworking are great places to start looking for these guides.
Ensuring the stability of your homemade easel is crucial, especially if you plan to work on larger canvases. To achieve this, make sure the legs of your easel are wide enough to distribute the weight evenly. You can also add a horizontal stabilizer bar between the legs for extra support. If you're using wood, choose a thicker cut for the main frame. For detailed instructions and stability tips, you can refer to DIY guides that provide step-by-step building processes.
Conclusion:
I believe building your own DIY easel is a rewarding experience. It brings unique value to your creative projects. Try it and see how it enriches your DIY skills and gives your art space a personal touch.


