Starting on a weekend project can be exciting. I recently decided to set up a DIY electric fence around my garden to keep pesky animals away. With a few basic tools and some guidance, it was simpler than I imagined. This guide will walk you through the steps I took, sharing tips and tricks I learned along the way.
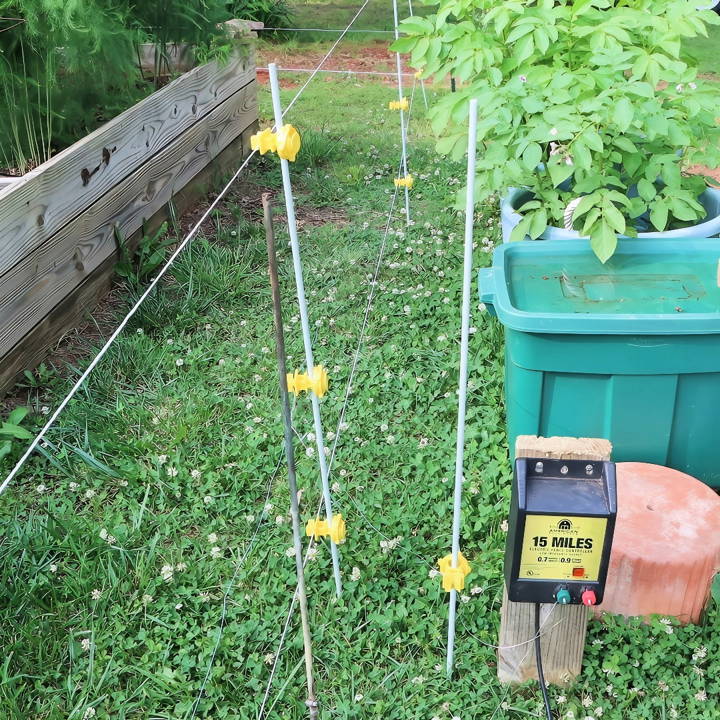
Breaking down the process made it manageable. First, I gathered my materials and carefully positioned the fence posts. Following the instructions, I attached the wire and connected the power source.
In just a few hours, my garden was protected. You'll find this guide helpful for a successful installation. I'm helping with this: it makes the setup easy and quick for anyone interested.
Materials Needed
Get your fence started with these essential materials: fence charger, wire, posts, and insulators. Everything you need for a secure installation.
Fence Charger
You need a proper fence charger, which can be plug-in, battery, or solar-powered. This is crucial because using any random electrical source can be extremely dangerous. A good fence charger ensures the electric current is controlled and safe.
Fence Wire
You have two main options here—braided wire and aluminum wire. Braided wire is easier to see and less likely to get ignored by both animals and humans. Aluminum wire is more budget-friendly but tends to stretch over time.
Posts
Choosing the right posts for your fence is crucial:
- Fiberglass Posts: Best because they last longer if taken care of.
- Plastic Posts: These degrade faster under the sun and are not as durable.
- Metal Posts: Useful for corner posts because they can handle the tension from the wire.
Insulators
Insulators are needed to prevent the electric current from grounding out through the posts. There are several types available, and we'll talk about how to use them as we go through the steps.
Tools
- Needle-nose pliers: For cutting and bending wire.
- Rubber (or dead blow) hammer: For driving fiberglass and plastic posts without damaging them.
- Post driver or a heavy hammer: For metal posts.
Step by Step Instructions
Learn how to build a DIY electric fence with our step-by-step guide. Perfect for securing your property with clear instructions on installation and testing.
Step 1: Install the Fence Charger
Learn how to install a fence charger, including finding a safe spot, mounting the charger, and setting up ground and hot wires, for optimal performance.
Locate a Safe Spot
Find a dry place near your garden. If it's out in the open, you'll need something like a piece of wood to mount the charger on.
Mount the Charger
Use screws to secure the charger to the piece of wood. It doesn't have to be overly tight—just snug enough to hold it.
Ground and Hot Wires
- Ground Wire: Connect one end of the wire to the charger and the other end to a ground rod driven deep into the earth.
- Hot Wire: Connect this to your fence wire.
Step 2: Set Up Corner Posts
Learn how to set up corner posts, insert fiberglass posts, and support the corners with our step-by-step guide for sturdy and reliable structures.
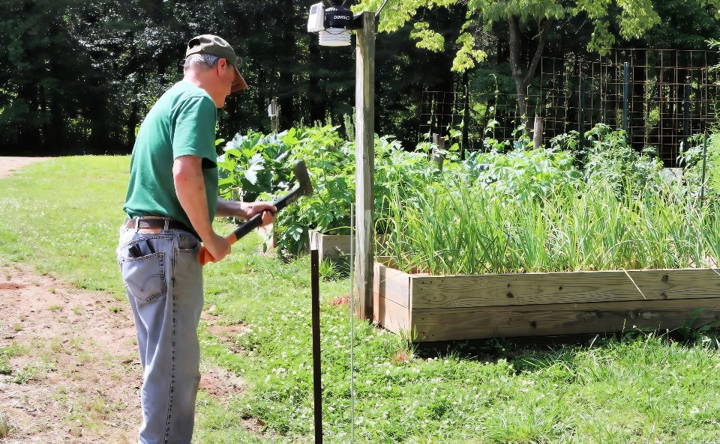
Insert Fiberglass Posts
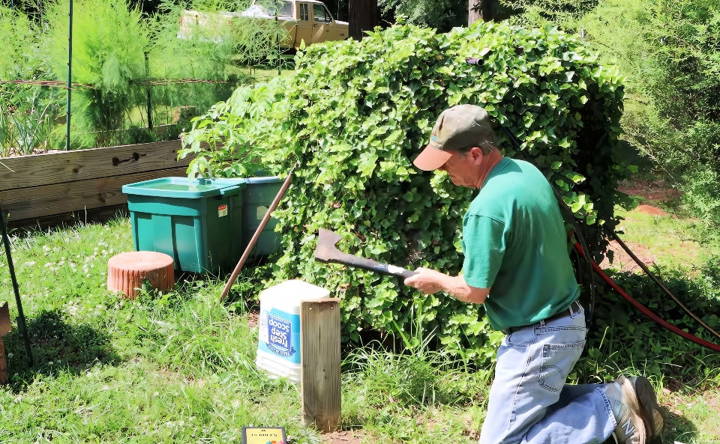
Decide where your corners will be and drive the posts into the ground, leaving enough room between the fence and your garden.
Support the Corners
Use heavier metal or wooden posts to provide additional support to your corner posts. You can run a wire from the top of the corner post to the support post to stabilize everything.
Step 3: Add Insulators
Efficiently install insulators on posts with our step-by-step guide. Boost safety and performance today!
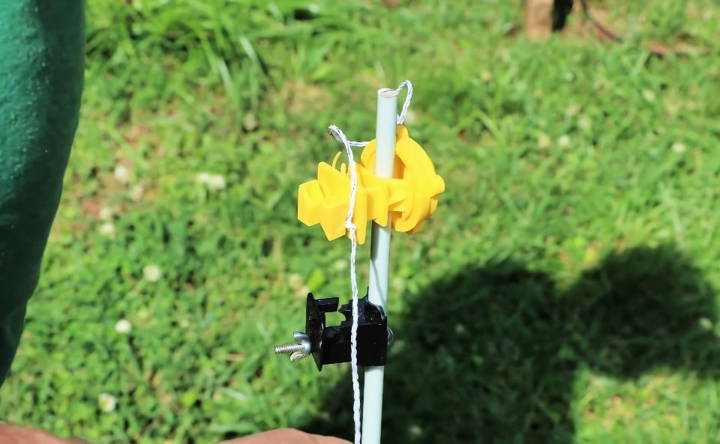
Install Insulators on Posts
Position the insulators at appropriate heights. Start close to the ground but not so close that the wire touches the earth and shorts out.
- Bottom Insulator: About six inches off the ground.
- Middle Insulator: A bit higher, around 18 inches, to deter animals that might jump over the lower wire.
- Top Insulator: Closer to the top to deter larger animals like deer.
Step 4: Run the Wire
Easily attach wire to corner insulators with this step-by-step guide. Ensure secure and efficient wire installation for any fencing project.
Attach Wire to Corner Insulators
- Aluminum Wire: Wrap it around and twist it to secure.
- Braided Wire: Tie a knot (two half-hitches work well), as twisting won't hold effectively.
String the wire through all the insulators and ensure it's taut.
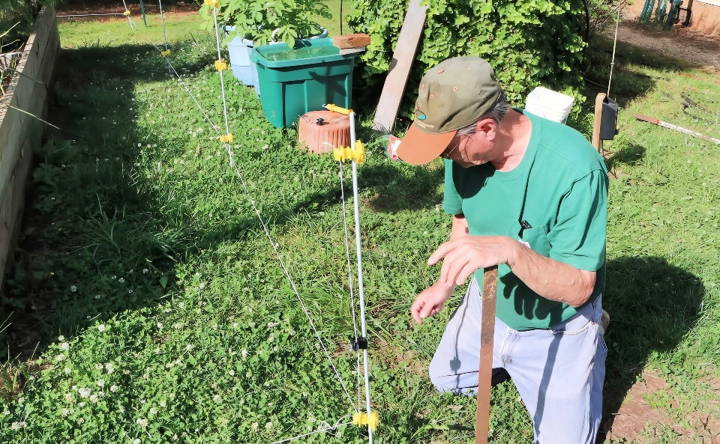
Step 5: Connect Different Wire Strands
To ensure all wires are live, connect them at one point using a lead wire. This will allow the electric current to flow through all the strands, making a continuous circuit.
Step 6: Final Adjustments and Testing
Optimize your final fence adjustments and deep ground rod placement with thorough testing to ensure robust performance. Complete guide included.
Ground Rod Deep Placement
Drive your ground rod about three feet deep to ensure a good earth ground. Connect it to the charger with aluminum wire and use a clamp to ensure a tight fit.
Testing the Fence
- Safety First: Stand on an insulated surface (avoid touching the ground) and use the fence tester.
- Simple Test: Bring a metal rod close to the wire without touching it. You should see a small spark, indicating that the fence is live.
Step 7: Adding a Gate
Learn how to enhance security by adding a gate using electric gate handles. Step-by-step guide for a safe and reliable installation.
Using Electric Gate Handles
For gates, electric gate handles are incredibly handy. Make a loop with your wire and attach the gate handle, which keeps the circuit closed when connected.
- Other Options: You can also install a physical gate and run the electric wire underground to keep the circuit complete.
Advanced Customizations for Your DIY Electric Fence
When you've mastered the basics of installing a DIY electric fence, you might be interested in exploring advanced customizations to enhance its functionality and efficiency. Here's a guide to some sophisticated tweaks you can apply to your electric fence setup:
Optimize the Power Source
- Upgrade to Solar Power: If you're using a traditional power source, consider switching to a solar-powered system. This not only makes your fence more environmentally friendly but also ensures it remains operational during power outages.
Enhance the Fence's Efficiency
- Voltage Monitoring System: Install a voltage monitoring system that alerts you when the voltage drops below an effective level. This ensures your fence is always functioning at its optimal deterrent level.
Integrate Smart Technology
- Smart Fence Controllers: Use smart controllers that can be managed via a smartphone app. This allows you to turn the fence on or off remotely and monitor its status from anywhere.
Improve Safety Features
- Insulation Upgrades: Replace standard insulators with high-quality ones to reduce power leakage and improve the overall safety of your fence.
Customize for Specific Needs
- Adjustable Pulse Rates: Customize the pulse rate of your fence based on the type of animals you're deterring. Different pulse rates can be more effective for different animals.
Aesthetic Enhancements
- Camouflage Wiring: If you're concerned about the visual impact of your fence, consider using materials that blend in with the surroundings, making the fence less noticeable.
Increase Durability
- Weather-Resistant Materials: Upgrade to weather-resistant wiring and components to ensure your fence withstands harsh weather conditions.
Expand Coverage
- Sectional Controls: Implement sectional controls to activate or deactivate different parts of the fence as needed, which is especially useful for large properties.
Ensure your DIY electric fence is effective, smart, safe, and tailored to your needs. Prioritize safety and consult experts for significant changes.
Troubleshooting Common Issues with DIY Electric Fences
When it comes to maintaining a DIY electric fence, encountering issues is a common part of the process. Here's a straightforward guide to help you troubleshoot some of the most frequent problems:
The Fence is Not Powering On
- Check the Power Source: Ensure that your power source is connected and functioning. If you're using a battery, verify that it's charged.
- Inspect the Switches: Make sure all switches are in the ‘on' position.
- Examine Connections: Look for loose or corroded connections and secure or clean them as needed.
Inconsistent or Weak Electric Pulse
- Test the Voltage: Use a voltage tester to check the pulse strength. It should be consistent along the fence line.
- Look for Vegetation: Vegetation touching the wires can drain power. Clear any plants that are in contact with the fence.
- Evaluate the Insulators: Damaged or worn insulators can cause power leakage. Replace any that are not in good condition.
The Fence is Shorting Out
- Identify Short Circuits: Walk along the fence and listen for the sound of electricity arcing or see if there's a visible spark.
- Check for Broken Wires: Inspect the wires for breaks or damage and repair or replace them as necessary.
- Assess the Earth Stake: Ensure the earth stake is properly installed and has a good connection to the ground.
Animals are Not Deterred by the Fence
- Increase the Voltage: If the voltage is too low, animals may not be deterred. Adjust the voltage to a higher setting.
- Add More Wires: For larger animals, adding more wires at different heights can improve effectiveness.
- Reposition the Fence: Sometimes, simply changing the placement of the fence can make it more effective.
Electric Fence is Making a Clicking Noise
- Normal Operation: A clicking sound is normal for many electric fences as it indicates the pulse of electricity.
- Check for Faults: If the clicking is irregular or too frequent, it may indicate a fault. Use a fault finder to locate the issue.
Turn off the power before any repairs. Follow these steps to fix common DIY electric fence issues and keep it running smoothly.
Safety Precautions for DIY Electric Fences
When constructing a DIY electric fence, safety is paramount. Here's a comprehensive guide to ensure you and others stay safe while installing and maintaining your electric fence:
Understand How Your Electric Fence Works
- Know the Basics: An electric fence operates by sending a brief, high-voltage pulse through a wire approximately once every second.
- Learn the Components: Familiarize yourself with the parts of your electric fence system, including the energizer, grounding system, and fence wires.
Prioritize Personal Safety
- Wear Protective Gear: Always wear insulated gloves and boots when working with or near the fence to prevent accidental shocks.
- Turn Off Power: Before touching the fence or performing maintenance, always turn off the energizer.
Ensure Safe Installation
- Follow Instructions: Carefully read and follow the manufacturer's instructions when setting up your energizer and other components.
- Check Local Codes: Some areas have specific codes and regulations for electric fencing. Ensure your installation complies with these.
Maintain a Safe Environment
- Keep Away from Water: Do not install electric fences near ponds, lakes, or streams as water can conduct electricity.
- Post Warning Signs: Clearly mark the perimeter with signs to warn others that the fence is electrified.
Regular Maintenance Checks
- Inspect Regularly: Check your fence regularly for wear and tear, vegetation growth, and proper tension in the wires.
- Test Voltage: Use a fence tester to check the voltage and ensure it's within safe operating levels.
Educate Others
- Inform Family and Visitors: Make sure that anyone who may come into contact with the fence understands how to behave around it and what to do in case of accidental shock.
Plan for Emergencies
- Emergency Plan: Have a clear plan for what to do in case of an electric shock incident, including quick access to first aid and emergency contact numbers.
Follow these safety tips to ensure your DIY electric fence is safe and effective. Prioritize safety and seek professional advice if unsure.
FAQs About DIY Electric Fence
Explore our FAQs about DIY electric fences for essential tips, safety guidelines, and installation advice to protect your property effectively.
A DIY electric fence is a barrier that uses electric shocks to deter animals or people from crossing a boundary. The fence is made up of wires that carry an electric current. When an animal or person touches the wire, they receive a short, sharp shock. This shock is designed to be uncomfortable but not harmful and serves as a powerful deterrent.
Maintaining an electric fence involves:
Regularly checking the voltage to ensure it’s at the correct level.
Inspecting for vegetation that may touch the wires and cause shorts.
Testing the grounding system to make sure it’s functioning properly.
Replacing any broken insulators or damaged wires as needed.
Yes, when installed and maintained correctly, a DIY electric fence is safe. The shock delivered by the fence is unpleasant but not harmful. However, it’s important to educate children about the fence and supervise pets to ensure they understand the boundary.
Yes, a DIY electric fence can operate in various weather conditions. However, there are some considerations:
Heavy rain can cause the earth to become more conductive, potentially reducing the fence's effectiveness. Regular checks are recommended.
Snow and ice may weigh down the wires, so it's important to use sturdy posts and tension the wires properly.
Lightning can damage the energizer. Using a lightning diverter or surge protector is advisable.
If your fence isn't working as expected, here are some troubleshooting steps:
Check the power: Ensure the energizer is turned on and receiving power.
Inspect the fence line: Look for broken wires, shorts caused by vegetation, or disconnected wires.
Test the voltage: Use a fence tester to check the voltage along different points of the fence.
Evaluate the grounding: Make sure the grounding rod is properly installed and connected.
Final Thoughts
In conclusion, taking on projects like DIY electric fence installation can be very rewarding. Having a clear, step-by-step guide makes it possible for anyone to protect their garden efficiently. I'm confident you'll find these steps helpful and straightforward to follow, ensuring your garden is secure and thriving.


