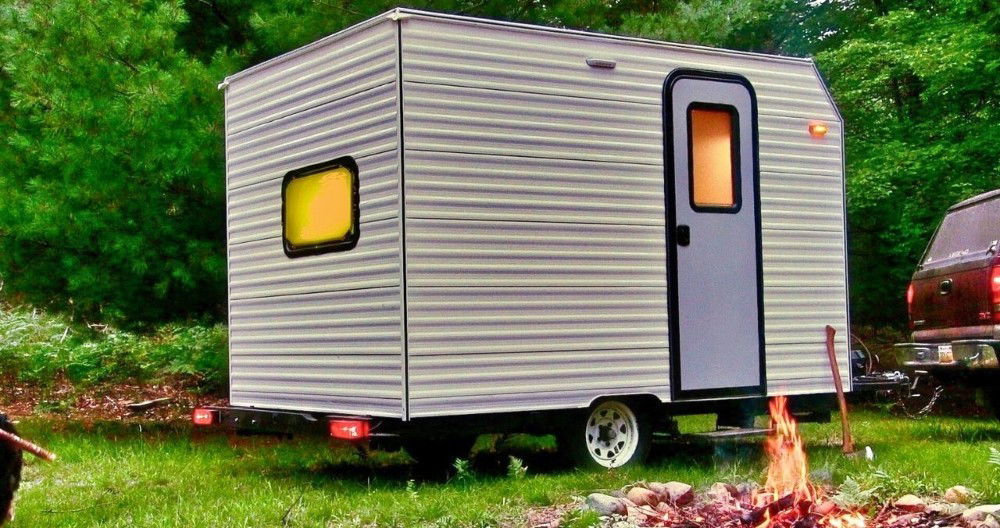
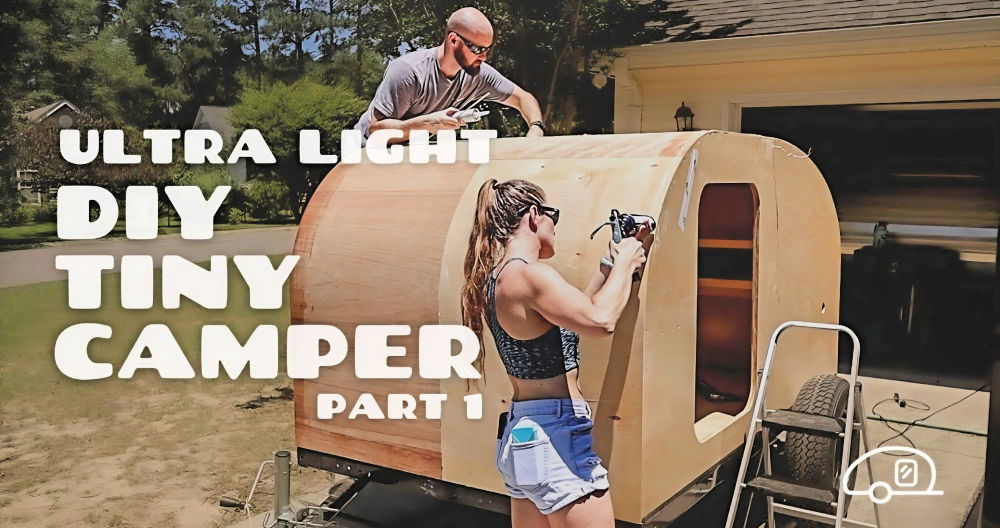
Building your DIY enclosed trailer can be a very rewarding project. I remember when I started designing my own homemade enclosed trailer. It was challenging but also an enriching experience. It began with gathering materials and creating a plan. I took my time, making sure everything was laid out perfectly. The satisfaction of watching each piece come together was incredible.
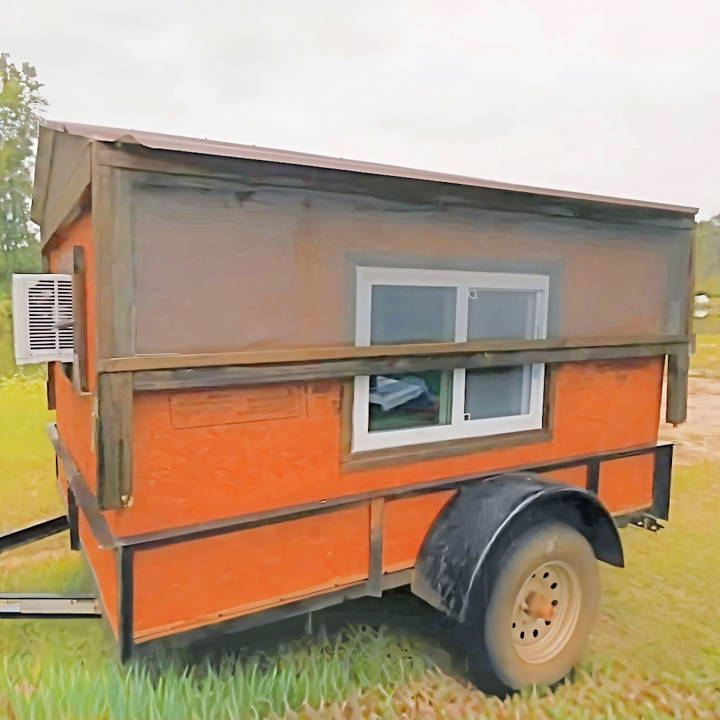
During the building process, I learned many useful skills and handy tips. There were moments of trial and error, but each mistake taught me something new. By the end, I had a fully functional DIY cargo trailer that met all my needs. These small victories kept me motivated throughout the project.
I'm helping with this: building your trailer will offer you a practical and rewarding experience.
Why Choose an Enclosed Trailer?
Enclosed trailers offer several advantages:
- Protection from the Elements: Your cargo is shielded from rain, snow, and sun.
- Security: Lockable doors mean your belongings are safe during transit.
- Versatility: They can be outfitted with shelves, racks, or even transformed into mobile workshops.
- Durability: With proper maintenance, they can last many years.
What Can You Use an Enclosed Trailer For?
The uses are nearly limitless. Here are a few examples:
- Transporting Vehicles: Cars, motorcycles, and ATVs can be moved without exposure to road grime.
- Business Needs: They’re ideal for hauling equipment for landscaping, construction, or mobile businesses.
- Recreational Activities: Perfect for camping trips or sports events, they can carry gear and double as a shelter.
- Moving: An excellent option for DIY movers, providing ample space for furniture and boxes.
Choosing the Right Trailer
When selecting an enclosed trailer, consider the following:
- Size: Ensure it’s large enough for your intended use but still manageable to tow.
- Weight Capacity: Check the Gross Vehicle Weight Rating (GVWR) to match your load requirements.
- Construction: Look for quality materials and construction for longevity.
- Features: Decide on must-have features like ramp doors, side doors, or specific interior setups.
Materials Required
Before diving into the construction, let's talk about the materials and why each is needed:
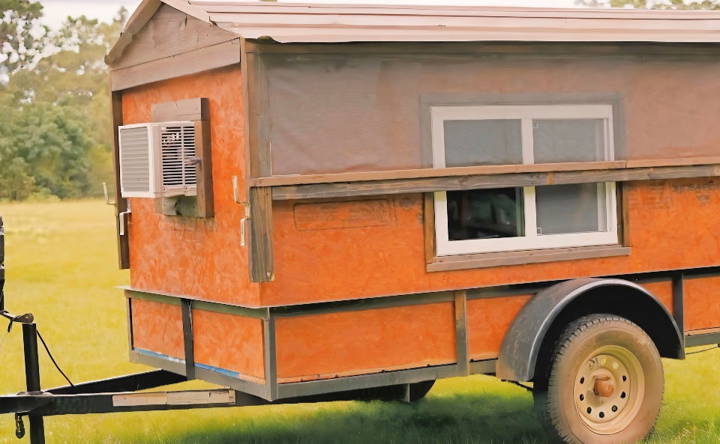
- Utility Trailer: The foundation of the camper. Ensure it's sturdy and in good condition.
- Plywood: For the flooring and walls, providing structure and insulation.
- 2x4s and 1x4s: Used for framing the walls and roof, contributing to the overall solidity of the camper.
- Insulation: Essential for temperature control, making the camper comfortable in various climates.
- Metal Roofing: Durable and waterproof, ensuring your camper stays dry.
- Screws and Hinges: For assembling the structure securely and adding movable parts like doors and windows.
- Caulk: To seal any gaps, prevent water intrusion, and improve insulation.
- Stain or Paint: To protect the wood and give your camper a finished look.
- Window Unit: For those hot summer days, an AC unit turns the camper into a cool oasis.
- Tools: Including a saw, drill, measuring tape, and other basic construction tools.
Step by Step Instructions
Learn how to build your own enclosed trailer with our DIY guide. Easy, cost-effective, and personalized trailer construction made simple!
Preparing the Utility Trailer
First, ensure your utility trailer is clean and free from rust. Any necessary repairs should be addressed beforehand. This sets a solid foundation for your camper.
Building the Frame
- Floor Frame: Start by creating a frame on the trailer bed using 2x4s. This will support the plywood flooring.
- Walls and Roof: Construct wall frames using 2x4s, measuring and cutting them to fit your trailer's dimensions. Remember to leave spaces for doors and windows. The roof frame can be a bit challenging, as creating a pitched roof not only adds visual appeal but also practicality by reducing water pooling.
Adding Insulation and Plywood
Once the frame is built:
- Insulate: Fit insulation between the wall frames. This is crucial for maintaining comfortable temperatures inside the camper.
- Plywood: Attach plywood to the frame, both inside and out, using screws. This forms the walls and flooring.
Installing the Roof
Using metal roofing adds durability and weather resistance to your camper. Cut the metal to size and secure it to the roof frame with screws designed for metal roofs. Don't forget to seal the edges with caulk to prevent leaks.
Doors, Windows, and Interior
- Doors and Windows: These can be custom-made or repurposed from an old RV. Installation will depend on the specific items, but ensure they're well sealed against the weather.
- Interior: This part is up to you. Install the window unit for air conditioning, and consider what layout you want for the bed, storage, and any other amenities. Staining or painting the wood adds a protective layer and personalizes your camper.
Tips for Success
- Plan Ahead: Draft a detailed plan before starting. Consider the height, weight, and balance of the camper.
- Seal Everything: Use caulk and weather stripping around windows, doors, and any other gaps to prevent leaks.
- Safety First: Wear appropriate safety gear when working, and ensure your modifications comply with road safety regulations.
https://www.youtube.com/watch?v=a1HjSrLUuwk&ab_channel=LOJO
Customization Ideas for Enclosed Trailers
When it comes to enclosed trailers, customization is key to maximizing their functionality and efficiency. Whether you’re a contractor, a weekend warrior, or a small business owner, tailoring your trailer to fit your specific needs can greatly enhance its utility. Here are some practical ideas to customize your enclosed trailer:
Shelving and Storage Solutions
- Install Shelving Units: Use vertical space by installing shelves to organize tools and materials.
- Add Cabinets: Lockable cabinets are great for securing valuable equipment.
- Use Pegboards: They’re perfect for hanging tools within easy reach.
Workstations and Benches
- Build a Fold-Down Workbench: Save space with a workbench that folds against the wall when not in use.
- Create a Mobile Office: Set up a desk and chair with a power source for on-the-go business tasks.
Power and Lighting
- Install LED Lights: Bright, energy-efficient lighting is essential for working inside the trailer.
- Add Outlets: Equip your trailer with electrical outlets to power tools and devices.
Climate Control
- Insulate the Walls: Keep the interior temperature regulated with proper insulation.
- Install an HVAC System: For extreme climates, consider heating and cooling options.
Security Features
- Upgrade Locks: High-quality locks deter theft and protect your cargo.
- Install an Alarm System: Consider a security system with remote monitoring for added peace of mind.
Exterior Customizations
- Add a Side Door: Improve access with an additional entry point.
- Install an Awning: Create a shaded area for outdoor work or relaxation.
- Apply Graphics: Use the trailer as a moving billboard for your business.
Flooring Upgrades
- Use Durable Materials: Install heavy-duty flooring to withstand wear and tear.
- Add Tie-Downs: Secure cargo during transit with built-in tie-down points.
Accessibility Improvements
- Install a Ramp: A drop-down ramp makes loading heavy items easier.
- Consider a Liftgate: For very heavy items, a liftgate can be a back-saver.
Vehicle Maintenance and Transport
- Add a Winch: Facilitate the loading of vehicles or heavy machinery.
- Install E-Tracks: These allow for adjustable anchor points for vehicle transport.
Personal Touches
- Decorate the Interior: Make the space your own with personal decorations.
- Custom Paint Job: Stand out with a unique exterior color or design.
Transform your enclosed trailer into a functional space with these customization ideas. Focus on impactful customizations that simplify daily activities. Keep it simple, practical, and tailored to your needs for optimal results.
Electrical Wiring and Lighting
Setting up the electrical system in an enclosed trailer is a critical step to ensure you have a functional and safe environment. Whether you’re using the trailer for work, recreation, or transport, having proper lighting and power sources is essential. Here’s a straightforward guide to help you with the electrical wiring and lighting of your enclosed trailer.
- Planning Your Electrical System Before you start, plan out your electrical needs. Consider what you’ll be powering inside your trailer and where you’ll need lights. Make a list of all electrical devices you plan to use, like power tools, chargers, lights, and appliances. This will determine the kind of wiring and the number of outlets you’ll need.
- Choosing the Right Wiring and Components For the wiring, you’ll typically use Romex 12-2 house wiring, which is suitable for most enclosed trailer applications. Ensure you have enough wire to run from your power source to all the outlets and lights you plan to install. You’ll also need a breaker box, outlets, light fixtures, switches, and other necessary components like wire nuts and conduit straps.
- Installing the Breaker Box The breaker box is the heart of your electrical system. Install it near the power entrance point of your trailer for easy access. From here, you’ll run wiring to all your outlets and lights. Make sure to secure it properly and follow all safety guidelines.
- Running the Wires Run your wires through plastic electrical flex conduit to protect them and keep your setup organized. Use conduit straps to secure the conduit to the walls of your trailer. Make sure to leave a little extra wire at each end for easy connections.
- Setting Up Outlets and Switches Install outlets where you’ll need to plug in devices. It’s a good idea to use Ground Fault Circuit Interrupter (GFCI) outlets for added safety, especially if you’ll be using the trailer in various weather conditions. Place switches near doors or entry points for easy access to lighting.
- Lighting Installation Choose LED lights for your trailer as they are bright, energy-efficient, and long-lasting. Install them evenly throughout the trailer to ensure good visibility. If you’re working inside the trailer, consider adding task lighting above work areas.
- Testing Your Setup Once everything is installed, test your electrical system to make sure all connections are secure and working correctly. Check that all lights turn on and that outlets are providing power. It’s crucial to ensure that there are no exposed wires or potential hazards.
- Safety First Always prioritize safety when working with electrical systems. If you’re not confident in your electrical skills, it’s best to consult with or hire a professional electrician. Make sure all your work complies with local regulations and safety standards.
Set up a reliable electrical system in your trailer by planning ahead, keeping it simple, and prioritizing safety. This ensures a well-lit, powered space for any task or adventure.
Maintenance and Upkeep
Keeping your enclosed trailer in top condition is crucial for ensuring its longevity and reliability. Regular maintenance not only extends the life of your trailer but also ensures safety on the road. Here’s a comprehensive guide to maintaining your enclosed trailer, presented in a clear and straightforward manner.
Before Every Trip
- Check the Tires: Ensure they are properly inflated and have no signs of wear or damage.
- Test the Lights: All lights should be working, including brake lights and turn signals.
- Inspect the Coupler and Hitch: Confirm they are undamaged and securely fastened.
- Verify Safety Chains: They should be intact and properly connected.
Every Six Months
- Wheel Bearings: Inspect and repack with high-quality grease.
- Axles and Suspension: Check for straightness and any wear.
- Frame and Body: Look for rust or damage and clean off any rust found.
- Roof and Seals: Ensure there are no leaks and that seals are intact.
Interior Checks
- Clean Regularly: Sweep out debris and wipe down surfaces.
- Inspect Flooring: Look for signs of rot or damage, especially if wooden.
- Check Walls and Tie-downs: Ensure they are secure and undamaged.
Exterior Care
- Wash the Trailer: Use mild soap and water, focusing on the undercarriage.
- Apply Wax: Protect the paint and finish with quality wax at least once a year.
- Rust Prevention: Regularly check for rust and apply preventive products as needed.
Winterizing (If Applicable)
- Proper Storage: Store in a dry, covered area and lift off the ground to remove weight from the tires.
- Tire Care: Inflate to the maximum recommended pressure and consider using tire covers.
By following these maintenance steps, you can keep your enclosed trailer functioning smoothly and avoid unexpected issues. Regular upkeep is the key to a dependable and safe trailer for all your transport needs.
FAQs About DIY Enclosed Trailer
Explore comprehensive answers to faqs about DIY enclosed trailer, covering construction, customization, and maintenance tips.
The axle type depends on the load you plan to carry. A single axle is suitable for smaller loads and is more economical, while a double axle provides stability for heavier loads and long-distance travel. Ensure the total weight does not exceed the towing capacity of your vehicle.
Absolutely! One of the benefits of building your own trailer is the ability to customize it to your specific needs. This includes the size, shape, type of materials used, and additional features like shelving or insulation. Just make sure to plan your design carefully and adhere to safety regulations.
Yes, it’s crucial to be aware of and comply with road safety regulations, which can include lighting, braking systems, and weight limits. Check with your local transport authority for the specific requirements in your area before you start building your trailer.
To weatherproof your DIY trailer, use materials like aluminum or fiberglass for the exterior, as they are durable and resistant to the elements. Seal all joints and edges with a high-quality waterproof sealant to prevent leaks. Consider adding weather stripping around doors and windows to keep moisture out. Insulation can also be added to protect against extreme temperatures.
Common mistakes include not planning the design thoroughly, underestimating the weight capacity needed, using inadequate materials, and neglecting legal requirements such as lighting and braking systems. Ensure you have a detailed plan, use materials suitable for your load, and familiarize yourself with the legal standards for trailers in your area.
Conclusion
So, if you're ready to build your DIY enclosed trailer, take that first step. The process is not just about creating something useful; it's about learning and growing. This guide will help you get started with confidence and ease.


