As a long-time DIY enthusiast, I recently decided to venture into a new project: building a set of end tables. My journey through this DIY build was filled with learning, minor hiccups, and ultimately, a great sense of achievement. Here's a step-by-step guide based on my experience, enriched with practical advice to help you craft your own end tables with ease.
Choosing the Materials
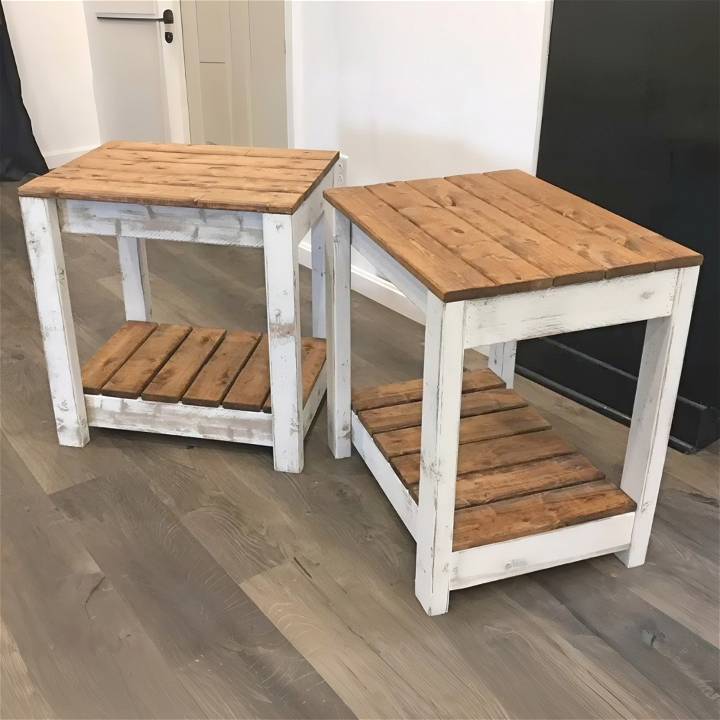
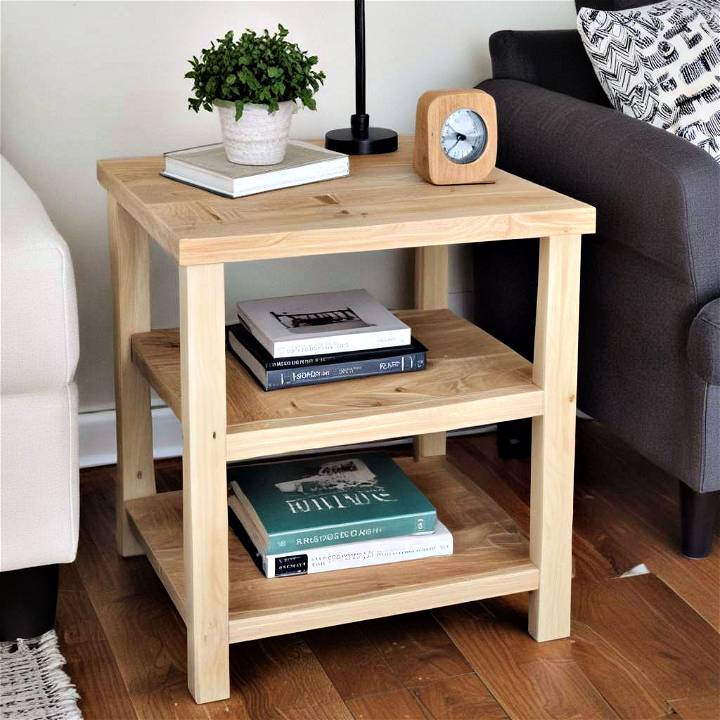
First things first, selecting the right materials is crucial. For my project, I used pine 2x3s for the legs and 1x4 inch furring strips for the side aprons and the tabletop and shelf slats. Pine is lightweight but sturdy, making it an excellent choice for furniture. The furring strips, while a bit rougher, complemented the rustic look I was aiming for. The fact that these materials are inexpensive was an added bonus.
Step by Step Instructions
Learn how to make your own DIY end table with step by step instructions. From cutting pieces to staining and assembling, this guide has you covered.
Step 1: Cutting the Pieces
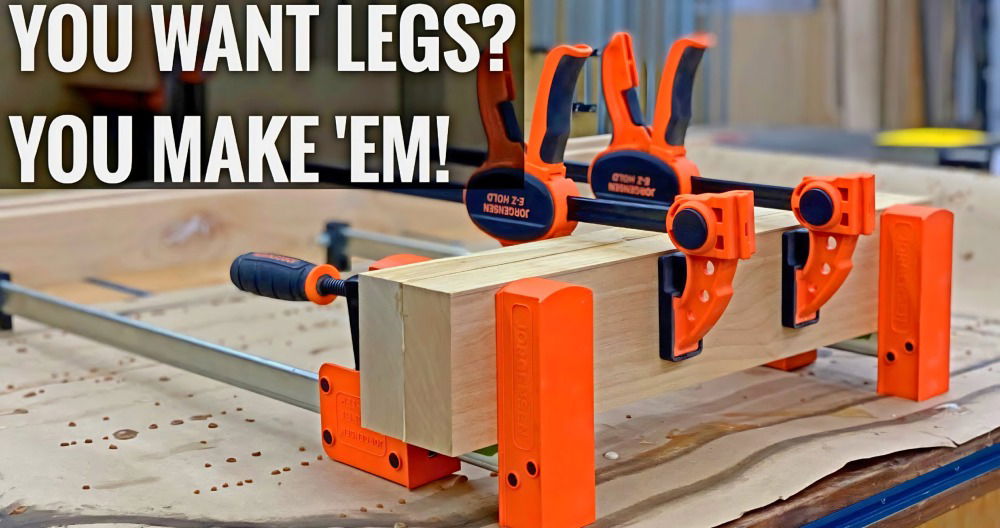
I started by cross-cutting the pine 2x3s to length for the legs using my miter saw. Precision is key here to ensure all legs are of equal length. Next, I cut the 1x4 inch furring strips for the side aprons. Every cut piece served a specific purpose, forming the skeleton of the end tables.
Step 2: Assembling the Side Frames
With all pieces cut, I began assembling the side frames. This involved attaching the apron pieces to the legs, leaving specific gaps for aesthetic and structural reasons. For instance, I left a gap on the bottom the width of a 2x3 to accommodate the bottom shelf and ensured the top shelf was flush with the top of the legs. Glue and brad nails were my go-to for securing everything in place, emphasizing the need for keeping the assembly square to facilitate alignment of the top and bottom shelves.
Step 3: Staining and Painting
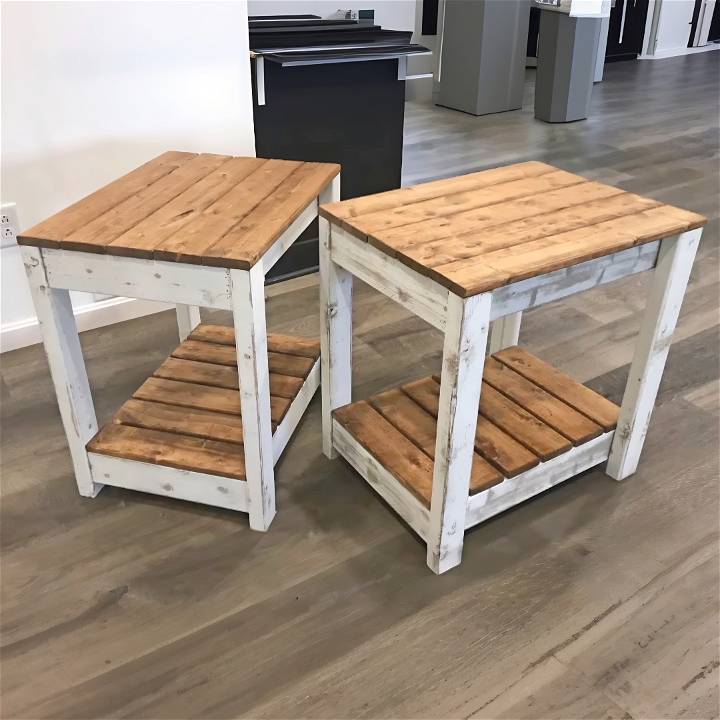
After the frames were assembled, I applied Minwax Early American wood stain to give the tables a rich color base. The staining process was straightforward; I wasn't aiming for perfection, given the rustic theme of the tables. A few days later, after the stain had fully dried, I covered the stain with latex white paint using a paint sprayer for an even coat. Once dry, I distressed the paint with 80-grit sandpaper, focusing on edges and corners to achieve a worn look.
Step 4: Adding the Top and Bottom Shelves
For the tabletop and bottom shelf, I used more 1x4 inch furring strips, stained with the same wood stain. The slightly rough texture of the furring strips added charm to the rustic aesthetic. Once the stain dried, I laid out the slats, spacing them evenly by eye, and secured them with brad nails. I made sure to angle the nail gun towards the interior to hide any potential nail mishaps.
Final Thoughts and Tips
The project was a success, offering not just a set of charming end tables but also a rewarding DIY experience. Here are a few tips based on my journey:
- Measure Twice, Cut Once: Precision in cutting ensures that all parts fit perfectly together.
- Patience Pays Off: Allow sufficient time for the stain and paint to dry to avoid smudges and stickiness.
- Safety First: Always ensure your hands are clear of the nail gun's path to avoid injuries.
- Embrace Imperfections: Small imperfections can add character to a rustic-themed piece.
For those interested, digital plans with all the necessary dimensions for this project are available, making it easy for any DIY enthusiast to replicate or customize according to their needs.
Innovative Design Ideas for DIY End Tables
When it comes to crafting your own end table, don't settle for the ordinary. Elevate your home decor with these creative design ideas that add flair and functionality to your living space.
1. Live-Edge Wood Elegance
- Highlight: Incorporate the natural beauty of live-edge wood into your end table design.
- Description: Live-edge wood features the raw, organic edge of the tree, showcasing its unique grain patterns and imperfections. Choose a thick slab of wood (such as walnut, oak, or maple) and preserve the live edge for a rustic yet elegant look. Sand it smooth and finish with a clear sealant to enhance the wood's character.
2. Geometric Metal Accents
- Highlight: Combine wood with sleek metal accents for a modern twist.
- Description: Build geometric shapes using metal legs or brackets. For instance, hairpin legs provide a minimalist vibe, while X-shaped brackets add stability and visual interest. Attach these metal elements to the corners or sides of your end table. The contrast between wood and metal adds sophistication.
3. Hidden Storage Solutions
- Highlight: Maximize functionality by incorporating hidden storage compartments.
- Description: Think beyond the basic tabletop. Design your end table with secret compartments or drawers. Consider a lift-top design where the tabletop reveals storage space underneath. Use it to stash remote controls, magazines, or small essentials. Concealed storage keeps clutter at bay while maintaining a clean aesthetic.
4. Upcycled Vintage Charm
- Highlight: Give new life to old furniture pieces.
- Description: Scour thrift stores, flea markets, or your own attic for vintage treasures. Repurpose an antique suitcase, wooden crate, or vintage toolbox into a charming end table. Sand, paint, or distress the piece to match your decor. The history and character of upcycled furniture make for great conversation starters.
5. Floating Shelf Magic
- Highlight: Build an illusion of floating tabletops.
- Description: Install a floating shelf-style end table against the wall. Use sturdy brackets or hidden supports to secure the tabletop without visible legs. This design works well in small spaces, as it doesn't clutter the floor visually. Opt for a single floating shelf or stack multiple shelves for tiered storage.
6. Whimsical Painted Patterns
- Highlight: Add personality with hand-painted designs.
- Description: Unleash your creativity by painting intricate patterns or motifs directly onto the end table surface. Consider mandalas, chevron stripes, or floral designs. Use stencils or freehand techniques. Choose colors that complement your room's palette. A touch of whimsy can transform a simple table into a work of art.
Whether you're a seasoned woodworker or a beginner, these ideas offer endless possibilities for customizing your own unique piece.
DIY End Table FAQs
Discover the answers to all your DIY end table questions with our comprehensive FAQ guide. Tips, tricks, and expert advice await!
1. What are some easy DIY end table ideas for beginners?
End tables are versatile pieces of furniture that can be both functional and decorative. If you're new to woodworking, here are some simple DIY end table ideas to get you started:
- Rustic End Table: Bring out the beauty of reclaimed wood with a rustic end table. You'll only need a few 2x4 boards for the shelves and 2x2 lumber for the frame. It's a great project for beginners.
- Laptop Stand or Side Table: Combine a store-bought metal base with a wooden top made of maple and colorful skateboard veneer. This design works well as a side table or laptop stand.
- Umbrella Stand Side Table: Build an outdoor end table with a hidden umbrella base. The hinged top provides easy access to extra storage.
- Hexagon End Table: Make a modern hexagon-shaped end table that's both stylish and easy to build.
2. How can I build an end table with storage?
If you're looking for end tables with storage options, consider these DIY projects:
- Nightstand with Notched Drawer: Combine a white frame with a figured maple drawer front for a two-toned look. This piece works well as a nightstand or next to the couch.
- Outdoor End Table with Built-In Planter or Ice Bucket: This dual-purpose end table can keep drinks cool on your deck or patio. Simply switch it to a planter box for flowers when needed.
- Tall Nightstand: Customize this nightstand for a taller mattress. The extra height makes it ideal next to a sofa with high arms.
3. What are some space-saving end table designs?
If you're short on space, these compact end table designs are perfect:
- Simple Side Table: Made from scrap wood, this minimalist end table is great for small spaces. It's perfect as a drop zone by the front door.
- Narrow Side Table: With a trim around the top and shelf, this narrow end table covers up the plywood edge and adds a nice detail.
- C Table for Sofa: This space-saving C-shaped side table hugs your couch or reading chair, providing a small surface for drinks or snacks.
4. How can I achieve a modern or industrial look with my end table?
For a modern or industrial vibe, try these DIY end table plans:
- Modern End Table: Build a two-tone end table with black legs designed to look like metal. It's a budget-friendly alternative to store-bought options.
- Industrial Style End Table: Get the industrial look for less by adding wheels to your end table. It's both stylish and mobile.
- Live Edge Table with Resin River: If you love natural elements, consider a live edge table with a resin river running through it. It's a stunning conversation piece.
5. What materials and tools do I need for building an end table?
For most DIY end tables, you'll need basic woodworking tools such as a saw, drill, and sandpaper. As for materials, consider using reclaimed wood, plywood, or solid lumber. Don't forget to add finishing touches like paint, stain, or varnish to protect and enhance the wood.
Conclusion:
Wrapping up this guide on building your own DIY end table - with practical tips and creative ideas, you're ready to embark on this fun project. Let your creativity shine as you design a unique piece for your home.


