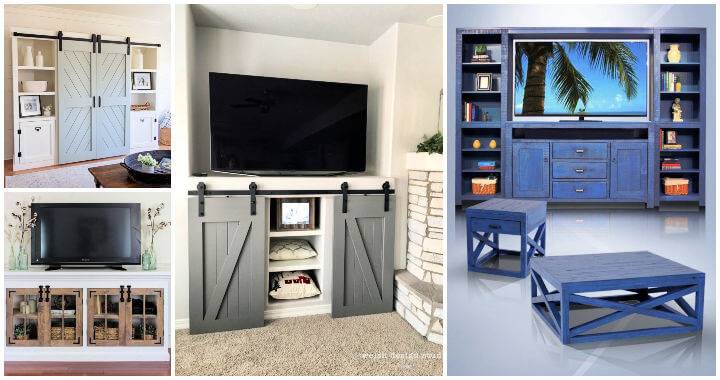
Transforming our family room into our dream space was a mix of excitement and challenge. We had always wanted a custom DIY entertainment center that reflected our style and catered to our love for movies and music. The journey from a plain room to a stylish, tech-friendly zone was both fascinating and arduous. Let me guide you through the entire process, offering insights and advice based on our hands-on experience.
Planning the Design
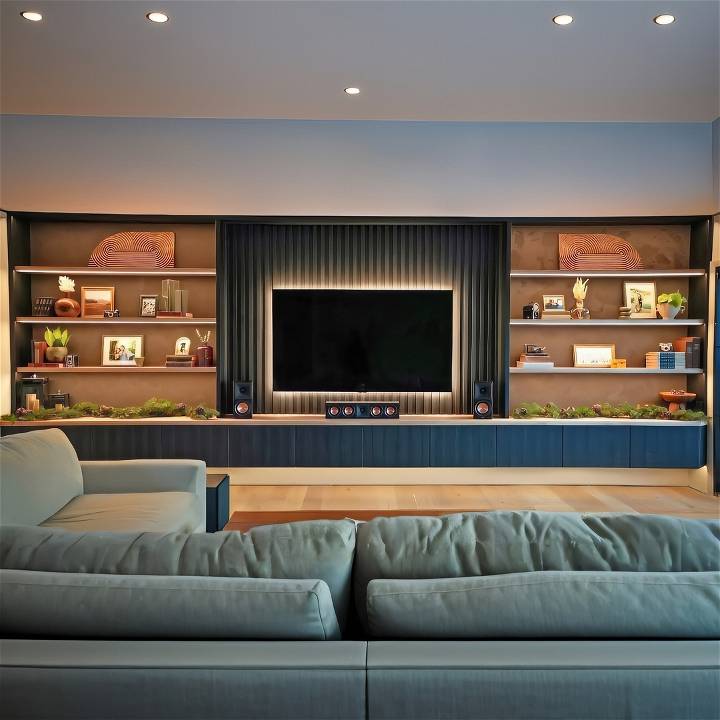
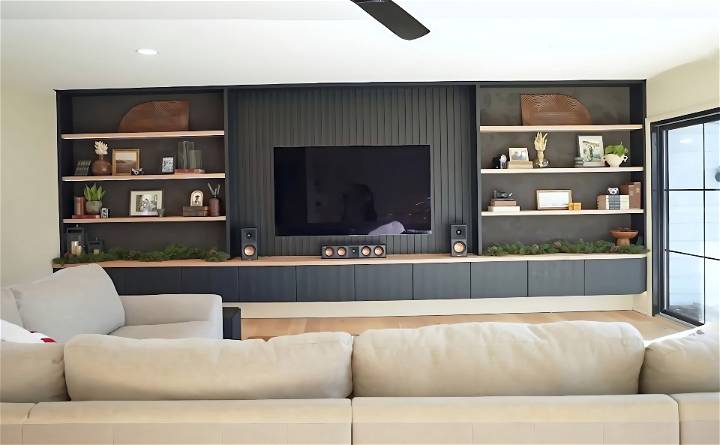
The first step was crucial – planning. We decided on a sleek, modern look with dark colors to contrast with our lighter walls. Floating wooden shelves, a massive 21 ft custom countertop, and strategic LED lighting were part of our ambitious plan. This phase required thorough research; we spent countless hours browsing designs online and discussing our vision. Our goal was not just aesthetics but also functionality, ensuring our space could comfortably host our tech gadgets, books, decor, and more.
Materials Needed and Why
- IKEA Besta Cabinets: A cost-effective yet stylish base for our custom cabinetry.
- Electrical Supplies: To install surge-protected outlets and run wires for HDMI cables and a 5.1 surround sound system.
- Wood for Shelves and Countertop: To build a custom, cohesive look that fitted our dimensions perfectly.
- LED Strips: For that modern glow and ambiance.
- Paint and Finish: To match our design palette and protect our woodwork.
Running Electrical and Starting Cabinet Installation
Before the physical building began, we addressed the electrical requirements. Installing a surge-protected recess outlet behind the TV area was crucial for safety and aesthetics, eliminating visible wires. Running speaker wires for the surround sound system was next, ensuring we had our audio setup integrated into the walls before they were covered.
Mounting the IKEA cabinets was our first significant milestone. We used a laser level to ensure alignment, crucial for a seamless look. The IKEA mounting system surprisingly supported the weight well, but getting the cabinets perfectly aligned took patience.
Custom Countertops and Shelves
The heart of our DIY project was the custom 21 ft oak countertop. Combining 1x12s and 1x6s, we glued, nailed, and added biscuits for alignment. It wasn't easy – our old home's uneven walls meant lots of adjustments to ensure a snug, straight fit.
For the floating shelves, we also opted for oak, matching the countertop. We used pocket holes for a clean look, ensuring they were sturdy enough to hold our decor and gadgets.
Adding Finishes and Lighting
Painting the walls and installing the oak boards onto the cabinets was a game-changer. It instantly made the room look tied together. The LED strips underneath the cabinets and behind the TV brought the wow factor we were aiming for. Each shelf got its light strip, making the shelves a focal point in the room.
Challenges and Solutions
- Alignment Issues: Aligning the cabinets and shelves was tricky but essential for a unified look. Patience and precision, with the help of laser levels, made this possible.
- Custom Countertop Fit: Our home's uneven walls were a challenge for the countertop. We opted to cut the drywall rather than the oak, saving us time and preserving the wood.
- Electrical Planning: Running wires for lighting, sound, and power outlets required foresight. We mapped everything out before sealing the walls, ensuring no need for adjustments later.
Final Touches
The last phase involved installing the TV mount, setting up the surround sound, and decorating our shelves. The room transformed before our eyes, from a plain space to our dream DIY entertainment center. Our vision was realized through careful planning, hard work, and attention to detail.
Building our entertainment center required a lot of effort, but it was worth it. Plan carefully, expect obstacles and embrace the DIY approach. The end product is a unique space that combines practicality with our personal touch. Whether relaxing or entertaining, it's now our favorite room.
Storage Solutions for DIY Entertainment Centers
When designing a DIY entertainment center, one of the most important aspects to consider is storage. Effective storage solutions not only keep your space tidy but also enhance the functionality and aesthetics of your entertainment center. Here's how you can build ample storage for all your needs.
- Measure Your Electronics: Start by measuring all the devices you plan to store in your entertainment center. This includes your TV, speakers, gaming consoles, and media players. Knowing their dimensions will help you build spaces that fit each item perfectly.
- Adjustable Shelving: Incorporate adjustable shelves into your design. This allows you to customize the height between shelves based on the size of your devices or decorative items. It also gives you the flexibility to change the layout as your storage needs evolve.
- Cable Management: Keep cables organized and out of sight with built-in cable management systems. You can use cord concealers, back panels with holes, or even a dedicated drawer to store power strips and keep cables untangled.
- Drawers and Cabinets: Use drawers for storing small items like remotes, game controllers, and cables. Cabinets with doors are great for hiding items you don't want on display, making a clean and uncluttered look.
- Open Compartments: Open compartments are perfect for items you use frequently or want to showcase. They provide easy access and can be styled with decorative objects to personalize your space.
- Vertical Space: Don't forget to utilize vertical space. Tall shelving units or wall-mounted shelves can dramatically increase your storage capacity without taking up additional floor space.
- Ventilation: Ensure proper ventilation for your electronics to prevent overheating. Leave some open space around devices, and consider adding vented shelves or perforated doors for airflow.
By implementing storage solutions, build an organized entertainment center that meets all media needs. Customize storage to your requirements while maintaining a sleek design.
Troubleshooting Common Issues in DIY Entertainment Centers
Building a DIY entertainment center can be a rewarding project, but it's not uncommon to encounter a few hiccups along the way. Here's a guide to troubleshooting some of the most common issues you might face, presented in a clear and straightforward manner.
Problem: Uneven Shelves
- Solution: Check if your floor is level using a spirit level. If the floor is the issue, adjust the legs or base of the unit. If the shelves themselves are uneven, ensure that all shelf supports are correctly installed and level.
Problem: Insufficient Space for Electronics
- Solution: Measure all your devices before cutting any wood or buying cabinets. If you've already built the unit, consider modifying the shelving or making additional compartments to accommodate your electronics.
Problem: Visible Cables
- Solution: Use cable management tools like tubing, clips, or ties to organize and hide cables. Plan for a cable management system in your design, with holes in the back panels for cords to pass through.
Problem: Doors or Drawers Not Closing Properly
- Solution: Adjust the hinges or drawer slides for better alignment. If the issue persists, check for any obstructions and ensure that the installation is square and level.
Problem: Scratches or Dents on the Surface
- Solution: For minor scratches, use a wood marker or crayon that matches the finish of your DIY entertainment center. For deeper dents, wood filler can be used, followed by sanding and refinishing the affected area.
Problem: Lack of Ventilation for Devices
- Solution: Ensure there's enough room around each device for air circulation. Consider adding vented panels or fans to help dissipate heat.
Problem: Stability Concerns
- Solution: If your entertainment center feels wobbly, reinforce the structure with additional brackets or a thicker base. Secure it to the wall with furniture straps for added safety, especially in homes with children or pets.
By being prepared for common issues and knowing how to fix them, you'll be ready for challenges in your DIY project. Remember, patience and planning are crucial for success.
FAQs About DIY Entertainment Centers
Get answers to all your FAQs About DIY Entertainment Centers. Tips, tricks, and step-by-step guides for building your own entertainment center.
How can I ensure my entertainment center is stable?
Stability is key for a safe entertainment center. Use sturdy materials and ensure all connections are tight. Anchor the unit to wall studs if possible. For freestanding units, consider a wider base to prevent tipping. Always double-check that each section is level during assembly.
Can I build an entertainment center if I'm not experienced in woodworking?
Yes, even those new to woodworking can build an entertainment center. Start with a simple design and follow a step-by-step guide. There are many resources available for beginners that provide clear instructions and helpful tips. Take your time, and don't hesitate to ask for help if needed.
How do I manage cables and wires in my entertainment center?
Cable management is important for both aesthetics and safety. Plan for cable management by including holes in the back panels for cords to pass through. Use cable ties or clips to keep cords organized and out of sight. Consider a dedicated space or drawer to store power strips and adapters.
What are some customizable features I can add to my entertainment center?
Customizable features can include adjustable shelves, built-in lighting, specific compartments for different devices, and decorative elements that match your room's decor. Think about what functionalities are important to you, such as a space for a soundbar or a hidden area for gaming consoles.
How do I protect my entertainment center from wear and tear?
To protect your entertainment center, use durable materials and finishes. Regularly dust and clean the surface to prevent buildup. If your entertainment center will hold heavy devices, reinforce the shelves to prevent sagging. Use felt pads under decorative items to avoid scratches.
Conclusion:
Wrapping up our DIY entertainment center article, I hope you feel inspired to build your own customized piece. With these helpful tips and ideas, you can unleash your creativity and design a functional and stylish centerpiece for your living space. Happy crafting!


