When I bought my first house, one of the projects I was most excited about was turning my basement into a functional, stylish space. Like many new homeowners, I wanted to transform the area quickly, but I wasn't ready to shell out thousands of dollars. So, I decided to tackle a DIY epoxy basement floor project on my own. With no prior experience, I learned a lot along the way.
In this guide, I'll walk you through each step of the process, sharing my insights, struggles, and lessons learned, so you can achieve a smooth, professional finish in your own space.
Step by Step Instructions
Learn how to epoxy your basement floor with our step-by-step instructions, from prepping and cleaning to applying and finishing for a professional look.
Prepping the Basement for Epoxy
Preparation is key when it comes to applying epoxy, and it all starts with clearing the space. I had to remove everything from the basement, even items I thought wouldn't be in the way. Dust and debris can ruin an epoxy floor, so a thorough clean is essential. This meant clearing out not just the floors, but also the cobwebs and dirt on the walls that might fall while the epoxy cures.
After I removed most items, I used a shop vacuum to clean the floors. Sweeping would have stirred up too much dust, so I vacuumed multiple times. It's tedious, but trust me, it's important. I went around the edges and corners multiple times to ensure the surface was spotless. If you don't get every bit of dust, the epoxy won't stick properly, leading to uneven spots or peeling later.
I also discovered random chunks of dried concrete from previous work done in the basement. If you have any uneven surfaces like this, you'll need to remove them with a hammer or chisel. Any bump left on the floor will show up through the epoxy, and trust me, you'll notice it every time you walk over it.
Degreasing and Cleaning the Floor
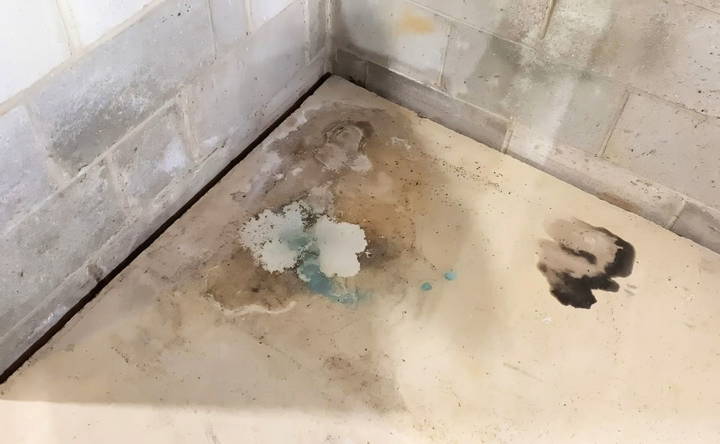
Once I vacuumed and removed debris, I noticed oil stains on the floor. You'll want to use a good degreaser to remove any stains, oil, or dirt that might prevent the epoxy from adhering properly. I bought a degreaser from my local home improvement store, poured it onto the problem areas, and let it sit for about 20 minutes.
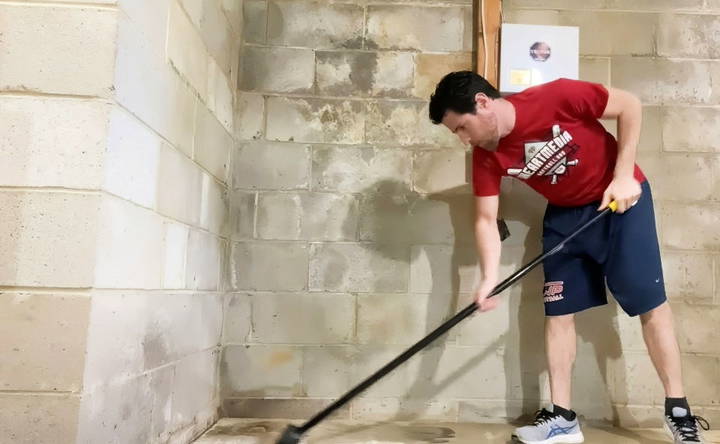
I then scrubbed the floor using a stiff brush and some elbow grease. It's a tough job, but worth the effort. Don't skip this part—epoxy won't bond to a greasy or dirty floor. After scrubbing, I used a squeegee to spread the degreaser evenly, then mopped up the area. You don't want to leave excess moisture, so I also used my shop vac to soak up the water and opened windows to help with ventilation.
Patching Cracks and Filling Holes
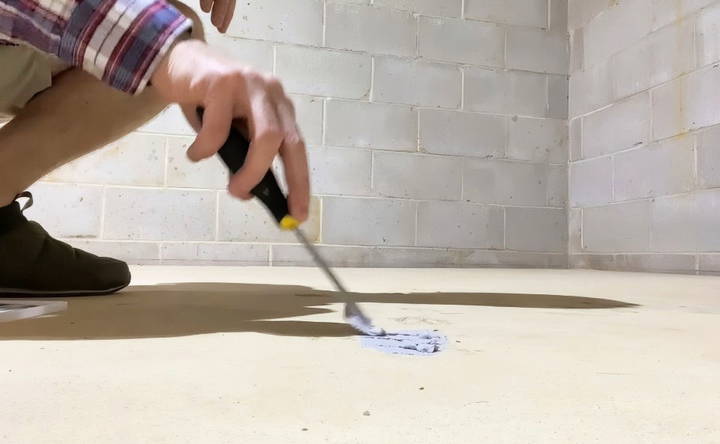
Even after cleaning, my basement floor wasn't perfect. There were small cracks and holes that needed to be filled. If you skip this step, the epoxy will settle into these gaps, leaving visible imperfections. I used a ready-mix concrete patch, which is easy to apply with a paint scraper. You'll need two scrapers: one for scooping out the patch material and another to smooth it out.
Filling the cracks is simple, but make sure to level the surface well. Once you spread the patch, let it dry for at least 12 hours before moving on. It's tempting to rush through this part, but patience here will give you a much better finish in the end.
Etching the Floor for Better Adhesion
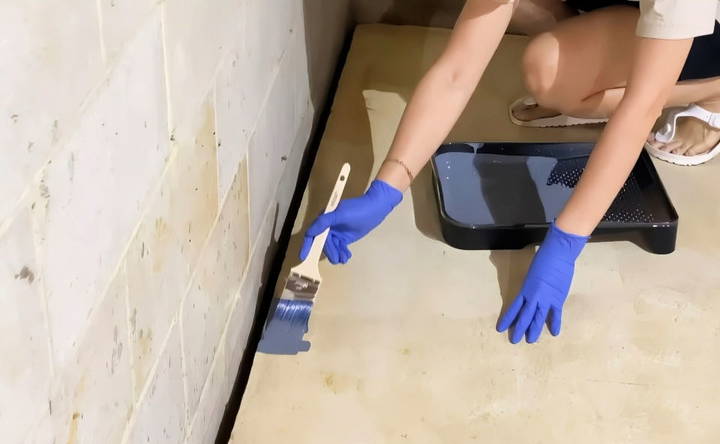
The next step in preparing the floor is etching. This is a critical step because it roughens up the surface, helping the epoxy bond to the concrete. The etching solution comes in a small can of powder. I mixed it with water and spread it across the entire floor.
You'll want to scrub the etching solution into the floor thoroughly. Once that's done, wash it off with water. In a basement with limited drainage like mine, you'll need to mop and vacuum up the water, as it will pool. Don't worry if the floor looks a little uneven after etching—that's normal.
Mixing and Applying the Epoxy
Now comes the fun part—mixing and applying the epoxy. Epoxy comes in two parts: Part A and Part B. Before you combine them, you'll need to mix each part separately. Once mixed, you can pop the seal between the two compartments, allowing them to combine. Mix for about 2–3 minutes, making sure everything is blended evenly.
Once mixed, let the epoxy sit for about 30 minutes. This allows the chemicals to react and thicken slightly, which makes the application smoother. Depending on the temperature, you may need to adjust the waiting time. In colder conditions, like the 65°F day I was working with, it may need the full 30 minutes to set.
Rolling Out the Epoxy
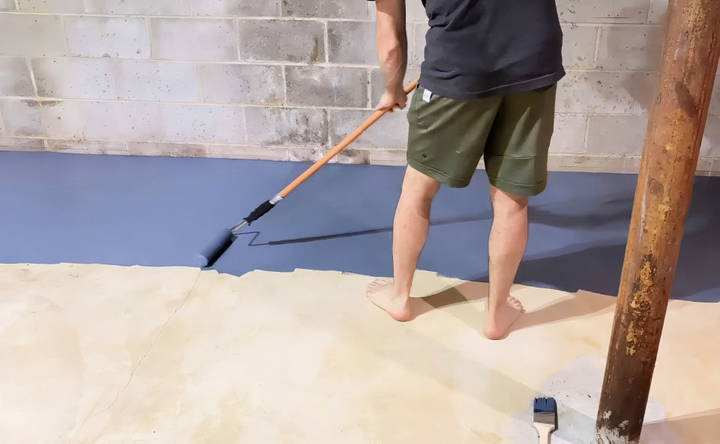
When the epoxy is ready, it's time to start applying it to the floor. You'll need a long-handled roller, some paint trays, and an edger. The edger is particularly useful for getting close to walls and around poles without making a mess. I started by using the edger around the perimeter, while my wife began rolling the epoxy in the center.
The technique I found most effective was the “M” or “W” pattern—rolling in a zigzag motion across the floor. This helps to ensure even coverage. We worked in 10-foot by 10-foot sections, which allowed us to control the spread of the epoxy without it drying too fast.
Adding Decorative Flakes
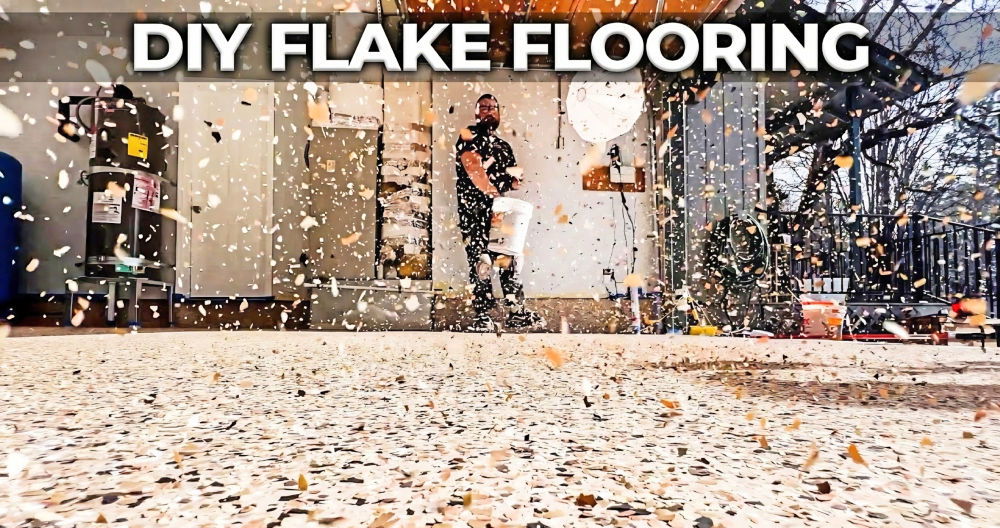
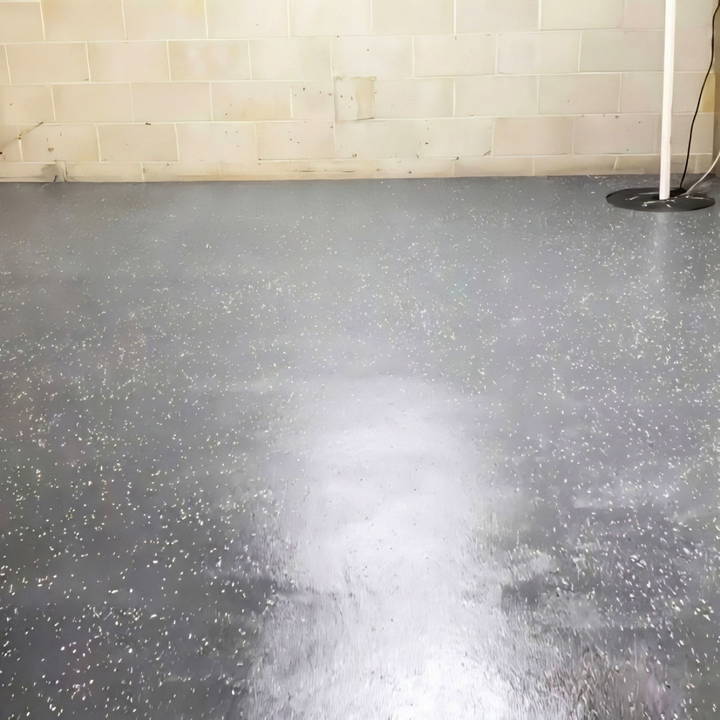
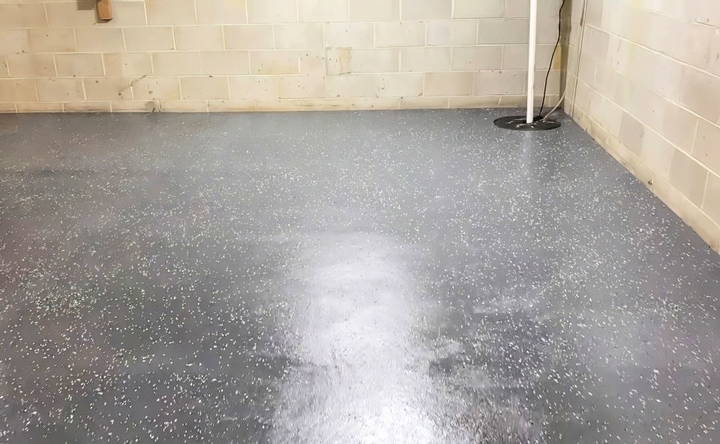
To give the floor a bit more personality, I decided to add decorative flakes. These are optional, but they help to cover any minor imperfections and add texture to the floor, making it less slippery. As I rolled the epoxy, my wife followed behind, sprinkling the flakes evenly across the wet surface.
It's important to apply the flakes while the epoxy is still tacky, so they adhere properly. You don't want to overdo it—just a light, even layer works best.
Final Touches and Drying Time
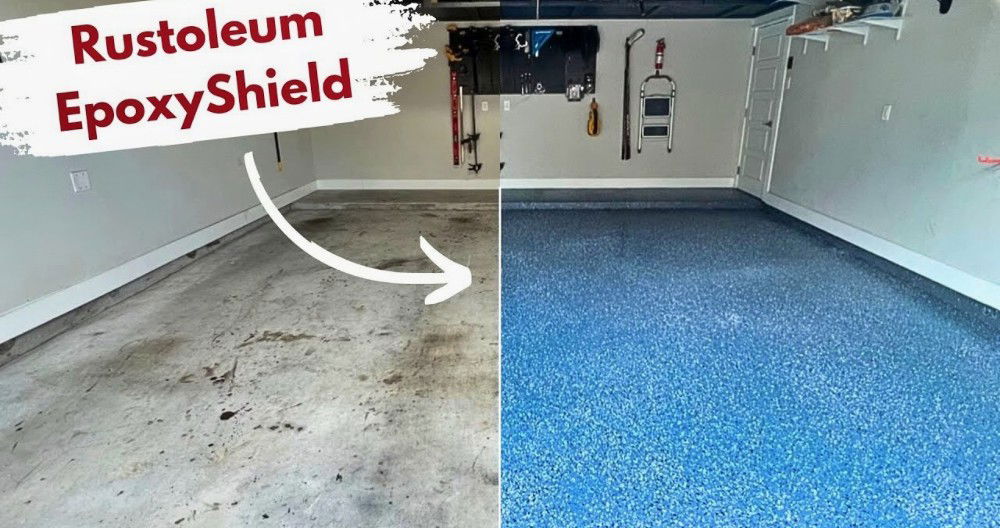
After applying the epoxy and flakes, we let the floor sit for 24 hours before walking on it. It can take up to a week for the epoxy to fully cure, so I avoided placing any heavy furniture on it during this time. The results were fantastic. The epoxy gave the basement a sleek, professional look, and the added flakes gave it a unique touch.
I did notice some areas where the filler still showed slightly through the epoxy, but overall, the floor looked great. One thing to note is that certain spots may appear to still be wet, even after they're dry. This is just the finish of the epoxy reflecting light and isn't anything to worry about.
Common Mistakes to Avoid
When applying epoxy to your basement floor, avoiding common mistakes can save you time, money, and frustration. Here are some key pitfalls to watch out for:
1. Inadequate Surface Preparation
Proper surface preparation is crucial for a successful epoxy application. Failing to clean and prepare the surface can lead to poor adhesion and peeling. Make sure to:
- Clean Thoroughly: Remove all dust, dirt, grease, and oil.
- Repair Cracks: Use a concrete patching compound to fix any cracks or holes.
- Etch the Surface: Etching helps the epoxy bond better with the concrete.
2. Ignoring Temperature and Humidity
Epoxy application is sensitive to temperature and humidity. Applying epoxy in unsuitable conditions can result in bubbles, poor adhesion, and uneven curing. Always:
- Check the Weather: Ideal temperature is between 60°F and 90°F (15°C to 32°C).
- Control Humidity: High humidity can cause moisture to get trapped, leading to bubbles.
3. Incorrect Mixing
Mixing epoxy incorrectly can lead to an uneven finish and weak spots. Follow these tips:
- Measure Accurately: Use the correct ratio of resin to hardener.
- Mix Thoroughly: Stir the mixture well to ensure a consistent blend.
4. Rushing the Application
Applying epoxy too quickly can cause streaks and uneven coverage. Take your time to:
- Apply Evenly: Use a roller or squeegee to spread the epoxy evenly.
- Work in Sections: Divide the floor into manageable sections to ensure even application.
5. Skipping Protective Gear
Epoxy can be hazardous if it comes into contact with your skin or if you inhale the fumes. Always wear:
- Gloves: Protect your hands from chemicals.
- Masks: Prevent inhalation of harmful fumes.
- Goggles: Shield your eyes from splashes.
6. Neglecting Curing Time
Rushing the curing process can compromise the durability of your epoxy floor. Ensure you:
- Follow the Manufacturer's Instructions: Adhere to the recommended curing time.
- Avoid Foot Traffic: Keep the area clear until the epoxy is fully cured.
7. Using Low-Quality Products
Investing in high-quality epoxy products can make a significant difference in the outcome. Low-quality products may:
- Wear Out Quickly: They may not be as durable or resistant to wear and tear.
- Have Poor Adhesion: They might not bond well with the concrete surface.
By avoiding these common mistakes, you can achieve a professional-looking epoxy basement floor that lasts for years. Taking the time to do it right will pay off in the long run.
Safety Precautions
When working with epoxy for your basement floor, safety should be your top priority. Here are some essential safety precautions to follow:
1. Wear Protective Gear
Epoxy contains chemicals that can be harmful if they come into contact with your skin or if you inhale them. Always wear:
- Gloves: Use chemical-resistant gloves to protect your hands.
- Masks: Wear a mask to avoid inhaling fumes. A respirator mask is ideal.
- Goggles: Protect your eyes from splashes and fumes.
2. Ensure Proper Ventilation
Epoxy fumes can be hazardous in enclosed spaces. Make sure your workspace is well-ventilated:
- Open Windows and Doors: Allow fresh air to circulate.
- Use Fans: Place fans to help move air out of the basement.
3. Read and Follow Manufacturer's Instructions
Each epoxy product may have specific safety guidelines. Always:
- Read Labels: Carefully read the safety instructions on the product label.
- Follow Directions: Adhere to the recommended usage and safety precautions.
4. Handle Chemicals with Care
Epoxy and its hardeners are chemicals that need careful handling:
- Avoid Skin Contact: If epoxy gets on your skin, wash it off immediately with soap and water.
- Store Safely: Keep epoxy products out of reach of children and pets.
5. Dispose of Materials Properly
Improper disposal of epoxy materials can harm the environment. Follow these steps:
- Follow Local Regulations: Check local guidelines for disposing of chemical products.
- Use Designated Disposal Sites: Take leftover epoxy and containers to designated disposal sites.
6. Be Prepared for Emergencies
Accidents can happen, so it's important to be prepared:
- Keep a First Aid Kit Handy: Have a first aid kit nearby in case of minor injuries.
- Know Emergency Contacts: Have the contact information for local emergency services readily available.
7. Avoid Eating and Drinking in the Work Area
To prevent accidental ingestion of chemicals:
- No Food or Drinks: Keep food and drinks out of the work area.
- Wash Hands Thoroughly: Always wash your hands before eating or drinking.
8. Take Breaks
Working with epoxy can be tiring and stressful. Remember to:
- Take Regular Breaks: Step outside for fresh air and rest.
- Stay Hydrated: Drink water to stay hydrated, but do so away from the work area.
Following these precautions ensures a safer epoxy process, protecting your health and achieving good results.
FAQs About DIY Epoxy Basement Floors
Discover essential answers to common FAQs about DIY epoxy basement floors, ensuring a durable, stylish space with expert tips and guidance.
Epoxy flooring is a type of floor coating made from a mixture of resin and hardener. When applied to concrete floors, it creates a durable, glossy surface that is resistant to stains, chemicals, and wear.
Epoxy is an excellent choice for basement floors because it is durable, moisture-resistant, and easy to clean. It also enhances the appearance of your basement, making it look polished and inviting.
Epoxy typically takes about 24 to 72 hours to cure, depending on the temperature and humidity. It's best to avoid heavy traffic on the floor during this time.
Yes, you can add decorative flakes or metallic pigments to the epoxy to build a unique look. Sprinkle the flakes onto the wet epoxy and let it cure.
Yes, epoxy flooring is safe for indoor use. However, ensure proper ventilation during application to avoid inhaling fumes. Once cured, epoxy is non-toxic.
Lessons Learned and Final Thoughts
Epoxying my DIY epoxy basement floor was a labor-intensive project, but the results were worth it. The key to success is all in the preparation. Make sure you thoroughly clean, degrease, patch, and etch the floor before applying the epoxy. Skipping these steps will result in a subpar finish, and you'll likely need to redo the job sooner rather than later.
Would I do it again? Absolutely. Not only did it transform the look of my basement, but it also provided a durable, easy-to-clean surface that will last for years. If you're thinking about epoxying your basement floor, I hope my experience helps you tackle the project with confidence.
Now, I'm already thinking about painting the walls to match!


