Discover a simple way to upgrade your kitchen with DIY epoxy countertops. I recently tried this project and was amazed by the results. First, I gathered all the materials: epoxy resin, a mixing stick, and protective gear. I started by cleaning the surface and then mixed the resin as per the instructions. Applying the resin was straightforward; just pour and spread evenly with a brush.
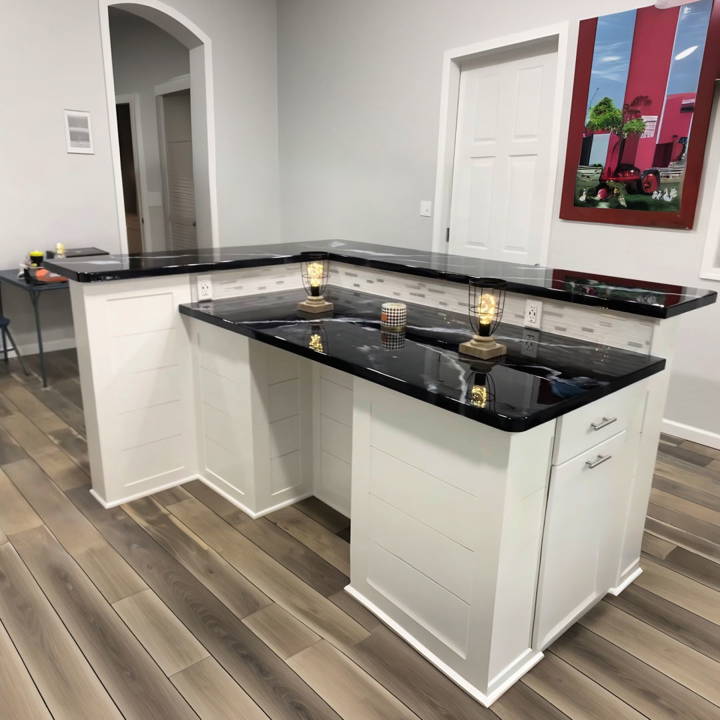
Watching the countertop transform into a modern look was incredible. I followed the steps patiently and let the epoxy cure for a few days. The shiny, durable finish amazed everyone who saw it. This easy project took my kitchen to the next level.
Now, I'm sharing these steps with you, so you can build your own stunning countertops. Get the supplies and get started—you won't regret it.
Materials Needed & Why
- Old Countertop Removal Tools: Clear the workspace and prepare for the new surface.
- Three-Quarter Inch MDF: Serves as a solid base for the epoxy coating.
- Steel Supports for the Island: To ensure stability and prevent sagging over time.
- FLEX SEAL* ®: Used on the undermount sink area to prevent water damage.
- Epoxy Resin Kit: The core material needed to build the countertop surface.
- Jigsaw, Belt Sander, Router, and Drill: Essential tools for shaping and preparing the MDF.
- Bondo* ® and Silicone Caulk: This is for sealing seams and making a waterproof barrier.
- 220 Grit Sandpaper: This is used to smooth the MDF and prep the epoxy base.
Step by Step Instructions
Learn how to build stunning DIY epoxy countertops with our easy, step-by-step instructions. Transform your surfaces with a durable and beautiful finish.
Step 1: Removal and Preparation
First, I removed the old laminate countertops, a decision made easier when I realized they were beyond salvation. This step set the stage for a transformation. After dismantling, I bolstered the cabinet support, particularly around the sink area, which had a notable absence of central support. This crucial step would ensure the longevity and stability of my new countertops.
Step 2: Building the Base
Using three-quarter inch MDF, I cut the material to the desired depth and width, paying close attention to the unique contours of my kitchen walls. Precision was key, as the epoxy coating required a perfectly level and well-prepared base. For the island, I installed steel supports to provide ample strength for the bar height countertop, ensuring a blend of functionality and sleek design.
Step 3: Water-proofing and Sealing
Given the decision to install an undermount sink, waterproofing became a significant priority. I brushed FLEX SEAL* ® around the sinkhole's base, an extra precaution alongside the epoxy and silicone sealant that would follow. This tri-layer defense promised to keep water damage at bay.
Step 4: Joining and Shaping
MDF boards were joined to form the countertop's shape, employing dowels and glue for simplicity and strength. Bondo* ® helped eliminate any visible seams, ensuring a seamless base for the epoxy. A silicone caulk was then run along the wall edges to prevent epoxy leakage behind cabinets during the pouring stage.
Step 5: Building the Epoxy Masterpiece
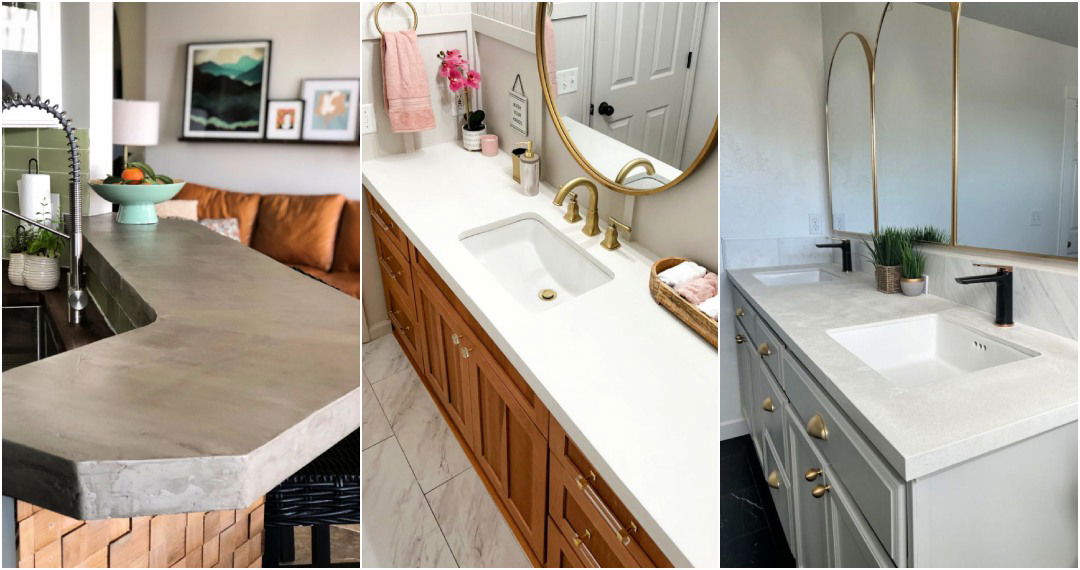
The heart of this project lay in the epoxy pour. With a black marble kit from Stone Coat Countertops at my disposal, I began by applying an undercoat as recommended. Mixing the epoxy was a one-to-one affair, adding metallic powder for that stunning marble effect. Spread with a trowel, chopped for texture, and torched to remove air bubbles, the process was both methodical and artistic.
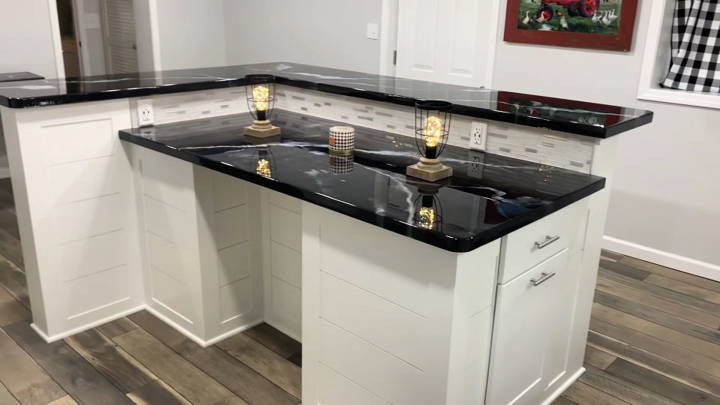
Collaboration with my brother-in-law ensured a personal touch to the countertops - we experimented with patterns and techniques, achieving a custom look that resonated with our vision. The final result? A breathtakingly smooth and visually striking surface that far exceeded my expectations.
Final Touches
After allowing the epoxy to cure, I applied a clear coat for additional protection and a glass-like finish. Installation of the undermount sink and faucet, followed by caulking the backsplash, brought the project to its fruitful conclusion. The transformation was not just visible but felt - the kitchen had evolved into a space of warmth, modernity, and function.
Design and Customization Tips for DIY Epoxy Countertops
Building your own epoxy countertops is not just about functionality; it's also an opportunity to express your personal style and add a unique touch to your home. Here are some design and customization tips to help you achieve a countertop that's both practical and visually appealing:
- Choose Your Colors Wisely: Epoxy comes in a wide range of colors, so select shades that complement your kitchen's color scheme. For a subtle look, consider neutral tones. If you're feeling adventurous, vibrant colors or metallic pigments can make a bold statement.
- Experiment with Patterns: You don't have to stick to solid colors. Use painter's tape to build geometric patterns, or swirl different colors together with a stick for a marbled effect. Remember, less is often more; don't overdo it with too many colors or patterns.
- Add Depth and Texture: To give your countertops depth, try adding layers of clear epoxy between colored ones. You can also embed objects like coins, pebbles, or glass fragments into the epoxy for added texture and interest.
- Use High-Quality Materials: The quality of your epoxy and pigments can greatly affect the final look. Invest in high-grade materials to ensure a smooth, durable finish that resists yellowing over time.
- Keep It Safe and Clean: Always work in a well-ventilated area and wear protective gear, such as gloves and a mask. Keep your workspace clean to avoid dust and debris getting mixed into the epoxy.
- Practice Makes Perfect: Before applying epoxy to your actual countertops, practice on a small piece of wood or cardboard. This will help you get comfortable with the materials and techniques.
- Seek Inspiration: Look at online galleries, social media, or home improvement shows for inspiration. Seeing what others have achieved can spark your own creativity.
Follow these tips to build beautiful, custom epoxy countertops that reflect your style and enhance your kitchen.
Troubleshooting Common Issues with DIY Epoxy Countertops
When working with epoxy for your countertops, you might encounter a few hiccups along the way. Here's a guide to help you troubleshoot some of the most common issues:
- Bubbles: Bubbles can form in your epoxy during mixing or pouring. To avoid this, mix the epoxy slowly and pour it gradually. If bubbles appear, you can pop them by gently waving a heat gun or hairdryer over the surface.
- Sticky or Tacky Surface: If your epoxy hasn't cured properly, it may feel sticky. This could be due to insufficient mixing, low temperatures, or incorrect ratios of resin to hardener. Double-check the manufacturer's instructions and ensure your working environment is at the recommended temperature.
- Uneven Finish: An uneven surface can occur if your countertop isn't level or if the epoxy is applied unevenly. Use a level to check your workspace before starting and spread the epoxy with a notched trowel for a consistent thickness.
- Color Irregularities: To prevent streaks or uneven color, thoroughly mix the pigment into the epoxy before pouring. Test the color mix on a small sample to ensure it meets your expectations before applying it to the entire countertop.
- Scratches and Dents: Epoxy countertops can scratch or dent if hit with sharp or heavy objects. Protect the surface during use, and if damage occurs, you can sand the area and apply a new layer of epoxy.
- Yellowing: Over time, some epoxies may be yellow, especially when exposed to UV light. To minimize this, choose an epoxy with UV inhibitors and consider adding a UV-protective clear coat over the top.
By being aware of these common issues and knowing how to address them, you'll be better prepared to build a stunning and durable epoxy countertop.
Safety Precautions for Working with Epoxy
When making your DIY epoxy countertops, safety is paramount. Epoxy is a chemical compound that requires careful handling. Here are some safety precautions to ensure a safe and successful project:
- Work in a Ventilated Area: Epoxy can release fumes, so work in a well-ventilated space or outdoors. If indoors, open windows and use fans to circulate air.
- Wear Protective Gear: Always wear gloves to protect your skin, and consider safety glasses to guard your eyes from splashes. If you're sensitive to fumes, wear a respirator or mask.
- Read Instructions Thoroughly: Before starting, read the product instructions carefully. Each epoxy brand might have specific safety recommendations.
- Measure Accurately: Use precise measurements for the resin and hardener. Incorrect ratios can lead to improper curing and can be more hazardous.
- Avoid Skin Contact: If epoxy gets on your skin, wash it off immediately with soap and water. Do not use solvents, as they can drive the epoxy into your skin.
- Be Prepared for Spills: Have paper towels and acetone handy for cleanups. If a spill occurs, clean it up quickly to prevent it from curing.
- Dispose of Waste Properly: Follow local regulations for disposing of epoxy waste. Do not pour leftover epoxy down the drain.
- Keep Away from Children and Pets: Store epoxy and related materials out of reach of children and pets to prevent accidental ingestion or contact.
By adhering to these safety precautions, you can enjoy crafting your epoxy countertops while keeping yourself and others safe.
FAQs About DIY Epoxy Countertops
Explore the faqs about DIY epoxy countertops: learn installation tips, pros and cons, maintenance hacks, and common issues. Get expert insights now!
Epoxy provides a glossy, seamless finish that’s resistant to moisture, stains, and scratches. It’s a cost-effective alternative to natural stone, offering a wide range of customization options to match any decor style.
Begin by thoroughly cleaning the surface and repairing any chips or cracks. Sand the countertop to build a rough texture for the epoxy to adhere to. Ensure the area is completely dry and free of dust before proceeding.
Absolutely! Epoxy is versatile, allowing you to add colors, patterns, or even objects like coins or photos within the resin for a personalized touch.
Yes, avoid applying epoxy in a dusty environment, as particles can settle into the finish. Also, be mindful of drips and ensure you have enough epoxy to cover the entire surface without overworking the material.
The curing time for epoxy countertops can vary depending on the product and environmental conditions. Generally, it takes about 24 hours for the epoxy to dry to the touch and 72 hours for it to fully cure. However, it's recommended to wait at least 7 days before putting heavy items on the surface or using the countertops normally to ensure complete hardness and durability.
Reflections
I'm confident DIY epoxy countertops will give your kitchen a whole new look, just like mine. So, follow the steps, and enjoy your new countertop!


