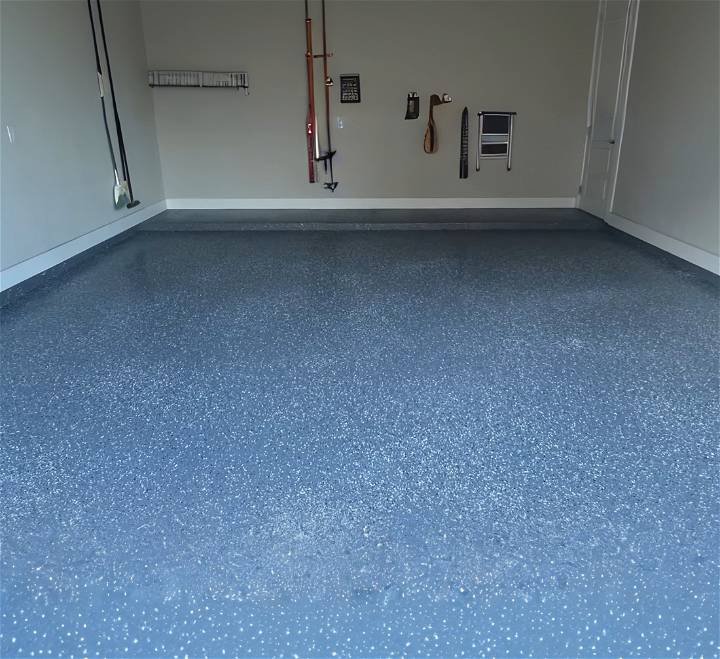
Embarking on a DIY epoxy garage floor project can transform your garage into a durable, visually appealing space. This guide is designed to walk you through the step-by-step instructions necessary for a successful application. From preparing your garage floor for epoxy application to selecting the right epoxy product, our aim is to equip you with the knowledge to make informed decisions. This content prides itself on being user-friendly, aiming to demystify the process and ensure you have all the information at your fingertips.
Next, we delve into essential preparation tips that are crucial for a flawless finish. From cleaning the floor to repairing cracks and holes and conducting a moisture test to etching the surface, each step is explained in detail to guide you through. As you move forward, the importance of choosing a high-quality epoxy product that suits your needs becomes evident. Stay tuned as we explore more on safety precautions, maintenance and care, and troubleshooting common problems to help you achieve a professional-grade epoxy garage floor.
Ready to elevate your garage floor? Let's get started on this transformative journey.
Preparation Tips for Applying Epoxy on Your Garage Floor
Before you start applying epoxy on your garage floor, it's crucial to prepare the surface properly. Often overlooked, this step is the key to a successful and long-lasting finish. Here's a detailed guide on how to prepare your garage floor for epoxy.
Clean the Floor
The first step is to clean the floor thoroughly. Any dirt, grease, or oil can prevent the epoxy from adhering properly. You can use a broom or a vacuum to remove loose debris. For stubborn stains, consider using a degreaser or a concrete cleaner.
Repair Cracks and Holes
Inspect the floor for any cracks or holes. These imperfections can affect the final result and make the surface uneven. Use a concrete patch or filler to repair them. Make sure to follow the manufacturer's instructions for the best results.
Test for Moisture
Garage floors can often have moisture issues, which can cause the epoxy to bubble or peel. To test for moisture, tape a plastic bag to the floor and leave it for 24 hours. If you see condensation under the bag, you might need to apply a moisture barrier before the epoxy.
Etch the Surface
Etching gives the floor texture, which helps the epoxy to bond better. You can etch the floor using an etching solution or a grinder. Remember to rinse the floor thoroughly after etching and let it dry completely.
Final Check
Before you start applying the epoxy, do a final check. The floor should be clean, dry, and free from imperfections. If everything looks good, you're ready to start the epoxy application process.
A well-prepared floor is the foundation of a successful epoxy garage floor. Take your time with these steps to ensure a smooth and durable finish. Good luck!
Choosing the Right Epoxy Product for Your Garage Floor
Selecting the right epoxy product is crucial for a successful and durable garage floor coating. Here's a guide to help you make an informed decision.
Understand Your Needs
Before you start shopping, it's important to understand your needs. Consider factors like the condition of your garage floor, the climate in your area, and how you use your garage. This will help you choose a product that's suited to your specific requirements.
Types of Epoxy
There are several types of epoxy products available on the market. Here's a brief overview:
- 100% Solid Epoxy: This is the most durable and long-lasting type. It's also the most expensive. It's ideal for high-traffic areas and commercial settings.
- Water-Based Epoxy: This is a more affordable option that's easier to apply. It's ideal for residential garages and light-duty applications.
- Solvent-Based Epoxy: This type offers a good balance between durability and ease of application. It's suitable for both residential and commercial settings.
Consider the Finish
Epoxy products come in a variety of finishes, from glossy to matte. Choose a finish that matches your aesthetic preferences and the style of your garage.
Check the Drying Time
The drying time can vary between products. Some epoxy coatings can take up to 72 hours to cure completely. Make sure to choose a product with a drying time that fits your schedule.
Read Reviews
Finally, don't forget to read reviews before making a purchase. This can give you a better idea of the product's performance and reliability.
The right epoxy product can make all the difference in the success of your DIY garage floor project. Take your time to research and choose wisely.
Step by Step Instructions
Learn how to transform your garage floor with our step-by-step DIY epoxy guide below:
Concrete Preparation
- Concrete Grinding Method: This labor-intensive method provides the best results, revealing a fresh concrete layer for superior epoxy adhesion. Cover everything in the garage to protect it from dust, rent a flooring pole and diamond brush attachment, and start grinding. Remember, it's crucial to always keep the machine moving to avoid uneven spots.
- Acid Etching Method: Provided as an alternative, acid etching can be effective but is generally recommended for newer or less stained floors. Mix powdered acid with water, apply evenly, and scrub into the concrete—particularly in high-risk areas like where car tires sit, to prevent hot tire pickup.
Applying Epoxy
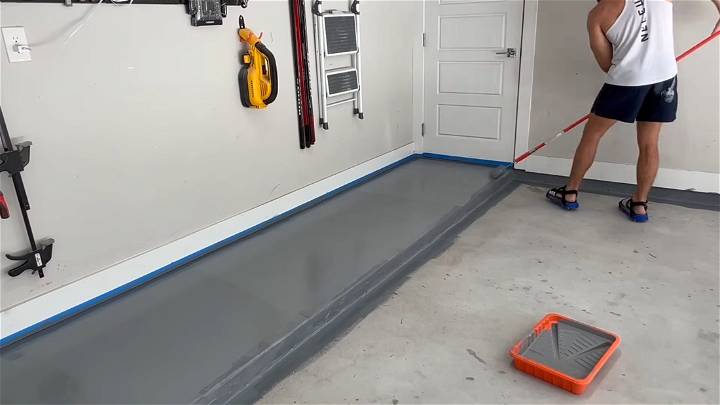
Once the concrete is prepared, ensure it is completely dry and immaculately clean. Tape off edges and gather materials, including epoxy kits, a paint tray, rollers, brushes, and decorative chips. Mix parts A and B of the epoxy thoroughly, noting temperature recommendations to ensure proper drying time.
Begin by brushing the edges and corners of your garage, then use a roller for the larger areas, maintaining a wet edge to avoid lap marks. Add decorative chips by throwing them into the air for a random dispersal.
Finishing Up
Allow the epoxy to dry for at least 24 hours before removing any masking tape. Avoid parking cars on the new surface for three days to allow full curing. Optionally, you can add a clear topcoat for added gloss and protection, but be aware it may yellow over time.
Video Tutorial
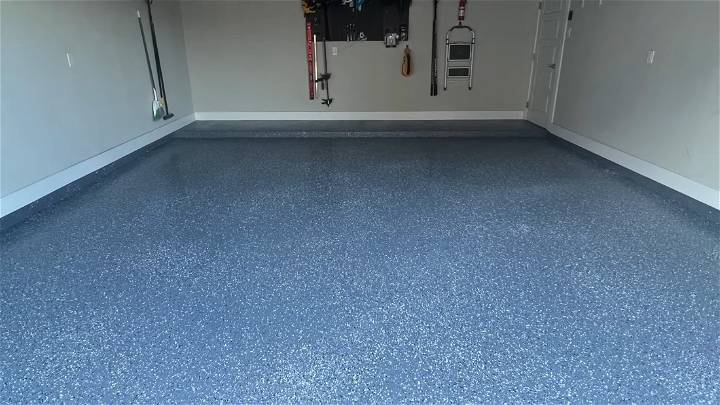
For a step-by-step video tutorial, watch Builds by Maz on YouTube.
It pairs well with this written guide, offering a visual representation that brings the discussed techniques to life in an engaging and straightforward manner.
By following these steps attentively, you'll achieve a beautifully protected and enhanced garage floor that not only looks fantastic but is also durable and long-lasting.
Safety Precautions When Applying Epoxy on Your Garage Floor
Working with epoxy requires careful attention to safety. Here are some important precautions to keep in mind during your DIY epoxy garage floor project.
Use Protective Gear
Epoxy can be harmful if it comes into contact with your skin or eyes, or if its fumes are inhaled. Therefore, it's important to wear protective gear. This includes gloves, safety glasses, and a respirator mask.
Ensure Proper Ventilation
Epoxy fumes can be harmful, so make sure your garage is well-ventilated. Open all doors and windows, and consider using a fan to circulate the air.
Handle Materials with Care
Epoxy components can be reactive. Always follow the manufacturer's instructions for mixing and applying the epoxy. Avoid contact with skin and eyes.
Be Aware of Fire Safety
Some epoxy products can be flammable. Keep them away from open flames or sparks. Have a fire extinguisher nearby as a precaution.
Dispose of Materials Responsibly
After your project, dispose of any leftover epoxy and cleaning materials responsibly. Check your local regulations for guidance.
Safety should always be your first priority when working on a DIY project. By following these precautions, you can ensure a safe and successful epoxy garage floor application.
Troubleshooting Common Problems with Epoxy Garage Floors
Even with careful preparation and application, you may encounter some issues when applying epoxy to your garage floor. Here's a guide to help you troubleshoot common problems.
Bubbles in the Epoxy
Bubbles can form if the epoxy is mixed too quickly or if the floor wasn't properly prepared. To fix this, you can use a toothpick or a pin to pop the bubbles before the epoxy cures. For larger bubbles, you may need to sand the area and apply a new coat of epoxy.
Uneven Coverage
Uneven coverage can occur if the epoxy is not spread evenly or if it's applied too thinly. To prevent this, make sure to use the right amount of epoxy and spread it evenly using a roller. If you notice uneven coverage after the epoxy has cured, you may need to apply an additional coat.
Peeling or Flaking
Peeling or flaking can happen if the floor isn't properly cleaned or if there's moisture in the concrete. To fix this, you'll need to remove the peeling or flaking epoxy, clean the floor thoroughly, and reapply the epoxy.
Discoloration
Discoloration can occur if the epoxy is exposed to sunlight for extended periods. To prevent this, consider using a topcoat with UV protection.
Troubleshooting is a normal part of any DIY project. Don't get discouraged if you encounter these issues. With a little patience and persistence, you can achieve a beautiful and durable epoxy garage floor.
Maintenance and Care for Your Epoxy Garage Floor
Once you've successfully applied epoxy to your garage floor, it's important to know how to maintain it. Proper care can extend the life of your epoxy floor and keep it looking its best. Here are some tips on how to care for your epoxy garage floor.
Regular Cleaning
Regular cleaning is the first step in maintaining your epoxy floor. Use a dust mop or a soft indoor broom to remove dust and debris. For a deeper clean, you can use a mild detergent and a soft mop.
Spot Cleaning
If you notice any spills or stains, clean them up immediately. Epoxy is resistant to most chemicals, but some substances can cause discoloration if left unattended. Use a soft cloth or sponge with warm water and mild detergent to clean the spot.
Avoid Sharp Objects
Sharp objects can scratch the surface of your epoxy floor. Be careful when moving heavy objects across the floor. Use a plywood or hardboard path if necessary.
Protect from UV Rays
If your garage gets a lot of sunlight, consider using window treatments to protect your epoxy floor from UV rays. Prolonged exposure to sunlight can cause the color of the epoxy to fade over time.
Regular Inspection
Inspect your floor regularly for any signs of wear or damage. If you notice any chips or cracks, repair them as soon as possible to prevent further damage.
With proper care and maintenance, your epoxy garage floor can last for many years. It's worth the effort to keep it looking its best.
Frequently Asked Questions About Epoxy Garage Floors
When it comes to epoxy garage floors, there are several common questions that homeowners often ask. Here's a detailed section addressing some of these frequently asked questions.
How Long Does Epoxy Garage Floor Last?
The lifespan of an epoxy garage floor can vary depending on several factors, such as the quality of the epoxy used, how well the floor was prepared before application, and how the floor is used and maintained. Generally, a well-applied and maintained epoxy garage floor can last anywhere from 5 to 10 years or even longer.
Can I Apply Epoxy Myself?
Yes, applying epoxy to your garage floor can be a DIY project. However, it requires careful preparation and application. It's important to follow all instructions and safety precautions. If you're not comfortable doing it yourself, consider hiring a professional.
How Long Does It Take for Epoxy to Dry?
The drying time for epoxy can vary depending on the product and environmental conditions. Typically, you should wait at least 24 hours before walking on the floor and about 3 to 7 days before driving a vehicle on it.
Can Epoxy Be Applied to Any Garage Floor?
Epoxy can be applied to most concrete garage floors. However, the concrete must be properly prepared and in good condition. Floors with excessive moisture or oil stains may not be suitable for epoxy.
Is Epoxy Resistant to Oil and Chemicals?
Yes, one of the benefits of epoxy is its resistance to oil, gasoline, and other common garage chemicals. However, spills should be cleaned up promptly to prevent staining or damage.
What is the Best Temperature to Apply Epoxy?
The ideal temperature to apply epoxy is between 60 and 85 degrees Fahrenheit. If it's too hot or too cold, the epoxy may not cure properly.
Can Epoxy Be Used Outdoors?
While epoxy can be used outdoors, it's not recommended because it can yellow over time when exposed to sunlight. If you want to use epoxy outdoors, consider using a polyurethane topcoat to protect it from UV rays.
How Thick Should an Epoxy Floor Be?
The thickness of an epoxy floor can vary depending on the product and the number of coats applied. Typically, a residential garage floor should be between 1 and 2 millimeters thick.
Can Epoxy Floors Be Slippery?
Epoxy floors can be slippery when wet. If you're concerned about slip resistance, consider adding a non-slip additive to the epoxy.
How Do I Clean an Epoxy Floor?
Epoxy floors are easy to clean. For regular cleaning, use a dust mop or a soft indoor broom. For a deeper clean, use a mild detergent and a soft mop.
Every epoxy garage floor project is unique. Always do your research and don't hesitate to seek professional advice if needed.
Conclusion:
In conclusion, transforming your garage floor with DIY epoxy garage floor is a project that not only enhances the appearance of your space but also increases its functionality and resilience. By following the step-by-step instructions outlined—from preparation to applying epoxy and ensuring safety measures—you can achieve a durable and aesthetically pleasing garage floor.
Don't forget the importance of maintenance and care to extend the life of your new floor. If you encounter any hiccups along the way, our troubleshooting guide is here to help you address common problems. With the right approach, your DIY epoxy garage floor project can be a rewarding and successful endeavor.


