As a passionate DIY enthusiast and a lover of unique, handmade furniture, I recently embarked on an ambitious project to build a colored epoxy resin table. Inspired by a video tutorial by Blacktail Studio, I decided to document my journey and share a step-by-step guide to help others looking to dive into this creative endeavor.+
Why Epoxy Resin?
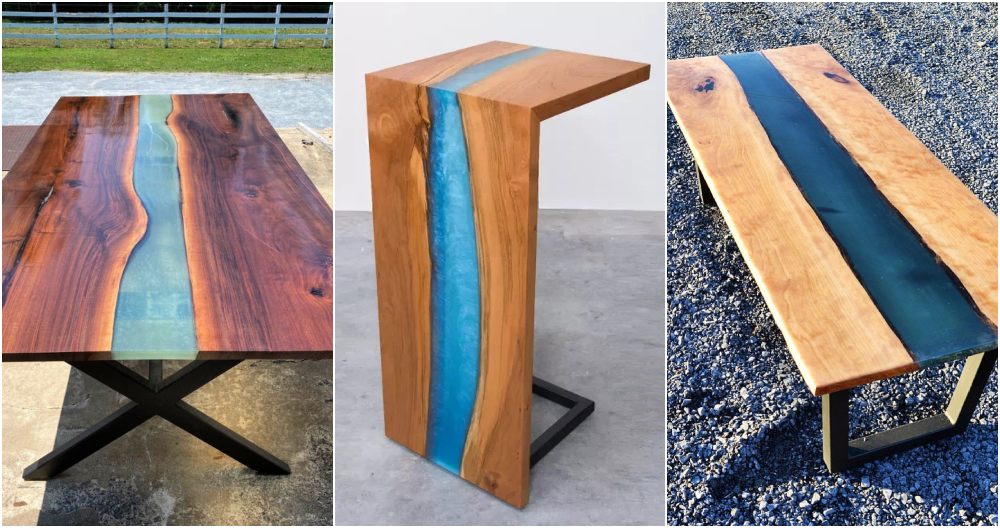
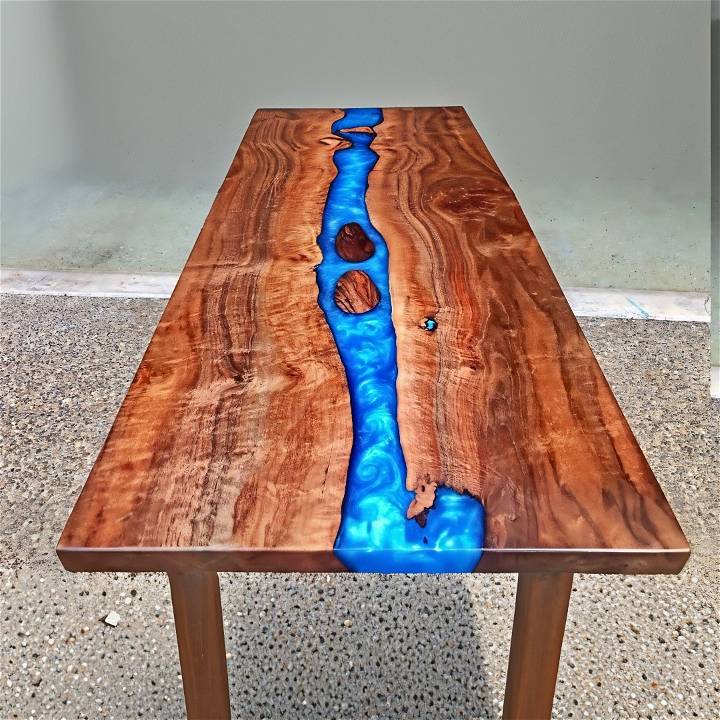
Epoxy resin is versatile, allowing for a broad range of colors and effects. It's durable, making it ideal for furniture that sees regular use. My chosen style was a blend of rustic and modern, utilizing black walnut with a vivid blue resin that brought a pop of color and life to my living space.
Materials Needed and Why
- Black Walnut Slab: Known for its beautiful grain and durability. I chose it for its natural beauty that contrasts well with the blue resin.
- Epoxy Resin and Hardener: The core of the project. I opted for a clear, high-quality epoxy to ensure a solid, transparent blend with the color pigment.
- Blue Pigment and Pearl White Pigment: To achieve a deep blue color with hints of metallic and iridescent effects that resemble the ocean.
- Sealant: To prepare and seal the wood edges, preventing the resin from leaking.
- Leak-proof Mold Materials: Essential for holding the resin mixture in place around the wood slab during curing.
- Mixing and Application Tools: Including stir sticks, mixing cups, an angle grinder for wood prep, and a torch for popping any air bubbles in the resin.
Step by Step Instructions
Learn how to make a stunning DIY epoxy resin table with our easy step-by-step instructions. Transform your space with this beautiful furniture piece today!
Step 1: Preparing the Wood
First, it was crucial to treat the black walnut slab. I started by removing any bark and soft spots, ensuring a firm surface for the resin to adhere. The angle grinder was invaluable here, allowing me to smooth out the edges and build a texture that the epoxy could grip onto easily.
Step 2: Building the Mold
Using silicone and sheathing tape, I constructed a mold around my wood slab. Ensuring the mold was leak-proof was crucial to prevent any resin from escaping, wasting material, and potentially ruining the project. This step required precision, but the effort paid off by providing a clean, defined area for the resin pour.
Step 3: Mixing and Coloring the Resin
Mixing the resin was a meditation of its own. Ensuring a thorough blend of resin, hardener, blue, and pearl white pigments was crucial. I learned quickly that patience and care in mixing could prevent a lot of headaches later. The pearl white added a depth to the blue that was genuinely stunning, changing hues as light hit from different angles.
Step 4: The Pour
Pouring the resin was a nerve-wracking yet exciting process. I poured slowly, allowing the resin to seep around the wood, ensuring no bubbles or gaps. Waiting for it to cure was a test of patience. In this waiting period, I periodically used a torch to pop any surface bubbles gently.
Step 5: Unveiling and Finishing Touches
After curing, removing the piece from the mold felt like Christmas morning. The blend of the rich walnut with the deep, oceanic blue was mesmerizing. I spent significant time sanding the piece, bringing out the wood's natural grain and the resin's smooth surface. The final coat of sealant protected the piece and enhanced its colors.
The Result
The table was more than a piece of furniture; it was a testament to creativity, patience, and learning. It found its place in my living room, a conversation starter, and a piece of art. The contrast of the rustic walnut with the modern, dynamic blue resin captured my vision perfectly.
Lessons Learned
- Patience is Key: Epoxy resin work isn't rushed. From mixing to curing, taking your time results in a better finish.
- Preparation Pays Off: A well-prepared mold and wood slab prevent many common issues before they start.
- Experiment: Don't be afraid to try new things. The addition of pearl white pigment was an experiment that paid off significantly in the aesthetics of the final piece.
Troubleshooting Common Issues with Epoxy Resin Tables
Learn how to troubleshoot common issues with epoxy resin tables. Get expert tips and solutions for bubbles, uneven surfaces, and more.
1. Bubbles: Preventing and Eliminating Air Pockets
- Problem: Bubbles can mar the surface of your epoxy resin table, affecting its clarity and overall appearance.
- Solution:
- Prevention:
- Mix the epoxy resin slowly and thoroughly to minimize air incorporation.
- Use a heat gun or propane torch to gently remove bubbles after pouring.
- Pour the resin in thin layers to allow trapped air to escape.
- Elimination:
- If bubbles appear during curing, use a heat gun or torch to carefully remove them.
- Alternatively, pop surface bubbles with a pin and fill the holes with additional resin.
- Prevention:
2. Sticky Spots: Tackiness After Curing
- Problem: Some areas of your resin table may remain sticky even after curing.
- Solution:
- Cause Analysis:
- Incomplete mixing of resin and hardener.
- Insufficient curing time.
- Remedies:
- Ensure thorough mixing of components.
- Extend curing time according to manufacturer instructions.
- Place the table in a warmer environment to aid curing.
- Cause Analysis:
3. Uneven Surfaces: Achieving a Smooth Finish
- Problem: Your epoxy resin table may have uneven spots or ridges.
- Solution:
- Surface Preparation:
- Sand the wooden base to build a level surface.
- Use a leveling compound or self-leveling epoxy for minor imperfections.
- Pouring Technique:
- Pour the resin evenly across the entire surface.
- Use a spreader or brush to distribute the resin smoothly.
- Check for levelness during the curing process.
- Surface Preparation:
4. Discoloration: Yellowing or Cloudiness
- Problem: Over time, epoxy resin tables may develop a yellow tint or become cloudy.
- Solution:
- UV Protection:
- Use UV-resistant epoxy resin to prevent yellowing.
- Keep the finished table away from direct sunlight.
- Polishing and Buffing:
- Sand and polish the cured resin to restore clarity.
- Apply a clear topcoat for added protection.
- UV Protection:
5. Dust and Debris: Keeping the Surface Clean
- Problem: Dust, hair, or other particles can settle on the curing resin.
- Solution:
- Covering the Table:
- Use a dust cover or plastic sheet to protect the curing surface.
- Remove any debris that lands on the resin during curing.
- Post-Curing Cleaning:
- After curing, sand the surface lightly to remove any imperfections.
- Wipe the table with a damp cloth to remove dust.
- Covering the Table:
Tips and Tricks for a Successful DIY Epoxy Resin Table
Discover expert tips and tricks for making a stunning DIY epoxy resin table. Learn how to achieve professional results at home with our comprehensive guide.
Choosing the Right Wood Base
- Selecting the Wood: Begin with a solid wood base for your table. Hardwoods like oak, walnut, or maple work well. Avoid softwoods, as they may warp over time.
- Sealing the Wood: Seal the wood with a clear sealant or epoxy-compatible wood sealer. This prevents air bubbles from escaping through the wood during curing.
Properly Sealing the Wood
- Importance of Sealing: Sealing the wood is crucial to prevent air bubbles and moisture from interfering with the epoxy resin.
- Steps:
- Sand the wood to a smooth finish.
- Apply a thin layer of sealant or epoxy-compatible wood sealer.
- Allow it to dry completely before proceeding.
Using a Mold for Consistent Results
- Benefits of a Mold:
- A mold ensures uniform thickness and shape.
- It prevents epoxy from overflowing or dripping off the edges.
- Types of Molds:
- Silicone molds are flexible and easy to release.
- Build custom molds using melamine boards or plywood.
Taking Your Time
- Patience Pays Off:
- Epoxy resin tables require patience. Rushing can lead to mistakes.
- Mix the resin slowly and thoroughly.
- Pour in thin layers to avoid excessive heat buildup.
Achieving the Mesmerizing “River” Effect
- Building the River Look:
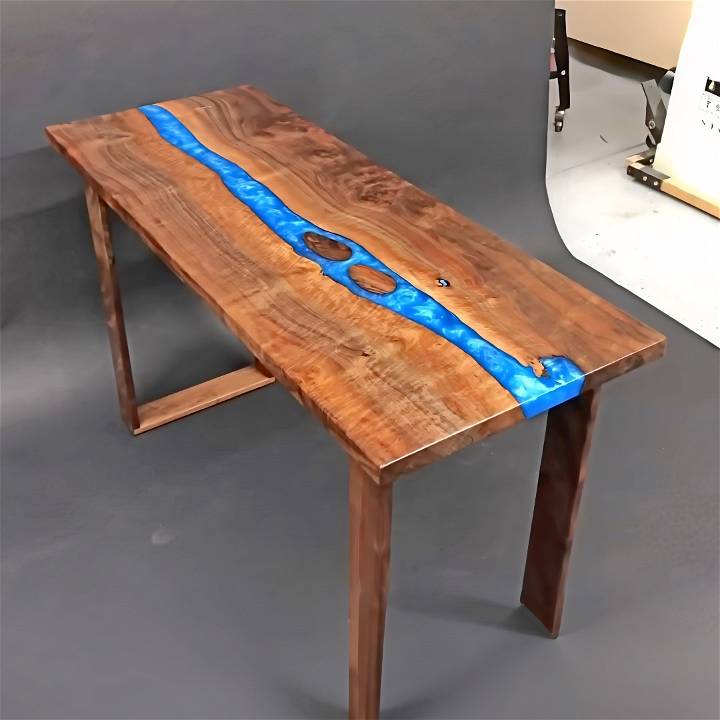
- For a river table, use a contrasting wood piece down the center.
- Pour the epoxy resin along the wood grain to mimic a flowing river.
- Add pigments or dyes to enhance the effect.
Sanding and Polishing
- Post-Curing Sanding:
- After curing, sand the surface with progressively finer grits (from 220 to 2000).
- This removes imperfections and builds a smooth finish.
- Polishing:
- Use a polishing compound or automotive wax to bring out the resin's shine.
Avoiding Dust and Debris
- Clean Environment:
- Work in a dust-free area.
- Cover the curing table to prevent debris from settling on the surface.
- Post-Curing Cleaning:
- Lightly sand any dust particles that may have settled.
- Wipe the table with a damp cloth.
Experiment and Enjoy the Process
- Creativity Unleashed:
- Epoxy resin tables allow room for experimentation.
- Try different pigments, inlays, or even embed objects (such as leaves or shells).
- Enjoy the artistic journey and embrace imperfections.
FAQs About DIY Epoxy Resin Tables
Discover answers to all your questions about DIY epoxy resin tables in this comprehensive FAQ guide. Learn tips, techniques, and more.
What is an epoxy resin table?
An epoxy resin table is a piece of furniture where epoxy resin is combined with wood or other materials to build a durable and decorative surface. The resin can be clear or tinted and often features objects like stones, shells, or colors to build unique designs.
How do I choose the right epoxy resin for my table?
Select a casting resin designed for thick pours, which is ideal for tables. Look for properties like low viscosity for easier pouring, longer curing times for thicker layers, and UV resistance to prevent yellowing if the table will be in sunlight.
Can I make an epoxy resin table at home?
Yes, you can make an epoxy resin table at home. You'll need a well-ventilated workspace, the right materials, and a bit of patience. Follow a step-by-step guide to ensure you mix, pour, and cure the resin correctly for the best results.
What are some common problems when making an epoxy resin table and how can I solve them?
Common issues include bubbles, sticky spots, and uneven surfaces. To avoid these, mix the resin slowly to reduce air bubbles, ensure thorough mixing for proper curing, and pour in layers to maintain evenness. Use a heat gun to remove bubbles and sand the surface for a smooth finish.
How do I maintain my epoxy resin table?
To maintain your table, keep it away from direct sunlight to prevent UV damage, clean it with a soft cloth and mild cleaner, and reapply a protective coat if necessary. Avoid placing hot items directly on the surface to prevent heat damage.
Final Thoughts
Making a colored epoxy resin table was a rewarding project that challenged and expanded my DIY repertoire. For anyone looking to undertake a similar project, remember: take your time, pay attention to detail, and enjoy the process. The end product is worth every moment spent.


