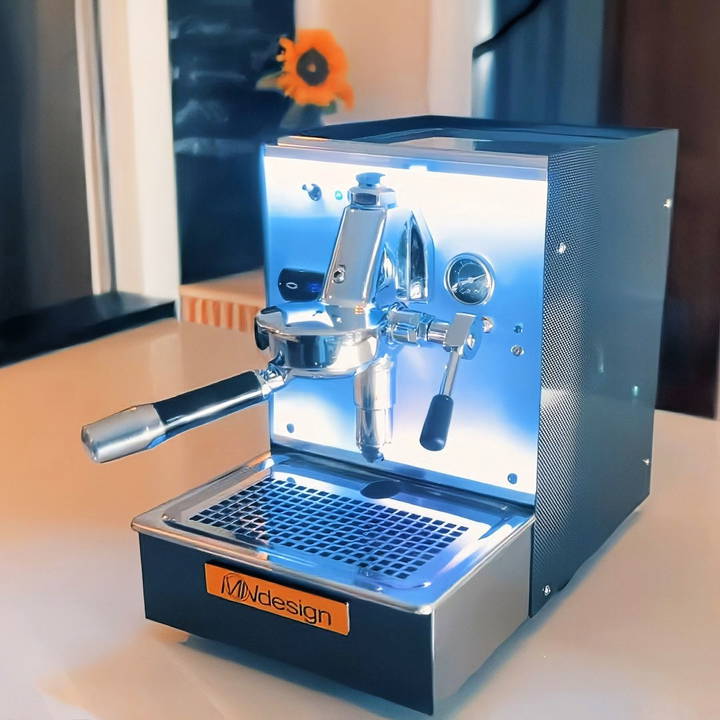
Are you a coffee enthusiast looking to take your brewing game to the next level? This guide walks you through building a custom DIY espresso machine with unique features like carbon-fiber panels, LED lights, and professional-grade brewing components. Whether you're a hobbyist or an espresso aficionado, this comprehensive guide covers everything you need to know.
Why Build a DIY Espresso Machine?
Commercial espresso machines can be expensive, and many lack the customization enthusiasts crave. Crafting your espresso machine lets you:
- Customize every component to match your needs.
- Save money compared to buying high-end machines.
- Enjoy the satisfaction of building something unique.
Key Components of an Espresso Machine
Understanding the anatomy of an espresso machine is essential before diving into the build. Here are the main components:
- Group Head: The group head is the heart of an espresso machine, where water meets coffee. A classic choice is the E61 group head, known for its durability and ability to maintain optimal brewing temperatures.
- Tip: Look for "non-working" espresso machines on platforms like eBay to source affordable E61 group heads and other parts.
- Boiler: The boiler heats water for brewing and steaming milk. You can choose from:
- Single Boiler: For brewing only. Heat Exchanger: Brews and steams simultaneously. Dual Boiler: Separate boilers for brewing and steaming.
- A heat exchanger or dual boiler is recommended for cappuccino lovers who need consistent steam.
- Pump: Pumps ensure water is delivered at the right pressure (usually 9 bars). Two common types are: Vibratory Pumps: Affordable but less consistent. Rotary Pumps: Offer precise pressure control, ideal for consistent shots.
- PID Controller: Unlike traditional thermostats, a PID controller maintains precise temperature, ensuring consistent coffee quality. It's a feature found in most professional espresso machines.
- Frame and Housing: The frame holds all components together. In this project, we use a combination of metal framing and carbon-fiber panels for a sleek and durable design.
Tools and Materials You'll Need
Before starting, gather these tools and materials:
Materials:
- E61 group head
- Boiler (heat exchanger or dual boiler)
- Rotary pump
- PID controller
- Carbon-fiber sheet
- Acrylic sheet (for LED backlighting)
- RGB LED strip
- Food-grade grease
Tools:
- Screwdrivers
- Sandpaper (320 and 600 grit)
- Drill and saw
- Fiberglass heat shield
- Teflon sheets
- Fire-resistant fiber mat
Step by Step Instructions
Learn how to build a DIY espresso machine with step-by-step instructions, from sourcing parts to troubleshooting for the perfect espresso.
Step 1: Sourcing Components
Start by acquiring essential parts:
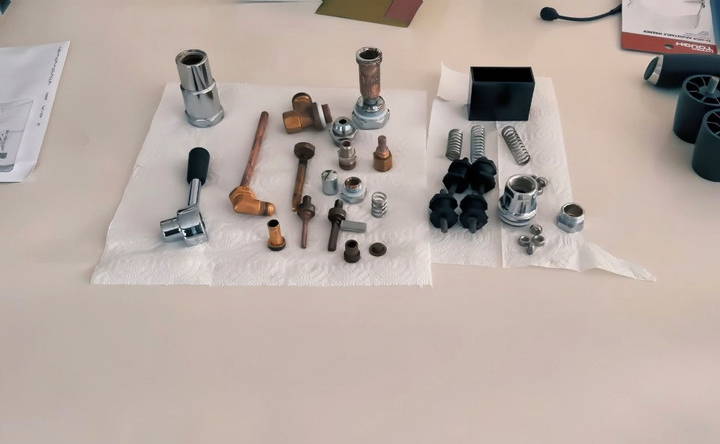
- Search online marketplaces for used espresso machines to salvage the E61 group head, boiler, and pump.
- Ensure all components are in good condition or can be refurbished.
Pro Tip: Carefully inspect parts like gaskets and heating elements. Use descaling solutions to clean metal parts, avoiding damage to chrome surfaces.
Step 2: Preparing the Frame
If you're reusing a frame from an old machine:
- Clean and sand it thoroughly.
- Apply a fresh coat of paint for durability and aesthetics.
- Ensure all mounting points align with your components.
If starting from scratch, use extruded aluminum profiles for a robust and customizable frame.
Step 3: Installing the Boiler
- Test the boiler's heating element in water to ensure no electrical shorts.
- Secure the boiler to the frame using heat-resistant mounts.
- Install a pressure relief valve for safety.
Safety Note: Always test boilers for leaks at higher pressures (e.g., 14 bars) before final assembly.
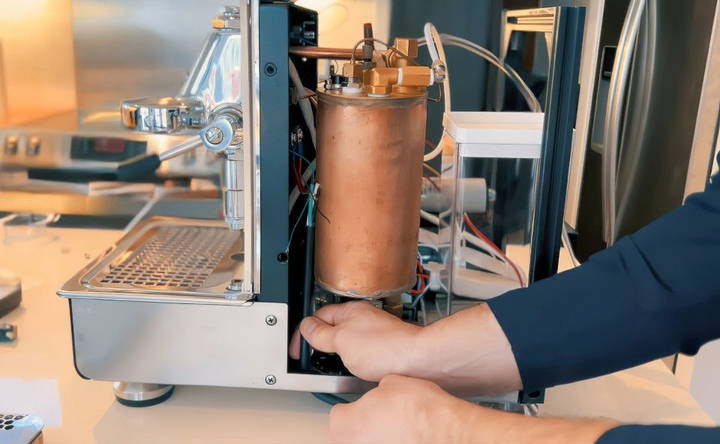
Step 4: Fitting the Group Head
Attach the E61 group head to the frame. Use Teflon gaskets to ensure a proper seal and avoid leaks. Preheat the group head for better espresso quality.
Step 5: Adding the Pump
- Mount the rotary pump near the boiler.
- Use food-grade grease to lubricate moving parts.
- Connect the pump to the boiler and group head with high-pressure tubing.
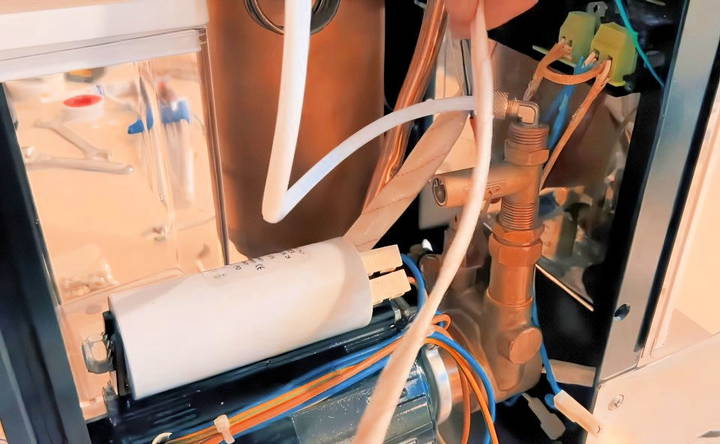
Step 6: Incorporating Electronics
- PID Controller: Wire it to the boiler and temperature sensors.
- LED Lighting: Attach RGB LED strips behind frosted acrylic panels for a backlit effect.
- Wi-Fi Controller: Optional but useful for scheduling the machine to heat up before use.
Step 7: Assembling the Housing
- Cut carbon-fiber sheets to fit the frame.
- Drill holes for screws and connections.
- Use Teflon sheets to insulate hot components from the housing.
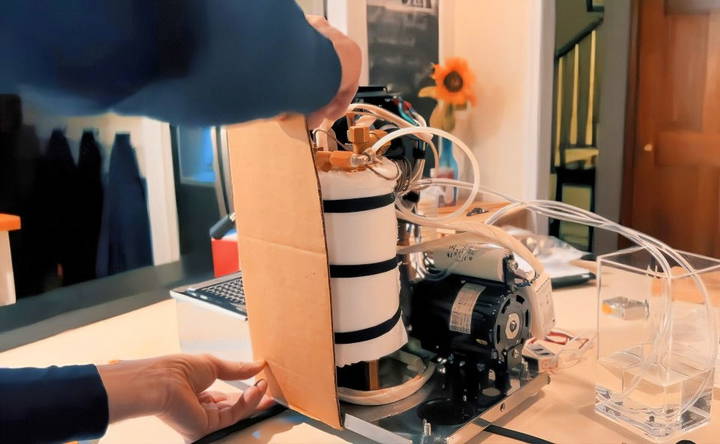
Step 8: Final Touches
- Install a drip tray.
- Attach adjustable legs for stability.
- Polish the carbon-fiber panels for a professional look.
Testing Your Machine
- Leak Test: Run water through the system and check for leaks, tightening connections as needed.
- Temperature Calibration: Use the PID controller to set the boiler to the ideal brewing temperature (195–205°F or 90–96°C).
- Pressure Test: Brew espresso and ensure the pump maintains consistent pressure at 9 bars.
Troubleshooting Common Issues
- Leaking Connections: Sand down grooves caused by over-tightening and use new gaskets.
- Inconsistent Temperature: Check the PID settings and replace faulty sensors.
- No Pressure: Ensure the pump is correctly connected and primed.
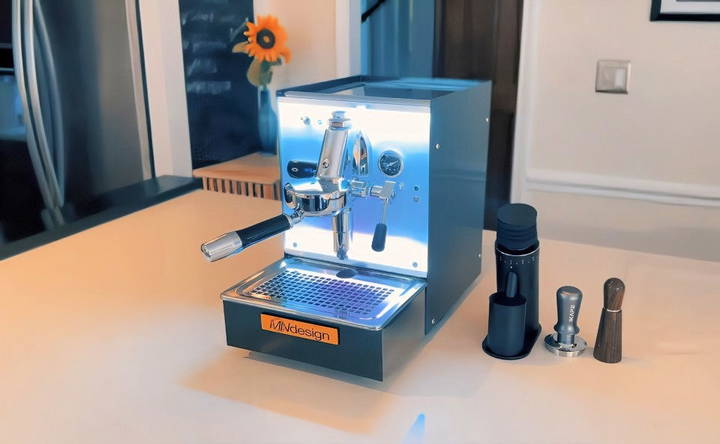
The Finished Machine
With your machine complete, you'll enjoy:
- Custom espresso tailored to your preferences.
- A stylish carbon-fiber finish with eye-catching LED lighting.
- The satisfaction of a DIY project that rivals commercial machines.
Tips for the Best Espresso
- Use Fresh Beans: Grind them just before brewing.
- Water Quality Matters: Use filtered or mineral-balanced water for better flavor.
- Experiment: Adjust grind size, dose, and brew time to find your perfect shot.
Conclusion:
Building a DIY espresso machine is not just about making coffee; it's about crafting an experience. From sourcing parts to brewing your first shot, every step brings you closer to mastering the art of espresso.
FAQs About Building a DIY Espresso Machine
Get answers to common questions about building a DIY espresso machine, from essential tools to assembly tips and troubleshooting.
The project costs around $300–$400, excluding labor. Carbon-fiber panels are the most expensive component, but used parts sourced from platforms like eBay significantly reduce costs.
You’ll need basic tools like screwdrivers, sandpaper, a drill, and a saw. Specialized items include fiberglass heat shields, Teflon sheets, and food-grade grease for assembly.
Yes, but rotary pumps provide better consistency and control. Vibratory pumps are cheaper but may not maintain the same level of pressure during brewing.
A PID controller ensures precise temperature control, which is critical for high-quality espresso. It outperforms standard thermostats by maintaining consistent water temperature within a narrow range.
To avoid leaks, ensure all connections are securely fastened. Sand down grooves caused by over-tightening and use Teflon gaskets. Test the system at higher pressures (e.g., 14 bars) before regular use.
Carbon-fiber panels provide a lightweight, durable, and aesthetic finish. They also prevent the machine from becoming excessively heavy compared to using materials like stainless steel.
A high-quality grinder ensures consistent grind size, reducing channeling and improving espresso flavor. Budget options like the Niche or DF64 are great entry-level choices.
Yes, incorporating a Wi-Fi controller allows you to pre-schedule the machine to turn on, ensuring it’s preheated when you need it. This can save time during your morning routine.
The time required depends on your experience and the availability of parts. For a novice, this project could take several weekends to complete, including sourcing, assembly, and testing.
Leaks, incorrect gasket fits, and wiring problems are common challenges. Address these by carefully testing each component during assembly and making adjustments as needed.
While possible for beginners, it's recommended to have basic DIY skills and patience. Researching espresso machine mechanics beforehand can help ease the process.
Use fresh, high-quality beans.
Incorporate flow or pressure control for better extraction.
Experiment with grind size, dose, and brewing time to achieve desired results.


