Have you ever found yourself needing an extension cord that's just the right length? Maybe you have a specific spot where only a short extension cord will fit, or perhaps a long extension cord isn't practical for your needs. Learning to make a custom-length extension cord is not only handy, but it's also straightforward and cost-effective. This guide covers the steps, materials, and safety tips needed to make your own custom DIY extension cord from scratch.
Why Make Your Own Extension Cord?
A custom extension cord is invaluable when:
- You need a short cord for limited spaces.
- A specialized length, like 2-3 feet, is necessary for a single device.
- You want to repurpose damaged cords, rather than discarding them.
Whether you're repurposing an old, broken extension cord or starting fresh, building your own allows you to have the exact length you need, reducing clutter and improving functionality.
Materials Needed
Here's what you'll need to make your own extension cord:
- Extension Cord Wire: Choose a suitable cord length and gauge for your needs. Common wire gauges for household use include 12 or 14-gauge wire, with 12-gauge being ideal for heavy-duty appliances.
- Male and Female Plug Ends: Available in many hardware stores or online. Ensure that the plugs are durable, rated for your intended wattage, and compatible with the wire you're using.
- Wire Cutters: For cutting the cord to the appropriate length.
- Utility Knife or Wire Strippers: Used for removing the insulation from the cord ends.
- Screwdriver: To secure the wiring within the plugs.
Safety Precautions
Working with electricity always requires care. Here are some critical safety tips:
- Understand the Basics: If you're not confident in your electrical knowledge, consult a professional.
- Power Off: Ensure the cord is not connected to any live power source while working on it.
- Wire Correctly: Incorrect wiring can lead to electrical fires or shocks.
- Use Proper Gauge Wire: The wrong gauge could cause overheating, which poses a safety risk.
Now, let's dive into the process of building a custom extension cord.
Step by Step Instructions
Learn how to make an extension cord with our step-by-step guide. From cutting to connecting wires, ensure a safe and functional DIY project.
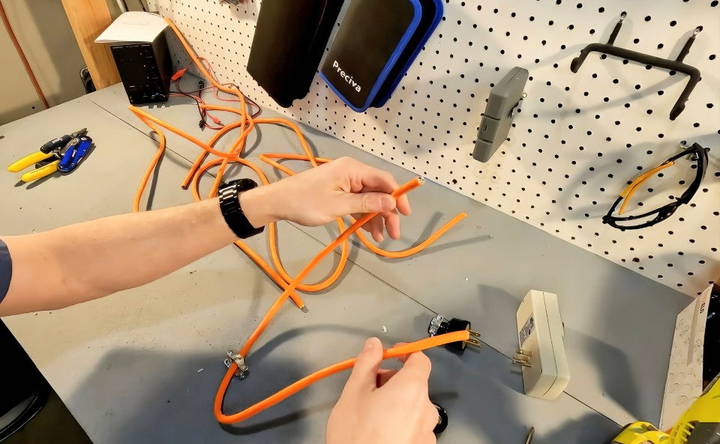
Step 1: Cut Your Extension Cord to Length
Decide on the length you need for your custom cord. Use wire cutters to cut the cord to your desired length. If you're repurposing an old extension cord, cut off any damaged or broken parts before measuring your final length.
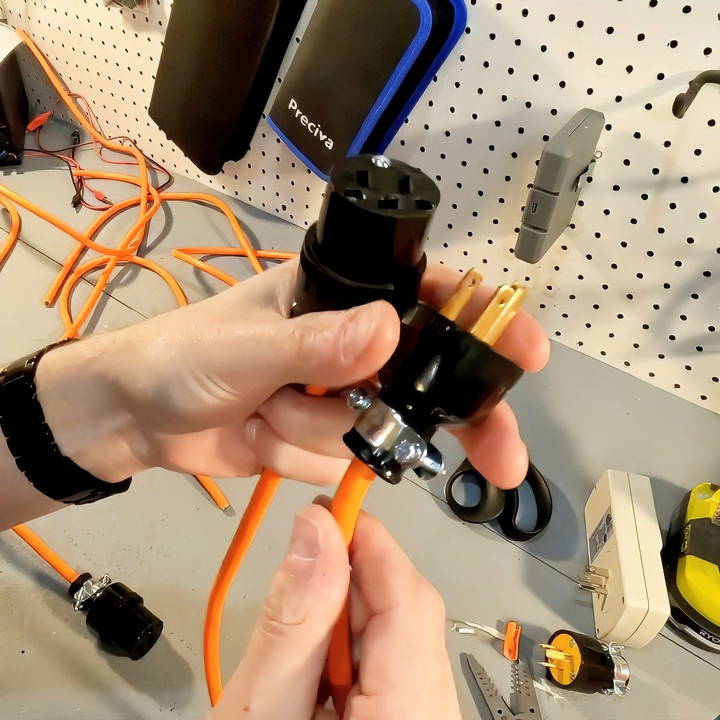
Step 2: Disassemble the Plugs
For each plug (male and female), you'll need to remove the outer casing:
- Use a screwdriver to loosen and remove the screws from the plug.
- Take off the plug casing to expose the terminals where the wires will be connected.
Most plugs have three main components:
- Ground Terminal: Usually green and connects to the ground wire.
- Neutral Terminal: Typically silver and connects to the neutral wire (white).
- Hot Terminal: Often brass-colored and connects to the live (hot) wire (black).
Step 3: Prepare the Cord Ends
Once the casing is off, it's time to prepare the ends of your cord:
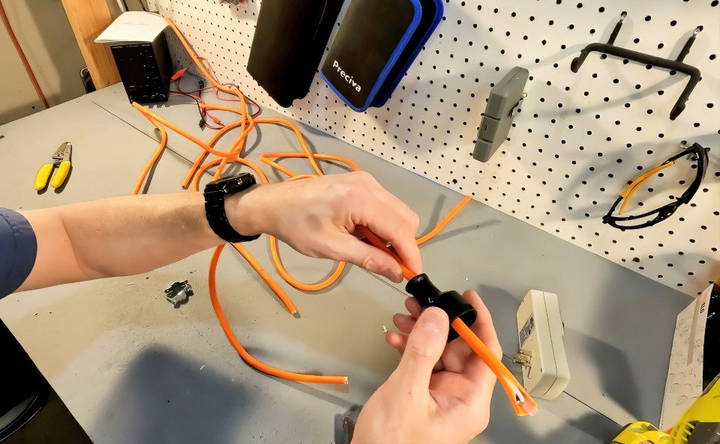
- Slide the Compression Bracket onto the Cord: This is typically a small metal or plastic clamp that will help secure the cord inside the plug.
- Slide the Outer Casing onto the Cord: This casing will cover the wires once you've finished wiring. Don't forget to put these on first, as you won't be able to add them once you've connected the wires.
Step 4: Strip the Insulation
Using a utility knife or wire stripper:
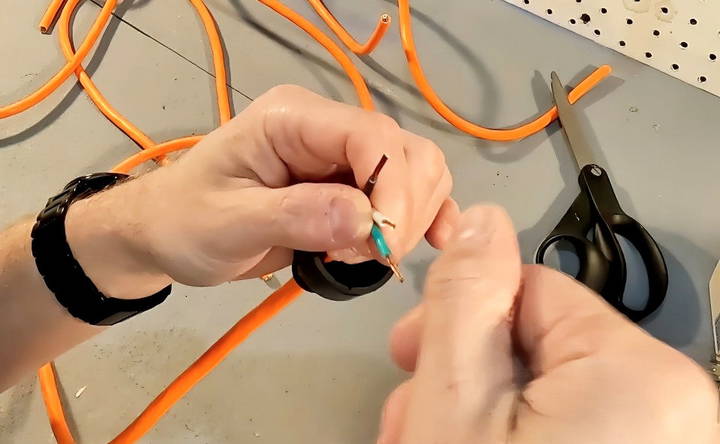
- Strip back approximately 1-2 inches of the outer insulation to reveal the three inner wires (black, white, and green).
- Then, strip about ¼ - ⅜ inch of insulation from each inner wire (black, white, green).
It's important not to cut too much. Having the outer sheathing close to the plug housing ensures that only a minimal amount of the inner wires are exposed, which helps prevent accidental shorts.
Step 5: Understand the Wiring Colors
Extension cords in the U.S. typically follow this color coding:
- Green Wire: Ground
- White Wire: Neutral
- Black Wire: Hot/Live
Each wire has a specific terminal in the plug:
- The green wire connects to the green terminal.
- The white wire connects to the silver terminal.
- The black wire connects to the brass terminal.
Step 6: Connect the Wires
Now, you're ready to connect each wire to its corresponding terminal:
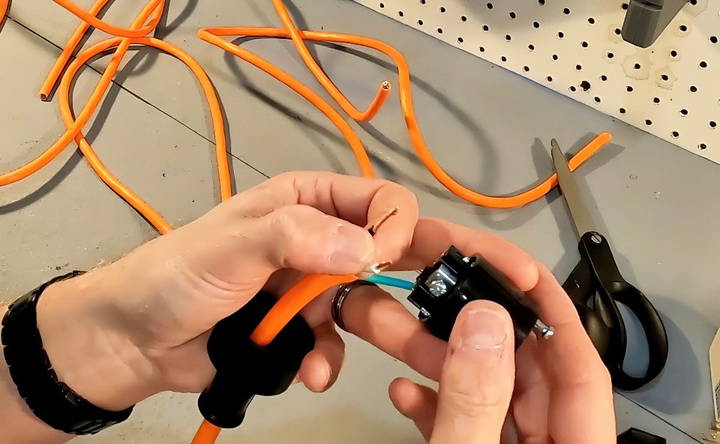
- Green Wire (Ground): Insert the stripped end of the green wire into the ground terminal. Tighten the screw securely to ensure the wire doesn't slip out.
- White Wire (Neutral): Place the white wire in the silver terminal and tighten.
- Black Wire (Hot): Insert the black wire into the brass terminal, ensuring it's firmly attached.
As you attach each wire:
- Make sure the exposed part of the wire is fully inserted into the terminal.
- Avoid any strands of wire sticking out, which can cause shorts or electrical hazards.
Step 7: Secure the Plug
After connecting the wires:
- Push the plug housing back into place, aligning it properly with the terminals.
- Tighten the screws on the casing to ensure the wires are enclosed.
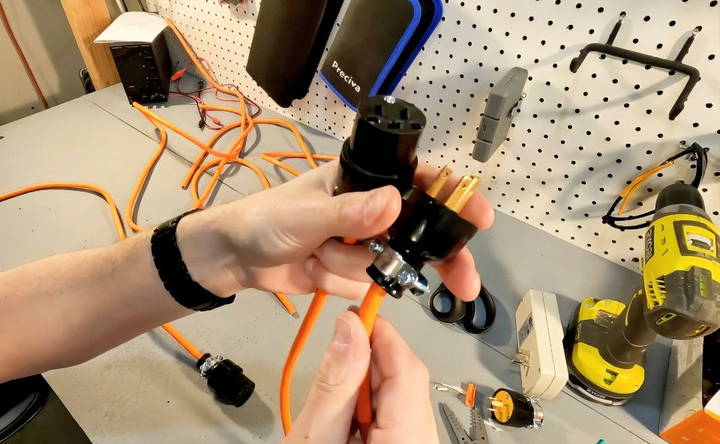
- Finally, secure the compression bracket over the cord to keep it from pulling out of the plug. This adds durability and strain relief, extending the life of your cord.
Repeat these steps for both the male and female plugs. When you've completed both ends, your custom-length extension cord is ready to use.
Testing Your Extension Cord
To ensure safety:
- Visually Inspect: Double-check all connections, ensuring wires are secure and that there is no exposed wiring.
- Use a Multimeter (optional): If you have a multimeter, you can test the continuity and voltage of your extension cord. This step is more advanced but can verify that everything is wired correctly and functioning.
Troubleshooting Common Issues
If your extension cord isn't working as expected, here are some common issues to check:
- Loose Wires: Make sure each wire is tightly connected to its corresponding terminal.
- Incorrect Wiring: Double-check the wiring configuration. Ground should be green, neutral white, and hot black.
- Damaged Wires: Inspect for any nicks or tears in the wires that may cause shorts or electrical faults.
Additional Tips for Success
- Use High-Quality Plugs and Wire: For durability and safety, avoid cheap materials.
- Choose the Right Gauge: For heavy-duty appliances, use a lower-gauge wire (e.g., 12-gauge for high power needs).
- Weatherproof if Needed: For outdoor use, consider using weather-resistant plugs and cord housing.
- Label if Necessary: Mark your custom cord's amperage rating to avoid overloading.
Conclusion: Build Your Own Extension Cord with Confidence
Making a custom extension cord is a practical, straightforward project that can solve specific electrical needs in your home. With just a few materials and careful attention to safety, you can make an extension cord in the exact length and configuration you need.
Remember, electrical projects always carry some risk, so don't hesitate to seek professional help if you're unsure. With this guide in hand, you're now equipped to make a custom extension cord tailored to your exact specifications—safe, effective, and ready for use where you need it most.
FAQs About DIY Custom-Length Extension Cord
Explore the FAQs on DIY custom-length extension cords. Learn how to make and safely use your own tailored extension cords at home.
No, it’s important to use wires that are specifically rated for the voltage and amperage of the devices you plan to connect. Regular speaker wire, for instance, won’t safely handle typical household appliances.
While you can technically make an extension cord of any length, longer cords can experience voltage drop, which affects performance. For high-powered devices, limit the cord length to reduce energy loss and overheating risks.
DIY electrical work, including building extension cords, can be dangerous if not done correctly. Incorrect wiring can lead to electrical shock, fires, or damage to your appliances. If you're uncertain, consult a professional.
Yes, making a custom extension cord can be cost-effective, especially if you need specific lengths or have damaged cords you can repurpose.
Yes, but it’s essential to use outdoor-rated components. Ensure the wire insulation and plugs are weather-resistant and suited for outdoor use to protect against moisture, temperature fluctuations, and UV exposure.
Select a wire gauge based on the power demand of the devices you’ll connect. A 12-gauge wire is suitable for heavy-duty use, while 16-gauge may work for light-duty. For extended lengths or high power loads, consider lower gauge numbers (thicker wires) to minimize voltage drop.
Yes, but you'll need heavy-duty components. For example, a 4/0 gauge wire can handle 220 volts over long distances with minimal voltage drop, making it ideal for industrial applications. Make sure all materials are rated for your required voltage and amperage.
Yes! Many people repurpose cords from old appliances or desktop computers. Just make sure the repurposed cord and its insulation are in good condition and rated for the intended load to avoid hazards.
Each component—wire, plugs, and casing—must be rated to handle the maximum power load of your devices. Using mismatched or low-rated components can lead to overheating or failure. Always check voltage, amperage, and environmental ratings before assembly.
You can make cords as short as a foot or as long as hundreds of feet, but note that long cords may experience voltage drops, affecting performance. For lengths over 100 feet or high-power applications, consider using a thicker gauge wire to maintain efficiency.


