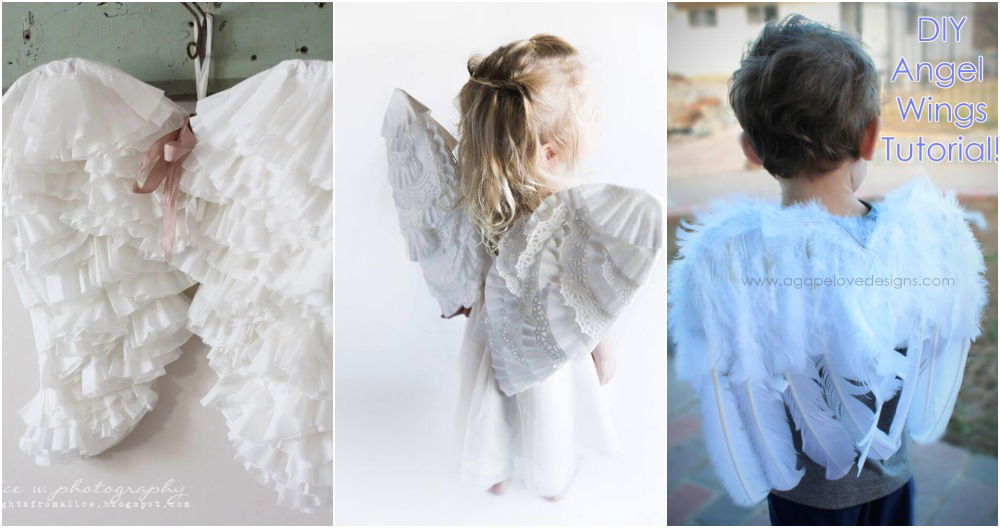
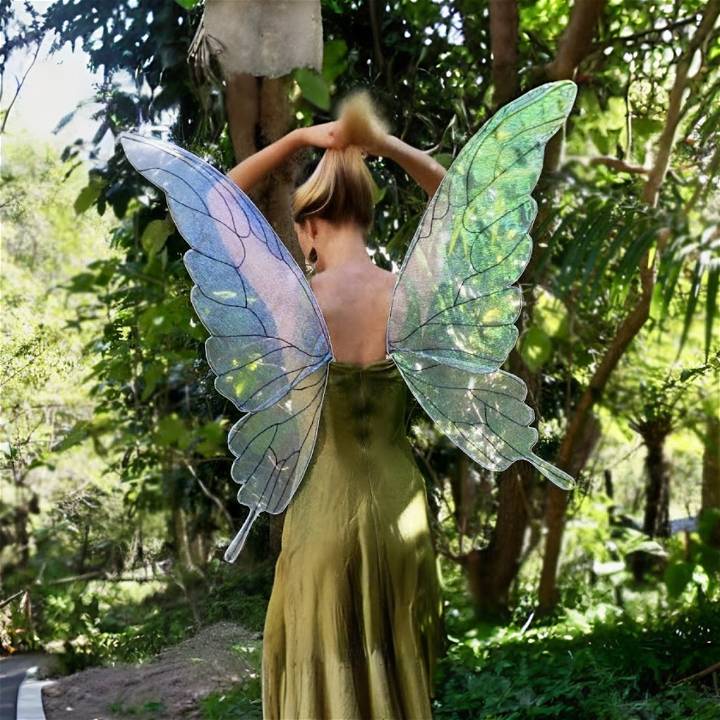
Making your very own DIY fairy wings for adults can add a magical touch to any costume or occasion. This guide provides detailed instructions on how to craft a beautiful, wearable wings costume from scratch. Whether you're attending a themed party, participating in a performance, or simply embracing your love for all things whimsical, knowing how to make your wings is both a fun and rewarding project.
We'll walk you through the essential materials needed, offer step-by-step instructions, and even share tips on customization to ensure your fairy wings truly reflect your unique style. Plus, we cover important aspects like safety precautions and care and maintenance to keep your creation in top shape.
Ready to spread your wings? Let's dive into how you can bring this enchanting accessory to life.
Materials Needed
- Sheer, iridescent organza fabric
- Pattern for wings (often linked in craft video descriptions)
- Baking paper
- Dimensional fabric paint
- Fencing wire (thick enough to hold shape but pliable for bending)
- Florist tape
- Hot glue gun and glue sticks
- Gray paint (for wing accents)
- Electrical tape
- Scissors
Step by Step Instructions
Learn how to make stunning DIY fairy wings for adults with our step-by-step guide below:
Step 1: Preparing Your Fabric
Begin by laying your Organza fabric flat on your workspace. Make sure you have the wing pattern handy; these can often be found linked in craft tutorial video descriptions. Place baking paper beneath the fabric to prevent any paint from leaking through during the process.
Step 2: Drawing the Veins
With the fabric grain oriented correctly (it should go outward from where the wings would sprout from your back), start drawing the veins onto the fabric using your dimensional paint. Follow the pattern lines, but don't hesitate to add personal touches. The dimensional paint is excellent because it remains on the surface of the fabric without dispersing, and any mistakes can easily be cleaned up with water. Let the paint dry thoroughly before moving on.
Step 3: Shaping the Wire
Take your fencing wire and bend it to form the outer shape of your fairy wings, allowing an extra 20 centimeters at the ends for attachment. Once shaped, cover the wire with florist tape. This tape is self-adhering when stretched and provides a grippy surface for the fabric to adhere to.
Step 4: Adding Color
Paint the center of your wings with gray paint, gradually lightening the shade as you move towards the tips, mimicking the natural gradient of wings.
Step 5: Attaching the Fabric
After painting, stretch the fabric over the wire to make tension, similar to stretching a canvas. Apply small dots of hot glue along the wire and press the fabric into place. Trim the excess fabric, then secure the fabric fully by applying hot glue all around, folding the raw edges over the wire.
Step 6: Assembling the Wings
Use the extra wire at the ends to attach the wings together. Electrical tape works well for this task due to its strength and elasticity. When joining the wings, ensure they are positioned at a 45-degree angle from your back for a natural fairy wing appearance. Secure any sharp wire edges with several layers of tape to prevent injury.
Step 7: Final Adjustments
Bend the wire gently to make a 'U' shape that will sit comfortably against your back. This step is crucial for ensuring your wings are not only beautiful but also wearable for extended periods.
Wear Your Wings Proudly
Congratulations! You've now completed your fairy wings. Pair them with a costume or corset to keep them securely in place, and enjoy the magic they bring to your outfit.
Video Tutorial
For a step-by-step video tutorial on making fairy wings, watch this helpful guide: Fairy Wings Tutorial on YouTube.
It pairs well with this written guide, offering a visual representation of the described techniques in a manner that's easy to see and understand, enriching your crafting experience.
Safety Precautions for DIY Fairy Wings
Making your own fairy wings can be a fun and rewarding project, but it's important to keep safety in mind. Here are some safety precautions to consider:
Handling Sharp Objects
When cutting wire or fabric, you'll be using sharp objects like wire cutters or scissors. Always handle these tools with care to avoid injury.
Using a Hot Glue Gun
A hot glue gun is a useful tool for this project, but it can also be dangerous if not used properly. Never touch the tip of the glue gun while it's hot and always let it cool down before storing it away.
Working with Wire
The wire used to form the wings can have sharp edges. Be careful when bending or cutting the wire to avoid scratches or cuts.
Glitter Safety
While glitter adds a magical touch to your fairy wings, it can also be messy and, if it gets in your eyes, irritating. Consider wearing safety glasses when applying glitter, and always clean up thoroughly afterwards.
Safety first! Always supervise children during this project, and ensure that everyone understands these precautions before getting started.
Customization Ideas for DIY Fairy Wings
Making your own fairy wings gives you the freedom to express your creativity and make something truly unique. Here are some ideas to customize your fairy wings:
Choose Your Colors
The color of your wings can dramatically change their look. You could go for a classic fairy look with pastel colors, or make dark fairy wings with deep purples and blacks. Don't be afraid to mix and match colors for a unique look.
Add Embellishments
Adding embellishments to your wings can give them extra sparkle and personality. Consider using sequins, rhinestones, or beads. You could also add feathers for a more natural look.
Experiment with Shapes
The shape of your wings can also be customized. You could make butterfly-like wings with rounded edges or dragonfly-like wings with pointed edges. Experiment with different shapes to see what you like best.
Make Patterns
Consider making patterns on your wings with the glitter or fabric paint. This could be as simple as polka dots or stripes, or you could make intricate floral patterns or swirls.
The most important thing is to have fun and let your creativity shine!

Troubleshooting Guide for DIY Fairy Wings
Making DIY fairy wings can sometimes come with its own set of challenges. Here's a troubleshooting guide to help you overcome some common issues:
1. The Wire Frame is Not Holding the Shape
If your wireframe is not holding its shape, it could be due to the type of wire you're using. Floral wire is recommended as it's flexible yet sturdy. If you're already using floral wire and still facing issues, try using a thicker gauge.
2. Fabric is Not Adhering to the Wire
If your fabric is not adhering to the wire, the issue could be with the type of glue you're using. A hot glue gun is recommended for its strong bond. Make sure the glue is hot enough before applying it to the fabric and wire.
3. Glitter is Falling Off
If your glitter is falling off, it could be that you're not using enough glue or the right type of glue. Try applying a thin layer of craft glue before sprinkling the glitter. Let it dry completely before shaking off the excess.
4. Wings are Too Heavy
If your wings are too heavy, it could be due to the size of the wings or the materials used. Consider making smaller wings or using lighter materials like organza or tulle for the fabric and beads or sequins for the embellishments.
5. Wings are Uncomfortable to Wear
If your wings are uncomfortable to wear, check the ribbon straps. They should be wide enough to distribute the weight evenly and not dig into your shoulders. Adjust the length of the straps for a better fit.
It's normal to encounter problems when trying something new. Don't get discouraged, and keep trying.
Care and Maintenance for DIY Fairy Wings
Once you've maked your beautiful fairy wings, it's important to take care of them so they can be enjoyed for a long time. Here are some tips on how to care for and maintain your DIY fairy wings:
Storage
When not in use, store your fairy wings in a safe place where they won't get crushed or damaged. A large box or a dedicated shelf can be a good option.
Cleaning
If your fairy wings get dirty, clean them gently to avoid damaging them. Use a soft cloth and some warm water. Avoid using harsh chemicals or scrubbing too hard, as this could damage the fabric or remove the glitter.
Repairs
Over time, your fairy wings may need some minor repairs. This could include reattaching loose glitter or mending a tear in the fabric. Keep some extra materials on hand for these repairs.
Handling
Always handle your fairy wings with care. They are delicate and can be easily damaged if handled roughly.
With the right care and maintenance, your DIY fairy wings can bring joy for years to come!
Frequently Asked Questions (FAQs) about DIY Fairy Wings
Here are some common questions and answers that might come up when making DIY fairy wings:
1. What type of wire is best for making fairy wings?
Floral wire is a good choice because it's flexible yet sturdy. You can find it at most craft stores or online.
2. Can I use any type of fabric to make fairy wings?
Lightweight and transparent fabrics like organza or tulle are excellent choices. These fabrics give your wings a delicate, fairy-like appearance.
3. How do I attach the fabric to the wireframe?
A hot glue gun is recommended for its strong bond. Be careful when using it to avoid burns.
4. Can I wash my fairy wings?
It's not recommended to wash your fairy wings in a washing machine as this could damage the wings. Instead, spot-clean any dirty areas with a damp cloth and mild soap.
5. How long will the fairy wings last?
With proper care and handling, your fairy wings can last for several years.
6. Are the fairy wings safe for children to use?
Yes, the fairy wings are safe for children to use under adult supervision. However, due to the use of small parts like beads and the potential sharpness of the wire, it's recommended that children are always supervised when wearing the wings.
7. What if my fairy wings get damaged?
Most damages can be repaired with some extra materials and a bit of patience. Keep some extra materials on hand for these repairs.
8. Can I use real feathers on my fairy wings?
Yes, you can use real feathers on your fairy wings. They can be glued onto the fabric for a more natural look.
9. How can I make my fairy wings sparkle?
Adding glitter to your wings can give them a magical sparkle. You can apply the glitter using craft glue.
10. Can I make fairy wings in different sizes?
Absolutely! You can adjust the size of your fairy wings by using more or less wire and fabric. Just make sure the wings are not too heavy to wear.
It's normal to have questions when trying something new. Don't hesitate to ask for help if you need it!
Conclusion:
In conclusion, crafting your own DIY fairy wings for adults can transform any costume from mundane to magical. From selecting the perfect materials to adding those final touches of sparkle and color, every step you take brings your fantastical vision closer to reality. It's not just about following instructions; it's about pouring your creativity and personality into a project that's uniquely yours.
Whether enhancing your costume for a special event or diving into a fun, creative endeavor, making fairy wings is an enchanting experience that yields more than just a costume piece—it makes memories and skills that last a lifetime. So grab your materials, unleash your creative spirit, and let your imagination soar as you craft a pair of fairy wings that will turn heads and spread magic wherever you go.


