Making realistic DIY fake blood for Halloween, a theatrical production, or just for fun can seem like a daunting task, especially if you want to avoid using food coloring. As someone who's passionate about making authentic effects without the use of harsh chemicals or stains, I embarked on a journey to find the perfect recipe.
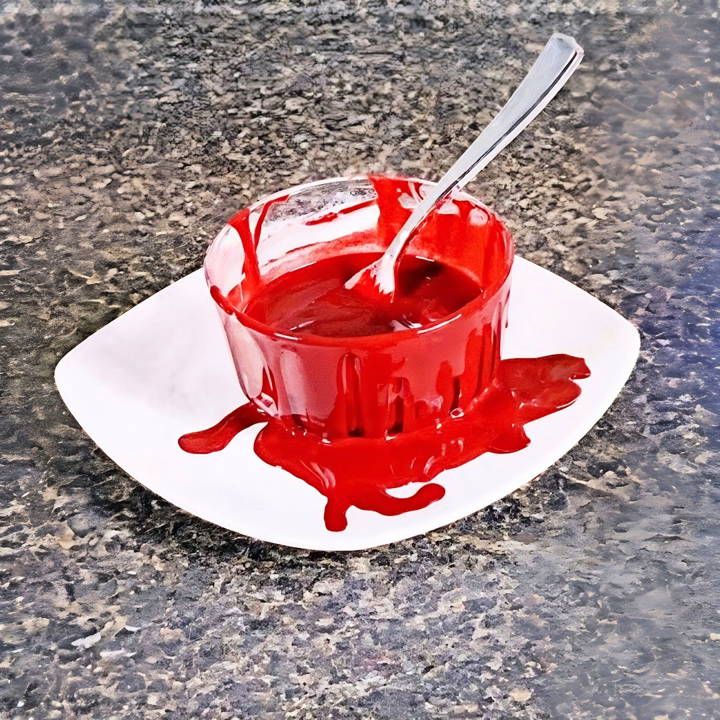
I stumbled upon a method that not only met my criteria but exceeded my expectations. Let me guide you through the process step by step.
Fake Blood in Film and Theater
Fake blood has been a staple in film and theater for over a century, playing a crucial role in storytelling and visual effects. Its use can be traced back to the early days of cinema, where filmmakers sought ways to make dramatic, realistic scenes that would captivate audiences. Over the years, the methods and materials have evolved, but the goal remains the same: to bring scenes to life in a believable way.
In the realm of theater, fake blood adds depth to performances, allowing actors to portray their characters' experiences more authentically. It's not just about the visual impact; it's about enhancing the emotional connection between the audience and the story. Whether it's a small trickle or a gushing wound, the presence of fake blood can be powerful.
Materials You'll Need and Why
- Ketchup: Serves as the base of our fake blood, providing a natural red color.
- Water: Used to adjust the consistency of the mixture.
- Flour: Helps thicken the mixture to replicate the viscous nature of real blood.
- A Bowl: Needed for mixing your ingredients.
- Mixing Tool (Spoon or Whisk): Essential for combining your ingredients evenly.
Each of these materials plays a crucial role in making a believable and easy-to-wash-off fake blood mixture without the need for harsh dyes or food coloring.
Step by Step Instructions
Learn how to make realistic fake blood with our step-by-step guide. Perfectly mix ingredients and adjust consistency for the best results!
Step 1: Preparing Your Mixing Bowl
Start by grabbing your bowl and cleaning it, ensuring it's free of any dirt or residue. A clean workspace is essential for making sure your fake blood is safe to use, especially if it might come in contact with your skin or mouth.
Step 2: Adding the Ketchup
Pour your ketchup into the bowl. The amount will depend on how much fake blood you need. Remember, it's better to start with less and make more if needed. Ketchup not only gives a realistic color but also a slightly thick base, making it perfect for our needs.
Step 3: Adjusting the Consistency with Water
After the ketchup is in the bowl, add a small amount of water. Start with a little and gradually add more until you achieve your desired consistency. This step is crucial as the viscosity of your fake blood can make or break its realism. Mix thoroughly with your spoon or whisk to avoid any lumps.
Step 4: Thickening with Flour
If your mixture is too runny, it's time to add some flour to thicken it. Add flour sparingly, a little at a time, while continuously mixing. This will help you avoid making it too thick too quickly. Aim for a consistency that's slightly thicker than real blood, as it will slightly thin out as it dries.
Step 5: Testing and Adjusting
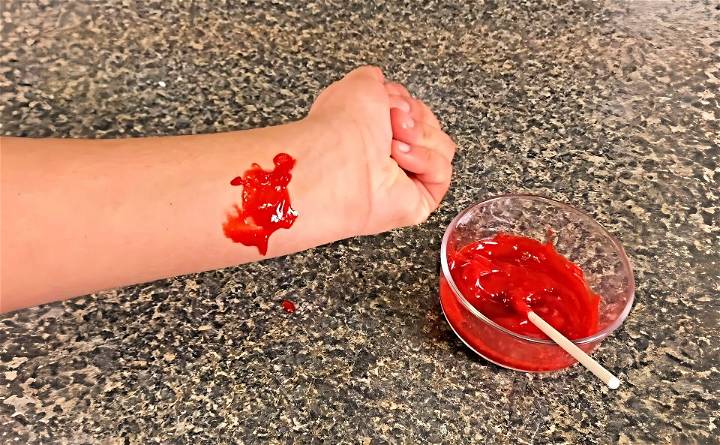
Once mixed, test the fake blood on a white surface or on the back of your hand to see if it achieves the desired effect. If it's too dark, you can add a bit more water. If it's too thin, add a pinch more flour. This step is all about adjusting, so don't worry if it takes a few tries to get it just right.
Tips for Application and Removal
- Application: For the best effect, apply the fake blood with a small brush or sponge. You can also let it drip for a more natural look.
- Removal: Since our fake blood recipe is made without harsh food colorings, it should come off easily with soap and water. However, applying a thin layer of lotion or barrier cream on your skin before the fake blood can make the removal process even easier.
Cleaning Up
Once you've finished with your creation, cleaning up is straightforward. As our ingredients are all food-based, they're safe to go down the sink. Just make sure to wash your bowl and mixing tool thoroughly with soap and water.
Storing Your Fake Blood
If you've made too much, don't worry. You can store your fake blood in an airtight container in the refrigerator for a couple of days. However, I recommend making it fresh to achieve the best consistency and color.
Application Techniques for Various Effects
Making realistic effects with fake blood requires not just the right mixture but also the proper application techniques. Whether you're aiming for a subtle scratch or a dramatic wound, how you apply the fake blood can make all the difference. Here are some straightforward methods to help you achieve various effects:
For Scratches and Grazes:
- Use a thin brush or a toothpick to draw fine lines on the skin.
- Dab the lines with a sponge to make a blurred effect, mimicking the rough edges of a scrape.
Fresh Wounds:
- Apply a thick layer of fake blood with a small spatula or the back of a spoon.
- Let it drip slightly to give the appearance of fresh bleeding.
For Dried Blood:
- Mix a bit of brown or black food coloring into your fake blood to darken it.
- Apply it to the skin and wait for it to partially dry before gently smudging it.
Splatter Effects:
- Dip a stiff-bristled brush into the fake blood and flick it onto the desired area for a random, splattered look.
- For larger splatters, use a spray bottle and adjust the nozzle for fine or coarse droplets.
Bullet Wounds:
- Make a small mound using tissue or latex as a base on the skin.
- Cover with fake blood, allowing it to pool around the base for a three-dimensional effect.
For Gushing Wounds:
- Attach a small tube near the wound area and run it under your clothing.
- Pump fake blood through the tube to simulate active bleeding.
Practice makes perfect for fake blood. Test different tools and techniques to find what works. Prioritize safety, especially near the eyes and mouth. These tips will help you make convincing and impactful visual effects.
Troubleshooting Common Issues with DIY Fake Blood
When making and using DIY fake blood, you might encounter some common issues. Here's a helpful guide to troubleshooting these problems, ensuring your fake blood looks and behaves as intended:
Doesn't Look Realistic
- Solution: Adjust the color by adding more red or a drop of blue or green to darken it. If it's too thick, thin it out with a bit of water.
The Blood Is Too Runny
- Solution: Thicken it by adding a small amount of corn syrup or flour. Stir well to avoid lumps.
Blood Is Staining Skin or Clothes
- Solution: Before application, apply a thin layer of lotion to the skin or a barrier spray to fabrics. Test the blood on a small, inconspicuous area first.
The Blood Won't Dry
- Solution: Mix in a bit of cornstarch to speed up the drying process. Apply in thin layers, allowing each to dry before adding more.
Blood Is Irritating the Skin
- Solution: Make sure you're not allergic to any ingredients. Do a patch test on your arm before full application. If irritation occurs, wash off immediately and try a different recipe.
Difficulty Removing Blood from Surfaces
- Solution: Clean up spills quickly with soap and warm water. For tougher stains, use rubbing alcohol or a mixture of baking soda and water.
The Blood Doesn't Show Up Well on Camera
- Solution: Increase the contrast by making the blood a little brighter or darker than you think it needs to be. Lighting can also greatly affect how blood appears on camera.
Anticipate issues and learn solutions to make DIY fake blood for your project. Experiment and adapt for success. Tweak your recipe and method as needed. Prioritize safety and skin sensitivity with ingredients.
Safety Precautions and Allergy Advice
When making and using DIY fake blood, safety should always be your top priority. Here are some straightforward guidelines to ensure that your fake blood is not only effective but also safe for everyone involved:
Choose Safe Ingredients:
- Opt for food-grade items like corn syrup, food coloring, and cocoa powder.
- Avoid using ingredients that can stain or cause allergic reactions, such as certain dyes or latex.
Conduct a Patch Test:
- Before using the fake blood, apply a small amount on the inside of your elbow to check for any adverse reactions.
- Wait for 24 hours to ensure there is no redness, itching, or swelling.
Be Mindful of Sensitive Areas:
- Keep fake blood away from the eyes and mouth. If a scene requires blood near these areas, use products specifically designed for sensitive skin.
- If fake blood does get into the eyes, rinse immediately with plenty of water and seek medical advice if irritation persists.
Check for Allergies:
- Always ask participants about their allergy history.
- Provide an ingredient list to all actors and crew members involved.
Prepare for Cleanup:
- Have a first aid kit and cleaning supplies on hand in case of accidents.
- Inform everyone about the cleanup process for skin and fabrics to avoid panic.
Use Non-Toxic Preservatives:
- If you're making fake blood in advance, use natural preservatives like salt or vinegar to prevent mold growth.
- Store the mixture in a cool, dry place and discard it if you notice any unusual odors or discoloration.
Follow these simple safety tips and allergy advice to make sure your DIY fake blood is safe for any film or theater.
FAQs About DIY Fake Blood
Discover answers to common questions about DIY fake blood, including ingredients, safety tips, and realistic application methods for projects.
The most basic fake blood recipe typically involves a combination of corn syrup, water, red food coloring, and sometimes a bit of chocolate syrup or cocoa powder to deepen the color. You can also use additional ingredients like flour or cornstarch to thicken the consistency, and green or blue food coloring to adjust the hue.
Many fake blood recipes are edible, using common kitchen ingredients. The corn syrup, water, and food coloring base is usually safe for consumption. If you want to avoid any potential allergens, be sure to check the ingredients of your chocolate syrup or cocoa powder, as some may contain milk or soy.
To thicken fake blood, you can gradually add flour or cornstarch while stirring the mixture until you achieve your desired consistency. Start with small amounts and gradually add more until it reaches the right thickness. Be careful not to add too much, as it can make the blood appear clumpy or opaque.
Yes, you can substitute corn syrup with other ingredients like honey, maple syrup, or golden syrup. Keep in mind that these alternatives might slightly affect the color and consistency of the final product.
Start with a base of red food coloring and gradually add small amounts of blue or green food coloring to achieve the desired shade. Blue can help darken the red for a more realistic blood color, while green can give it a bruised or decayed appearance.
When using fake blood for special effects, consider the following:
Application: Use a brush, sponge, or dropper to apply the blood to the desired areas.
Layering: Build up the blood in layers for a more realistic effect.
Splatter: Flick a brush or toothbrush dipped in blood to make splatter effects.
Drips: Let the blood drip naturally from wounds or props.
Clotting: Apply thicker blood to the edges of wounds to simulate clotting.
Final Thoughts
Making fake blood without food coloring was an enlightening experience for me. It proved that you don't need harsh chemicals to achieve realistic effects, whether for entertainment or educational purposes. By following this simple guide, I hope you can make your own fake blood safely and effectively, enhancing your projects while keeping cleanup and skin safety in mind.


