Carpenter bees are fascinating creatures, with their large, buzzing bodies and important role in pollination. However, when they decide to make their home in your wood structures—whether it be your porch, greenhouse, or even the eaves of your house—things can quickly turn frustrating. These bees, known for burrowing into wood, can leave behind a mess of wood shavings and even cause significant damage over time. But don't worry, there's a simple, inexpensive, and surprisingly effective solution: a DIY fake wasp nest. This method can help deter carpenter bees without the need for traps or chemicals.
In this guide, you'll learn all about making a fake wasp nest, its mechanism, and why it serves as such an effective deterrent for carpenter bees and other pests. By the end, you'll be ready to protect your wood structures with this easy, budget-friendly project.
What You'll Learn
- Why carpenter bees are a problem
- How a fake wasp nest works
- What materials you'll need
- Step-by-step guide to making a fake wasp nest
- Placement and maintenance tips
Why Carpenter Bees Are a Problem
Carpenter bees are large, solitary bees that look similar to bumblebees but have smooth, shiny abdomens. Unlike bumblebees, which nest in the ground, carpenter bees bore holes into wood to make their nests. This behavior can lead to significant damage to wooden structures over time. If you've ever seen small, perfectly round holes in your porch or siding and found piles of sawdust nearby, you likely have carpenter bees.
The Signs of Carpenter Bee Infestation Include:
- Small, round holes in wood surfaces
- Piles of sawdust or “wood fluff” beneath the holes
- Wood shavings on plants or surfaces beneath the nest sites
While they don't eat wood like termites, carpenter bees can still weaken structures by making multiple tunnels over time. Additionally, their constant presence can be a nuisance if they are buzzing around frequently used areas like porches or patios.
How a Fake Wasp Nest Works
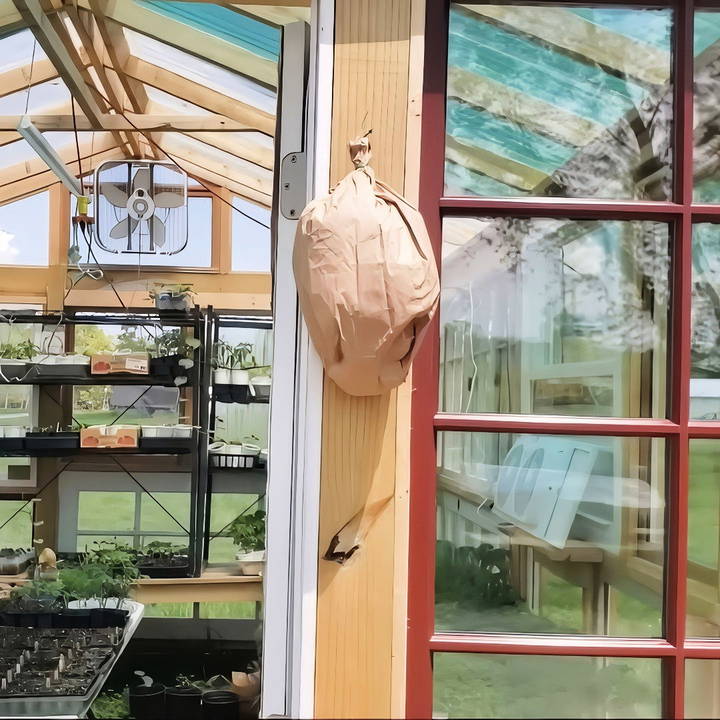
Wasp nests and carpenter bees don't mix well. Bees are naturally territorial and tend to avoid areas where other stinging insects, like wasps, have already claimed the space. Wasps, especially species like yellowjackets and hornets, are aggressive and pose a threat to carpenter bees. When carpenter bees come across a wasp nest, even a fake one, they often steer clear of the area altogether to avoid conflict.
This simple behavioral quirk is what makes a fake wasp nest such a powerful tool in keeping carpenter bees (and even some wasps) away from your wood structures.
Materials You'll Need
The great thing about making a DIY fake wasp nest is that it requires only a few inexpensive materials—most of which you can find at a dollar store or even have on hand already. Here's what you'll need:
- Brown paper lunch bag (you can substitute with any small brown paper bag)
- Bubble wrap, plastic bags, or styrofoam peanuts (any kind of filler)
- Small rocks or gravel (to weigh down the nest)
- String, twist ties, or bread ties (to hang the nest)
- Nail or hook (for mounting)
These materials will come together to form a realistic-looking wasp nest that will trick bees into thinking the area is already claimed.
Step by Step Instructions
Make a lifelike DIY fake wasp nest with easy step-by-step instructions. Learn where and how to hang it for effective wasp deterrence.
Step 1: Prepare the Paper Bag
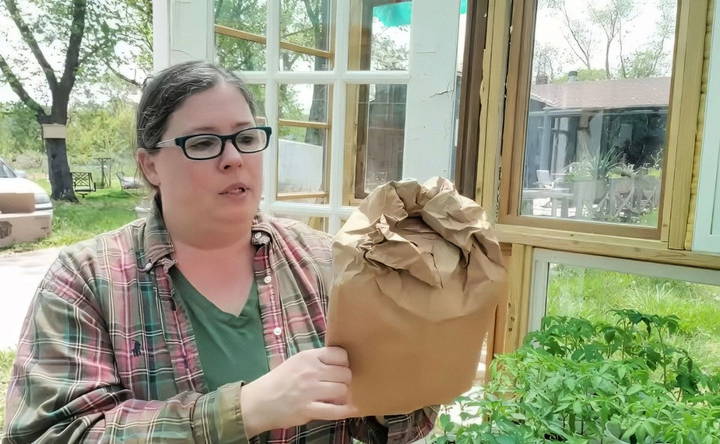
Start by taking the brown paper bag and crumpling the bottom slightly to give it a wrinkled appearance. You want the bag to look as irregular and textured as possible because real wasp nests are never smooth. Push the bottom inward and squish it with your hand to make a more natural, nest-like shape.
Step 2: Add Weight to the Nest
Take a handful of small rocks or gravel and place them into the bottom of the bag. This will give the fake nest some weight, ensuring that it doesn't blow around in the wind. The weight will help the nest hang securely and keep its shape.
Step 3: Fill the Bag with Filler
Next, you'll want to fill the paper bag with something lightweight to give it volume. Bubble wrap, plastic grocery bags, or even styrofoam peanuts work great for this purpose. You could also use old newspaper or even popcorn if you're in a pinch. The goal is to keep the bag puffed up, making the illusion of a real wasp nest.
Step 4: Close and Secure the Top
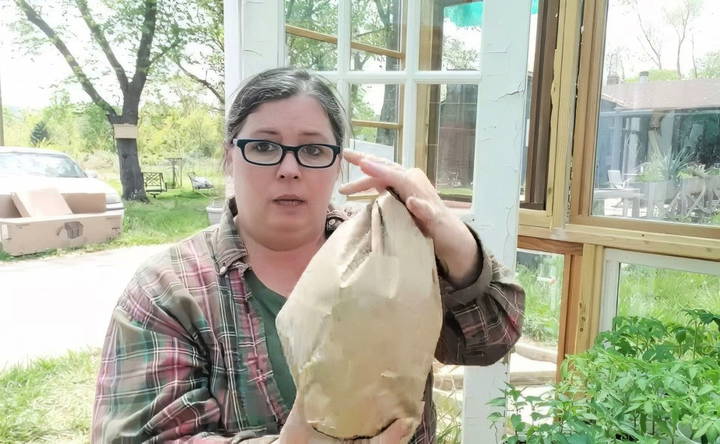
Once the bag is filled, bunch up the top and twist it tightly to close. Use a twist tie, string, or bread tie to secure the top. Make sure it's wrapped tightly so the filler doesn't fall out, especially if the nest gets wet from rain.
Step 5: Shape the Nest
Now that the nest is assembled, it's time to give it the proper shape. Use your hands to crumple the bag and make it look irregular, just like a real wasp nest. Pay special attention to making sure the surface isn't too smooth. The more textured it is, the more convincing it will look.
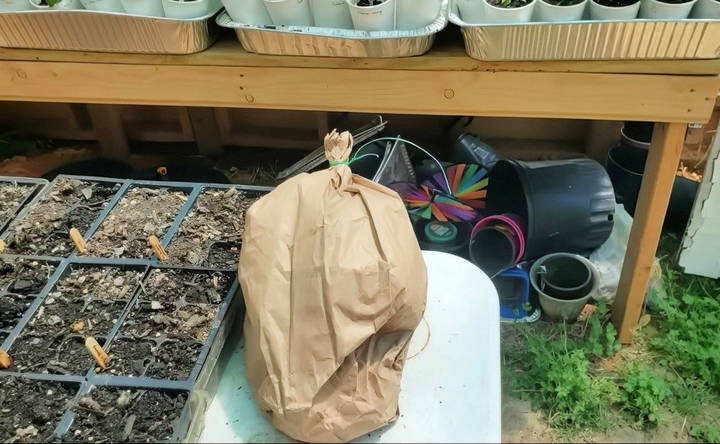
Hanging the Fake Wasp Nest
Once your fake wasp nest is complete, it's time to hang it. Here are a few tips on where and how to place your nest for maximum effectiveness.
Where to Hang It
- Near problem areas: Hang the nest close to where you've noticed carpenter bees or other pests, such as under porches, near eaves, or around your greenhouse.
- Visible locations: Make sure the nest is easily visible to carpenter bees as they fly toward your home.
- Avoid direct rain: While the nest can withstand a little water, hanging it under an overhang or eave will help extend its lifespan and prevent it from getting too soggy.
How to Hang It
Using the string or twist tie from earlier, simply loop the fake nest onto a nail or hook. If you're concerned about the nest getting knocked down by wind, consider adding extra weight or securing it more tightly.
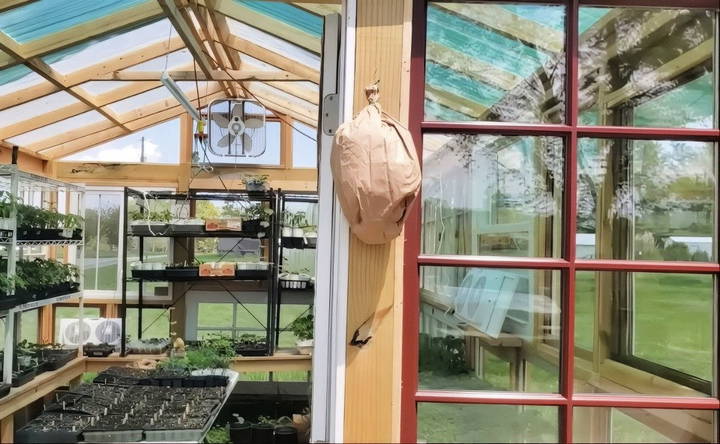
Maintenance and Longevity
One of the best things about the DIY fake wasp nest is how easy it is to maintain. While the materials are sturdy enough to last a while, there are a few things to keep in mind:
- Re-shape after rain: If the nest gets rained on, it may lose its shape. Simply let it dry and reshape it by hand if necessary. Keep an eye on the bottom to make sure the rocks or filler haven't fallen out.
- Replace when needed: After a few months, the paper bag may wear out or get too damaged. When this happens, simply replace the bag and reuse the filler and rocks. Since the materials are inexpensive, it's easy to make multiple nests at once.
Why This Method Works
The DIY fake wasp nest works because it takes advantage of the natural territorial behavior of carpenter bees and wasps. Bees will avoid areas where they perceive competition or threats, such as a wasp nest. By mimicking the appearance of a wasp nest, you can discourage bees from settling in or around your home without harming them.
In addition to carpenter bees, this method can also deter certain types of wasps, which may avoid areas where they think other wasp colonies are present.
Additional Tips and Alternatives
- Natural fillers: If you prefer an eco-friendly approach, try using biodegradable fillers like leaves, twigs, or natural fibers instead of plastic or styrofoam.
- Multiple nests: If you have a large area to protect, consider making several fake nests and placing them in different locations. This will increase the chances of deterring carpenter bees.
- Use year-round: While carpenter bees are most active in the spring and summer, you can keep the nests up year-round to prevent bees from nesting in early spring.
Conclusion
A DIY fake wasp nest is an easy, affordable, and effective solution to prevent carpenter bees from burrowing into your wood structures. By simulating the appearance of a real wasp nest, you can take advantage of natural bee behavior and keep your home safe from wood damage—all without the need for traps or harsh chemicals. With just a few materials and a little bit of time, you can protect your property and keep carpenter bees at bay for good.
So the next time you see signs of these buzzing invaders, don't reach for a trap—try the simple fake wasp nest method instead. It's a solution that works, and best of all, it costs just a few dollars to make.
FAQs About DIY Fake Wasp Nest
Discover common questions and expert answers about DIY fake wasp nests to deter wasps effectively and safely from your home.
It depends on the size of the area and the severity of the infestation. Generally, one nest is effective for a small porch (about 15 x 7 feet). For larger areas, like sheds or multiple sides of a house, consider hanging multiple nests at intervals to ensure coverage.
Yes, the fake wasp nest can also deter some species of wasps and other bees. However, it primarily works on carpenter bees due to their aversion to wasps. Some users have noted its effectiveness with other stinging insects, though results may vary.
No, the fake wasp nest is a humane solution. It scares the bees away without causing harm. They relocate to avoid what they perceive as a territorial threat from wasps, preserving their role as pollinators.
If the nest gets wet, simply let it dry and reshape it. For better durability, you can seal the bag with a light coat of paint or lacquer, or use alternative materials like burlap to withstand the elements better.
Yes, you can use various materials such as plastic bags, bubble wrap, styrofoam peanuts, or even popcorn to give the nest volume. Some people prefer using eco-friendly fillers like leaves or paper, but be mindful that these may degrade faster if exposed to moisture.
No, it typically doesn’t scare hummingbirds. They are less likely to perceive the nest as a threat. However, if you’re concerned, place the fake nest away from feeders or areas where you encourage hummingbird activity.
It may take a few days for the bees to notice the fake nest and relocate. Bees can leave a scent in their burrows, which might initially draw them back. Give it time and monitor whether they are making new holes—if not, the deterrent is working.
Yes, a real wasp or hornet nest can work just as well, as it provides an authentic visual deterrent. If you have access to an old nest, you can use it in place of the paper bag method.
While the fake nest can last several months, especially if it's protected from the elements, it may need to be replaced annually or after heavy weathering. To increase its longevity, you can paint or seal it with waterproof coatings.
If the bees continue to drill despite the fake nest, it's possible they are persistent or have already marked their territory. In such cases, you may need to relocate the nest or combine this method with other deterrents like essential oil sprays or traps.


