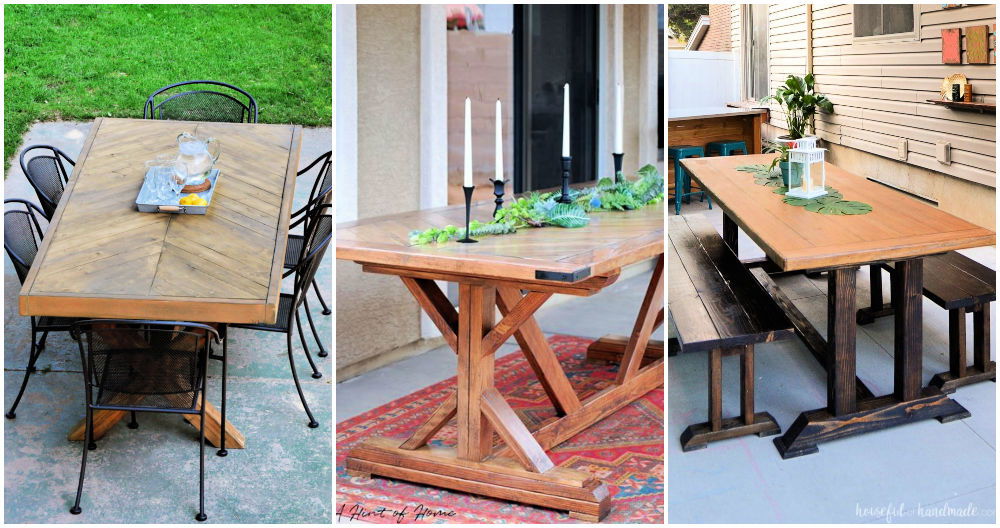
Building my own DIY farmhouse table was an adventure filled with learning curves, triumphs, and the occasional mishap. This was my first attempt at building something so substantial, and I aimed to incorporate the design and practicality seen in farmhouse tables I admired. Allow me to guide you through the process I undertook to build a 10-foot farmhouse table, rich with character and capable of bringing warmth to any family gathering.
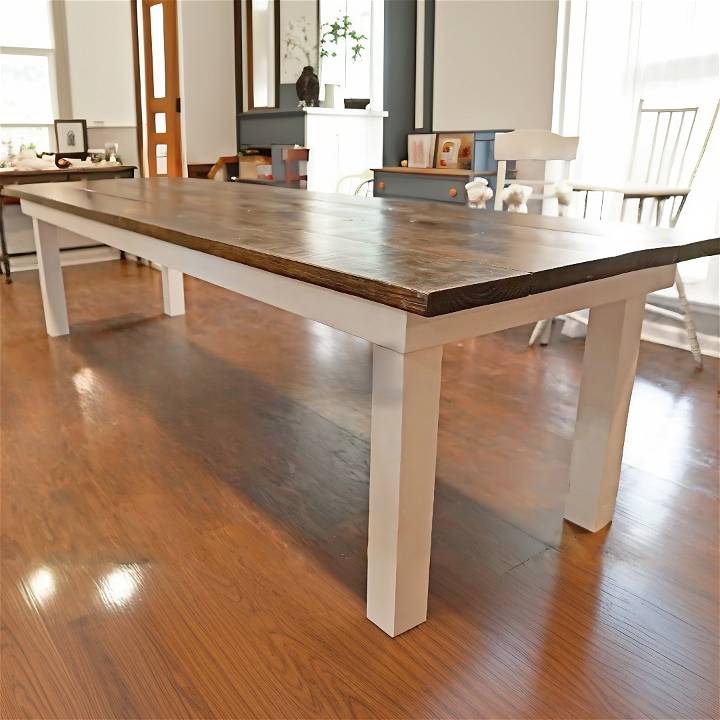
Materials Needed and Their Purpose
- Southern Yellow Pine (4x 2by10by10s for the tabletop and 4x 4by4by8s for the legs): This wood was chosen for its durability and classic appearance which is essential for a farmhouse aesthetic.
- 2by4 lumber: Used to construct the apron and support the tabletop.
- Hanger bolts, wood screws, and dowels: These are crucial for assembling the table securely.
- Minwax Jacobean stain and white paint: To achieve the specific look desired by our friend; a classic farmhouse table with a richly stained top and white base.
- Polyurethane finish: This is used to protect the wood and seal the stain, ensuring longevity.
Step by Step Instructions
Learn how to build a DIY farmhouse table with our step-by-step instructions. From planning to finishing, we guide you through the process effortlessly.
Step 1: Planning and Measurements
Initiating the project, I first confirmed the desired dimensions with our friend. A 10-foot length, 38 inches width, and a standard height of about 30 inches were agreed upon. Accurate measurements are vital as they influence the purchase of materials and the overall result.
Step 2: Cutting Lumber to Size
With dimensions in hand, I proceeded to cut the 2by10 planks for the table top and the 4by4s for the legs. Precision in cutting is paramount as even slight deviations can lead to a less stable structure. Each piece was meticulously measured and marked before making any cuts.
Step 3: Constructing the Apron
The apron's role is to frame the underside of the table top and provide additional support. Opting for a mitered corner design, I cut the 2by4s to size. The mitered corners not only contribute to the overall aesthetics but also add to the integrity of the table structure. I assembled the apron with wood glue and screws, ensuring each joint was square.
Step 4: Assembly Challenges
An important learning point was the realization that not all my initial plans would pan out as expected, particularly with attaching the table legs and apron. My initial idea was to build a detachable structure for easy transport, which led to using hanger bolts. However, during execution, I found that my method resulted in a less stable setup than anticipated. Adaptability was key, leading me to modify my approach to ensure stability and aesthetics aligned with our vision.
Step 5: Sanding and Finishing
Thorough sanding began with coarse grit moving to finer grit to prepare the wood for staining. This step was crucial for a smooth finish and to ensure the stain and polyurethane applied evenly. Applying the stain and polyurethane required patience and attention to detail, culminating in a beautifully finished top that highlighted the wood's natural grain.
Step 6: Painting and Final Assembly
The base was painted with the white paint supplied by our friend, designed to contrast yet complement the rich, dark stained top. Ensuring a smooth, even coat of paint was as vital as the staining process, emphasizing the table's farmhouse charm.
Customization Ideas for Your Farmhouse Table
When building a farmhouse table, you have the opportunity to build a piece that reflects your personal style and fits seamlessly into your home. Here are some customization ideas to enhance your DIY farmhouse table project:
Finish Options:
- Stained Finish:
- Staining the wood allows you to highlight its natural grain and color. Opt for warm tones like oak or walnut for a classic farmhouse look.
- Painted Finish:
- If you prefer a more rustic or distressed appearance, consider painting your table. White, muted pastels, or even bold colors can add character.
- Distressed Finish:
- Build a weathered look by distressing the wood with sandpaper or a wire brush. Focus on edges and corners for an authentic farmhouse vibe.
Leg Styles:
Choose a leg style that complements your overall design:
A. Tapered Legs:
- Tapered legs are sleek and elegant. They gradually narrow from the top to the bottom, providing stability without overwhelming the table's appearance.
- Ideal for a modern farmhouse aesthetic.
B. Turned Legs:
- Turned legs feature decorative twists or curves. They add a touch of traditional charm.
- Perfect for a cozy, cottage-style farmhouse table.
C. X-Shaped Trestle Base:
- An X-shaped trestle base provides both visual interest and stability.
- Great for larger tables and a rustic farmhouse feel.
Tabletop Thickness:
- Consider the thickness of your tabletop. Thicker tops (around 1.5 to 2 inches) build a substantial, sturdy look.
- Thinner tops (around 1 inch) offer a more delicate appearance and work well for smaller spaces.
Breadboard Ends:
- Breadboard ends are decorative extensions at the table's ends. They add visual appeal and prevent the tabletop from warping.
- Use contrasting wood or stain for an eye-catching effect.
Seating Capacity:
- Determine how many people your table needs to accommodate. Farmhouse tables can vary in size, so choose dimensions that fit your family or guests comfortably.
- Benches or a mix of chairs and benches can maximize seating.
Incorporate Metal Accents:
- Add metal elements for an industrial farmhouse twist. Consider metal brackets, corner braces, or even rivets.
- These accents can contrast beautifully with the warmth of wood.
Remember, the beauty of a farmhouse table lies in its imperfections and the stories it holds. Whether you're a seasoned woodworker or a beginner, embrace the creative process and make your farmhouse table uniquely yours!
DIY Farmhouse Table FAQs
Get answers to all your DIY Farmhouse Table questions with our comprehensive FAQs. Learn how to build, finish, and style your own table at home.
What materials do I need to build a farmhouse table?
To build a farmhouse table, you'll typically need:
- Lumber: Various sizes of wood planks and beams, such as 2x4s, 1x2s, and 2x6s.
- Tools: A circular saw, drill, sander, and possibly a pocket hole jig for joinery.
- Hardware: Screws, nails, wood filler, and possibly pocket screws if using a pocket hole jig.
- Finishing Supplies: Sandpaper, stain, paint, and polyurethane finish.
How do I choose the right wood for my farmhouse table?
The choice of wood depends on your budget and desired aesthetic. Pine is affordable and gives a rustic look but is softer and may dent more easily. Hardwoods like oak or maple are more durable and have a finer grain, making them ideal for a tabletop that will last longer and withstand more wear and tear.
Can I build a farmhouse table if I'm new to woodworking?
Yes, building a farmhouse table can be a beginner-friendly project. Many designs use simple cuts and joinery techniques. It's recommended to start with a straightforward design and follow step-by-step instructions or plans, which are often available online.
How do I achieve a smooth finish on my farmhouse table?
To achieve a smooth finish, start by sanding the table with coarse grit sandpaper and gradually work up to a fine grit. Wipe away any dust before applying your chosen finish. For a traditional farmhouse look, consider a stained top with painted legs.
What are some design variations for farmhouse tables?
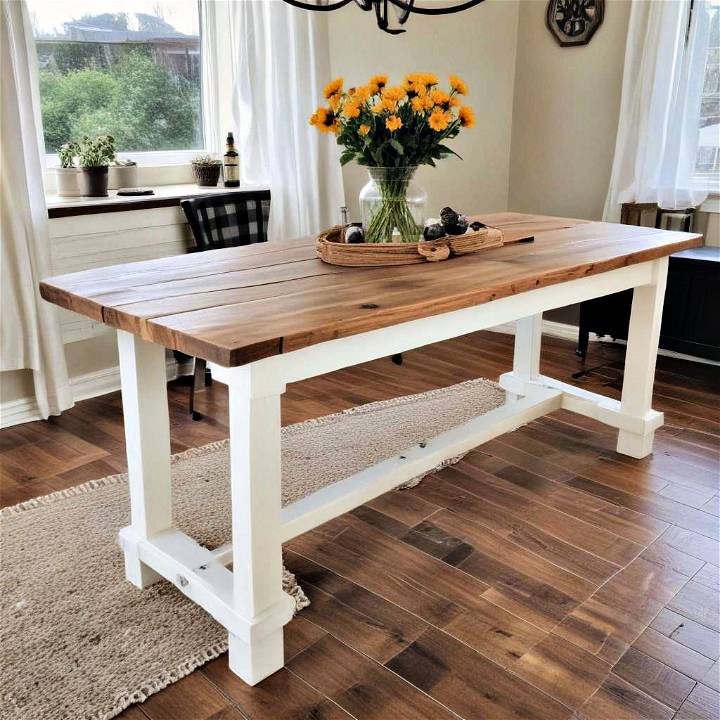
Farmhouse tables can vary in design, from trestle and x-brace leg designs to tables with a pedestal or center leg. Some may feature a weathered top for an aged look, while others might have a modern twist with colorful paint. The design can be tailored to fit the space and style of your home.
Conclusion
Reflecting on this project, several lessons stood out. First, flexibility in problem-solving is essential. When a planned method didn't yield the expected stability, I had to rethink and adjust my approach without compromising on quality. Second, meticulous planning and measurement are foundational for success but being able to adapt is just as crucial.
Despite the challenges encountered, the farmhouse table was a rewarding project. It brought to life a shared vision and proved to be a fulfilling venture into DIY craftsmanship. For others embarking on similar projects, remember that every mistake is an opportunity to learn and improve. With careful planning, patience, and adaptability, building your own farmhouse table is well within reach.


