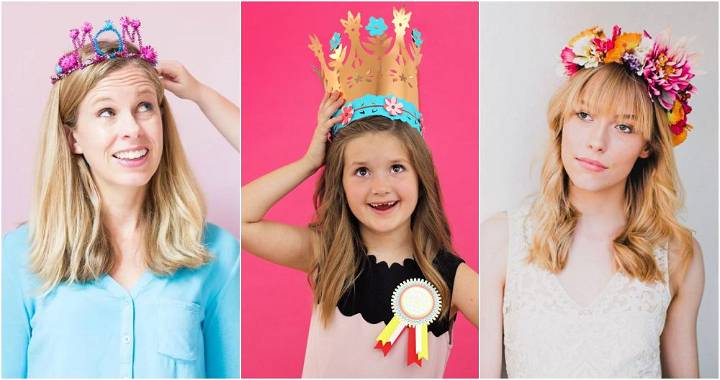
Making your own DIY fascinator at home is a fun project that allows you to express your personal style. With 15 easy DIY fascinator ideas to choose from, anyone can find a project that suits their taste and skill level. Each guide is structured to help you smoothly navigate through the crafting process, from selecting the right materials to adding the final touches to your creation.
Our step-by-step instructions are tailored to ensure a satisfying and stress-free crafting experience. Whether you aim to prepare a unique piece for a special occasion or just wish to try your hand at something new, these tutorials cater to all your needs.
We invite you to explore the next section for insightful tips on how to make your own fascinator, along with advice on styling, maintenance, and solving common issues, setting you up for success in your DIY venture.
How to Make Your Own Fascinator
Making a fascinator can be a fun and creative way to express your personal style, especially for special occasions like weddings or horse racing events. Follow these simple steps to make a unique fascinator at home.
What You Need
- Fascinator base (Disc with headband slot)
- Hot glue gun and glue sticks
- Flower decoration
- Crinoline or netting
- Ribbon or feathers for additional decoration
- Covered wire
- Scissors
- Optional: Wig head for easy assembly
Steps to Make the Fascinator
Discover how to create your own fascinator with our easy-to-follow guide below.
Prepare the Base
- Placement: If your fascinator base has a slot for a headband, decide which side of the head you want to wear it on. Add a dab of glue under the headband in the slot to secure it.
- Stability: If you have a wig head, place the base on it for easier handling.
Add the Main Decoration
- Prepare Flower: Choose a large flower as your main decoration. Cut the stem close but ensure the flower stays intact. Optionally, reinforce the cut end with a bit of hot glue to prevent petals from falling off.
- Attach Flower: Add a generous amount of hot glue to the back of your flower and press it onto the fascinator base in your chosen location. Use a cooling spray like an electronics duster to set the glue faster.
Cover the Base
- Netting/Crinoline: Measure about a yard of crinoline. If you prefer a ruffled effect, pull on the gathering thread to make a ruffle. For a simpler look, remove the thread, fold the crinoline into loops, and secure with covered wire. Glue this arrangement behind the flower, covering any visible parts of the base.
Add Additional Decorations
- Feathers and Ribbon: Tuck feathers or loops of ribbon into the spaces around the flower and netting. Use hot glue to secure them in place.
- Variety: Experiment with different textures and colors to make your fascinator unique. Additional netting can be formed into loops like a bow and attached with glue.
Final Touches
- Check for Gaps: Make sure there are no visible parts of the base or mechanics showing. Add more decorations as needed to cover any gaps.
- Adjust and Trim: Once all elements are attached, adjust the decorations to ensure a balanced and attractive design. Trim any excess materials if necessary.
Video Tutorial
For a more detailed guide, watch this step-by-step video tutorial on making a fascinator.
It pairs well with this written guide, offering a visual representation of each step to enhance your understanding and ensure success in your fascinator making project.
By following these steps, you can craft a unique and stunning fascinator for any special event or just for fun.
Customization Ideas for Your DIY Fascinator
Personalizing your DIY fascinator is a fantastic way to express your individual style and creativity. Here are some ideas to inspire you to customize your creation:
Add a Personal Touch with Embellishments
- Be Bold with Color: Don't shy away from vibrant colors. Add a pop of color with feathers, beads, or ribbons that reflect your personality.
- Incorporate Meaningful Charms: Attach small charms or pendants that hold personal significance to you. This could be anything from a vintage brooch to a family heirloom.
Reflect Your Interests
- Theme It: Base your fascinator on a theme that interests you, such as your favorite flower, animal, or hobby. This adds a unique storytelling element to your accessory.
- Celebrate Your Heritage: Use patterns, fabrics, or motifs that represent your cultural background, making your fascinator a celebration of your heritage.
Experiment with Textures
- Mix and Match: Combine different textures like soft tulle, smooth satin, and delicate lace for a fascinator that's visually interesting and tactile.
- Recycle and Upcycle: Use materials from old clothing or accessories to add texture and contribute to a sustainable approach.
Play with Shapes and Sizes
- Go Asymmetrical: An asymmetrical design can be eye-catching. Try placing elements off-center for a modern twist.
- Vary the Sizes: Use decorations of different sizes to make depth and dimension. Larger elements can serve as focal points, while smaller ones can fill spaces and add detail.
By trying out these customization ideas, you'll make a stylish fascinator that truly reflects your personality. Experiment with various elements until you find the perfect blend that suits your fashion sense. Your fascinator should represent you and make you happy!
Styling Tips for Wearing a DIY Fascinator
When it comes to wearing a fascinator, the key is to complement your outfit and occasion while ensuring comfort and style. Here are some tips to help you wear your DIY fascinator with confidence and elegance.
Choosing the Right Hairstyle
- Keep it Simple: A simple hairstyle often works best with a fascinator. If your fascinator is elaborate, let it be the star by choosing a sleek bun or a low ponytail.
- Secure the Base: If you have fine hair, backcomb the section where you'll attach the fascinator for extra hold. For thick hair, ensure the fascinator's base is large enough to be stable.
Matching with Your Outfit
- Color Coordination: Match the colors in your fascinator with one element of your outfit, such as your dress, shoes, or bag. This makes a cohesive look.
- Balance the Proportions: If your outfit is voluminous, opt for a smaller fascinator to balance the look. Conversely, with a minimalist outfit, a larger fascinator can add a dramatic touch.
Comfort is Crucial
- Test the Fit: Before the event, wear your fascinator at home to ensure it's comfortable. Adjust the fit if it feels too tight or loose.
- Mind the Weight: Ensure your fascinator isn't too heavy. A lightweight fascinator is easier to wear for extended periods without discomfort.
For Different Occasions
- Weddings: Choose elegant and romantic designs with soft feathers, pearls, or floral elements for a wedding.
- Races: Be bold and playful with bright colors and unique shapes for horse racing events.
- Garden Parties: Opt for nature-inspired designs with flowers, leaves, or even butterflies for a whimsical touch.
By following styling tips, wear your DIY fascinator confidently for any occasion. Best accessory is your confidence, so wear proudly & enjoy compliments!
Troubleshooting Common Issues with DIY Fascinators
Making a DIY fascinator can be a fun and rewarding project, but sometimes you might encounter a few hiccups along the way. Here's a helpful guide to overcoming common issues, ensuring your fascinator looks fabulous for any occasion.
Problem: The Fascinator Keeps Slipping Off
Solution: Ensure the base of your fascinator is the right size. If it's too small, it won't have enough surface area to grip your hair. Consider adding a comb or hair clips to the base for extra hold. Use hairspray on the area where the fascinator will sit to provide additional grip.
Problem: Difficulty Attaching Decorations Securely
Solution: Use the right adhesive for the materials you're working with. Fabric glue works well for cloth and felt, while hot glue is better for heavier decorations. Allow enough drying time for the glue to set properly before handling.
Problem: The Design Looks Unbalanced
Solution: Lay out your design before attaching anything. Step back and look at it from different angles to ensure a harmonious balance. If it feels off, try redistributing the elements or adding smaller decorations to fill gaps.
Problem: Choosing the Wrong Materials
Solution: Select materials that complement each other in texture and color. Avoid materials that are too heavy, as they can cause the fascinator to tilt. Opt for lightweight feathers, tulle, or netting that add volume without the weight.
Problem: The Fascinator Is Uncomfortable to Wear
Solution: Comfort is key, especially for events where you'll wear the fascinator for hours. Make sure the attachment mechanism doesn't dig into your scalp. Padding the base with a thin layer of felt can provide cushioning.
Make a DIY fascinator with creativity and courage. Experiment until you're satisfied. Solve issues, make a unique and secure piece. Wear it proudly! 😊
Maintenance and Care for Your DIY Fascinator
Ensuring your DIY fascinator remains in pristine condition requires proper maintenance and care. Here's how you can keep your creation looking its best for years to come.
Storing Your Fascinator
- Keep it Dry: Store your fascinator in a dry place away from humidity to prevent mold and mildew.
- Avoid Crushing: Use a hat box or a spacious container to protect the shape and delicate decorations.
Cleaning Tips
- Spot Clean Only: Gently clean any stains with a soft cloth and mild detergent. Avoid soaking the entire fascinator.
- Handle with Care: Be delicate when cleaning around embellishments to avoid dislodging them.
Environmental Considerations for DIY Fascinators
Making an eco-friendly fascinator is not only good for the environment but also adds a unique story to your accessory.
Choosing Sustainable Materials
- Repurpose Fabrics: Use scraps from old clothes or fabric offcuts to reduce waste.
- Natural Decorations: Opt for biodegradable elements like dried flowers or leaves.
Eco-Friendly Practices
- Minimize Glue: Where possible, sew elements together instead of using glue to make your fascinator more recyclable.
- Support Local: Purchase materials from local suppliers to reduce your carbon footprint.
By following these tips, you'll prolong your fascinator's lifespan and help the environment. Your careful actions will show in your fascinator's beauty and your dedication to sustainability.
FAQs About DIY Fascinators
When diving into the world of DIY fascinators, it's natural to have questions. Here's a comprehensive FAQ section to help you navigate the process with ease and confidence.
What materials do I need to start making a fascinator?
To begin, you'll need a base (like a headband or comb), fabric for covering the base, decorations (such as feathers, flowers, or beads), and tools like scissors, glue, and needle and thread.
How do I choose the right base for my fascinator?
Consider the weight and style of your decorations when selecting a base. A headband is versatile and comfortable, while a comb is suitable for lighter designs.
Can I make a fascinator without sewing skills?
Absolutely! Many fascinators can be made using glue. However, sewing can provide extra durability, especially for heavier elements.
How can I make my fascinator stay in place all day?
Ensure the base fits well and use hairpins to secure it. If it's still slipping, try adding a small elastic band that goes behind your head.
What's the best way to attach feathers to my fascinator?
Feathers can be glued directly onto the base or attached to a piece of felt first for added stability. If you're sewing, stitch the quill end of the feather to the base.
How do I transport my fascinator without damaging it?
Use a hat box or a sturdy container with soft padding. Avoid stacking anything on top of it and keep it in a cool, dry place.
By keeping these FAQs in mind, you'll be better prepared to make a beautiful and functional DIY fascinator. Remember, practice makes perfect, so don't hesitate to experiment and learn as you go.
15 Easy DIY Fascinators to Make at Home
Get creative with these 15 easy DIY fascinators to make at home. Step-by-step tutorials for crafting unique headpieces for any occasion.
1. How to Make a Cute Fascinator
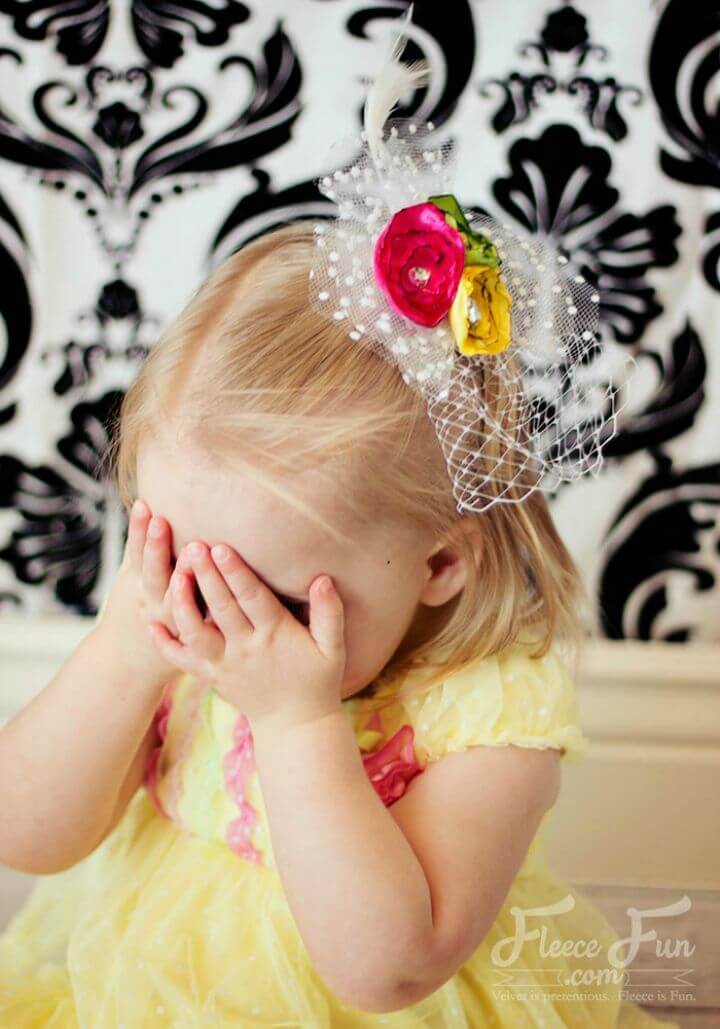
Add charm and elegance to your hairstyle with a custom-made fascinator! This comprehensive tutorial offers a simple yet effective method to make your fascinator, perfect for photo shoots, weddings, and other special occasions. The choice to include feathers adds a whimsy, while millinery lace lends a vintage appeal.
Starting with a free satin flower hairclip pattern, you'll assemble this delightful accessory using everyday materials like felt, satin, tulle, and a few ornamental buttons or jewels for added sparkle.
This project is wonderfully adaptable, allowing for personalization based on your preferred style or color palette. This versatile accessory will enhance your outfit, whether a mini top hat or a pirate hat! fleecefun
2. Adorable DIY Flowery Bow Fascinator
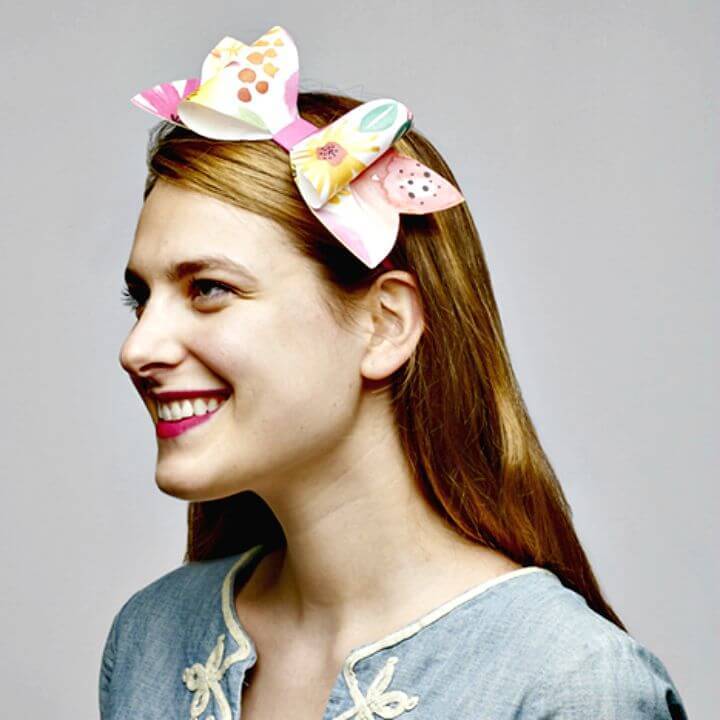
Channel your inner crafter and gear up for the racing event of the season with these DIY Kentucky Derby fascinators! Two stunning styles, the flowery bow, and the tip-top flower, come to life with simple materials: a headband, washi tape, wildflower flat sheet wrapping paper, hot glue gun, scissors, satin ribbon, and a paper flowers kit.
Their creation process is straightforward and requires no specialized skillset, making it a fun project for all. Each design exhibits its unique flair, seamlessly blending functionality and style.
Adding these handmade fascinators to your Derby attire not only amps up your fashion game but also injects personality into your look. So, don't wait; craft your way to a standout Derby style today! source
3. Making a Kentucky Derby Fascinator
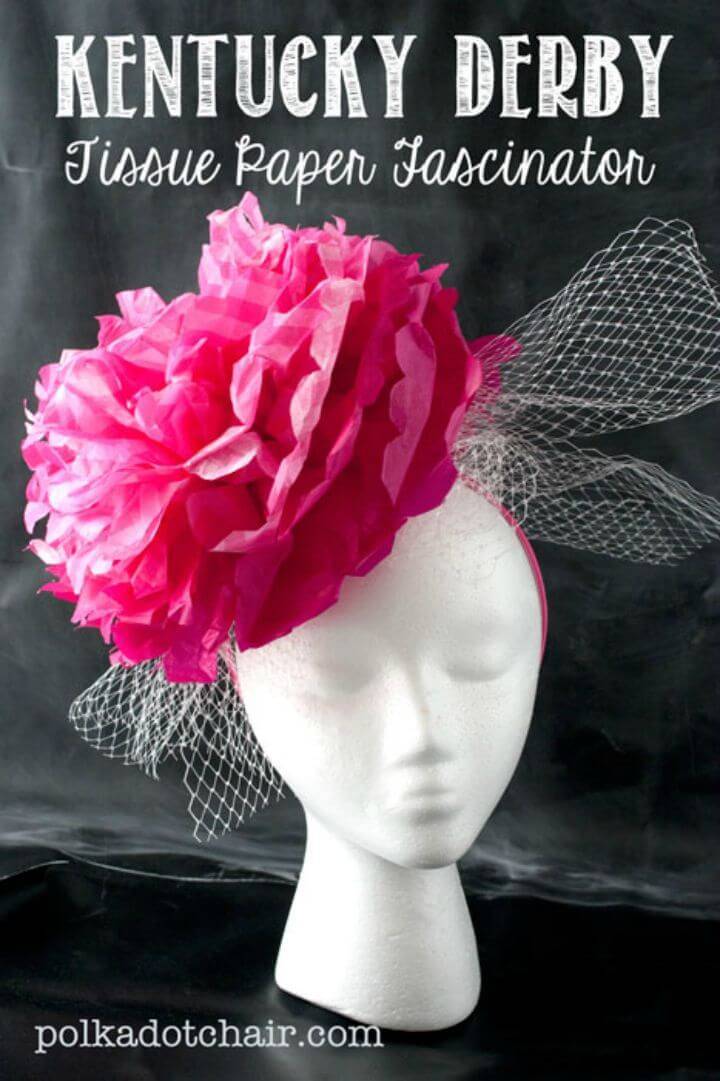
Ignite your Kentucky Derby party with a simple yet stylish DIY tissue paper fascinator! This easy-to-make accessory brings the fun and excitement of the Derby right to your home or kid's event. You need some basic materials: tissue paper, a headband, white floral wire, string, a glue gun, netting, and an extra silk flower.
With less than $10 and an hour of your time, you can craft a fascinating Derby-inspired headpiece. Attach the handmade giant tissue paper flower to the headband, jazz it up with some netting, and you're set!
This project is excellent for relishing the Derby atmosphere without breaking the bank; this tutorial guides you through each step, ensuring an enjoyable crafting experience and a stunning result. Happy Derby Day crafting! polkadotchair
4. Fancy Feather Fascinator Hat Tutorial
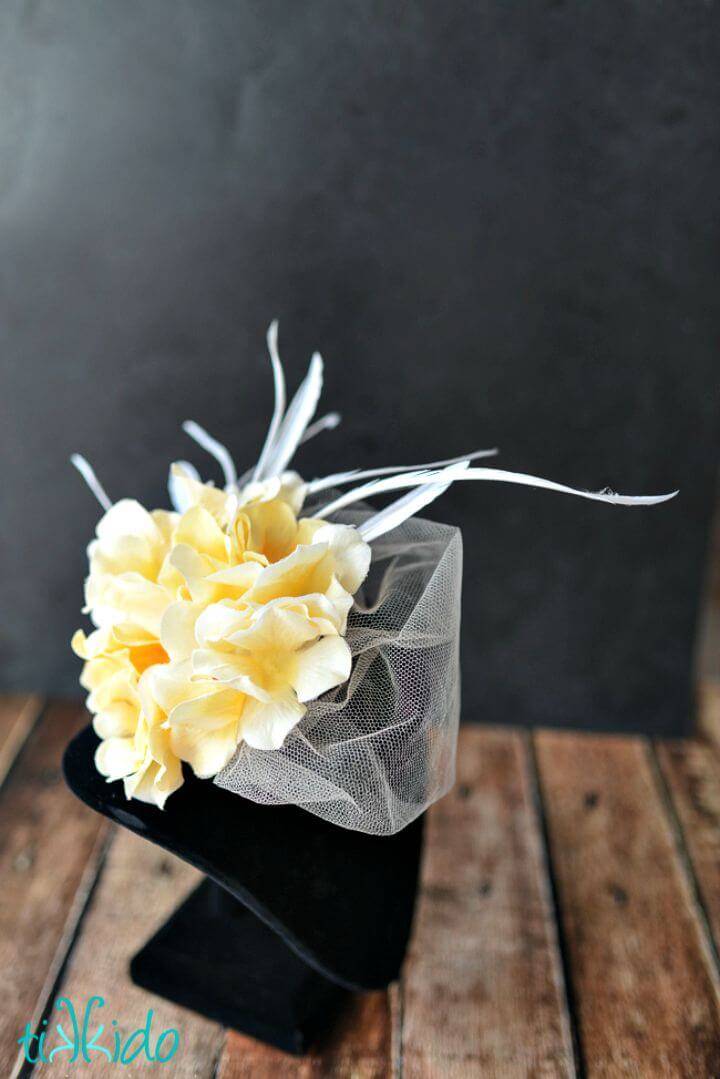
Unleash your inner milliner and craft your feathery, fabulous fascinators with this comprehensive guide. This DIY tutorial walks you through crafting two delightful fascinator styles using simple materials such as craft feathers, silk flowers, felt fabric, and a hot glue gun.
Following the detailed instructions, you can make these beautiful headpieces right from the comfort of your home, perfect for high tea parties or Kentucky Derby festivities.
The key ingredient in this crafting adventure is your creativity and the desire to have fun! So, grasp your materials and get ready to design your fashionable fascinators. Bring a tinge of class to your ensemble and uplift your spirits with these charming creations. tikkido
5. DIY Three Paper Fascinators
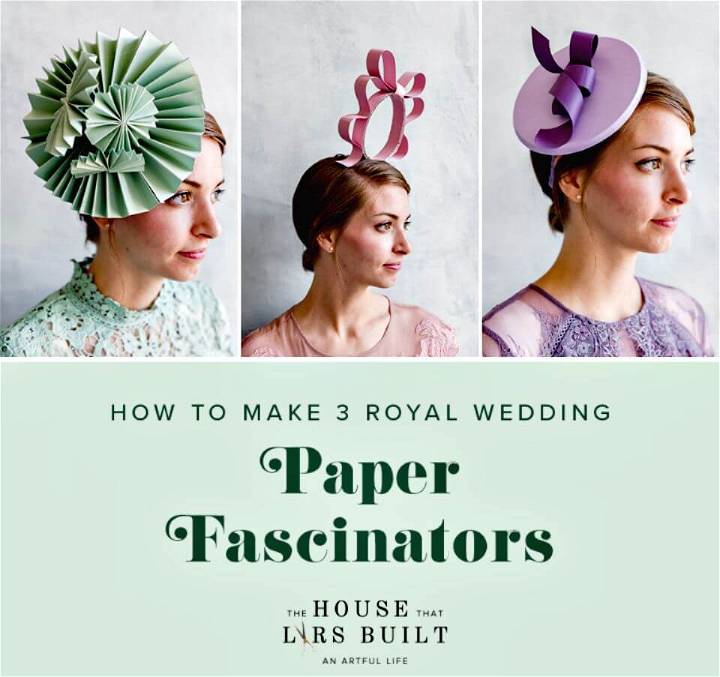
Evoke the grandeur of royal weddings with DIY paper fascinators, perfect for celebrating such regal affairs. Crafted from cardstock, a hot glue gun, and a headband, these accessories are chic and affordable. Discover three unique designs: a paper fan fascinator, Curly Q Fascinator, and a Princess Beatrice-Inspired Fascinator.
With detailed instructions provided, the making process is straightforward and suitable for all crafters. Each unique design features distinctive elements like accordion-folded paper medallions, looped and curled paper strips, or an elegant bow.
The purpose? To add a tinge of royal flair to your wardrobe while celebrating significant events like Harry and Meghan's royal wedding. Don't just watch from the sidelines - immerse yourself in the festivities with these fabulous paper fascinators! thehousethatlarsbuilt
6. Easy-To-Make Witch Hat Fascinators
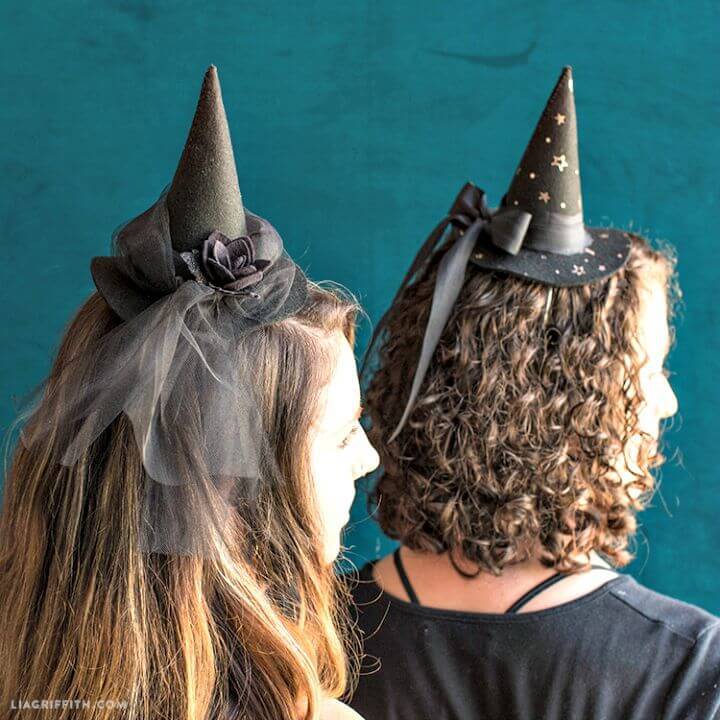
Craft a captivating Halloween look with our DIY witch hat fascinators! These miniature hats add a dash of spookiness without requiring a full costume. You can make a gorgeous headpiece that will make your All Hallow's Eve unforgettable in a few easy steps.
The materials you'll need include a low-temp hot glue gun, scissors, a cutting machine, a sewing needle, and an iron along with black felt, iron-on black glitter and rose gold foil, black ribbon, a headband, tulle, black thread, floral wire, a white fabric pencil or crayon, and a black marker.
After crafting your hat and decorating it with tulle and a mini felt rose, your Halloween accessory will be ready to steal the show! So, cast spells this Halloween and manifest your inner witch with our fascinating project. liagriffith
7. How to Make a Fascinator Hat

With this DIY guide, get a beautiful, handmade fascinator to accentuate your outfit for any special occasion. This unique hat, adorned with intricately placed feathers, mesmerizes with every movement. Despite its grandeur, the hat is minimalistic, as a base for striking feathers and other embellishments.
A few materials required for this project include sinamay fabric, hat wire, crimp wire, ribbon, and feathers. In a few steps, you can shape the fabric and wire, make a ribbon decoration, and secure the feathers in a bouquet arrangement.
Personalize your fascinator with other decorations like plastic flowers, netting, or sequins. This artistic venture lets you express your style while crafting an accessory perfect for any special occasion. stguitars
8. DIY Headband Fascinators for The Royal Wedding
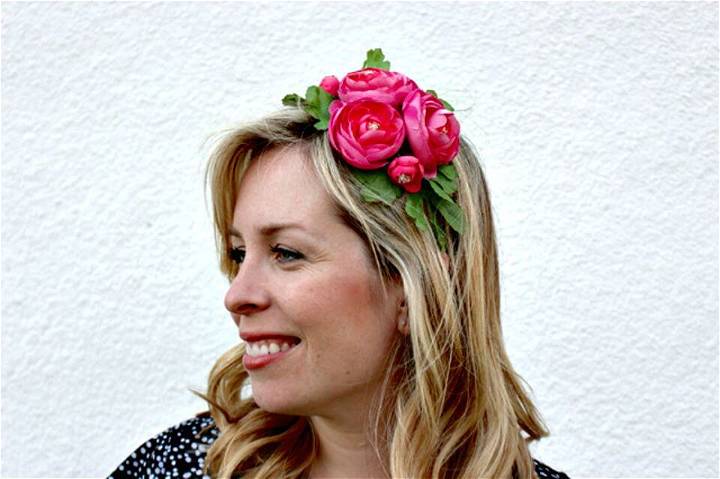
Elevate your style with these DIY headband fascinators, a perfect accessory for special occasions like the Royal Wedding, a Derby race, or themed parties. These elegant pieces, demonstrating versatility through distinct styles, are maked using inexpensive materials at a local dollar store. The materials range from headbands, faux flowers, feathers, tulle, and even a brooch for a vintage appeal.
This craft is easy to make and customizable according to your preferred colors and themes. A detailed guide illustrates assembling the headbands, offering tips like choosing a headband color that complements your hair or the decorative elements.
Whether you prefer the lush look of faux ranunculus, the bridal elegance of white peony with tulle, or the dramatic allure of black feathers with a brooch, these headband fascinators are a fun and fashionable project to undertake. lifeatcloverhill
9. Make Your Own Felt Fascinator
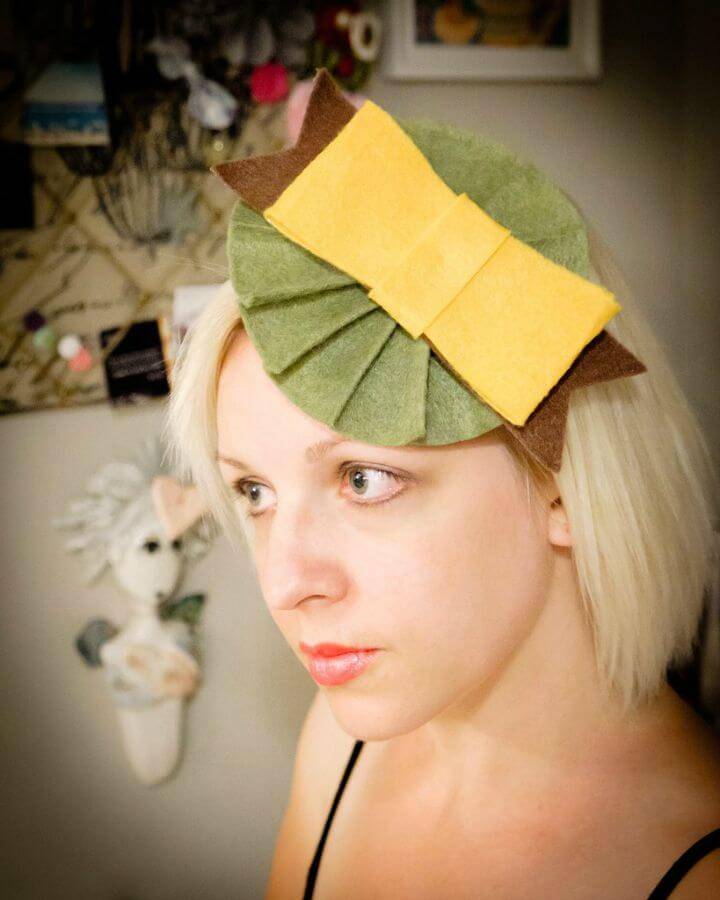
Bring a unique touch to your fashion ensemble with a homemade felt fascinator, an effortless project using the Cricut Explore. Channel your inner milliner by crafting this vibrant yellow DIY accessory, using felt, interfacing, and a headband as your main materials. The process begins by ironing the interfacing onto three pieces of felt and using the Cricut Explore to cut out intricate bow and donut designs expertly. Once the pieces are assembled and stitched together, your stylish fascinator can be attached to a headband, ready to debut. The Cricut Explore streamlines this creative process, making it an easy and enjoyable craft project, leaving you with a fabulous fascinator that will turn heads wherever you go. albiongould
10. Simple + Stylish DIY Fascinator Hat
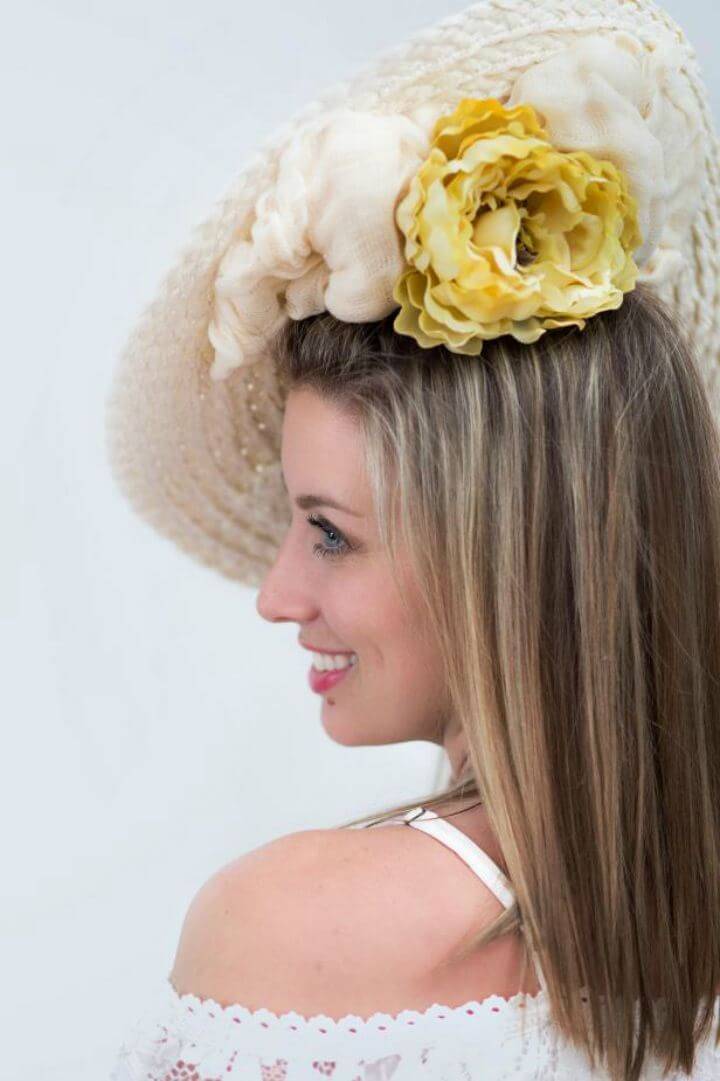
Have an elegant hair accessory inspired by the iconic look of Kate Middleton with this DIY tutorial. This fashionable piece, modeled after a Gina Foster design, is surprisingly simple and affordable, needing only a placemat and a few crafting items. Using cheesecloth to form a delicate bow, gluing it to the placemat.
Next, place a large faux yellow flower at the center of the bow for a vibrant touch. Attach a pair of duckbill hair clips using small pieces of felt to ensure a secure fit. This eye-catching accessory, costing less than $10, exudes a royal charm, making it a stunning statement for fancy soirees or garden parties. Craft your very own Kate Middleton-inspired hat today! hgtv
11. Easy DIY Rainbow Fascinator
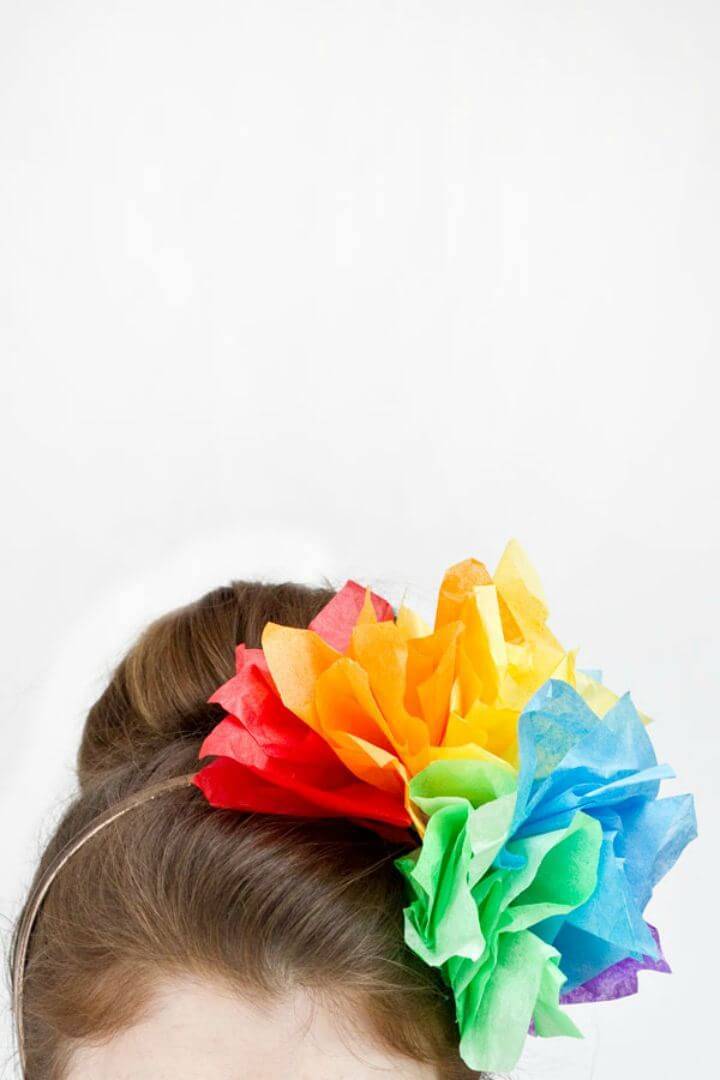
Bring the fun of St. Patrick's Day to life with this DIY rainbow fascinator project! An excellent addition to various festivities beyond March 17th, this colorful hair accessory can brighten tea parties, bridal showers, or any event requiring a touch of whimsy.
Crafted with an array of tissue paper colors, a headband, scissors, hot glue, and tape, this project allows for customization based on personal preference or event theme.
With simple steps involving the creation of color-coordinated tissue 'poofs,' adhering them to a headband, and fanning them out to reveal a vibrant rainbow, this task serves as an engaging, creative outlet. Enhance your celebratory gear with this rainbow fascinator, ensuring you're always party-ready! studiodiy
12. DIY Fascinators Hat
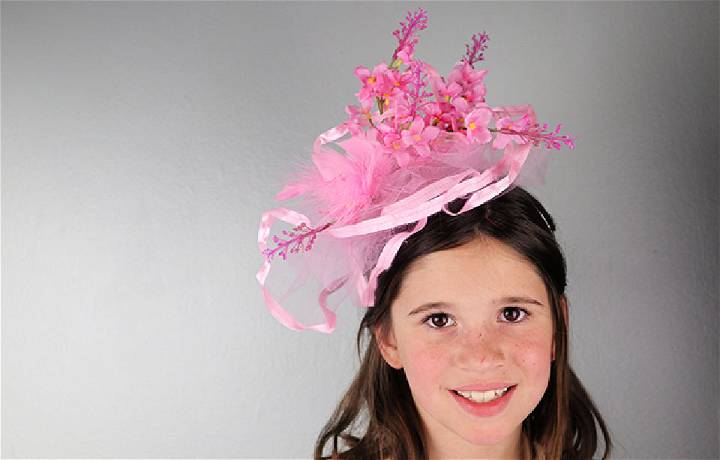
Experience a creative and entertaining way to celebrate special events like royal weddings, tea parties, or the Kentucky Derby. Make a fashionable, whimsical fascinator using easily accessible dollar store supplies. These DIY headpieces are built around simple headbands and paper plates, forming a stable base to customize according to your style.
This guide outlines how to utilize various items, from fake flowers and feather boas to loofahs and ballerina skirts, to add texture, height, and a unique twist to your fascinator.
Not only is this a great activity to add festive joy to your special occasions, but it also makes for a fun-filled craft night with friends. You'll certainly enjoy crafting these fashionable hats, which will spark conversations at your next event. clumsycrafter
13. Make A Fascinator Hat For Under $10
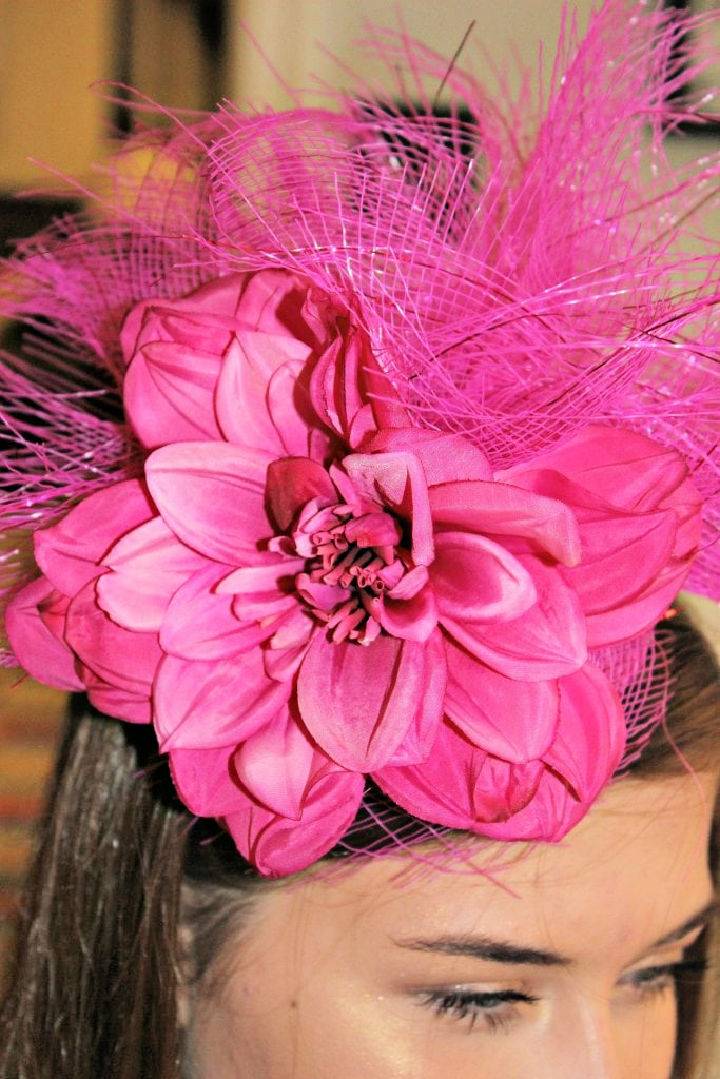
Immerse yourself in creativity and be the highlight of your celebration with this DIY fascinator hat. It is designed for those looking to bring a touch of royal flair to their next Kentucky Derby Party or Royal wedding celebration. This small, flamboyant hat or hairpiece typically commands high prices, but we will help you make a unique, budget-friendly version.
This guide emphasizes using common supplies like scrap fabric, small paper plates, tulle, deco-mesh, ribbon, and a large flower. The step-by-step instructions include crafting the hat base, adding hat lining, clipping mechanism, mesh, and embellishments.
This project ensures you have a bespoke accessory ready for any outfit for any occasion. Tap into your inner Duchess of Sussex, and make a fascinator that's bound to captivate! knockitoffkim
14. How to Make Whimsical Teacup Fascinators
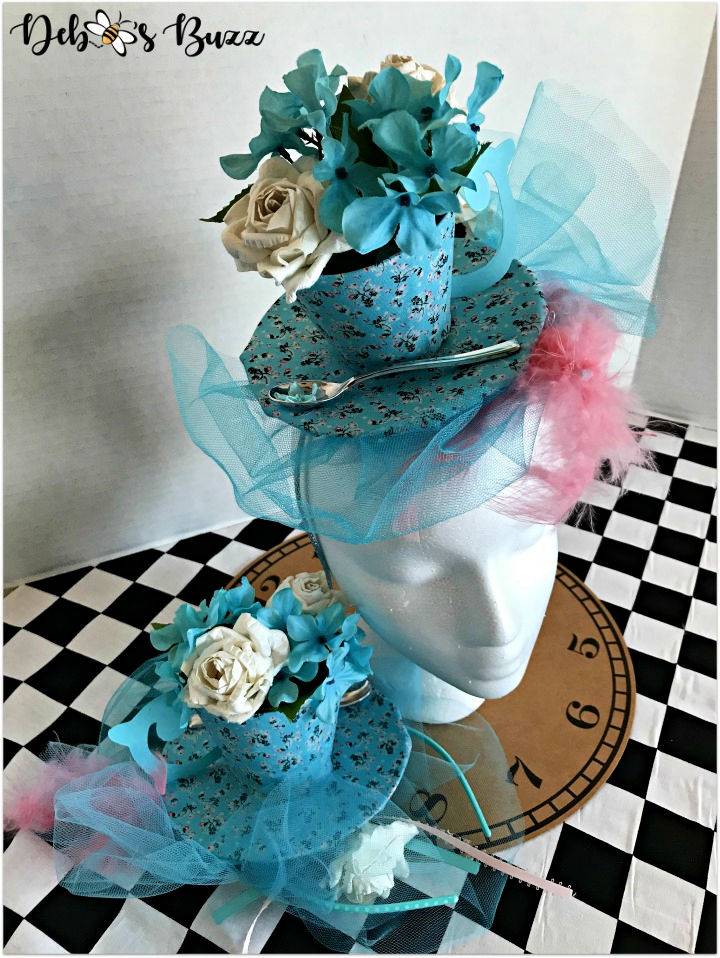
Embark on a delightful creative journey with a hands-on project, perfect for any tea-themed event or costume party. Discover how to craft whimsical DIY teacup fascinators, the talk of the town at any gathering. Not only are these pieces a fun craft project, but they also make unforgettable party favors or costume accessories.
Making these unique pieces has been perfected to ensure they are lightweight and balanced, allowing for comfortable wear throughout your event.
It's a rewarding and engaging journey, from picking your materials to designing and assembling your unique piece. The best part? No expertise is needed, just a zest for creativity and a love for unique, handcrafted items. Make your next party a hit with these delightful teacup fascinators. debbeesbuzz
15. Perfect Fascinator for the Derby
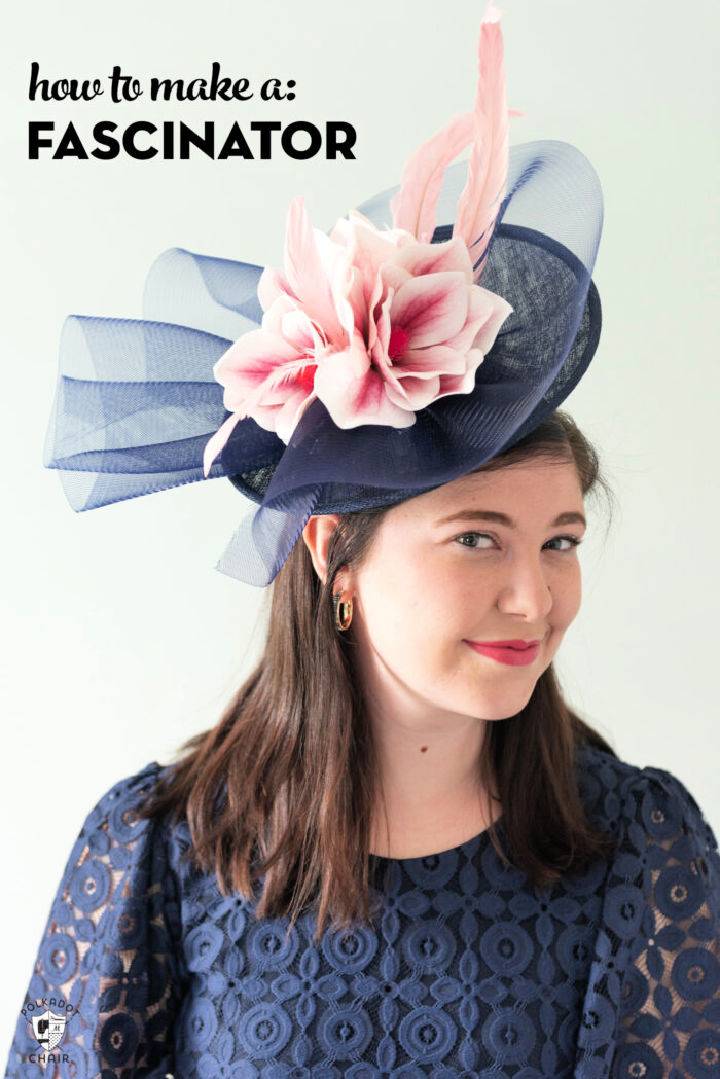
Get ready to add a dynamism of creativity to your Derby Day attire with this informative guide on crafting a handmade fascinator. Taking on this unique DIY project allows for individual style expression and offers a touch of whimsical elegance to your Kentucky Derby look.
This tutorial provides clear, step-by-step instructions on using supplies such as a headband or fascinator base, silk flowers, feathers, hot glue gun, wire cutters, and more to craft your bespoke piece.
This guide will even help you find the perfect positioning to ensure all-day comfort and stability. Let's make your next Derby event a fashion statement with a personal flair by crafting your fascinator. polkadotchair
Conclusion:
In conclusion, making your own DIY fascinators at home is a rewarding and creative endeavor that allows you to express your unique style and personality. With the right materials, some patience, and a dash of creativity, you can craft beautiful fascinators that are perfect for any occasion.
We've covered everything from selecting the right base, adding decorations, to troubleshooting common issues. Remember, customization and self-expression are key. So, grab your supplies, and let's make your bespoke fascinator stand out at your next event. With these 15 easy DIY fascinators to make at home, you're well on your way to adding a fabulous, homemade touch to your outfit.


