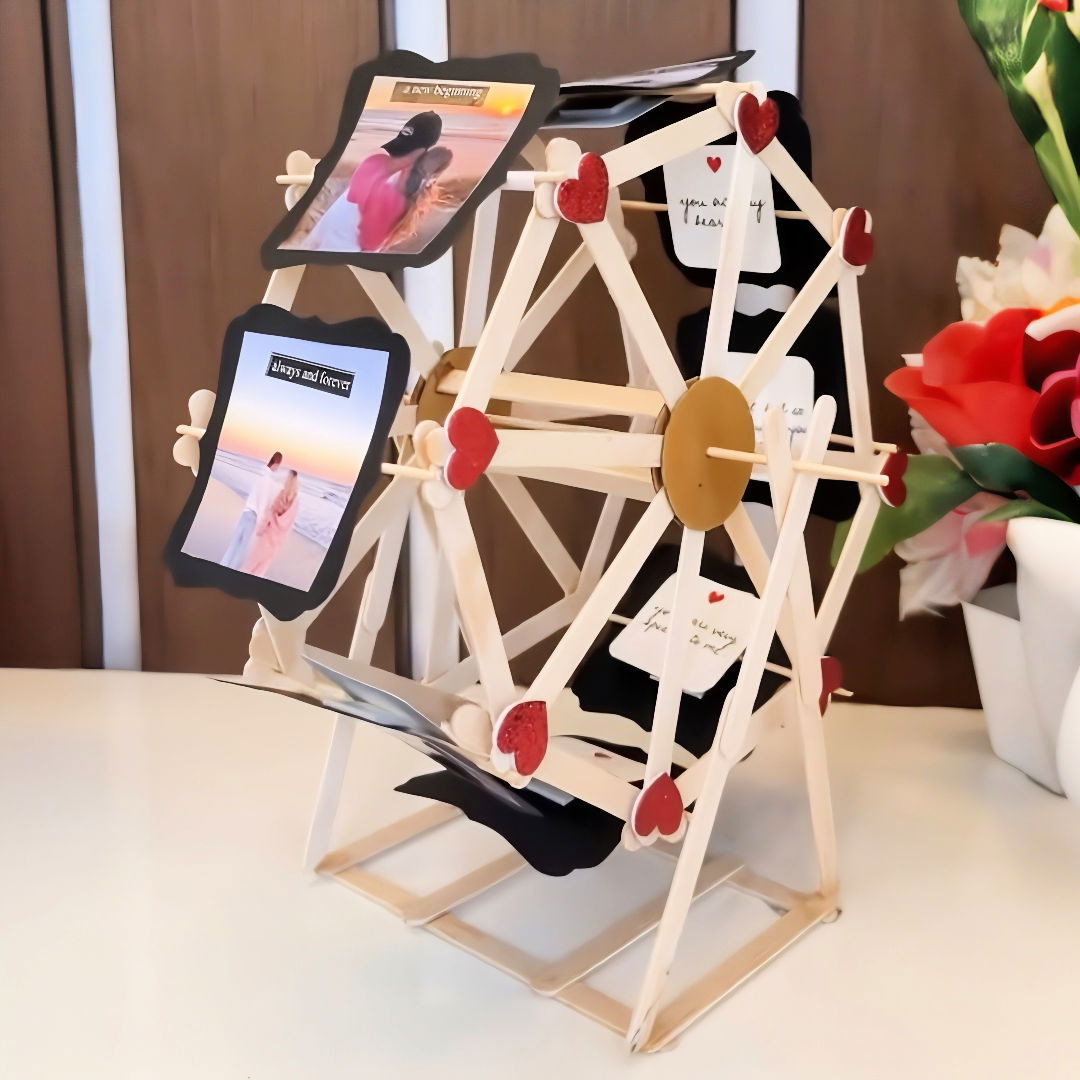
Building my own DIY Ferris Wheel was an exciting experience that taught me so much about patience and creativity. I started by gathering all the materials, including cardboard, glue, and some simple tools. It felt great to see everything come together step by step, watching the wheel take shape. It wasn't difficult, but it did require some careful attention to detail.
As I finished the project, I realized how rewarding it is to build something with my own hands. Now, I'm excited to share these steps with you, so you can try this fun and simple project too. I'm confident this guide will help you make a DIY Ferris Wheel with ease, and you'll feel just as proud when you're done.
With this easy guide, you'll quickly find yourself enjoying the process as much as I did. Let's get started!
Historical Context Of Ferris Wheel
The Ferris wheel, an iconic symbol of fun and leisure, has a rich history that dates back to the 19th century. The concept of a rotating wheel that carries passengers for entertainment is not new; it has roots in ancient civilizations where spinning platforms were used for amusement. However, the modern Ferris wheel, as we know it, was born from the ingenuity and engineering prowess of George Washington Gale Ferris Jr.
In 1893, the world was dazzled by the debut of the original Ferris wheel at the World's Columbian Exposition in Chicago. This marvel was America's answer to the Eiffel Tower and was designed to be an architectural and engineering exclamation point for the fair. Ferris, a 33-year-old engineer from Pittsburgh, envisioned a structure that would offer an aerial panorama previously unseen by most people.
The wheel measured 250 feet in diameter and carried 36 cars, each capable of holding up to 60 people. It was a colossal undertaking, with over 100,000 parts and an axle weighing 89,320 pounds—heavier than the Statue of Liberty. On its launch on June 21, 1893, the Ferris wheel became an instant success, offering more than 1.4 million visitors a breathtaking 20-minute ride.
Fun Facts About the Ferris Wheel:
- The original Ferris wheel was illuminated by over 3,000 lights, making it a beacon of innovation and excitement.
- The design and construction of the wheel involved a bet by Ferris, who invested $25,000 of his own money to prove its feasibility.
- The concept of pleasure wheels can be traced back to 17th-century Bulgaria, where passengers rode in chairs suspended from large wooden rings.
- The term “Ferris wheel” has become synonymous with this type of ride, though smaller wooden wheels existed before Ferris's invention, dating back to the 1500s.
The Ferris wheel symbolizes human creativity, engineering, and joy. It showcases imagination, innovation, and shared experiences, making it a cultural and technological landmark.
Materials Needed and Their Importance
- Cardboard: Acts as the main structure. You need two circles cut out of it.
- Popsicle Sticks: They serve as the spokes of the wheel and are essential for the frame and stand.
- Thin Wooden Stick: This will be the axis for the Ferris wheel, allowing it to spin.
- Fevi Stick (or any strong adhesive): Necessary for securing your pieces together.
- Colored Paper/Photos: To personalize your Ferris wheel with memories or designs.
- Double-Sided Tape: This is for attaching your pictures onto the wheel.
- Decoration Items (optional): Heart stickers, quotes, or anything that adds a personal touch.
Step by Step Instructions
Make a DIY Ferris wheel with our step-by-step guide. From crafting the base to adding photos, personalize your project with ease.
Crafting the Base
Learn how to craft the base, Cut and Prepare the cardboard, Construct the wheel's framework, and Join the rings for your next project.
Cutting and Preparing the Cardboard
I began by tracing out two even circles from my cardboard, using a large bowl to get the perfect shape. After cutting these out, a small hole was made in the center of each circle, which is crucial for inserting the axis later on.
Constructing the Wheel's Framework
Aligning eight popsicle sticks evenly around the edge of one cardboard circle proved to be a test of patience. To get them evenly spaced, I envisioned the circle as a clock and placed a stick at every hour mark. Taking another eight sticks, I followed QuinnsArte's tutorial to make an octagonal shape connecting these sticks. This is your wheel's skeleton – crucial for its stability. Applying the Fevi Stick generously, I attached the second cardboard circle on top, mirroring the process for another identical ring.
Joining the Rings
Introducing verticality, I attached four more sticks vertically on one ring and carefully aligned the second ring on top, securing them with a hearty amount of adhesive. Trust me, stability is key here, so don't skimp on the glue.
The Stand and Assembly
Discover how to make the perfect display with "the stand and assembly." tips on crafting the stand and bringing it all together seamlessly.
Crafting the Stand
Following the guide, constructing the stand was next – a relatively straightforward process of attaching sticks until a sturdy base was formed. The concentration here was on ensuring the stand was strong enough to hold the wheel without toppling over.
Bringing It All Together
The most exciting part was inserting the thin wooden stick through the center holes of the assembled rings, making an axis. Attaching the stand to this structure required a gentle touch and a bit of ingenuity to ensure it stood balanced.
Personalization: The Fun Part
Explore Personalization: The Fun Part - learn how to add photos and decorations to make your space uniquely yours.
Adding Photos and Decorations
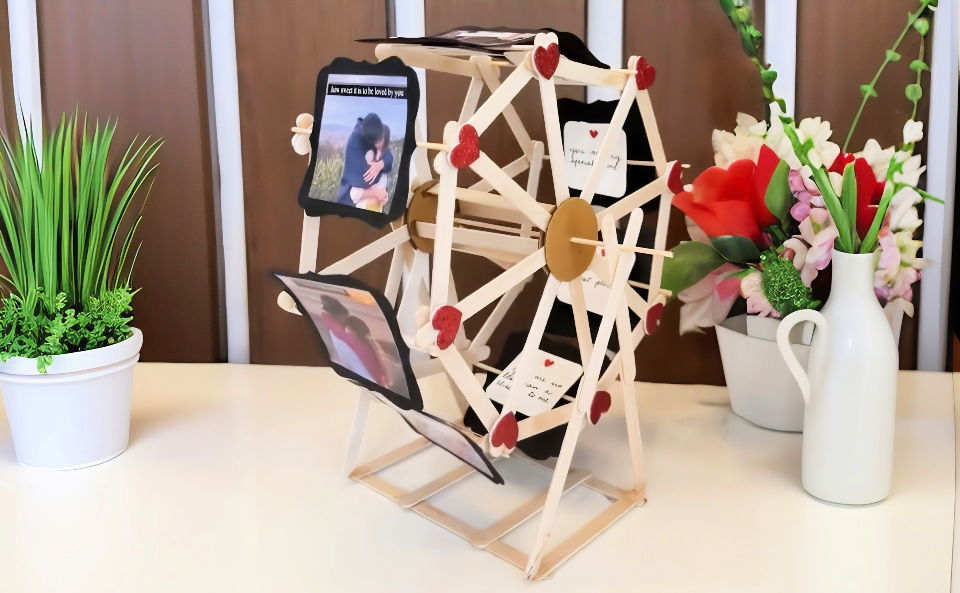
With the structure complete, I cut out frames from colored paper (choosing a vibrant teal to match my room's color scheme). I attached photos of fun memories and inspirational quotes, using double-sided tape to place them onto the Ferris wheel. Here, creativity knows no bounds – feel free to decorate with glitter, stickers, or anything that brings joy.
Final Touches
Adding some heart stickers and a few personal handwritten notes alongside the photos gave it the final touch of warmth. This customization aspect turned a simple craft project into a cherished keepsake.
Customization Ideas
Building a DIY Ferris wheel means crafting an experience. Customization makes it unique. Here are some ideas to inspire you:
- Choose a Theme: Decide on a theme that resonates with you. It could be anything from a classic carnival to your favorite holiday. Let this theme guide your color choices, patterns, and decorations.
- Color It Up: Paint your Ferris wheel in bright, bold colors, or opt for a more pastel palette. Use weather-resistant paint to ensure your creation can withstand the elements.
- Lighting: Add LED lights to your Ferris wheel for a dazzling effect. Consider solar-powered lights for an eco-friendly option. You can even program the lights to make patterns or spell out words.
- Seating Style: Customize the seats on your Ferris wheel. Cushion covers, or even seats of different shapes, can add comfort and style.
- Music: Incorporate a music system that plays tunes as the wheel turns. Choose music that fits your theme or allows riders to connect their own playlists.
- Interactive Elements: Install interactive elements like a photo booth or a game that can be played while enjoying the ride.
- Landscaping: Surround your Ferris wheel with beautiful landscaping. Flowers, shrubs, and even a small pond can enhance the overall aesthetic.
- Safety Signage: Design custom safety signs that match your Ferris wheel's theme while clearly conveying important safety information.
- Eco-Friendly Materials: Use recycled or sustainable materials where possible. This not only helps the environment but also adds a story to your project.
Customization means personalization. Choose what reflects your personality and brings joy with your Ferris wheel.
Advanced Modifications
After mastering the basics of a DIY Ferris wheel, you can try advanced modifications to make it more dynamic and fun. Here's how to enhance your project:
- Motorization: Adding a motor can bring your Ferris wheel to life. A simple DC motor can be used to power the rotation, providing a steady movement. You'll need a motor driver and a power source, such as batteries or a power adapter.
- Programmable Lighting: Incorporate programmable LED lights to make an eye-catching display. You can use a microcontroller like an Arduino to control the lights, making them change colors or flash in patterns.
- Remote Control: For an interactive experience, implement a remote control system. This allows you or others to control the speed and direction of the Ferris wheel's rotation.
- Sound Effects: Add a sound module that plays music or sound effects as the Ferris wheel turns. This can be synced with the lighting for a full sensory experience.
- Solar Power: Make your Ferris wheel eco-friendly by powering it with solar panels. This is a great way to learn about renewable energy and reduce the environmental impact of your project.
- Safety Sensors: Install sensors that detect if something is blocking the Ferris wheel or if a component is not functioning correctly. This adds an extra layer of safety to your creation.
- Digital Interface: Make a digital interface, such as a touchscreen or a web app, to control the Ferris wheel. This could include features like scheduling operation times or selecting different lighting and music options.
- Structural Enhancements: Use stronger materials or add support structures to increase the durability and capacity of your Ferris wheel. This might allow it to hold more weight or withstand harsher weather conditions.
Great power requires great responsibility. Make modifications safely and know your electrical components. Disconnect power before adjustments. Consult an expert if unsure.
Troubleshooting Common Issues
Building a DIY Ferris wheel can have some challenges. This guide helps troubleshoot common issues, ensuring safety and fun for all.
The Wheel Doesn't Turn Smoothly
- Possible Causes: Lack of lubrication, debris caught in the mechanism, or misaligned parts.
- Solutions: Apply a silicone-based lubricant to moving parts, clear any obstructions, and check that all components are properly aligned.
Unstable Structure
- Possible Causes: Loose bolts, uneven ground, or inadequate support.
- Solutions: Tighten all bolts, ensure the Ferris wheel is on a flat surface, and reinforce the structure with additional supports if necessary.
Electrical Components Not Working
- Possible Causes: Loose connections, blown fuses, or moisture damage.
- Solutions: Secure all connections, replace any blown fuses, and keep electrical components dry.
Squeaking Noises
- Possible Causes: Metal parts rubbing together or rusty joints.
- Solutions: Lubricate the joints and consider using rust-resistant materials or coatings.
Seats Are Not Secure
- Possible Causes: Worn-out fixtures or improper installation.
- Solutions: Replace any worn fixtures and double-check that seats are installed according to the manufacturer's instructions.
Lights Not Functioning
- Possible Causes: Burnt-out bulbs, wiring issues, or power supply problems.
- Solutions: Replace bulbs, inspect and repair wiring, and ensure a consistent power supply.
Track issues and fixes to keep your DIY Ferris wheel smooth. Regular maintenance ensures a lasting ride. Prioritize safety—get professional help if unsure.
FAQs About DIY Ferris Wheel
Discover all the answers to your FAQs about DIY ferris wheel. Learn essential tips, tricks, and insights for building your own ferris wheel at home!
Yes, you can add lights to your Ferris wheel to make it more attractive. Fairy string lights are a popular choice because they’re lightweight and easy to wrap around the structure. Make sure to use battery-operated lights or have a safe electrical setup if you’re using plug-in lights.
To ensure stability, make sure the base of your Ferris wheel is heavy and wide enough to support the structure. Use a sturdy material for the base and consider adding weight to the bottom to prevent tipping. Additionally, evenly distribute the seats and ensure the wheel is properly balanced.
Personalize your Ferris wheel by painting it in your favorite colors or adding patterns. You can also create themed decorations, such as holiday ornaments or characters. Adding quotes or stickers can also give it a unique touch. Be creative and make it reflect your personal style.
To make seats for your Ferris wheel, you can use small cardboard pieces or lightweight wood. Cut them into small rectangles for the seat base and attach them to the wheel's spokes using glue or small hinges. For added detail, you can make backrests and side panels. Remember to ensure that each seat is securely attached and balanced to prevent the wheel from tipping.
Safety is paramount when building a DIY Ferris wheel. Always use tools according to their instructions and wear protective gear like gloves and safety glasses when necessary. Keep your workspace clean and organized to avoid accidents. If you're using a motor or adding electrical components, be sure to follow electrical safety guidelines and consider consulting with an expert to review your setup.
Conclusion
I hope this guide inspires you to make your own DIY Ferris Wheel with confidence. Taking the time to build something yourself brings a sense of accomplishment that's hard to beat. If I could do it, so can you. Start your project today, and you'll see how fun and satisfying it can be!


