Making a DIY fire starter is a simple and effective way to ensure you can easily light a fire for camping, grilling, or emergencies. Using household items, anyone can make a homemade fire starter that ignites quickly and burns steadily. This method not only saves you time but also gives you a sense of accomplishment. With just a few materials, you'll be ready for any situation that requires fire.
Making a homemade fire starter is not only enjoyable but also practical. It helps you reduce waste by using items you may already have at home. Plus, understanding the steps involved in making your own fire starter empowers you for future outdoor adventures. Ready to learn how to make one? Let's explore the materials and steps needed for your DIY fire starter project.
Materials Needed and Why
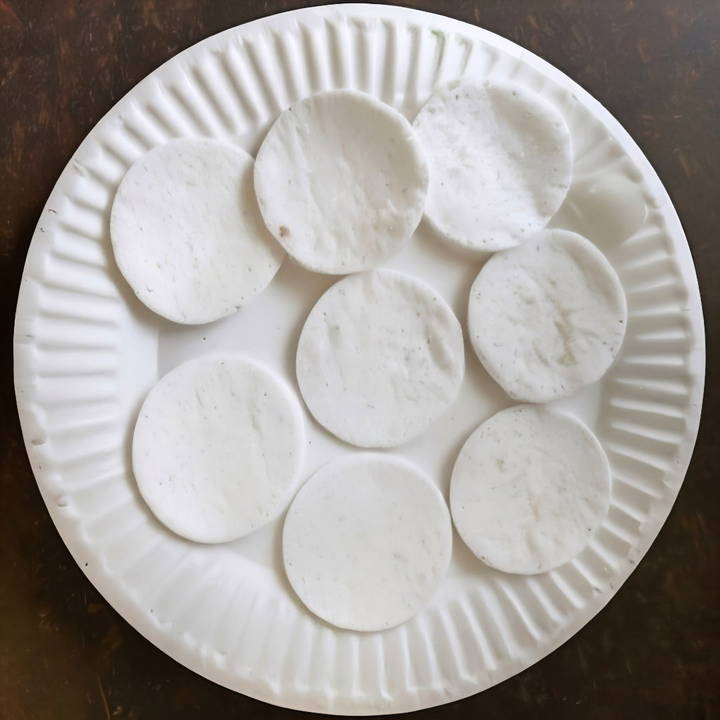
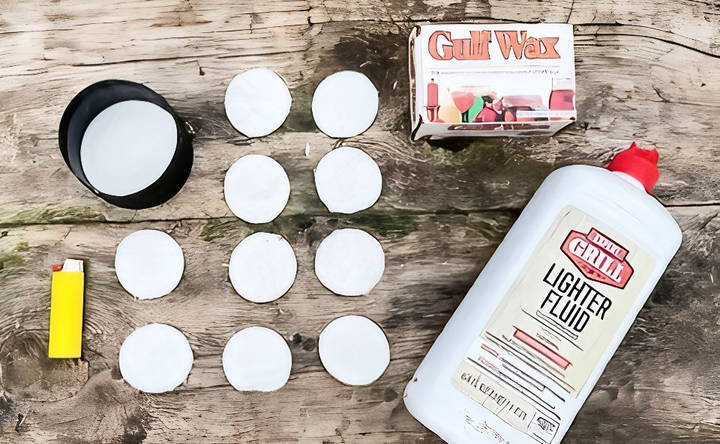
- Cotton Rounds: Found in the makeup aisle of your local dollar store, these serve as the base of our fire starter. They're cheap and highly absorbent.
- Paraffin Wax: Available at most grocery stores. Paraffin wax acts as a burning agent that prolongs the life of your fire starter, ensuring a sustained burn.
- Lighter Fluid: Easily available in the grilling section of stores. This will help your fire starter catch fire quickly.
- Old Tin Can: To melt the wax. It's a great way to repurpose those used cans.
- Aluminum Foil: For setting the discs to dry without sticking.
- Fork: To dip and retrieve the cotton rounds from the wax mixture.
Step by Step Instructions
Learn how to make your own fire starter with our easy step-by-step guide. Perfect for camping or emergencies. DIY fire starter instructions inside!
Melting the Wax
First, I get a campfire going, although a kitchen stove works just fine when preparing these at home. I take my old tin can (cleaning is optional as it's just melting wax) and cut about half a brick of paraffin wax into it. I prefer using a campfire because it adds an element of fun, but safety is key, so keep an eye out to prevent the wax from catching fire. If it gets too hot, cover the can with something metal to smother the flames.
Mixing in the Lighter Fluid
After the wax has melted and cooled slightly, I pour in about an equal part of lighter fluid. It's not an exact science, so eyeballing it works fine. The aim is to have a mix where the paraffin wax isn't completely dominating. This balance ensures a longer burn without sacrificing the ease of ignition.
Preparing the Cotton Rounds
This part is really simple but satisfying. I dip the cotton rounds into the wax and lighter fluid mixture, soaking each one thoroughly. Using a fork to flip and retrieve them, I then lay them out on aluminum foil to dry. It's amazing how quickly they set, becoming your very own DIY fire starters in about 15 to 20 minutes.
Testing Out the Fire Starter
The real proof of its effectiveness comes with testing. I take one of the now-dried fire starters and expose its fibers by tearing it open slightly. This step is crucial as it mimics the "small to large" material principle crucial for building a fire. Upon striking a match or using a flint, it lights up impressively fast, thanks to the lighter fluid, while the paraffin wax ensures it burns long enough to get your kindling and eventually larger pieces to catch.
Tips and Tricks for Success
- Adjusting the Mixture: If your fire starter feels too soft or won't light easily, adjust the wax-to-lighter fluid ratio. More wax strengthens it, whereas more lighter fluid makes it easier to light.
- Color Coding: If you're making these in bulk or for different conditions (snow vs night), adding a bit of candle dye can help identify them quickly.
- Storage and Portability: Store them in a waterproof container to ensure they're ready when you need them. They're lightweight, so carrying a few doesn't add noticeable weight to your pack.
Troubleshooting Common Issues
When it comes to starting fires, whether for warmth, cooking, or emergency signaling, encountering issues is not uncommon. Here's a straightforward guide to troubleshooting some of the most frequent problems you might face with fire starters.
Fire Won't Start
- Cause: Wet tinder or insufficient airflow.
- Solution: Ensure your tinder is dry and loosely packed to allow oxygen to circulate. If necessary, shield your fire-starting area from wind or moisture.
Fire Starts Then Dies Quickly
- Cause: Lack of sustainable fuel or too much wind.
- Solution: Gradually add larger pieces of kindling and fuel once the tinder catches fire. Block wind with a barrier or find a more sheltered location.
Sparks but No Flame
- Cause: The tinder may not be catching the sparks, or the sparks are too weak.
- Solution: Use finer, more combustible materials for tinder, like dryer lint or cotton balls dipped in petroleum jelly. Check your fire starter for wear and replace if necessary.
Smoke but No Fire
- Cause: Too much moisture in your fuel or an imbalance between tinder, kindling, and fuel.
- Solution: Make sure all materials are dry. Start with small tinder, add kindling, and then gradually increase to larger pieces of wood.
Fire Starter Breaks or Malfunctions
- Cause: Wear and tear or a defective product.
- Solution: Regularly inspect your fire starter before trips and carry a backup method, such as waterproof matches or a second lighter.
Understand these issues and solutions to improve fire-starting skills. Ensure reliable heat and light outdoors. Always practice fire safety and fully extinguish fires before leaving.
Safety First
Prioritize safety when making fire starters. For camping, emergency kits, or backyard fires, follow these safety guidelines for a good experience:
Choose a Safe Location:
- Set up your fire-making area away from flammable materials, dry grass, and overhanging branches.
- Use a designated fire pit or make a cleared space with rocks or bricks to contain the fire.
Gather Your Materials Safely:
- Collect dry, non-flammable materials for tinder, kindling, and fuel.
- Avoid using toxic or chemically treated materials that can release harmful fumes when burned.
Keep a Fire Extinguisher Handy:
- Have a fire extinguisher nearby, especially if you're indoors or in a confined space.
- Water buckets or sand can also help smother flames if needed.
Tinder Preparation:
- Use easily ignitable materials like cotton balls, shredded paper, or dry leaves as tinder.
- Keep tinder dry and separate from other fire-starting materials.
Fire Starter Options:
- Choose reliable fire starters such as waterproof matches, lighters, or ferro rods.
- Test your fire starter before relying on it in an emergency.
Ventilation and Airflow:
- Ensure proper airflow to sustain the fire.
- Avoid blocking air vents or making a fire in an enclosed space without ventilation.
Lighting the Fire:
- Light the tinder from the bottom, gradually adding small kindling.
- Once the fire is established, add larger fuel logs.
Supervise the Fire:
- Never leave a fire unattended.
- Keep a watchful eye, especially if children or pets are nearby.
Extinguish the Fire Safely:
- When you're done, use water or sand to fully extinguish the fire.
- Stir the ashes to ensure no hidden embers remain.
Leave No Trace:
- Clean up your fire site, removing all debris and ensuring it's cool to the touch.
- Respect the environment by not leaving any trace of your fire.
Fire can be both a valuable tool and a potential hazard. By following safety precautions, you can enjoy the warmth and comfort of a well-managed fire while minimizing risks to yourself and the environment.
FAQs About DIY Fire Starters
Discover FAQs about DIY fire starters! Learn key tips, materials, and step-by-step guides to make your own fire starters at home easily.
DIY fire starters are simple tools designed to ignite fires more easily. They come in handy for campfires, fireplaces, or emergency situations. Here's why you should consider using them:
Ease of Ignition: DIY fire starters help you start a fire quickly, even with wet wood or in rainy conditions.
Cost-Effective: Making your own fire starters is budget-friendly compared to store-bought options.
Resourceful: You can make them from common household items, reducing waste and repurposing materials.
All DIY fire starters share two essential components:
Wick: The wick ignites the fire. Common wick materials include cotton balls, dryer lint, torn paper, or sawdust.
Fuel: Fuel sources include Vaseline, wax, or other petroleum-based products. These fuels sustain the flame once ignited.
Here are some easy methods:
Dryer Lint Fire Starter: Collect dryer lint (the fuzzy fibers from your lint trap) and stuff it into a cardboard toilet paper roll. Leave enough room for air circulation. Use two or three lint-stuffed rolls to start your fire.
Waxed Pine Cone Fire Starters: Dip pine cones in melted beeswax. Beeswax-coated pine cones are both attractive and effective for starting wood fires. You can also add Epsom salt or essential oils for variations.
Vaseline and wax are excellent choices. Vaseline-based fire starters are easy to make and have a long burn time. Rub Vaseline onto cotton balls or burlap for mess-free options. Egg carton fire starters filled with cotton, sawdust, or dryer lint and coated in melted Vaseline also work well.
Absolutely! Dryer lint consists of cotton and other fibers from your laundry. There are no toxic chemicals to worry about. Just ensure you don't pack the lint too tightly; leave room for proper airflow when making your fire starters.
Conclusion
In conclusion, making your own DIY fire starter is a simple and effective way to enhance your outdoor experiences. This handy project not only saves money but also ensures you're always prepared for your next adventure. Enjoy the satisfaction of crafting something useful!


