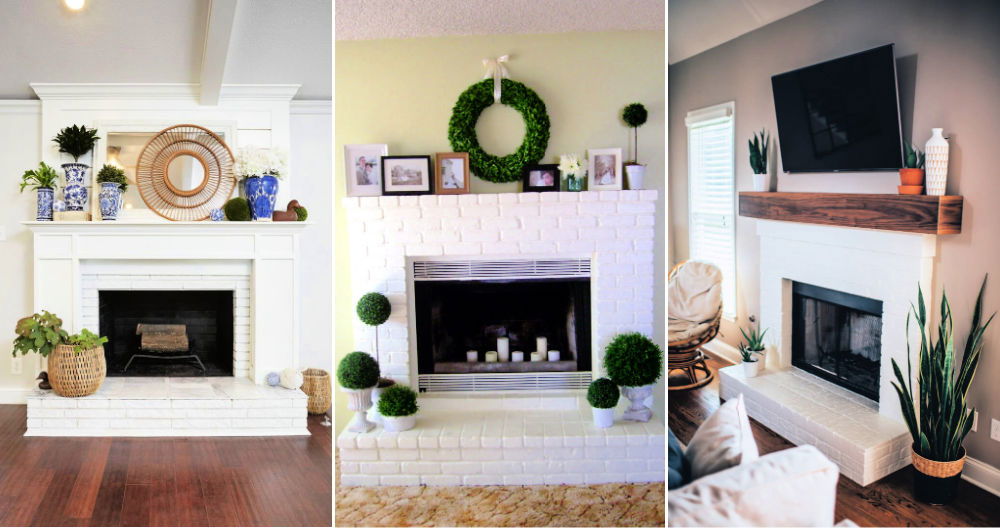
Building a DIY fireplace mantel is a rewarding project that not only enhances the aesthetics of your living space but also adds a warm, inviting ambiance. This guide is designed to assist in building a fireplace surround with ease and confidence. With the right tools and materials, anyone can embark on this home improvement venture, transforming a plain fireplace into the focal point of any room.
This step-by-step guide offers comprehensive instructions, from preparing the boards to the installation process, ensuring a smooth and successful build. Additionally, we cover essential safety precautions to protect yourself during the project. Whether it's selecting the perfect material in the customization ideas section or troubleshooting common issues, this guide is here to help.
So, let's get started on building a beautiful and functional DIY fireplace mantel that you'll be proud to showcase in your home.
Tools and Materials Needed:
- Rough sawn boards
- Planer
- Table saw (set at 45 degrees for bevel cuts)
- Miter saw (set at 45 degrees for miter cuts)
- Pocket hole jig
- Clamps
- Speed square
- Right angle adapter
- Glue brush
- Brass to secure glue
- Orbital sander with 220-grit sandpaper
- Screwdriver
- Paintbrush (for removing dust and applying stain)
- Stain and white bond polyurethane
- Screws (including trim screws and cabinet screws)
Step by Step Instructions:
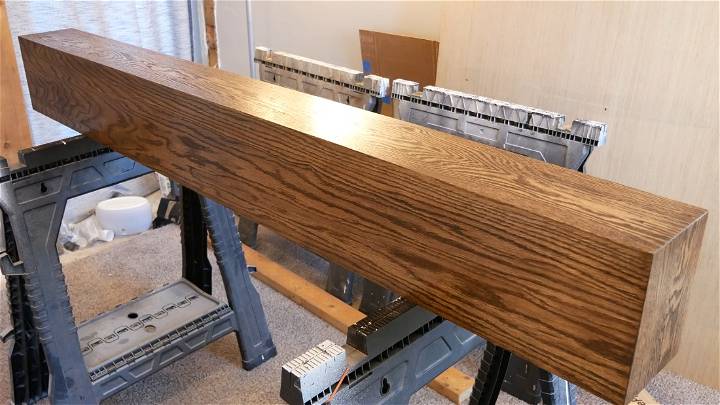
Learn how to make a wood beam DIY fireplace mantel with this step-by-step guide below:
Preparing the Boards
- Rough Cutting: Start by cutting the board slightly larger than the final dimensions you need for the beam. This makes them easier to manage.
- Planing: Pass the boards through a planer until each is three-quarters of an inch thick, ensuring they are even and smooth.
Cutting and Assembling
- Bevel and Miter Edges: Set your table saw to 45 degrees and rip a beveled cut down the front edge of the top and bottom pieces. Likewise, set the miter saw to 45 degrees for the ends of the boards.
- Building the Frame: Cut four rectangular pieces equal to the width of the inside of the front board and three quarters inch shorter than the length of the inside of the top and bottom pieces.
- Pocket Holes: Use a pocket hole jig to drill holes in the frame pieces, then clamp and screw them to the inside of the bottom board of the beam.
Fine-Tuning and Fixing
- Gluing Blocks: Cut small blocks from scraps and glue them in line with the beveled edge on both the top and bottom of the beam. These blocks add extra support.
- Attaching the Front: Test fit the front piece before adding glue to the beveled edges and blocks. Clamp it firmly and screw the frame pieces to the front.
Finishing Touches
- Sanding: Sand all flat surfaces with 220-grit sandpaper to smooth out any roughness.
- Staining: Apply a coat of stain in the direction of the grain. After a few minutes, wipe down to remove any excess.
- Sealing: After the stain dries, apply a coat of white bond polyurethane—sand lightly between coats. Repeat for a total of six coats for a durable finish.
Installation
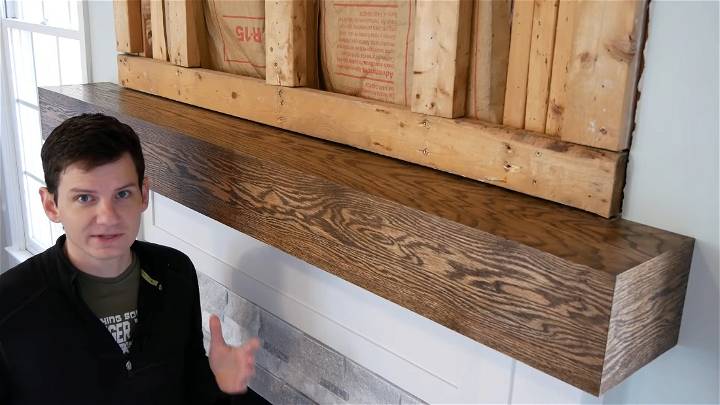
- French Cleat Method: For mounting, use a French cleat system. Attach one half to the wall and the other to the beam for a secure yet easy-to-remove mantel.
- Securing the Mantel: Once the cleat is in place, set the finished beam on top, ensuring equal overhang on each end. Screw in from underneath to secure the beam firmly.
Video Tutorial:
For a more visual step-by-step guide, watch this YouTube video on making a DIY wood beam fireplace mantel.
It pairs well with this written guide, enriching your understanding through visual representation and making complex steps easier to follow.
With patience and attention to detail, you can build a stunning wood beam mantel that adds a touch of rustic elegance to your home. Take your time to measure, cut, and finish each piece carefully for the best results, and enjoy the satisfaction of a job well done.
Safety Precautions
When working on a DIY fireplace mantel, safety should be your top priority. Here are some safety tips to keep in mind:
Personal Protective Equipment
Always wear appropriate personal protective equipment (PPE). This includes:
- Safety glasses: To protect your eyes from dust and debris.
- Work gloves: To protect your hands from splinters and sharp tools.
- Dust mask: To prevent inhalation of sawdust and other particles.
Safe Tool Use
Use your tools safely and correctly. Remember:
- Power tools: Always disconnect power tools when changing blades or bits.
- Sharp tools: Always cut away from your body to avoid injury.
- Ladders: Ensure ladders are stable before climbing on them.
Work Area Safety
Keep your work area clean and well-lit. A cluttered or dark area can lead to accidents.
Fire Safety
Since you're working with wood, be mindful of fire safety. Keep a fire extinguisher nearby and avoid open flames.
Safety first! By following these precautions, you can ensure a safe and successful DIY mantel project.
Estimated Time and Cost
When planning a DIY mantel project, it's important to have a clear understanding of the estimated time and cost involved. This will help you plan your project effectively and avoid any unexpected surprises.
Time Estimate
The time it takes to complete a DIY mantel can vary greatly depending on your skill level, the complexity of the design, and the tools you have available. However, here's a general estimate:
- Planning and Designing: This includes measuring your space, choosing a design, and gathering your materials. This could take anywhere from 2 to 4 hours.
- Cutting and Assembling: The bulk of the work will be in cutting the wood to the correct dimensions and assembling the pieces. This could take approximately 6 to 8 hours.
- Finishing: This includes sanding, painting or staining, and sealing the wood. This could take about 4 to 6 hours.
In total, you should expect to spend around 12 to 18 hours on your DIY mantel project. Remember, it's better to take your time and do the job right than to rush and make mistakes.
Cost Estimate
The cost of a DIY mantel can also vary depending on the materials you choose and whether you already have the necessary tools. Here's a rough breakdown:
- Wood: Depending on the type and quality of wood you choose, this could cost anywhere from $50 to $200.
- Hardware and Supplies: This includes nails, screws, paint or stain, and other supplies. Expect to spend around $20 to $50 on these items.
- Tools: If you don't already have the necessary tools, you may need to purchase or rent them. This could add an additional $50 to $100 to your costs.
In total, a DIY mantel project could cost anywhere from $120 to $350. Keep in mind that these are just estimates, and the actual cost could be higher or lower depending on various factors.
A well-planned project is a successful project. Good luck with your DIY mantel!
Customization Ideas
One of the best parts about a DIY mantel is the ability to customize it to your personal style and home decor. Here are some ideas to inspire you:
Choose Your Material
The material you choose for your mantel can greatly influence its look and feel. Wood is a classic choice, but you could also consider materials like stone, tile, or metal for a unique twist.
Paint or Stain
Painting or staining your mantel can dramatically change its appearance. You could choose a color that matches your room's decor, or opt for a contrasting color to make your mantel a focal point.
Add Decorative Elements
Consider adding decorative elements to your mantel. This could include carvings, moldings, or even hardware like decorative brackets or nails.
Consider the Season
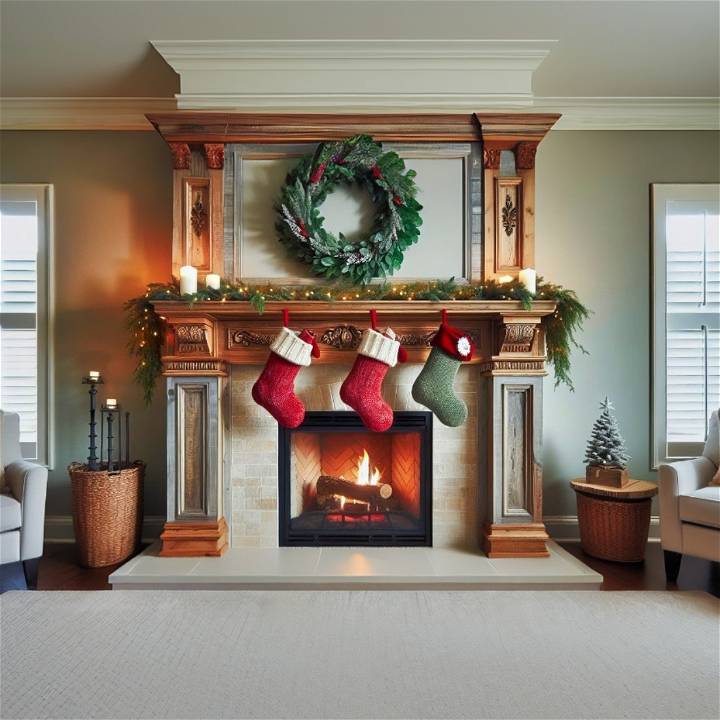
Your mantel can be a great place to display seasonal decorations. For example, you could decorate your mantel with pumpkins and leaves in the fall, or ornaments and garlands during the holiday season.
Personal Touches
Don't forget to add your own personal touches. This could be anything from family photos to a piece of artwork that you love.
The goal is to build a mantel that reflects your personal style and makes your space feel like home.
Troubleshooting Guide
When working on a DIY mantel, you might encounter some common issues. Here's a guide to help you troubleshoot these problems:
Problem: Wood Splitting
Solution: If the wood splits while you're working on it, it could be because you're using screws or nails that are too large. Try using smaller ones. Also, drilling pilot holes before inserting screws can help prevent splitting.
Problem: Uneven Surfaces
Solution: If your mantel isn't level, it could be because the wall isn't straight or the mantel itself is warped. Use a level to check both the wall and the mantel. If the wall is the issue, you might need to use shims to level the mantel. If the mantel is warped, you may need to plane or sand it to make it level.
Problem: Stain Not Absorbing Evenly
Solution: If the stain isn't absorbing evenly into the wood, it could be because the wood wasn't properly prepped before staining. Make sure to sand the wood evenly before applying the stain, and consider using a pre-stain wood conditioner.
Problem: Mantel Not Secure
Solution: If your mantel doesn't feel secure, it could be because it's not properly anchored to the wall. Make sure you're using the right type of hardware for your wall (drywall anchors for drywall, masonry anchors for brick, etc.), and that the mantel is attached at the studs.
Every problem has a solution. Don't get discouraged if things don't go perfectly the first time. With a little patience and perseverance, you'll have a beautiful DIY mantel in no time.
Maintenance Tips
Maintaining your DIY mantel is crucial to ensure its longevity and keep it looking its best. Here are some tips to help you care for your mantel:
Regular Dusting
Dust your mantel regularly. Dust can build up and dull the finish of your mantel. Use a soft, dry cloth to gently remove dust and debris.
Avoid Harsh Chemicals
Avoid using harsh chemicals on your mantel. They can strip the finish and damage the wood. Instead, use a mild soap and water for cleaning.
Protect from Heat and Moisture
Protect your mantel from excessive heat and moisture. Too much heat can cause the wood to dry out and crack, while too much moisture can lead to warping or rotting.
Regular Inspection
Inspect your mantel regularly for any signs of damage or wear. This includes checking for any loose parts, cracks, or changes in the finish.
Touch Up Paint or Stain
If your mantel is painted or stained, you may need to touch up the paint or stain occasionally to keep it looking fresh and new.
A well-maintained mantel not only looks better, but it also lasts longer.
FAQs About DIY Fireplace Mantel
Discover the answers to your DIY mantel project questions with our comprehensive FAQ guide. Get expert tips and advice for building the perfect mantel.
What type of wood is best for a mantel?
Hardwoods like oak, maple, or cherry are often used for mantels due to their durability and attractive grain patterns. However, the best type of wood for your mantel really depends on your personal preference and the style of your home.
Can I use reclaimed wood for my mantel?
Yes, reclaimed wood can be a great choice for a mantel. It can add a rustic charm and unique character to your fireplace. Just make sure the wood is properly treated and sealed to prevent any potential issues with pests or moisture.
How thick should a mantel be?
The thickness of your mantel can vary depending on your design preference, but a common thickness is around 2 to 4 inches. However, make sure to check local building codes as they may have specific requirements.
How high should a mantel be from the fireplace?
The height of a mantel from the fireplace can depend on local building codes and the type of fireplace you have. However, a common guideline is to have at least 12 inches of clearance between the top of the fireplace opening and the bottom of the mantel.
Can I paint or stain my mantel?
Yes, you can either paint or stain your mantel. Paint can give your mantel a clean, modern look, while stain can highlight the natural beauty of the wood grain.
How do I attach my mantel to the wall?
There are several methods to attach a mantel to the wall, but one common method is to use a French cleat. This involves attaching one piece of the cleat to the wall and the other piece to the mantel, then hanging the mantel on the wall cleat.
How do I care for my wooden mantel?
Regular dusting and avoiding harsh chemicals can help keep your wooden mantel looking its best. If your mantel is sealed, you can also use a damp cloth for cleaning.
Can I decorate my mantel?
Absolutely! Your mantel is a great place to display decorative items. Just be sure to keep flammable items at a safe distance from the fireplace.
What if my mantel gets damaged?
Minor damage like scratches or dents can often be repaired with a bit of sanding and touch-up paint or stain. For more serious damage, you may need to consult a professional.
Can I build a mantel if I'm a beginner at DIY?
Yes, building a mantel can be a great project for beginners. Just make sure to start with a simple design, follow all safety precautions, and don't hesitate to ask for help if you need it.
Every DIY project is a learning experience. Enjoy the process, and be proud of what you build!
Conclusion:
In conclusion, crafting your DIY fireplace mantel presents an opportunity to add a personal touch to your living space while engaging in a rewarding project. From selecting the right tools and materials to following thorough step-by-step instructions, each aspect of building your fireplace surround is crucial for achieving the aesthetic appeal and functionality you desire.
As you navigate through customization options and adhere to safety precautions, remember to consider maintenance practices to ensure the longevity of your mantel. With this comprehensive guide, building a stunning DIY fireplace mantel is within reach, bringing warmth and character to your home.


