Last winter, I noticed my living room felt incomplete without a fireplace screen. Simple solutions can enhance home safety and add charm. So, I decided to build a DIY fireplace screen. I was not very experienced but determined to learn and improve.
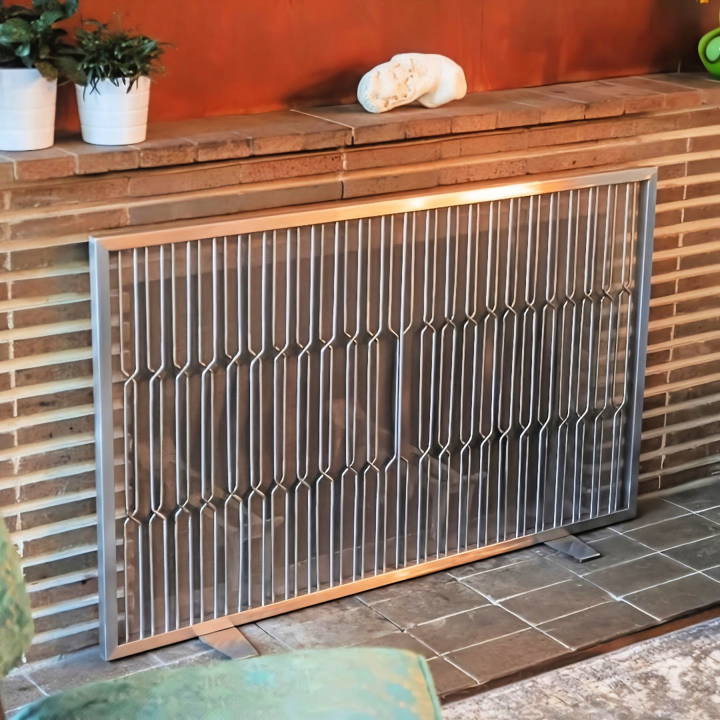
I gathered all materials: wood, nails, hinges, and paint. Step-by-step, I built the frame and attached the mesh. It was easier than I thought. Now, my fireplace looks great, and it's much safer.
I'm helping with this guide below to inspire you to try it, too—it may help you, just like it helped me!
Materials Needed and Why
- Stainless Steel Tubes: The base material for the frame and rods. Stainless steel provides durability and resistance to rust and corrosion, perfect for the heat exposure near a fireplace.
- Abrasive Cut-off Saw and Disc Sander: For accurately cutting and sanding the stainless steel tubes. Precision is key in a project involving metalwork.
- Drill Press: To build holes for fitting the rods within the frame, ensuring a secure and consistent assembly.
- Welding Equipment: Essential for joining all parts together securely.
- Sandpaper and Buffer: For smoothing and finishing the steel surface, giving it a clean, polished look.
- Oxygen Acetylene Torch: For bending the rods accurately according to the desired design.
- Epoxy: For attaching the screen to the frame, offering a simpler alternative to welding delicate materials.
- Safety Gear: Including gloves, goggles, and welding helmets for protection.
Step by Step Instructions
Learn how to make your own fireplace screen with our step-by-step DIY instructions. From cutting to welding, we cover every step to help you build it.
Step 1: Cutting and Sanding
The project began with cutting the stainless steel tubes for the frame. Due to the limitations of our equipment, we cut the pieces a bit oversized and then used a disc sander for precise adjustment to 45-degree angles. Consistency in length was more important than specific measurements.
Step 2: Drilling
After prepping the frame, I marked and drilled holes for the rods. This process was made easier using a fence on the drill press, ensuring accuracy and consistency.
Step 3: Grinding and Polishing
Before welding, grinding the surfaces of the pieces ensured that the final product would have a consistent and clean look. This step was both time-consuming and critical for the aesthetic appeal of the screen.
Adding the Rods
Adding the rods: expert guide on cutting, chamfering, bending, and attaching rods to the frame. Perfect for DIY enthusiasts and professionals alike!
Step 1: Cutting and Chamfering
Cutting the rods to consistent lengths was crucial for the integrity of the pattern we were aiming for. After cutting, I chamfered the edges to prep them for welding, which also contributed to the final appearance.
Step 2: Bending
Using a jig and an oxygen-acetylene torch, I bent each rod to match our design. This required careful heating and consistent application of force to ensure that each bend matched the others perfectly.
Step 3: Attaching to the Frame
With all rods bent and prepped, attaching them to the frame involved aligning them properly and then welding. To keep the rods stable during this process, we used tie wraps and spacer blocks.
Building the Screen
The screen itself was another challenge. After the initial plan to weld the screen directly to the frame failed due to the delicacy of the screen material, we opted to use epoxy to attach it securely. This alternative method proved effective and allowed for a tight application without damaging the screen.
Finishing Touches
Perfect the finishing touches: expert welding of feet and precise sanding and polishing for a flawless finish.
Welding the Feet
Designing and attaching the feet was one of the final steps. I wanted to ensure stability and durability, so I welded extra support to each foot before attaching them to the frame.
Sanding and Polishing
The last few hours of the project involved meticulous sanding and polishing, especially at the welded joints and where the screen was attached to the frame. This effort was essential in achieving a uniform, brushed look that elevated the entire piece.
Design Customization Ideas
When it comes to making a DIY fireplace screen, the design possibilities are as vast as your imagination. Here are some ideas to inspire a personalized touch to your fireplace screen:
- Choose Your Style: First, consider the overall style of your room. Is it modern, rustic, traditional, or eclectic? Select a design that complements your space. For a modern look, think of clean lines and minimalistic patterns. For a rustic charm, use natural materials like stone or wood.
- Play with Patterns: Patterns can add depth and interest to your fireplace screen. Geometric shapes are versatile and suit many decors. Floral or organic patterns can soften the look and feel of the room. If you're feeling bold, mix and match patterns for a unique statement.
- Color It Up: Color can dramatically change the appearance of your fireplace screen. Classic black or white can blend seamlessly with most decors, while a pop of color like red or blue can become a focal point. Consider the color palette of your room and choose a hue that either complements or provides a pleasant contrast.
- Material Matters: The material you choose for your screen can influence both its look and functionality. Metal screens are durable and can be crafted into intricate designs. Glass can give a sleek and modern feel, while mesh offers a more traditional look. Think about what material best suits your needs and style.
- Add Texture: Texture can bring a tactile element to your design. A hammered metal finish, a brushed bronze look, or a glossy paint can all add dimension to your fireplace screen. Consider how the light interacts with the texture to enhance the visual appeal.
- Personal Touches: Personalize your screen with elements that reflect your personality. This could be a monogram, a family crest, or a motif that has special meaning to you. These details make your fireplace screen truly one-of-a-kind.
- Safety First: While aesthetics are important, safety should never be compromised. Ensure that your design allows for proper ventilation and is made from heat-resistant materials. The screen should fit snugly against the fireplace opening to protect it from sparks and embers.
The key to a great DIY project is having fun and being creative. With these ideas, your fireplace screen can be functional and stylish.
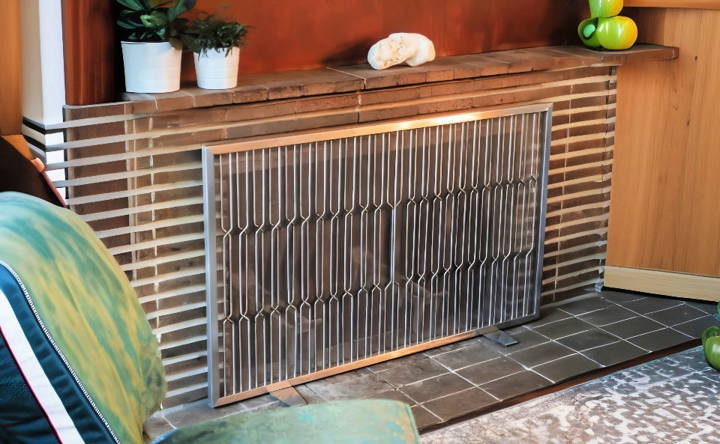
Advanced Techniques and Upgrades
For those who have mastered the basics of DIY fireplace screens and are looking to elevate their projects, advanced techniques and upgrades can add both functionality and aesthetic appeal. Here's how you can enhance your DIY fireplace screen:
- Incorporate Lighting: Adding lighting to your fireplace screen can build ambiance and highlight your design. Consider installing LED strip lights behind cut-out patterns or attaching small lamps to the frame for a warm glow.
- Use Decorative Hinges and Handles: Swap out standard hinges and handles for decorative ones. This small change can make a big difference in the overall look of your screen. Choose finishes that match your room's hardware for a cohesive design.
- Experiment with Stained Glass: For a truly stunning effect, use stained glass panels on your screen. This upgrade requires more skill but can result in a beautiful, light-catching piece that stands out.
- Add a Folding Mechanism: A folding screen is both practical and stylish. Implement a folding mechanism to make your screen adjustable and easy to store. This is particularly useful for larger fireplaces.
- Try Metalworking Techniques: If you're comfortable with metalworking, consider making intricate designs with wrought iron or copper. Metalworking allows for detailed patterns and shapes that can give your screen a professional, high-end look.
- Apply High-Temperature Paint: Use high-temperature paint to add color to your metal screen without the risk of flaking or damage from the heat. This type of paint is specifically designed to withstand high temperatures and comes in various colors.
- Consider a Multi-Panel Design: A multi-panel screen can be more stable and versatile. Design each panel with a different pattern or color for a unique, modular effect.
- Safety Check: With any upgrade, always prioritize safety. Ensure that all materials are fire-resistant and that any electrical components are properly insulated and installed.
Use advanced techniques to turn a DIY project into functional art. Plan your design, follow safety precautions, and enjoy making something special for your home.
Troubleshooting Common Issues
When undertaking a DIY project like making a fireplace screen, you might encounter a few hiccups along the way. Here's a guide to troubleshooting some common issues you may face:
Measurements Don't Match Up
- Solution: Always double-check your measurements before cutting any materials. Use a reliable tape measure and mark out your measurements clearly on the material. If you've already cut and there's a mismatch, see if you can adjust the frame to accommodate the difference or use the piece in a less critical area.
Material is Difficult to Handle
- Solution: Some materials can be unwieldy. For metal, use proper clamps to hold it steady while you work. For glass, always wear safety gloves and work on a stable surface. If the material is still challenging, consider switching to a more manageable alternative.
Screen is Unstable
- Solution: An unstable screen can be a safety hazard. Ensure that the base is wide enough to support the screen and that all joints are securely fastened. Adding feet or a heavier base can also improve stability.
Paint or Finish is Uneven
- Solution: Apply thin, even coats of paint or finish, allowing each layer to dry completely before applying the next. If the finish is already uneven, lightly sand the area and reapply the coating.
Screen Doesn't Fit the Fireplace Opening
- Solution: Measure the fireplace opening three times to be sure of the dimensions. If your screen is too small, add decorative elements or a frame to bridge the gap. If it's too large, trim the material where possible, or build a new section that fits better.
Tools Aren't Working Properly
- Solution: Maintain your tools to keep them in good working order. If a tool isn't working, check if it needs cleaning, sharpening, or if it's time to replace it. Always use the right tool for the job to avoid damage and ensure precision.
Problem: Design Doesn't Look as Expected
- Solution: Sometimes the finished product doesn't match your vision. Step back and assess what's different. It could be a matter of adjusting proportions, adding more detail, or simplifying the design. Don't be afraid to make changes until you're satisfied with the result.
Anticipate issues and know how to address them to handle challenges in your DIY fireplace screen project.
FAQs About DIY Fireplace Screen
Explore FAQs about DIY fireplace screens, covering materials, safety tips, and design ideas to enhance your home's fireplace efficiently.
Safety is paramount when it comes to fireplace screens. Ensure that all materials are non-flammable and properly secured. The screen should be sturdy enough to stand on its own and should not have any gaps large enough for sparks to pass through. Always place the screen at a safe distance from the flames.
Yes, many DIY fireplace screens are designed to be freestanding and easily movable. This allows you to remove the screen when not in use or when you need to clean the fireplace. Using lightweight materials and simple construction methods can facilitate this.
Creative ideas for a DIY fireplace screen include using a large gilded frame for an elegant look, turning an old window sash into a screen with a rustic charm, or even making a screen from wallpaper and scrap wood for a budget-friendly option. You can also explore making a screen with modern lines using a radiator cover or a barn door style for a country-industrial vibe.
There are many online resources that provide detailed instructions for making your own fireplace screen. These guides offer step-by-step processes, list the materials needed, and often include visual illustrations to help you through the DIY project. You can find such tutorials on DIY-focused websites and home improvement blogs.
Measuring and cutting materials accurately is crucial for a well-fitted DIY fireplace screen. Start by measuring the width and height of your fireplace opening to determine the size of your screen. Add a few inches to each side for safety coverage. For cutting, use a saw suitable for your chosen material—like a wood saw for timber or a hacksaw for metal frames. Always wear protective gear, such as safety glasses and gloves, when cutting materials. If you're working with glass or similar fragile materials, consider getting them professionally cut to size.
Final Thoughts
Building my DIY fireplace screen made me feel accomplished and proud. Don't hesitate! These tips will surely guide you. Give it a try and transform your fireplace today!


