I started my DIY flagstone patio project to build a beautiful outdoor space. I chose flagstone because it looks natural and elegant. I soon realized that this would involve a lot of planning and hard work. Gathering all the needed tools and materials was my first step. I made sure I had gloves, a shovel, a rake, and a wheelbarrow.
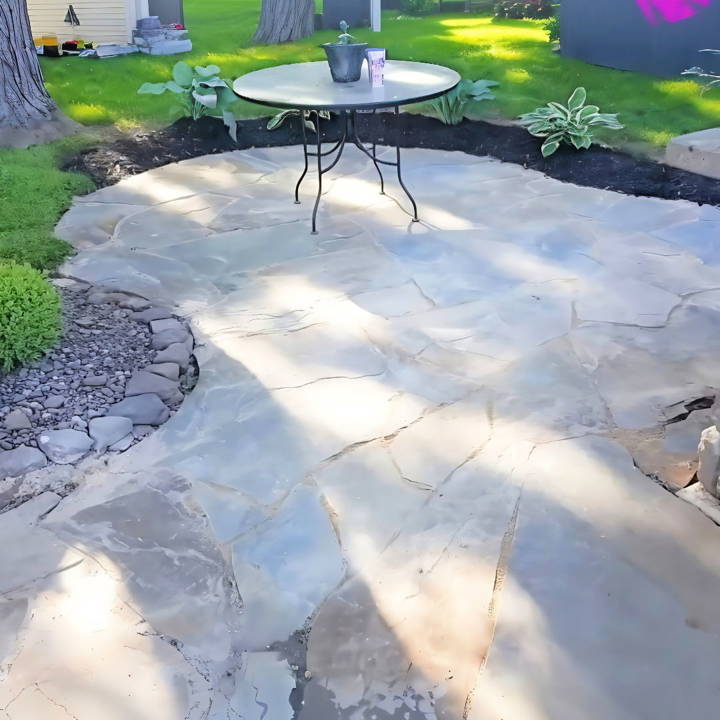
Preparing the ground was crucial. I leveled the area and added a layer of sand for stability. Laying the flagstone was like solving a puzzle; each piece had to fit perfectly. With patience, I finally arranged them to form a solid and charming patio.
I am sharing these steps so you can build your own beautiful DIY flagstone patio.
Planning and Preparation
Discover expert tips on planning and preparation, choosing the right stone, and essential materials needed for your next project.
Choosing the Right Stone
The quest began with selecting the perfect flagstones. Visiting local stone suppliers, I learned that not all flagstone is buildd equal. Each piece has unique attributes in color, size, and thickness, which can significantly affect your patio's overall appearance and functionality. I opted for a variety that complemented my pond's natural surroundings, ensuring the palette buildd a cohesive outdoor aesthetic.
Materials Needed:
- Flagstone: The star of the project. I chose stones that ranged in size to accommodate a more natural-looking pattern.
- Crusher Run Stone: For a solid foundation, it's crucial to have a base layer that facilitates drainage and prevents sagging.
- Sand: Used to level the flagstones and fill in the gaps after laying them down.
- Landscaping Fabric: To prevent weed growth between the stones.
Each material was selected with a specific purpose in mind, ensuring the longevity and beauty of the patio.
Step by Step Instructions
Learn how to build a DIY flagstone patio with step-by-step instructions. From clearing the area to overcoming obstacles, build a stunning outdoor space today!
Step 1: Clearing the Area
The first step required me to clear the designated area. This involved removing any turf, weeds, and obstructions. Surprisingly, I unearthed several large roots that demanded attention. Using a sawzall, I meticulously removed these obstacles, ensuring a clean slate for the patio.
Step 2: Laying the Foundation
After leveling the ground, I added a layer of crushed stone, compacting it to build a stable, level base. This step was pivotal in preventing future issues like uneven stones or water pooling on the patio surface.
Step 3: Arranging the Flagstones
Then came the most creative part of the process—laying the flagstones. I started with larger stones, working my way out from the pond towards the edges of the patio area. This task required patience and a bit of muscle, as adjusting each stone to fit snugly next to its neighbor was akin to solving a giant jigsaw puzzle.
Step 4: Fillncountered
One major challenge I faced was underestimating the amount of physical labor involved. Flagstones are heavy, and transporting them from the driveway to the pond site was a workout in itself. Cutting the stones to fit required not just physical effort but also a keen eye for design and detail.
Overcoming Obstacles
Persistence and creativity were my greatest tools in overcoming obstacles. Whenever a particular stone didn't fit, I found that taking a step back and reassessing the layout often presented a new, sometimes better, placement option. Additionally, ensuring I had the right tools at hand, such as a durable sawzall blade for roots and a reliable angle grinder for shaping stones, was essential for tackling unexpected challenges.
The Final Touches
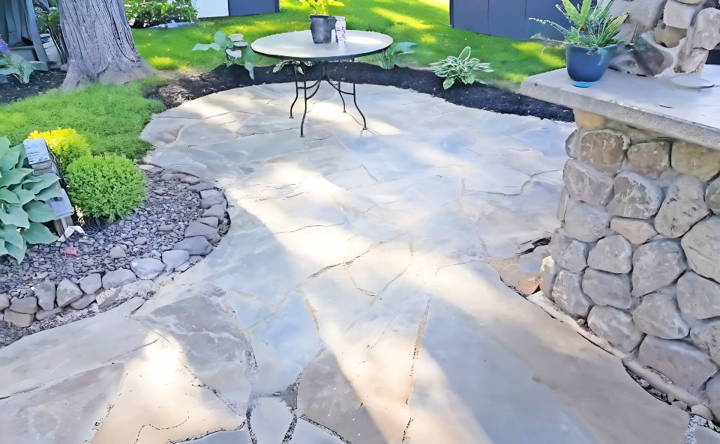
With all the stones laid and secured, I took the final step of cleaning the patio. Removing any excess sand and rinsing the stones revealed the flagstone patio in its full glory. The satisfaction of seeing the finished project—a harmonious extension of the natural landscape around my pond—was unparalleled.
Troubleshooting Common Issues
Building a flagstone patio can be a rewarding DIY project, but like any outdoor endeavor, it may come with its set of challenges. Here's a guide to help you troubleshoot some common issues you might encounter:
- Sunken Flagstones: Over time, flagstones can sink due to soil erosion or improper base preparation. To fix this, remove the affected stones and add a layer of compactible gravel, followed by sand, to level the base before relaying the stones.
- Cracked or Broken Stones: Flagstones can crack if heavy objects fall on them or due to natural wear and tear. If a stone cracks, carefully remove the pieces and replace them with a new stone cut to fit the space.
- Loose Stones: If your flagstones wobble, it could be due to an uneven base or the settling of the ground. Lift the stone, adjust the base material for evenness, and reposition the stone.
- Mortar Issues: Mortared joints may crack or deteriorate over time, especially in areas with freeze-thaw cycles. Remove the old mortar and apply new mortar, ensuring it's smooth and level with the flagstone surface.
- Weeds Between Stones: Weeds can sprout between flagstones, detracting from the patio's appearance. Use a natural weed killer or polymeric sand in the joints to prevent weed growth.
- Water Pooling: Poor drainage can lead to water pooling on your patio. Ensure the patio has a slight slope away from your house for proper drainage. If pooling persists, consider installing a French drain or adjusting the patio's gradient.
- Discoloration: Flagstones may become discolored due to exposure to elements or spills. Clean the stones with a mild detergent and water, and seal them to protect against future stains.
Address these issues to keep your flagstone patio beautiful and functional for years. Regular maintenance helps prevent most problems.
Safety
Safety should be your top priority when embarking on a DIY flagstone patio project. Here are some essential safety tips to ensure you can enjoy the process without injury:
- Personal Protective Equipment (PPE): Always wear the right gear. This includes sturdy gloves to protect your hands from sharp edges, safety goggles to shield your eyes from flying debris, and heavy-duty boots to safeguard your feet from falling stones.
- Proper Tools Handling: Use the right tools for the job and handle them with care. If you're cutting stones, make sure you're using a grinder or chisel correctly. Keep your tools in good condition, and replace any that are worn out or damaged.
- Lifting Techniques: Flagstone can be heavy, so lift with your legs, not your back. If a stone is too heavy, don't try to move it alone—get help or use a dolly.
- Chemical Safety: If you're using sealants or cleaners, read the instructions carefully. Some chemicals can be harmful if not used properly. Work in a well-ventilated area and consider wearing a mask if the product recommends it.
- Power Washing: While a power washer can make cleaning your patio easier, it can also damage the stone if not used correctly. Avoid high pressure on the flagstone, and keep the nozzle moving to prevent chipping.
- Weather Awareness: Plan your project on a day with good weather. Wet conditions can make flagstones slippery, and extreme heat can lead to dehydration or heatstroke. Stay hydrated and take breaks as needed.
- Know Your Limits: Don't take on more than you can handle. If a task seems too complex or dangerous, consider hiring a professional. Safety is more important than saving a few dollars.
By following these safety guidelines, you'll be better prepared to tackle your flagstone patio project with confidence and care.
FAQs About DIY Flagstone Patio
Discover answers to common questions about DIY flagstone patios. Learn tips, tricks, and essentials for your perfect patio project!
A flagstone patio is an outdoor space buildd with flat stones laid on a sand or mortar base. It's a popular choice for its natural look and durability. Flagstones are typically made from slate, limestone, or sandstone and come in various shapes and sizes.
Select flagstones that are at least 2 inches thick to prevent cracking. Consider the stone type and color that match your outdoor decor. Irregular shapes offer a natural look, while cut stones are better for a formal design.
First, mark the area for your patio and remove any grass or soil to reach the desired height. Ensure the site has a slight slope away from your home for proper drainage. For a sand-based patio, lay a 4-inch gravel base, then a 2-inch layer of sand before placing your flagstones.
Regularly sweep your patio to remove debris. If weeds appear between the stones, pull them out or use a weed killer. To prevent shifting, refill joints with sand or mortar as needed. Seal the flagstones every few years to protect against stains and weather damage.
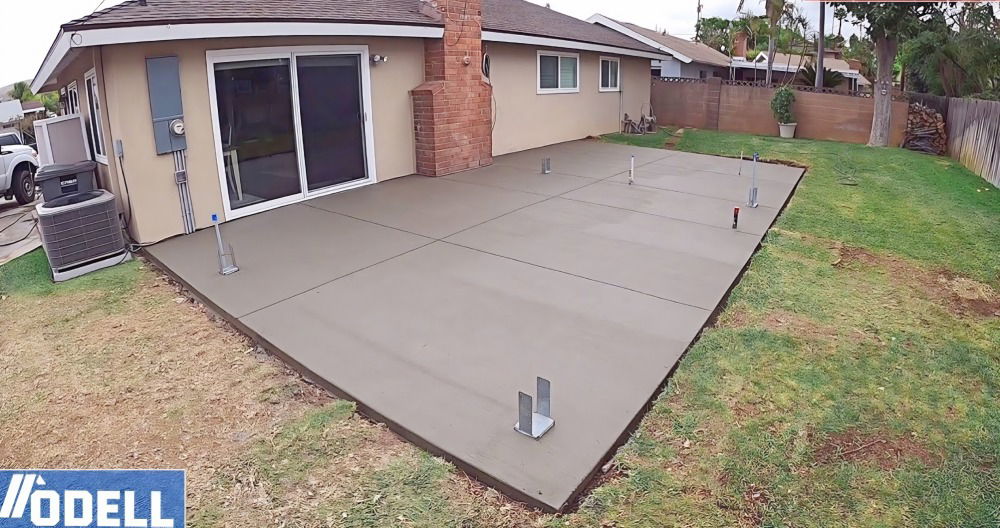
Yes, you can install flagstone over an existing concrete slab, provided the slab is in good condition without major cracks or unevenness. This method is known as a mortared installation and requires a solid base like concrete for stability. Before starting, clean the concrete surface thoroughly and check for levelness. You'll need to use mortar to set each flagstone in place and fill the joints. Remember to leave a slight slope for water drainage and follow local building codes for outdoor structures.
Conclusion
Making your own DIY flagstone patio may seem challenging, but I believe you can do it. Follow these steps and enjoy your new outdoor space. I'm here to help you get started.


