Getting good lighting in photos doesn't have to be expensive. I found that making a DIY flash diffuser is one of the easiest ways to soften harsh lighting. It only takes a few materials, and the results can be impressive. Whether you're taking photos at home or outside, a diffuser helps make better light that feels more natural. I'm excited to share how I did it.
When taking photos, especially in macro photography, lighting is key. But sometimes, the light from a flash can be too harsh, making strong shadows and washing out the details we want to capture. That's where a flash diffuser comes in handy.
A flash diffuser is a simple tool that spreads the light from your flash over a broader area. This makes the light softer and more even, which can help you take pictures that look more natural. It's like the difference between standing in the direct afternoon sun and standing in the soft light of a cloudy day.
Why Use a Diffuser for Macro Photography
Macro photography lets us capture the world's tiny wonders, from the intricate patterns on a butterfly's wings to the delicate petals of a flower. But when you're working up close, lighting can be tricky. A diffuser is a game-changer in these situations.
The Challenge of Lighting in Macro Photography
In macro photography, you're often zooming in on something very small. The closer you get, the harder it is to light your subject evenly. Without a diffuser, the flash can make harsh shadows and bright spots, which can ruin the beautiful details you're trying to capture.
The Role of a Diffuser
A diffuser scatters the light from your flash, spreading it out so it hits your subject more evenly. It's like putting a soft, translucent curtain between the flash and what you're photographing. This softer light reduces glare and helps to bring out the textures and colors in your subject.
Benefits of Using a Diffuser for Macro Photography
- Softens Light: It turns the harsh, direct flash into a softer glow.
- Reduces Harsh Shadows: No more distracting dark spots in your photos.
- Enhances Detail: The gentle light reveals the intricate details of your subject.
- Improves Color Accuracy: Colors look more natural without the wash-out effect of direct flash.
- Prevents Hotspots: It avoids shiny reflections on reflective surfaces, like water droplets or glossy leaves.
A diffuser in macro photography can turn a good photo into a great one by capturing tiny details and maintaining natural lighting. So, remember, it's your best friend for close-up shots.
Materials Needed and Why
Find out why Craft Foam, Plastic Canvas, Velcro, and Velcro Wrap are essential materials needed for your next DIY project. Discover their benefits now!
Craft Foam
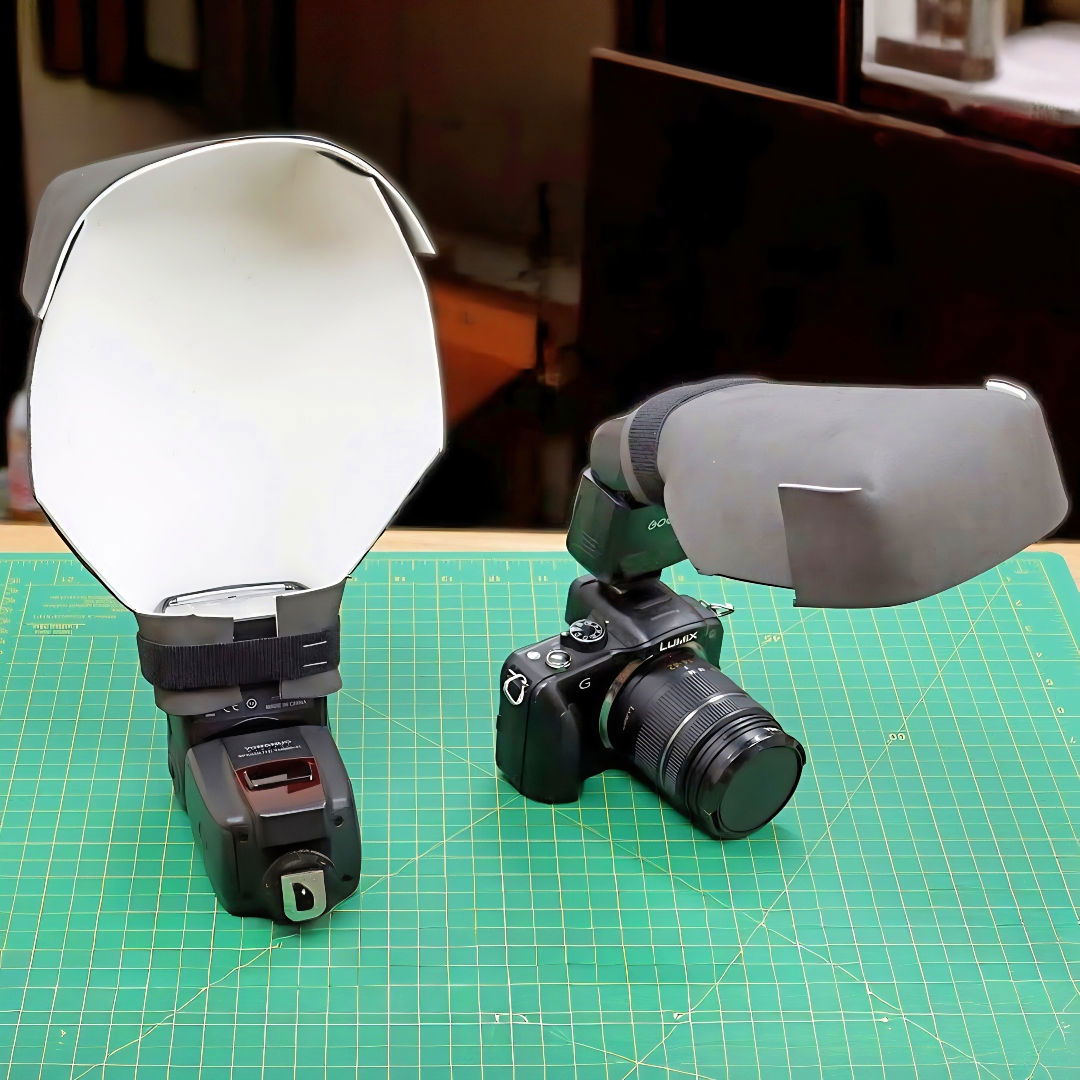
You'll need both black and white craft foam sheets. I opted for the ones with adhesive on one side for ease of assembly. The black foam serves as the exterior, reducing light spill, while the white foam lines the interior, reflecting and diffusing the light evenly.
Plastic Canvas
This flexible, mesh-like material provides structure to the diffuser. It's usually found in craft stores, and any color will do since it's concealed within the diffuser.
Velcro
Adhesive-backed Velcro strips are essential for securing the diffuser to the flash and for attaching the two sides of the foam. This allows for easy assembly and adjustments as needed.
Velcro Wrap
This material wraps around the flash, holding the diffuser in place. I prefer it for its adjustability and the protection it offers to the flash body.
Step by Step Instructions
Learn how to make a DIY flash diffuser with our step-by-step instructions. Simple material prep and easy assembly for perfect lighting.
Preparing the Materials
- Print the Template: I printed three copies of the template to size based on my flash dimensions. This included one each for the black foam, white foam, and plastic canvas. The design can be adjusted for any flash size, making this diffuser universally applicable.
- Cutting the Foam and Canvas: After attaching the templates to their respective materials using spray adhesive, I carefully cut along the outlines with a utility knife. It's crucial to be precise, particularly when cutting out the slits and triangles that help in folding and shaping the diffuser.
Assembly
- Assembling the Backbone: I first peeled off the adhesive backing from one foam piece and carefully aligned and pressed the plastic canvas onto it. Then, doing the same with the second foam piece, I carefully aligned both adhesive sides and pressed them together, ensuring the canvas was sandwiched in between.
- Attaching the Velcro: The next step was attaching the Velcro wrap to the black (outer) side of the foam. I used staples for a secure hold, ensuring the soft side faced outwards to avoid scratching the flash. Then, I measured and cut additional Velcro strips to attach one side to the white (inner) foam and the opposing side to the far end of the black foam. This allows the diffuser to be easily opened and closed around the flash.
- Final Adjustments: After fitting the assembled diffuser onto my flash, I made minor adjustments, trimming any misaligned edges for a neat finish. The Velcro wrap secured the diffuser in place, and the additional Velcro strips allowed me to adjust the amount of diffusion by changing the shape of the hood.
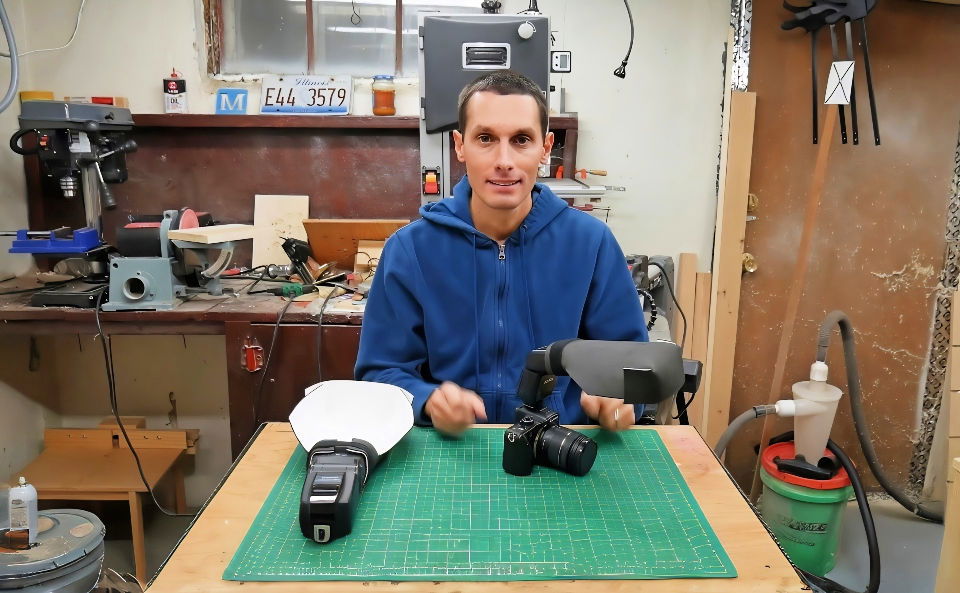
The difference this homemade diffuser made was night and day. The harsh, direct flash was transformed into a soft, evenly spread light that flattered my subjects, eliminating harsh shadows and highlights. It worked wonders for macro shots, revealing minute details without overpowering them. Portrait photography also benefited from this diffuser, as it mimicked the soft, natural light often sought after in studio environments.
Types of Flash Diffusers
In photography, controlling light is key, and flash diffusers help us achieve this. Available in various shapes and sizes, each tailored for specific needs. Let's look at common types and how they improve your photos.
Dome Diffusers
Dome diffusers are shaped like a dome and fit over your flash head. They spread light in all directions, which can help to fill a room with soft, even light. This type is great for events where you want to avoid harsh shadows and need a broad light source.
Bounce Diffusers
Bounce diffusers are designed to redirect and soften the light by bouncing it off ceilings or walls. They're perfect for indoor photography, providing a natural-looking light that mimics the effect of a larger, more diffuse light source.
Softbox Diffusers
Softbox diffusers are miniature versions of the large softboxes used in studios. They attach to the flash and have a front panel that diffuses the light, making a soft and flattering light for portraits and close-up work.
Reflectors
Reflectors are not diffusers per se, but they work alongside your flash to bounce light onto your subject. They come in various shapes and sizes, and you can use them to direct light where it's needed most.
DIY Diffusers
For the creative and budget-conscious photographer, DIY diffusers are a popular choice. You can make them from a variety of materials like white paper, fabric, or even a translucent plastic container. The goal is to make a material that softens the light from your flash, and the possibilities are endless.
Each type of diffuser has a unique use. Choose one based on the effect you want in your photos. Whether it's a portrait, macro shot, or event, a diffuser can help you get perfect lighting.
FAQs About DIY Flash Diffuser
Discover the top FAQs about DIY flash diffusers for better lighting in your photography. Get expert tips and solutions in this comprehensive guide.
A DIY flash diffuser is a homemade attachment for your camera’s flash that helps to spread the light more evenly. This can reduce harsh shadows and create a softer, more natural look in your photos. It’s especially useful in macro photography, where you need to illuminate small subjects without overexposing them.
Yes, there are several types of DIY flash diffusers you can make, depending on your needs and the materials you have available. Some common types include bounce diffusers, which redirect the light towards a ceiling or wall, and softbox diffusers, which create a larger surface area for the light to spread out from.
DIY flash diffusers can be surprisingly effective, especially considering their low cost. While they may not have the same level of refinement as professional-grade diffusers, they can still significantly improve the quality of your photos by softening harsh lighting and reducing shadows. Plus, they’re customizable to your specific needs and preferences.
Attaching a DIY flash diffuser is straightforward. Follow these steps:
Cut your chosen translucent material (such as white paper or plastic) to the appropriate size to fit around your flash.
Secure it in place using tape or an elastic band.
Test your setup by taking a few test shots. Adjust the diffuser’s position if needed to achieve the desired effect.
Absolutely! DIY diffusers are versatile. Here are some modifications you can try:
Bounce diffuser: If you're indoors, angle the diffuser upward to bounce light off the ceiling. This makes softer, indirect light.
Softbox-style diffuser: Attach a larger piece of translucent material to make a mini softbox. This spreads the light even more evenly.
Conclusion
In conclusion, learning how to DIY flash diffuser is an excellent way to improve your photography without breaking the bank. Using simple materials, you can easily make soft, professional lighting that enhances your photos. Try this budget-friendly solution and see the difference in your images today!


