Making a DIY floating desk is a fantastic solution for small-space living. It not only saves space but also provides a functional and stylish work area. This guide will help you understand how to build a floating desk step-by-step, using easy-to-find materials. You'll find tips on measuring, cutting, and assembling, making the process straightforward and accessible.
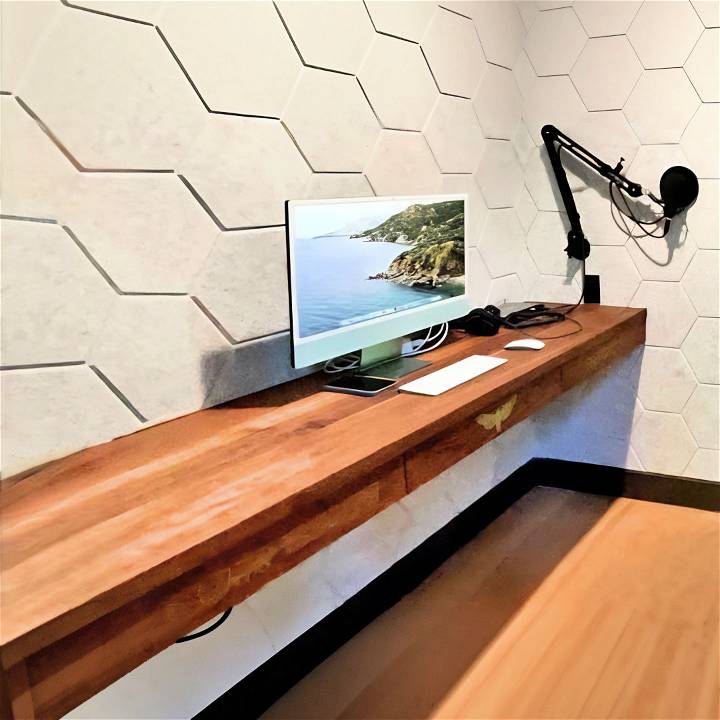
Building your own desk brings a sense of accomplishment and allows for customization to fit your specific needs. This project is perfect for those looking to enhance their living area without taking up much room.
Discover how to build a sleek DIY floating desk with our step-by-step guide. Perfect for maximizing space and adding a modern touch.
Gathering the Materials
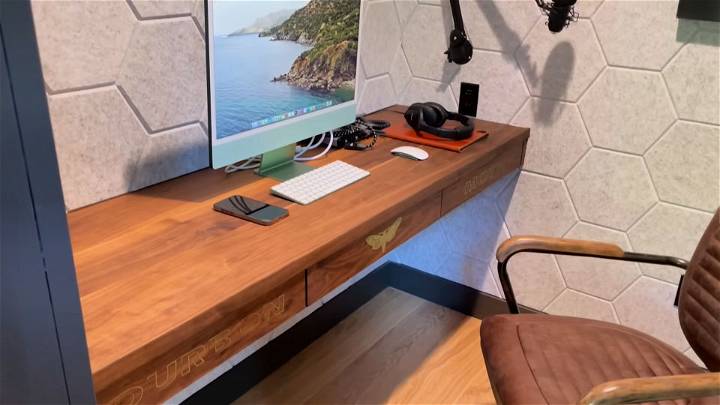
Why a floating walnut desk, you ask? Well, walnut, with its deep and rich tones, promised a look of elegance and durability. The floating aspect was to give a modern and spacious feel to my studio. Brass lettering was the cherry on top—giving it a personal touch. The materials I used were:
- Six quarter walnut: For the desk and drawer faces. Chosen for its quality and beautiful grain.
- Brass powder and epoxy: For the inlaid lettering, bringing a gleam of sophistication.
- Bloom under-mount drawer slides: For smooth and sturdy drawer movement.
- Various adhesives: Including wood glue and CA glue, for various bonding needs.
Step by Step Instructions
Learn how to build a DIY floating desk with step-by-step instructions, including milling walnut, gluing, crafting, inlaying brass, and more!
Step 1: Milling the Walnut
The first step was making the desk top. I cut the walnut roughly to length, then ran it through the jointer and planer. Ensuring the boards were perfectly flat and smooth was crucial for a seamless top.
Step 2: Gluing the Desk Top
After milling, I glued the boards together. I decided against using biscuits or dominoes, feeling confident in the wood's ability to bond well with just glue and clamps.
Step 3: Crafting the Under Frame
This was where the magic of the floating desk would come to life. I cut and assembled walnut pieces to build a strong frame that would be anchored to the walls and support the weight of the desk. Accurate measurements here were vital.
Step 4: Making Drawer Faces
For the drawer faces, I used one solid piece of walnut to ensure the grain flowed beautifully across all drawers. I carefully measured and cut the wood, keeping track of each piece's position.
Step 5: Inlaying Brass Lettering
This part was exciting yet challenging. After carving out the lettering, I mixed brass powder with epoxy and filled in the carved areas. A miscalculation here taught me the importance of patience and precision—as I sanded through some lettering, learning that mistakes can add character or… a lesson.
Step 6: Finishing Touches
Using Rubio Monocoat, I finished the wood, bringing out the walnut's warmth and depth. The final steps involved installing the desk atop the underframe, securing it with fasteners, and attaching the drawer faces.
Lessons Learned
- Measure Twice, Cut Once: A mantra for life, but especially crucial in woodworking.
- Patience is Key: Especially with inlaid lettering, taking the time to ensure precision can save you from mistakes.
- Embrace Imperfections: They tell stories. While I aimed for perfection, the errors I made added uniqueness.
- Always Buy Extra Materials: Especially those felt tiles!
Design Customization Ideas
When it comes to making a floating desk that not only serves its purpose but also reflects your personal style, the possibilities are endless. Here are some design customization ideas that can help you make your DIY floating desk uniquely yours:
- Choose Your Style Start by deciding on the overall style of your desk. Do you prefer a modern look with clean lines and a minimalist approach, or are you more inclined towards a rustic aesthetic with natural wood finishes? Maybe a vintage charm with antique brackets is more to your taste. Select a style that complements your room’s decor.
- Pick the Right Materials The material you choose for your desk can drastically change its look and feel. For a sleek and contemporary design, consider using materials like MDF (Medium Density Fiberboard) or plywood with a laminate finish. If you’re going for a warmer, more traditional feel, solid wood like oak or walnut can be a great choice.
- Add a Pop of Color Don’t shy away from adding color to your floating desk. Whether it’s a bold statement color that stands out or a subtle hue that blends with your walls, a touch of color can bring your desk to life. Use paint or colored laminates to achieve the desired effect.
- Incorporate Textures Textures can add depth and interest to your floating desk. Think about incorporating elements like a leather mat for the writing surface or a textured vinyl wrap for the sides. These details can elevate the overall design.
- Personalize with Accessories Accessorize your desk with items that are not only functional but also add to the design. Consider sleek cable management solutions, stylish desk organizers, or even a custom-made mouse pad that matches your desk’s theme.
- Light It Up Proper lighting is crucial for any workspace. You can integrate LED strips underneath the desk for a modern glow or add a classic desk lamp for a more traditional look. Choose lighting that enhances the mood and functionality of your space.
- Functional Add-Ons Think about the practical aspects of your desk. Do you need extra storage? Perhaps adding a drawer or a set of shelves underneath the desk could be useful. If you’re a tech enthusiast, consider pre-drilling holes for cables or adding a built-in USB charging station.
Make your DIY project unique. Start with these ideas and let your creativity shape a functional, personalized floating desk.
Advanced Customization Techniques
For those who are ready to take their DIY floating desk to the next level, advanced customization techniques can transform a simple workspace into a feature-packed hub that caters to all your needs. Here’s how you can upgrade your floating desk with some innovative ideas:
- Integrated Lighting Consider installing LED strip lights under the desk for a sleek, modern look that also provides functional task lighting. You can choose from a variety of colors and brightness levels to build the perfect ambiance for your workspace.
- Cable Management: Keep your desk clutter-free with built-in cable management solutions. Use cable trays and cord clips to neatly route and organize wires. For a more advanced setup, install grommets or cable ports directly into the desk surface to allow cables to pass through cleanly.
- Built-In Storage: Maximize the utility of your floating desk by adding hidden drawers or sliding panels. These can be custom-fitted to store your office supplies, documents, or electronic devices, keeping them accessible yet out of sight.
- Custom Surface Finishes Upgrade the look of your desk with custom surface finishes. Apply a veneer for a high-end wood look, or use epoxy resin for a glossy, durable finish that can incorporate colors and patterns.
- Ergonomic Enhancements: Make your desk more comfortable to use with ergonomic features. Install an adjustable monitor stand or keyboard tray to ensure you maintain a healthy posture while working.
- Tech Upgrades For the tech-savvy, consider adding USB charging ports or wireless charging pads embedded into the desk surface. You can also integrate Bluetooth speakers for a seamless audio experience.
- Personal Touches Finally, add personal touches that reflect your style and interests. This could be anything from a custom paint job to decorative edge detailing or even engraved patterns.
Use advanced techniques to make your floating desk functional and show your craftsmanship. Plan well, use quality materials, and prioritize safety during upgrades.
Troubleshooting Common Issues
Building a floating desk can be a rewarding DIY project, but it’s not without its challenges. Here are some common issues you might encounter and how to solve them:
- Uneven Walls: If your wall isn’t perfectly straight, it can make mounting your desk difficult. Use a level to find the high and low points. You can then either sand down the high points or fill in the low points with a joint compound. Let it dry completely before proceeding.
- Stud Location Finding studs is crucial for a secure mount. Use a stud finder to locate them. If the studs don’t align with your desk’s design, you can install a plywood backing across the studs, onto which you can then securely attach your desk.
- Sagging Desk A floating desk should be both visually appealing and functional. If your desk sags, it might be due to insufficient support. Ensure you’re using heavy-duty brackets and that they’re properly anchored into the wall studs.
- Hidden Pipes or Wires Before drilling into walls, use a multifunctional wall scanner to detect any hidden pipes or wires. This will help you avoid costly and dangerous mistakes.
- Finish Flaws If the finish on your desk isn’t smooth or has imperfections, sand it down lightly with fine-grit sandpaper. Then, apply a new coat of paint or sealant, making sure to follow the product’s instructions for the best results.
- Drawer Installation Adding drawers can be tricky. Make sure to measure the space accurately and purchase or build drawers accordingly. Use drawer slides that can support the weight of the drawer and its contents.
- Lack of Space If your desk doesn’t provide enough room, consider adding shelves above or cabinets below the desk. This will give you additional storage without compromising floor space.
By anticipating these common issues and knowing how to address them, you’ll be better prepared to tackle your DIY floating desk project and achieve a result you can be proud of.
FAQs About DIY Floating Desk
Discover answers to common faqs about DIY floating desks, including installation tips, material choices, and design ideas. Perfect for home office upgrades.
The weight a floating desk can support depends on the materials used and the mounting method. Generally, a well-constructed floating desk using sturdy brackets and mounted to wall studs can hold between 100-150 pounds. It’s crucial to use a stud finder to attach the desk to the wall securely.
Installing a floating desk without wall studs is not recommended because the desk may not be able to support much weight. However, if wall studs are not available, you can use heavy-duty wall anchors designed for drywall. Keep in mind that this will significantly reduce the desk’s weight capacity.
To ensure your floating desk is level, use a level tool when marking the wall for your support brackets. Once the supports are installed, double-check with the level before attaching the desk surface. Adjust as necessary to ensure the desk is perfectly horizontal.
When designing a floating desk, consider the desk’s size and shape to fit your space and needs. Think about the placement of outlets and other room features. Additionally, decide if you want extra features like drawers or shelves, which will require additional planning and materials.
When designing your floating desk, incorporating storage can be a smart way to keep your workspace organized. Here are some ideas:
Shelves: Install floating shelves above the desk for books and supplies.
Drawers: If you’re handy, you can build drawers into the desk design. Use drawer slides and attach the drawer box to the underside of the desk.
Cabinets: Small cabinets can be mounted under the desk or on the wall above for additional hidden storage.
Pegboards: A pegboard mounted above the desk can hold small items and tools, keeping them within easy reach.
Cable Management: Consider adding a cable tray under the desk to keep cords neat and out of sight.
Conclusion
Wrapping up, learning how to build a DIY floating desk for small-space living can transform your home. This guide has provided steps to build a stylish and functional workspace without taking up much space. With the right materials and a bit of effort, your small space can shine with your new DIY floating desk.


