Making a DIY flower wall backdrop was one of the best projects I have ever tried. I remember starting it for my sister's birthday party, feeling both nervous and excited. I gathered all the supplies, including a variety of flowers, a sturdy backdrop frame, and adhesive materials. Having everything laid out helped me feel prepared and ready to start.
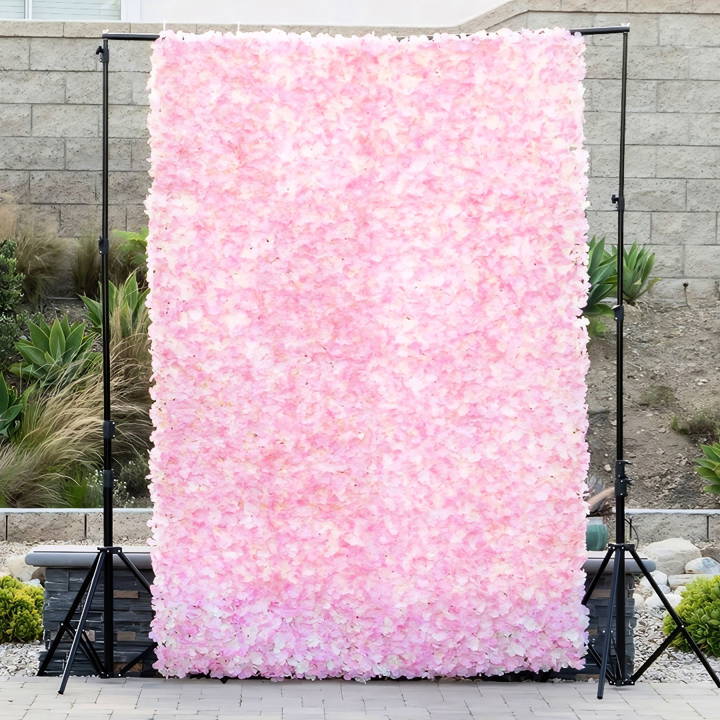
I began by arranging the flowers on the frame, trying different combinations until I found a pattern I liked. It took some time, but seeing the beauty unfold was truly satisfying. Each step made the wall come to life, turning it into a stunning piece of art.
I'm helping you with this so you can make your beautiful DIY flower wall backdrop easily, too!
Materials Needed:
- Flower Wall Panels: I opted for 16 panels, each measuring 17"x24", providing ample coverage for a standard backdrop size of 68"x96". The choice of flowers depends on your event's theme or personal preference. I went with a mix of roses and peonies for a lush look.
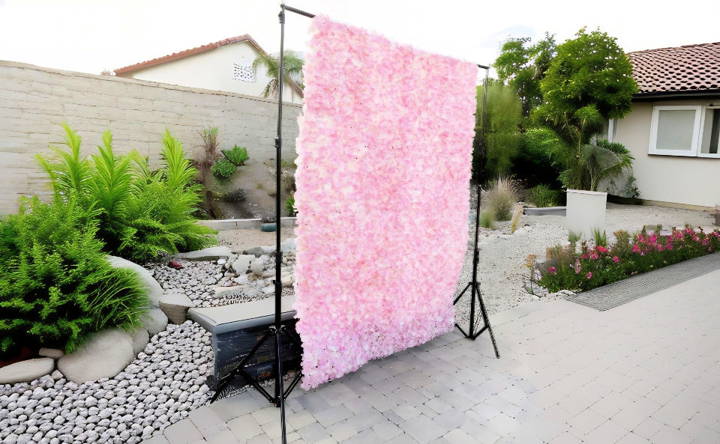
- Backdrop Stand: Since my setup was indoors, I used an 8x10 feet photo backdrop stand for easy assembly and mobility.
- Zip Ties or Wooden Dowels: Essential for securing the panels to the stand or each other, ensuring the backdrop remains stable and the panels don't warp.
- Sandbags or Weights (Optional): If you plan to set up your flower wall outdoors, securing your stand with sandbags or weights prevents it from tipping over due to wind.
Step by Step Instructions
Make a lovely DIY flower wall backdrop with our step-by-step guide. Perfect for events, weddings, or home decor. Easy instructions included!
Step 1: Planning Your Design
Before purchasing your materials, sketch out your flower wall to determine the size and number of panels needed. Consider the overall color scheme and types of flowers that will complement your event or space. I found that planning helped me visualize the end product and ensured I was happy with my choices before committing.
Step 2: Assembling Your Backdrop Stand
Setting up your backdrop stand is the first step. Follow the instructions provided with your stand, making sure it's level and sturdy. For an indoor setup, I didn't need additional support but remember to use sandbags or weights for outdoor setups.
Step 3: Attaching the Flower Panels
Starting from the top corner, begin attaching your flower panels to the stand using zip ties or if preferred for added stability, attach wooden dowels to the back mesh of the panels first. This prevents the panels from warping or sagging, especially important for larger backdrops.
Step 4: Securing and Adjusting
Once all the panels are attached, step back and look at the overall effect. You may need to adjust some flowers or panels for a fuller or evener look. This step is about tweaking and making sure every inch of your flower wall is exactly as you envisioned.
Step 5: Final Touches
Now that your flower wall is up add any final touches. This could be additional flowers to cover any gaps or securing the sides of the panels more tightly to the stand. It's all about those small details that make a big difference in the final presentation.
Maintenance and Storage
Your DIY flower wall backdrop is not only stunning but also reusable. After your event, carefully dismantle the panels and store them in a dry, flat place. This keeps the flowers looking fresh and the panels ready for your next event.
Design Inspiration for Your DIY Flower Wall Backdrop
A DIY flower wall backdrop can change any space into a beautiful setting. For weddings, birthdays, or home décor, the possibilities are endless. Here's how to build a stunning flower wall that shows your style and creativity.
Start with a Theme
Begin by deciding on a theme. It could be as simple as a color scheme or as elaborate as a garden party. Themes can be inspired by the seasons, such as spring blossoms or autumn leaves, or by specific styles, like bohemian chic or classic elegance.
Choose Your Flowers
Select flowers that fit your theme. For a romantic look, consider roses or peonies. If you're going for a tropical vibe, bright orchids or hibiscus might be perfect. Don't be afraid to mix and match different types and sizes of flowers to add depth and interest.
Incorporate Various Textures
Add texture to your backdrop by using a variety of materials. Mix in greenery like ferns or eucalyptus for a lush look. You can also include elements like lace, tulle, or even lights to build a unique backdrop that stands out.
Personalize Your Design
Make your flower wall personal. Integrate items that have special meaning to you, such as family heirlooms or handmade paper flowers. This not only adds a personal touch but also tells a story through your decor.
Keep It Eco-friendly
Consider the environment when choosing materials. Use recycled paper for paper flowers or silk flowers that can be reused. If you opt for fresh flowers, think about how they can be repurposed after the event.
Stay Updated with Trends
Stay current with design trends. Look at recent tutorials and guides for fresh ideas. For instance, incorporating geometric shapes or using a monochromatic palette has been popular in recent designs.
Visualize with Sketches
Before you start building, sketch out your design. This will help you visualize the final product and make any necessary adjustments before you begin the assembly process.
Test and Adjust
Don't hesitate to test different layouts on a small scale before committing to the full backdrop. This allows you to experiment with arrangements and find the perfect fit for your space.
Make a flower wall that's beautiful, trendy, personal, and meaningful by following these tips. Success lies in the details and the love you invest.
Common Mistakes to Avoid in DIY Flower Wall Backdrops
When making a DIY flower wall backdrop, it's easy to miss important details in the excitement. To ensure it looks as beautiful as you imagine, avoid these common mistakes:
Overlooking the Base Structure
- Don't skimp on the base. A sturdy base is essential for supporting the weight of the flowers. Make sure to use a solid frame that can hold everything securely.
Ignoring the Flower Quality
- Use high-quality flowers whether you choose fresh, silk, or paper flowers, quality matters. Poor-quality flowers can make your backdrop look cheap and unattractive.
Forgetting About Color Balance
- Balance your colors. Too much of one color or overcrowding with too many colors can be overwhelming. Aim for a harmonious color palette that complements the event's theme.
Neglecting the Backdrop Size
- Measure your space. It's important to build a backdrop that fits well in the intended area. A backdrop that's too small or too large can disrupt the overall aesthetics.
Underestimating the Time Required
- Give yourself enough time. Crafting a flower wall can take longer than expected, especially if it's your first time. Start early to avoid a last-minute rush.
Overlooking the Lighting
- Consider the lighting. The right lighting can make your flower wall pop. Think about the natural light in the space or add spotlights to enhance the backdrop's look.
Disregarding the Venue Rules
- Check with the venue. Some venues have restrictions on wall hangings. Make sure your backdrop adheres to their rules to avoid any issues on the day of the event.
Keep these points in mind to build a stunning, structurally sound flower wall backdrop. Attention to detail avoids common mistakes.
FAQs About DIY Flower Wall Backdrop
Discover answers to common FAQs about DIY flower wall backdrops, including tips, materials, and step-by-step guides for making stunning decor.
Choose durable flowers like roses, carnations, or high-quality faux flowers that can withstand handling and last longer. The type of flowers you select will depend on the look you’re aiming for and whether the backdrop is for a one-time event or multiple uses.
Yes, you can design your flower wall to be foldable. Use hinges to connect plywood panels, which can be folded for easy storage and transportation. Ensure the size of the panels matches the dimensions of your storage space.
Trim the stems of your faux flowers and use a hot glue gun to attach them to the wall backing. Arrange the flowers in your preferred design, ensuring they are securely fastened to withstand movement and touch.
For a full-size backdrop, consider mounting it to an actual wall with Velcro strips or a stand designed for backdrops. Make sure the mounting method you choose is stable and safe for the venue where it will be displayed.
For a professional and seamless appearance, make sure to cover the entire base with greenery mats or moss before adding flowers. This builds a lush background and hides any gaps. Use flowers of varying sizes to add depth and texture, and consider incorporating a few real flowers for a natural scent and touch. Secure the flowers tightly and trim any excess stem to maintain a flat surface against the backing. Lastly, step back frequently during the assembly to check for consistency and symmetry in your design.
Closing Thoughts
Starting your own DIY flower wall backdrop can be a wonderful experience. Just follow the step-by-step instructions below, and soon, you'll have a gorgeous backdrop for any event. With patience and creativity, you can make something truly special.


