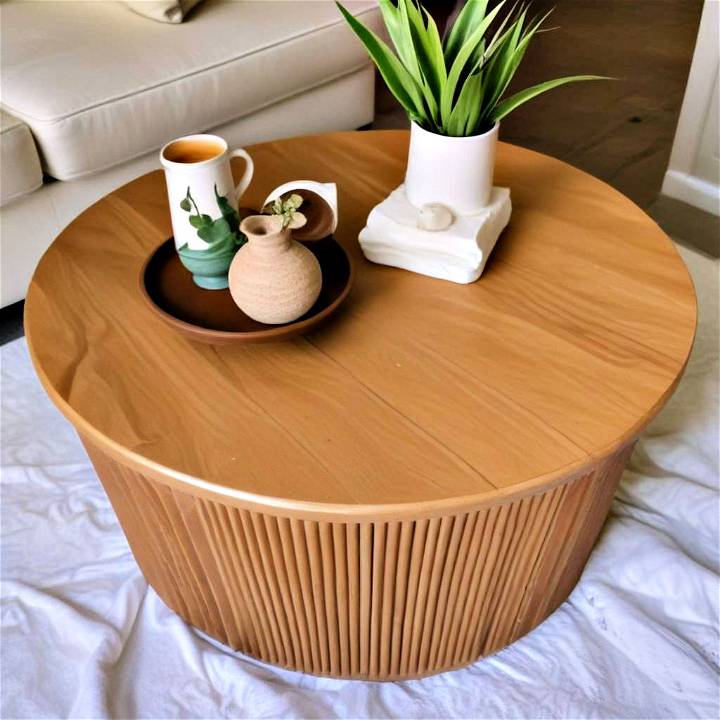
Hello everyone, my journey into the world of DIY projects was inspired by a fluted coffee table that would have cost me $2800 if bought from the store. Instead, I managed to build this stunning piece for less than $300. Yes, you heard it right! Today, I'm excited to share how I turned an Instagram inspiration into a reality, making it both an affordable and rewarding experience. So grab your tools, and let's get started on building your very own luxe coffee table for less.
Materials Needed and Their Purpose
Before we dive into the steps, let's talk about the materials you'll need for this project:
- Wooden Rounds: I used 1x3 foot circles. The rounds serve as the top and bottom of your table.
- Half-inch Wooden Dowels: These build the fluted effect around the table, adding a luxurious touch.
- Wood Glue: Essential for attaching the dowels securely to the rounds.
- Stain and Polycrylic: For finishing and protecting your table, giving it a rich color and durability.
- Metal Brackets and Screws: These will keep the structure sturdy and in place.
Remember, the quality of your materials will directly influence the final product, so choose wisely based on your budget and end goal.
Step-by-Step Guide
Learn how to create your own fluted coffee table with this step-by-step DIY guide. Determine height, make a brace, attach brackets, measure/cut dowels, stain, and finish for a polished final look.
Step 1: Determine the Height
The height of your coffee table is crucial. It should ideally be no higher than your couch cushions. For my table, I went with a height just shy of 17 inches, considering my cushions' height was 17.5 inches.
Step 2: Make a Brace
Next, build a brace using 2x4 boards to support the rounds. I cut mine at 15 inches to account for the top and bottom rounds' thickness, ensuring the overall height matched my preference.
Step 3: Attach Metal Brackets
Attach metal brackets at the top and bottom of your brace, which will later be used to secure the wooden rounds. It's a simple but vital step for structure stability.
Step 4: Measure and Cut Dowels
This step requires precision. Measure the distance from the bottom to the top of where your dowels will go, ensuring a snug fit. Sometimes, adjustments are needed, so patience is key here.
Step 5: Attach Dowels
Using wood glue, start attaching your cut dowels around the brace. This is time-consuming but crucial for achieving that luxe fluted look. Ensure everything is aligned correctly as you go.
Step 6: Stain and Protect
Choose a stain that complements your interior. Test it on a scrap piece first before applying it to your table. After staining, apply a polycrylic coat to protect the wood and add a satin finish. This also aids in making your table water-resistant and easier to clean.
Step 7: Final Touches
Once everything is dry, place your table in your desired spot and add your finishing touches. Styling it with books, a vase, or a tray can elevate the look even further.
Making this coffee table was challenging but rewarding. DIY saved money and resulted in a custom piece that fits my decor. If I can do it, so can you!
Design Variations of Fluted Coffee Tables
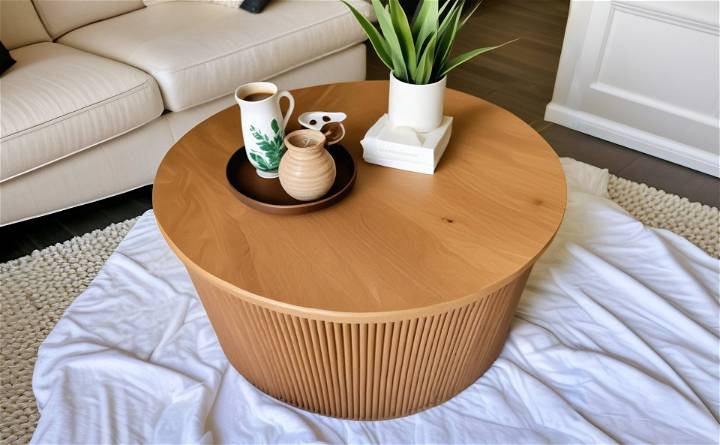
When it comes to adding character and elegance to your living space, a fluted coffee table can be a centerpiece that draws the eye and invites conversation. The fluting detail—vertical grooves or channels—adds texture and depth to the table's design. Let's explore some design variations that can suit different tastes and styles.
Classic Straight Flutes
The classic straight flute design is timeless. These are evenly spaced, vertical channels that run the length of the table legs or the side panels. This style suits a traditional or contemporary space, offering a subtle texture that complements various decor themes.
Spiral Flutes
For a dynamic twist, spiral flutes add movement to the piece. The grooves spiral around the legs, building a playful yet sophisticated look. This variation is perfect for those who appreciate a touch of whimsy in their furniture.
Varied Depth Flutes
Playing with the depth of the flutes can build a unique tactile experience. Some flutes can be shallow, while others are deeper, providing a contrast that is pleasing both visually and to the touch. This design can add a modern flair to any room.
Horizontal Flutes
Who says flutes have to be vertical? Horizontal flutes can offer a fresh perspective and are ideal for longer, lower coffee tables. This design can make a space feel wider and is a great conversation starter.
Asymmetrical Flutes
For a more avant-garde approach, asymmetrical flutes throw uniformity out the window. Different widths and spacings between flutes can result in a one-of-a-kind piece that is as much art as it is furniture.
Combining Materials
Fluted designs don't have to be limited to wood. Combining materials like metal, glass, or marble with wooden flutes can elevate the design. Imagine a glass tabletop resting on fluted wooden legs—elegant and modern.
Painted Flutes
Color can transform the mood of a piece. Painting the flutes in a contrasting color to the rest of the table can highlight the design and add a pop of color to the room.
Consider overall aesthetic and space when choosing a fluted coffee table design. Customize to fit personal style and space story.
Maintenance and Care for Your Fluted Coffee Table
Ensuring your fluted coffee table remains a stunning feature in your home involves regular maintenance and care. Here's how you can keep your table looking its best for years to come.
Regular Cleaning
Dust and dirt can accumulate in the flutes of your coffee table, so regular cleaning is essential. Use a soft brush or a vacuum with a brush attachment to gently remove debris from the grooves. For the table surface, a damp cloth will suffice to wipe away fingerprints and spills.
Protecting the Surface
To prevent scratches and water rings, consider using coasters and felt pads under decorative items. If your table has a wood finish, use placemats or a tablecloth during meals to protect against heat and moisture.
Dealing with Spills
Spills should be wiped up immediately to prevent staining, especially on wood. Use a clean, dry cloth to blot the spill, and follow up with a mild cleaner suitable for your table's material if necessary.
Avoiding Direct Sunlight
Prolonged exposure to direct sunlight can fade the finish of your coffee table. Position your table away from windows or use curtains to minimize sun damage.
Periodic Polishing
If your table has a wood finish, an occasional polish can help maintain its luster. Choose a polish that's appropriate for the type of wood and finish of your table.
Handling Scratches and Nicks
For minor scratches, a furniture marker or wax crayon matching the color of your table can help conceal the damage. Deeper nicks may require a more thorough repair, possibly involving sanding and refinishing.
By following maintenance tips, your coffee table will remain beautiful and functional. Taking care of furniture preserves appearance and extends life.
FAQs About DIY Fluted Coffee Table
Building a DIY fluted coffee table can be a rewarding project. Here are some frequently asked questions to help guide you through the process.
What is the best wood to use for a fluted coffee table?
The best wood for a fluted coffee table is one that is sturdy and easy to work with, such as pine, oak, or maple. These woods are durable and have a beautiful grain that can enhance the fluted design.
How do I build the fluted design on the table?
To build the fluted design, you can use a router with a roundover bit or attach wooden dowels or half-round trim to the sides of the table. Measure and cut the dowels to the desired length, then glue them evenly along the edges.
What tools will I need for this project?
The essential tools for a DIY fluted coffee table include a saw for cutting the wood, a drill for assembling the pieces, a router or adhesive for building the flutes, sandpaper for smoothing, and paint or stain for finishing.
Can I make a fluted coffee table without advanced woodworking skills?
Yes, you can make a simple fluted coffee table without advanced skills. Choose a straightforward design and follow a step-by-step guide. There are tutorials available that require minimal tools and no complex joinery.
How do I ensure the flutes are evenly spaced?
To ensure even spacing, use a ruler or a spacing jig to mark where each flute will go before attaching them. Consistent measurement is key to achieving a uniform look.
What's the best way to finish and protect my fluted coffee table?
After sanding the wood to a smooth finish, apply a coat of primer followed by paint or stain. Once dry, apply a clear sealer to protect the wood from scratches and spills. For added durability, consider a polyurethane topcoat.
Conclusion:
In conclusion, building a DIY fluted coffee table is a fun and rewarding project that can add a touch of elegance to your living space. With simple materials and a bit of creativity, you can have a stylish piece that reflects your personal style. Happy crafting!


