I had a blast making my own DIY foam machine for our last summer party. The kids loved it, and even the adults couldn't resist joining the fun. It was easier than I thought, using just a few household items and some basic tools. The foamy mess was a hit, turning our backyard into a bubbly paradise.
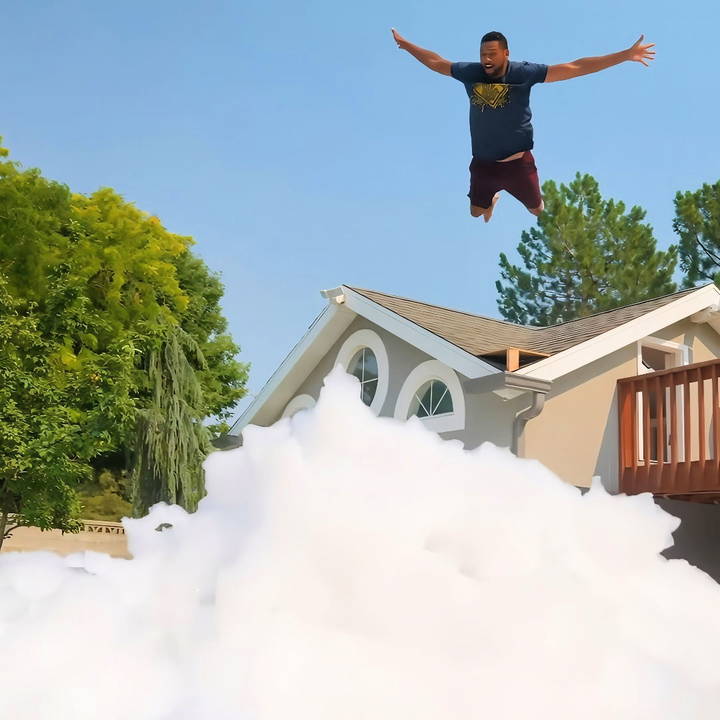
Building the DIY foam machine was a great creative outlet. I simply followed some online tutorials, and with a little bit of patience, my foam machine was up and running. Seeing everyone enjoy it made the effort worthwhile. If you want to turn your next event into an unforgettable experience, giving this a try is worth it.
Materials You'll Need
Before jumping into the steps, let's gather and understand the materials. Each item plays a critical role in the bubble generation process:
- Air Blower and Sump Pump: These are essential to make and maintain pressure for the bubble solution.
- 10 feet of Half-Inch PVC Pipe: Forms the structure of the foam generator.
- Sprinkler Heads: These aid in the distribution of the bubble solution.
- Corner Pieces (Four): These ensure the PVC structure stays secure.
- Half-Inch Tees (A Few): Used to connect different PVC segments.
- Connector Points (Five): Helps in connecting the PVC pipes sturdily.
- Threaded Pipe to Garden Hose Attachment: Allows easy connection to your garden hose.
- Half-Inch Cross: Key in the central structure where multiple pipes intersect.
- Six Feet of Hose: Connects the water supply to the foam generator.
- Shut Off Hose Adapter: Controls the water flow to the generator.
- Dish Soap: The primary ingredient for making bubbles.
- Trash Cans: Acts as the reservoir for the bubble solution.
- J-Lube: Enhances the longevity and quality of the bubbles.
- Cloth (e.g., T-Shirt, Towel, Plush Blanket): Acts as the membrane for generating bubbles.
Step by Step Instructions
Learn how to make a DIY foam machine with our step-by-step guide. From assembling the pvc frame to testing different fabrics, get it all here!
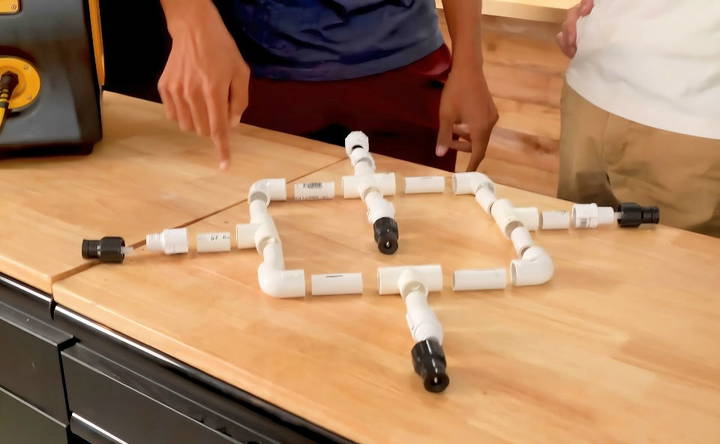
Step 1: Assemble the PVC Frame
First, start by assembling the PVC pipes into a rectangular frame:
- Cut the PVC Pipes: Make sure your cuts are precise so all sections fit perfectly.
- Connect the Pipes: Use the four corner pieces and several tees to join the PVC pipes together into a square or rectangular shape. Ensure the connections are firm but avoid using glue, which allows for future adjustments.
Step 2: Install Sprinkler Heads
Here's how to install the sprinkler heads:
- Strategic Placement: Place the sprinkler heads at intervals along the PVC frame. This guarantees even distribution of the bubble solution.
- Attach Securely: Use appropriate connectors and tees to fix the sprinkler heads to the pipes.
Step 3: Connect the Garden Hose Attachment
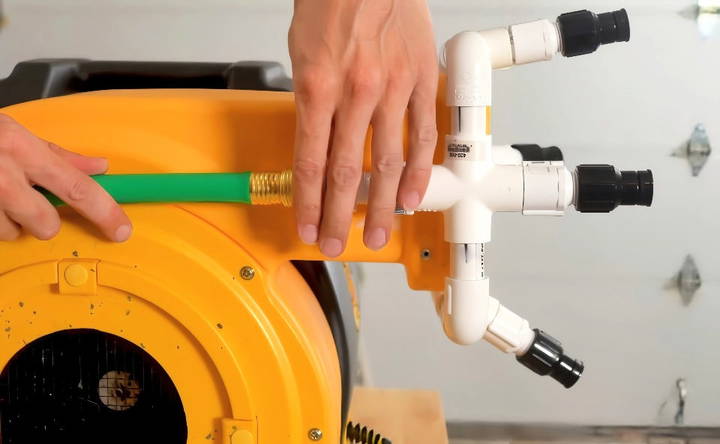
Next, connect the half-inch cross to the frame:
- Perpendicular Setup: Ensure the crosspiece where the hose connects is perpendicular to avoid interference with other parts of the frame.
- Hose Attachment: Attach the garden hose to the threaded pipe.
Step 4: Set Up the Bubble Solution Reservoir
Using trash cans, make a bubble solution reservoir:
- Fill the Trash Cans: Mix dish soap and J-Lube with water in the trash cans.
- Submerge the Sump Pump: Place the sump pump inside the trash can to draw the mixture into the hose.
Step 5: Attach Cloth to Sprinkler Heads
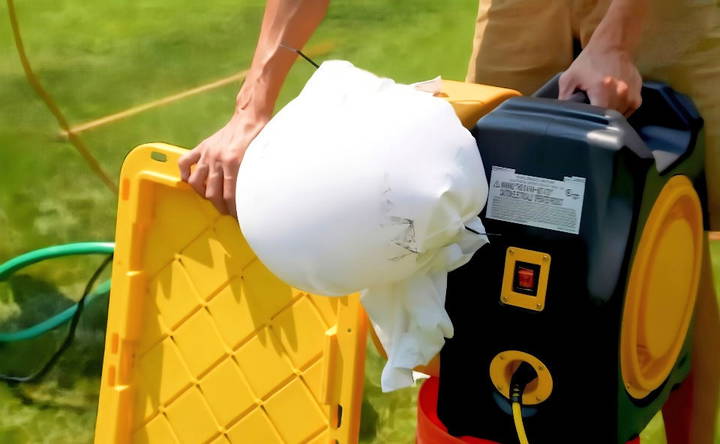
Choose a cloth (T-shirt, towel, or plush blanket) as the membrane:
- Experiment with Different Fabrics: Each type of fabric makes different bubble textures. T-shirts offer fine, dense bubbles, while plush blankets produce larger bubbles.
- Secure the Cloth: Stretch the cloth tightly over the sprinkler heads and fix it with rubber bands or similar fasteners.
Step 6: Turn On the System
Finally, it's time to test your foam machine:
- Adjust Water Pressure: Use the shut-off hose adapter to control the water flow.
- Observe and Enjoy: Start the blower and sump pump. Watch as your backyard fills with a sea of bubbles. Adjust the cloth tension or water pressure for optimal foam production.
Testing Different Fabrics
Testing different types of cloth helped us find the best material for producing the perfect bubbles:
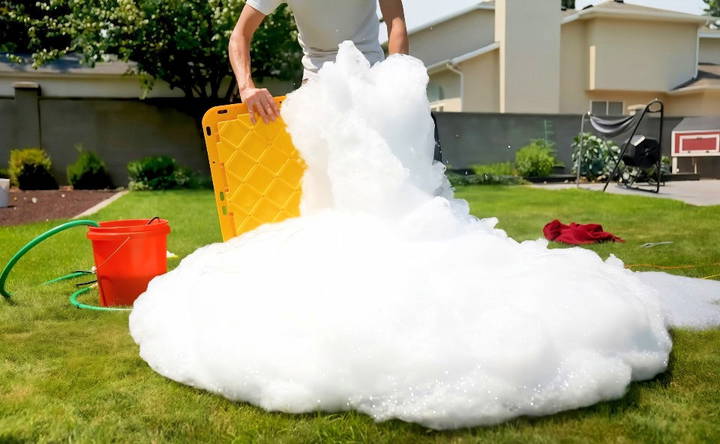
- T-Shirt: Maked tight, dense bubbles that stacked well.
- Plush Blanket: Slowed bubble production, making larger, airier bubbles.
- Towel: Produced results somewhat in between the T-shirt and blanket.
We found that T-shirts were the best all-rounder, providing excellent bubble density and stacking capabilities.
Fun Activities with Your Foam Machine
Once your foam machine is operational, here are some exciting activities to try:
- Foam Pit: Dive into a pit filled with bubbles for some safe and thrilling fun.
- Foamy Slip and Slide: Lay out a slip and slide and cover it with foam for double the fun.
- Foam-Filled House: (Only with permission and precautions!) Fill a room or tent with bubbles and experience foam-filled madness indoors.
Adding glow fluid (like fluorescein) to the bubble solution achieves a mesmerizing glow-in-the-dark effect, turning an ordinary foam party into a spectacular night-time event.
Customization Ideas for Your DIY Foam Machine
Making a DIY foam machine can be a fun and rewarding project. Not only does it allow you to enjoy endless foam parties, but it also gives you the freedom to personalize your machine to suit your preferences. Here are some customization ideas to make your foam machine uniquely yours:
Choose Your Foam Color
Why settle for plain white foam when you can add a splash of color to your parties? You can use food coloring to tint the foam solution without harming the machine or the environment. Just a few drops can transform your foam into a vibrant feature that matches the theme of your event.
Add Fragrance to the Foam
Enhance the sensory experience by adding a non-toxic fragrance to the foam solution. Whether you prefer the smell of fresh citrus or a floral bouquet, a pleasant aroma can elevate the mood and make your foam party unforgettable.
Integrate LED Lights
For evening events, integrating LED lights into your foam machine can make an exciting atmosphere. Use waterproof LED strips to illuminate the foam in different colors, or even sync the lights to music for a dynamic effect.
Portable Power Options
If you want to take your foam machine to various locations, consider making it battery-operated or solar-powered. This not only makes your machine more portable but also more environmentally friendly.
Foam Output Control
Install a variable speed controller for the fan or pump to adjust the foam output. This allows you to control the density and amount of foam produced, which is perfect for tailoring the foam to the size of your party.
Easy-Clean Design
Make maintenance a breeze by designing your machine with removable parts. This way, you can easily clean each component after use, ensuring your machine stays in top condition.
Safety Features
Incorporate safety features such as a ground-fault circuit interrupter (GFCI) plug to protect against electrical hazards. Safety should always be a priority, especially when water and electricity are involved.
By implementing these customization ideas, you'll not only have a functional foam machine but also one that reflects your personal style and enhances your events.
Troubleshooting Tips for Your DIY Foam Machine
When you're hosting a foam party, the last thing you want is for your DIY foam machine to stop working. Here are some troubleshooting tips to help you quickly solve common problems and get back to the fun:
Foam Isn't Coming Out
- Check the Solution: Make sure you've mixed the foam solution correctly. The right balance of water and soap is crucial for producing foam.
- Inspect the Pump: If the pump isn't working, the foam won't flow. Ensure it's properly connected and receiving power.
- Unclog the Nozzle: Soap build-up can clog the nozzle. Clean it out with warm water to clear any blockages.
Machine Is Leaking
- Tighten Connections: Loose hoses or connections can cause leaks. Tighten them to ensure everything is sealed properly.
- Replace Worn Parts: Over time, parts can wear out. Check for any worn hoses or seals and replace them as needed.
Foam Is Too Watery or Too Thick
- Adjust the Ratio: If the foam is too watery, add more soap. If it's too thick, add more water. Finding the perfect ratio may take a few tries.
- Temperature Matters: Cold water can make the foam thick, while warm water can make it watery. Adjust the water temperature to achieve the desired consistency.
Machine Won't Turn On
- Power Source: Ensure the machine is plugged in and the outlet is working. Try a different outlet to rule out power issues.
- Check the Fuse: If your machine has a fuse, it might have blown. Replace it with one of the same rating.
Foam Doesn't Last Long
- Soap Quality: Use high-quality, foam-producing soap. Cheaper soaps may not produce long-lasting foam.
- Environmental Factors: Wind and heat can break down foam quickly. Set up your machine in a sheltered area if possible.
Machine Is Overheating
- Give It a Break: Continuous running of the machine can cause overheating. Turn it off periodically to let it cool down.
- Ventilation: Ensure the machine has proper ventilation. Avoid covering any vents that allow heat to escape.
By following these tips, you can ensure your DIY foam machine runs smoothly, and your parties are a hit. Always handle repairs with care and consult a professional if you're unsure about fixing any electrical components.
FAQs About DIY Foam Machine
Explore common questions about DIY foam machines. Get quick answers and tips for making foam parties and events at home.
A DIY foam machine is a homemade device that creates foam for parties or events. It’s a cost-effective alternative to commercial machines, offering the flexibility to customize the size and foam output to suit your needs. Building your own foam machine can be a fun project that provides a sense of accomplishment and a unique feature for your gatherings.
Mix eco-friendly dish soap with water in a 1:3 ratio, and add one tablespoon of glycerin for every gallon of the mixture. This combination makes a soft, luxurious foam that's perfect for your foam machine.
Yes, you can! The process is straightforward and doesn't require advanced technical skills. You'll be connecting the fan to the pump with a hose, and the pump to the container with the foam solution. Then, place the mesh or fabric in front of the fan to form the foam. Turn on both devices, and you're ready to go.
Always ensure that all electrical connections are safe and away from water. Use eco-friendly and non-toxic soap to prevent skin irritation. Keep the machine on a stable surface to avoid tipping over, and never leave it unattended while in operation. Following these precautions will help ensure a safe and enjoyable experience.
Maintaining your DIY foam machine is crucial for its longevity and performance. After each use, flush the system with clean water to remove any soap residue. Dismantle the parts that come in contact with the foam solution and rinse them thoroughly. Allow all components to air dry completely before storing to prevent mold and mildew. Regular checks for any wear and tear on the hoses and connections can help prevent leaks and ensure your machine runs smoothly for your next event.
Final Thoughts
Building a DIY foam machine for under $200 is entirely possible and immensely rewarding. It's an excellent way to bring joy and creativity to family gatherings, backyard parties, or any outdoor event. Follow these steps, experiment with different materials, and let your imagination run wild. With some time and effort, you can transform any space into a bubble-filled paradise. Let the foamy fun begin!


