Installing a DIY French drain can efficiently manage excess water in your yard. This straightforward guide on French drain installation walks you through the essential steps. You'll learn about selecting the right materials, digging the trench, and laying the piping. Ensuring proper drainage can prevent water-related issues, making your outdoor spaces more functional and enjoyable.
Understanding how to install a French drain is crucial for keeping your property safe from water damage. Our easy-to-follow instructions take the guesswork out of the installation process. From planning to execution, we've got you covered.
What is a French Drain?
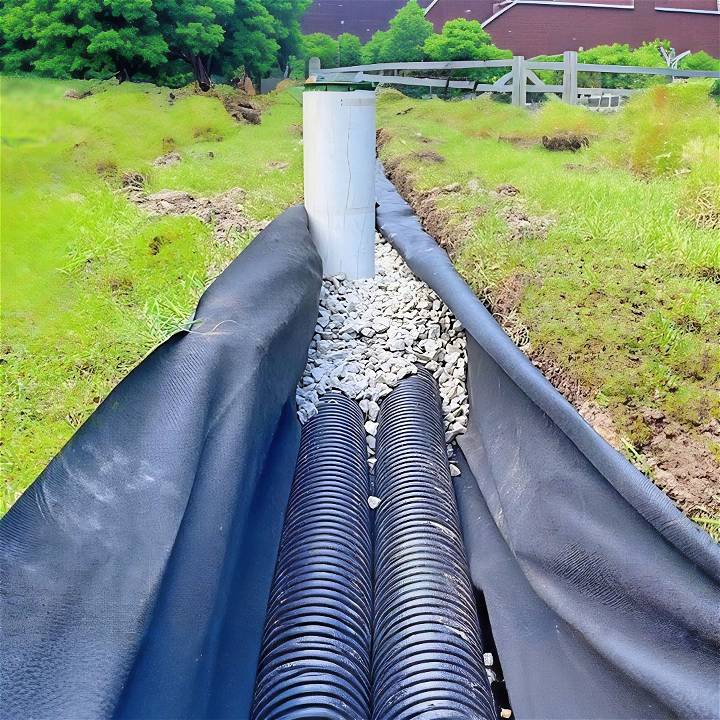
A French drain is essentially a trench filled with gravel or rock containing a perforated pipe that directs water away from an area. The design is straightforward: water flows through the gravel, enters the pipe through the perforations, and is carried away to a suitable exit point, such as a drainage ditch or a storm sewer.
How Does it Work?
The operation of a French drain relies on gravity. The trench is dug in such a way that it slopes away from the area you want to keep dry. As water collects in the trench, it filters through the gravel and into the pipe. The slope of the trench ensures that water flows through the pipe and out to the designated drainage area.
Benefits of a French Drain
- Prevents Water Accumulation: By redirecting water, French drains keep basements, yards, and foundations dry.
- Reduces Soil Erosion: They help to prevent erosion by controlling the flow of water.
- Longevity: A French drain can function effectively for many years with proper maintenance.
- Cost-Effective: Compared to other drainage solutions, French drains are relatively inexpensive and provide excellent value for money.
Installation Considerations
While installing a French drain might seem like a straightforward DIY project, it's important to consider the following:
- Location: Choose the right location for the drain to ensure it captures the water effectively.
- Slope: Ensure the trench has the correct slope to facilitate water flow.
- Depth and Width: The size of the trench should be adequate to handle the expected volume of water.
- Materials: Use the right type of gravel and a high-quality perforated pipe to ensure longevity.
- Legal and Safety: Always check for underground utilities before digging and comply with local building codes.
Knowing how French drains work and their benefits helps you decide if they're right for your needs. A well-installed French drain can prevent water issues for years. If you're unsure, consult a professional.
Material Rundown: Tools of the Trade
To avoid the ire of hindsight, I meticulously listed everything I needed:
- Four-inch corrugated pipes, both solid and perforated—the solid for directing water away from my house via downspouts and a sump pump, and the perforated for the actual French drain. Their flexible nature promised an easier installation around the obstacles of my backyard.
- Catch basins to tackle standing water and serve as easy-access cleanouts. Their importance was twofold: keeping the system maintenance-friendly and my yard dry.
- A rented mini excavator because my backyard boasted 700 feet of future trench, a task no shovel (or back) should face.
- Non-woven geotextile fabric to ensure only water made its way into my drain, leaving soil, roots, and small creatures where they belonged—out.
- Gravel—about ten tons of it—was chosen for its affordability and its crucial role in water filtration within the system.
- Last but not least, patience and perseverance are the most critical materials in any DIY project's success.
Step by Step Instructions
Learn step-by-step instructions on how to install a DIY French drain, from digging to final fill and troubleshooting common issues. Rain's no longer a foe!
Stage 1: The Great Dig
The excavation was a beast of its own. Stripping the first few inches of sod, then delving deeper to lay the groundwork for the pipes, I ensured a slope—a necessary one percent grade that promised water would indeed leave my yard. Despite the ease the mini excavator provided, I faced moments of manual labor, especially around utilities and under fences. This is a reminder that even in the age of machinery, some tasks demand the human touch.
Stage 2: Laying the Pipes
Verifying the slope with a rotary level, I laid the solid pipe closer to home. It was designated to carry the bulk of the water away from my foundation. Parallel, the perforated pipe took its position, ready to relieve my yard of its excess water. The installation of catch basins every 100 feet ensured I could easily maintain the system and manage any standing water. Their inclusion was a no-brainer, prioritizing long-term effectiveness over upfront effort.
Stage 3: Wrapping It Up
After placing the pipes thoughtfully in their trenches, it was time to wrap it up—literally. The geotextile fabric enveloped my newly laid system, a protective barrier ensuring the longevity and functionality of my labor. Gravel was then introduced into the equation, filling the trenches and providing an essential permeable layer through which water could flow freely to the pipes.
Stage 4: The Final Fill
As the project neared completion, the backfilling began. Replacing the soil on top of the gravel-filled trenches, I meticulously worked, ensuring not to disturb the fabric's placement. The sod followed a green blanket to hide the scars of the excavation. The sense of satisfaction in those final stages was palpable—my backyard was no longer held hostage by standing water.
The Result: Rain's No Longer a Foe
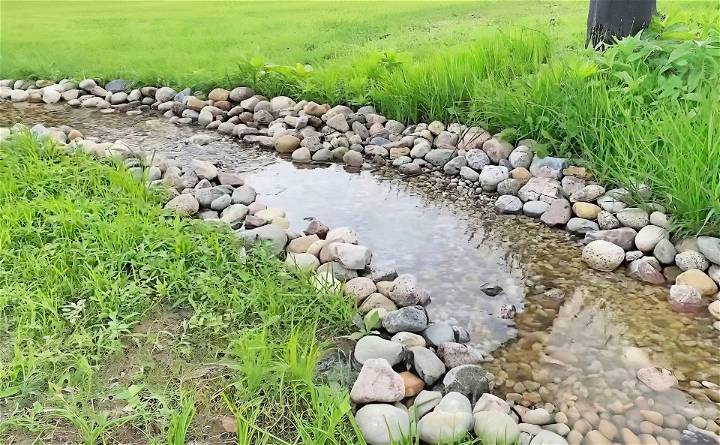
Weeks have passed since the project's completion. What are the results? Nothing short of miraculous. Rain, once a catalyst for backyard flooding, now seamlessly navigates through my yard's new venous system, disappearing into the dry creek bed at the property's edge. My yard remains dry, the sump pump quiet, and my disdain for rain a thing of the past.
Troubleshooting Common Issues with French Drains
When installing a French drain, it's crucial to be aware of potential issues that could arise. By understanding these common problems, you can take proactive steps to prevent them or address them if they occur.
Clogged Drain Pipes
One of the most frequent issues with French drains is clogging. Over time, debris such as leaves, roots, or sediment can block the perforated pipes, preventing water from flowing through the system. To avoid this, ensure that the trench is lined with a suitable landscape fabric before adding gravel and the pipe. This fabric acts as a filter, keeping out the debris while allowing water to pass.
Improper Sloping
For a French drain to work effectively, it must have a proper slope. A gradient of about 1% is recommended, which means the trench should descend about 1 foot for every 100 feet in length. This slight slope ensures that gravity can move the water along the pipe to the exit point. Use a level during installation to check the slope and make adjustments as needed.
Poor Installation
If a French drain is not installed correctly, it can lead to various problems, including improper sloping and clogged pipes. Make sure to follow a detailed guide or consult with a professional to ensure that each step of the installation is carried out correctly.
Soil Erosion
Improperly installed or maintained French drains can lead to soil erosion around the drain area. To prevent this, make sure the exit point of your drain disperses water in a way that doesn't wash away soil or make a new problem area.
Tree Roots
Tree roots can grow into the French drain and cause blockages. When planning your drain, consider the location of nearby trees and their root systems. Root barriers might be necessary to protect the drain from root intrusion.
Addressing Issues
If you encounter any of these issues with your French drain:
- For clogs: Remove the top layer of gravel and inspect the pipe. Clean out any debris and consider installing a better filter fabric if necessary.
- For sloping problems, Adjust the trench to achieve the proper gradient.
- For installation errors: Review the installation process and correct any mistakes. Sometimes it may require redoing parts of the drain.
- For soil erosion: Redirect the water flow to a more suitable area or use a splash block to disperse the water more gently.
- For tree roots: Cut back any roots that are intruding into the drain and install root barriers if needed.
Regularly inspect and maintain your French drain to avoid issues. Monitor its performance after heavy rains and promptly address any problems to keep it functioning properly.
Maintenance and Upkeep of French Drains
Keeping your French drain in good working order is essential to ensure it continues to protect your property from water damage. Regular maintenance is straightforward and can prevent costly repairs down the line.
Regular Inspections
Check your French drain periodically, especially after heavy rainfalls. Look for signs of sediment build-up or debris that could block the flow of water. Clear away any leaves or twigs that have gathered around the drain opening.
Cleaning the Drain
At least once a year, flush out your French drain with a garden hose to remove any small particles that have accumulated. If you notice slow drainage, you may need to use a plumber's snake to clear out more stubborn clogs.
Checking the Slope
Ensure that the drain maintains a proper slope. Over time, soil settlement can alter the gradient of your drain. A correctly sloped drain should have a drop of about 1 inch for every 8 feet of length.
Preventing Root Intrusion
If you have trees near your French drain, consider installing root barriers to prevent roots from growing into and clogging the drain. This is a proactive step that can save you from future headaches.
Updating Landscape Fabric
The landscape fabric that lines your French drain can deteriorate over time. Check it during your inspections and replace it if it's worn out to prevent soil from clogging the system.
Ensuring Proper Drainage
Make sure the exit point of your French drain is free from obstructions and directs water away from your property effectively. If water pools at the exit, it can back up the system.
Professional Assessment
If you're unsure about any aspect of your French drain's condition, don't hesitate to call in a professional. They can provide a thorough assessment and address any issues that may be beyond the scope of DIY maintenance.
By following these maintenance and upkeep steps, you can ensure that your French drain remains an effective and reliable component of your home's drainage system for years to come.
FAQs About Installing a DIY French Drain
Discover answers to common questions about installing a DIY french drain, from materials needed to step-by-step instructions and maintenance tips.
A French drain is a trench filled with gravel or rock containing a perforated pipe that directs water away from your home. It’s useful for preventing water pooling in your yard, protecting your foundation from water damage, and reducing the risk of basement flooding.
First, identify a downhill slope near the problem area for water to flow away. The trench should be about 18 inches deep and 9 to 12 inches wide, with a 1% slope. Use a shovel or trench digger, avoiding utility lines. Line the trench with landscape fabric before adding gravel.
Use a perforated pipe, either flexible or PVC. Lay it on the gravel bed in the trench, ensuring it has holes along it to collect water. Connect it to any downspouts or sump pumps if necessary. Test the system by running water through it before covering it with gravel and landscape fabric.
Regularly inspect and clean the inlet grate and outlet of the drain. Remove any debris that might block the flow of water. If you notice water pooling or slow drainage, check for clogs or sediment buildup in the pipe.
Yes, with the right tools and materials, you can install a French drain yourself. It's labor-intensive but doable. Follow detailed guides and tutorials, and consider consulting with a professional if you're unsure about any steps.
Final Thoughts: The Value of DIY
Wrapping up, we've covered the crucial steps on how to install a DIY french drain. French drain installation is a manageable project with the right tools and preparation. By following these instructions on how to install a french drain, you can effectively manage water drainage around your home, saving time and money.


