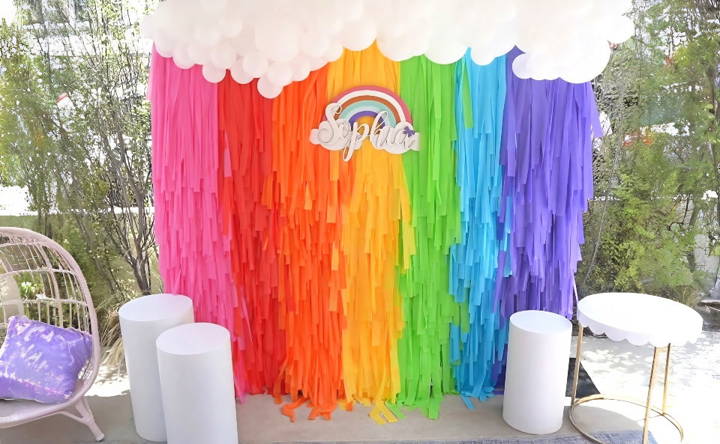
My DIY fringe backdrop idea started when I wanted to add a fun background for my friend's party. I had seen amazing backdrops online and thought, "I can make that!" So, I gathered materials like table cloths, scissors, and tape. I decided to go with bright colors to match the party theme. The process was surprisingly easy and enjoyable.
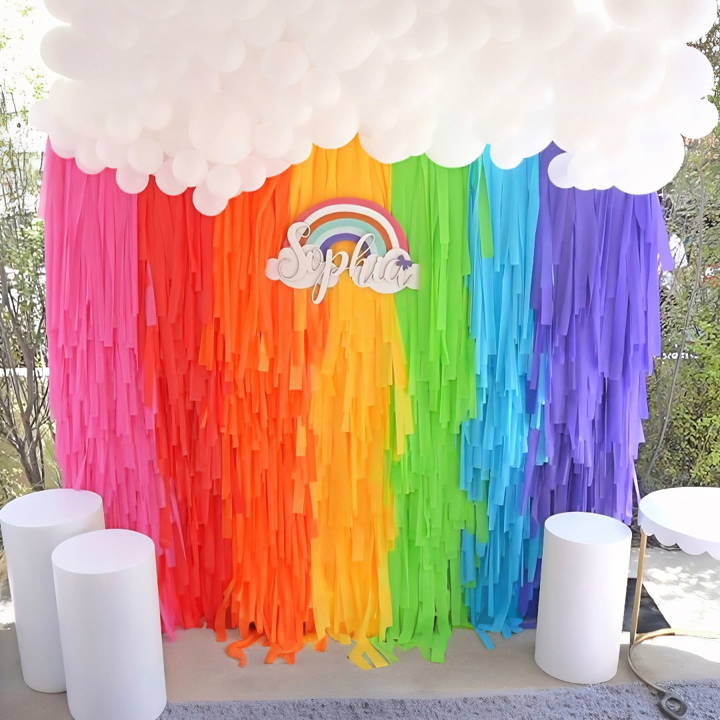
Starting simply, I cut the tablecloths into long strips to make the fringe. Then, I taped the strips onto a rod, one by one, making layers of fringes. It turned out better than expected, and everyone loved it. If you're looking to make a stunning backdrop for your event, this DIY fringe backdrop is a great start.
With just a few materials and a bit of time, you can make a fantastic backdrop, too. This guide will help you make your party unforgettable. Ready to get started? Let's dive into the step-by-step method!
Why Go for a DIY Fringe Backdrop?
Before we dive in, let's talk about why a fringe backdrop is such a fantastic idea. First off, it's super cost-effective. I was able to pull off the entire setup for under $30. Plus, it's highly customizable. Whether you're going for a chic, monochromatic look or a whimsical rainbow, the colors and patterns are entirely up to you. It's also incredibly durable, meaning it can last throughout your event without wilting or tearing, unlike paper decorations.
Materials You Will Need
- Plastic Tablecloths: I chose seven different colors to make a rainbow theme.
- Mesh Fencing: Much sturdier and easier to work with than alternatives like deer block mesh.
- Rotary Cutter and Cutting Mat: These make cutting strips a breeze.
- Weighted Ruler: Helps ensure straight, even cuts.
- Zip Ties: For securing the mesh fencing to the backdrop stand.
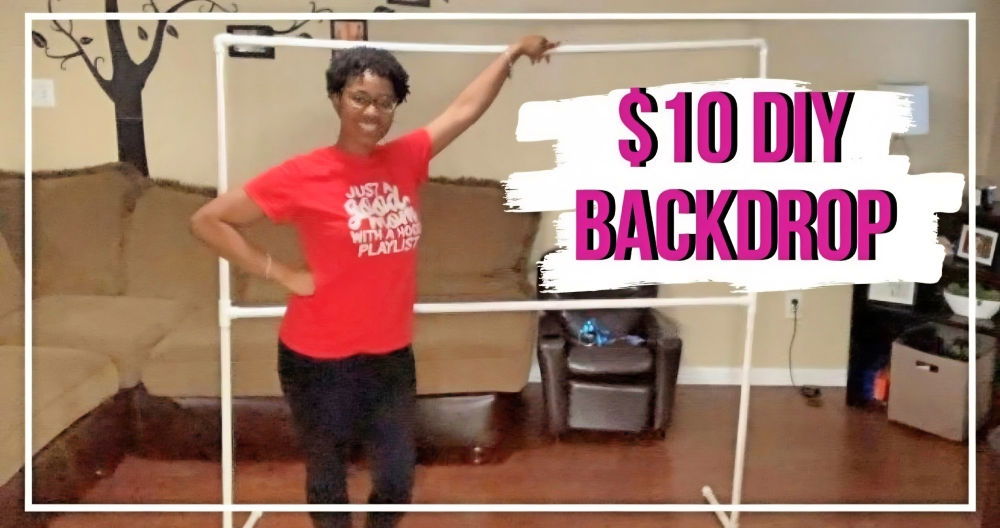
- Backdrop Stand: If you don't have one, you could also secure your backdrop to a wall using hooks or nails.
Why These Materials?
The choice of materials is crucial for durability and ease of assembly. The plastic tablecloths are not only affordable but also offer a wide range of colors. The mesh fencing is sturdy, ensuring your backdrop stays intact, and the larger squares make tying the tablecloth strips easier.
The rotary cutter and mat speed up the cutting process, and the weighted ruler ensures precision. Finally, zip ties and a backdrop stand (or an alternative way to hang your backdrop) are necessary for setting up your creation.
Step by Step Instructions
Make a gorgeous DIY fringe backdrop with our step-by-step guide. Perfect for events, this tutorial covers tablecloth prep, mesh setup, and finishing touches.
Preparing Your Tablecloths
- Partially Unfold the Tablecloths: You don't want to unfold them completely to avoid tangles.
- Cut the Tablecloths into Strips: Using your rotary cutter, cut 1.5-inch strips. The weighted ruler helps keep everything straight and even.
Setting Up the Mesh Fencing
- Measure and Cut: Determine the size of your backdrop and cut the mesh fencing to fit. This will depend on your backdrop stand or the space you're hanging it.
- Attach the Mesh to the Stand: Use zip ties to secure the mesh fencing to your backdrop stand. If you're hanging it against a wall, make sure it's secured at multiple points to handle the weight.
Attaching the Tablecloth Strips
- Start at the Bottom: Begin attaching the tablecloth strips from the bottom of your mesh fencing and work your way up. This over-and-under method hides the mesh and makes a fuller look.
- Use a Pattern or Randomize: For the rainbow effect, I followed the color order, but you can choose any pattern or even go random for a fun, eclectic vibe.
- Tie Each Strip Securely: Make sure each strip is tied tightly to the mesh. You don't want them flying off with a gust of wind!
Finishing Touches
Once you've covered the mesh entirely with your colorful strips, step back and admire your work. This is the moment when you can adjust any strips that might be out of place or add more if you see any gaps.
Time and Cost Efficiency
The entire project took me about 2 hours to complete and, as promised, stayed under $30. Considering the impact it had on the party d* écor and the countless compliments I received, it was time and money well spent.
Design Ideas for DIY Fringe Backdrops
Making a DIY fringe backdrop can transform any party space into a vibrant and festive area. Here's how you can design a stunning backdrop that will be the talk of the event:
Choose Your Color Scheme
Start by selecting a color palette that fits your event's theme. For a birthday party, consider bright and cheerful colors like pink, yellow, and turquoise. For a more elegant event, such as a wedding, opt for softer tones like white, gold, and pastel shades.
Mix Textures and Materials
Add depth to your backdrop by mixing different textures. Combine metallic fringes with matte paper or fabric strips. This contrast will make your backdrop pop and give it a professional look.
Incorporate Patterns
Patterns can add a playful touch. Think about using stripes, polka dots, or chevron patterns. You can make these patterns by alternating colors or cutting the fringes at different lengths.
Add Dimension
Give your backdrop a 3D effect by layering the fringes. Start with longer fringes in the back and shorter ones in the front. This technique makes a sense of depth and makes your backdrop more dynamic.
Personalize with Accessories
Make your backdrop unique by adding personalized accessories. Attach paper flowers, balloons, or custom signs with messages or names. These details will tailor the backdrop to your event and can serve as a great photo booth background.
Lighting
Soft lighting can enhance the overall effect of your fringe backdrop. String lights or spotlights can highlight the colors and textures, making them stand out. Ensure the lights are safely installed and don't pose a fire hazard.
By following these design ideas, you'll make a fringe backdrop that's not only beautiful but also original and tailored to your event.
Customization Tips for DIY Fringe Backdrops
When it comes to personalizing your DIY fringe backdrop, the possibilities are endless. Here are some tips to help you customize your creation and make it truly one-of-a-kind:
Reflect the Occasion
Think about the event you're decorating for. Is it a baby shower? Consider soft colors and add baby-themed cutouts like bottles or booties. For a graduation party, use the school's colors and incorporate grad caps or diplomas into the design.
Play with Length and Shape
Don't be afraid to experiment with the length of your fringes. Mix long and short strips to make a textured look. You can also cut the ends into different shapes, such as arrows, waves, or points, for added visual interest.
Use Meaningful Colors
Colors can convey different emotions and meanings. Choose colors that have a special significance for you or the person you're celebrating. For example, use favorite colors or hues that match a wedding theme.
Incorporate Personal Items
Adding items like photographs, mementos, or handwritten notes can make your backdrop more personal. Attach these items with clips or strings so they can be easily removed and kept as keepsakes.
Interactive Elements
Make your backdrop interactive by adding elements that guests can engage with. This could be a chalkboard section for writing messages or a Polaroid area where guests can hang pictures taken during the event.
Seasonal Touches
If your event coincides with a holiday or season, add appropriate decorations. For a Christmas party, intertwine green and red tinsel. For a summer bash, incorporate floral garlands or paper suns.
Use these tips to make your DIY fringe backdrop both beautiful and meaningful, reflecting the event's essence or the honoree's personality.
Troubleshooting Common Issues
When crafting a DIY fringe backdrop, you might encounter a few hiccups along the way. Here's how to tackle some common issues with simple, effective solutions:
Fringes Tangling
- Problem: Your fringes may get tangled during assembly or hanging.
- Solution: Roll each fringe section around a cardboard tube before hanging. Unroll them gently as you place them on the backdrop. This keeps them neat.
Uneven Lengths
- Problem: Sometimes, fringes can end up uneven after cutting.
- Solution: Use a ruler or a straight edge as a guide when cutting. If they're already cut, trim the edges with sharp scissors for a clean, uniform look.
Color Bleeding
- Problem: Colored paper or fabric might bleed when wet.
- Solution: Test your materials beforehand by dampening a small piece. If it bleeds, spray a clear fixative over the fringes or use colorfast materials.
Adhesive Fails
- Problem: Tape or glue not holding up your backdrop.
- Solution: Use double-sided tape or hot glue for a stronger hold. For heavier materials, consider using hooks or a backdrop stand.
Wrinkled Materials
- Problem: Fringes appear wrinkled or creased.
- Solution: Gently iron paper fringes under a low heat setting with a protective cloth. For fabric, use a steamer or an iron in the appropriate setting.
Not Enough Fullness
- Problem: The backdrop looks too sparse.
- Solution: Add more layers of fringes or fluff them out by gently separating the layers with your fingers.
By anticipating these issues and knowing how to solve them, you'll ensure a smooth creation process and a stunning final product.
FAQs About DIY Fringe Backdrop
Discover essential faqs about DIY fringe backdrops, including materials, step-by-step instructions, and creative tips to elevate your decor.
Start by measuring and cutting your tablecloths into strips of three different lengths for a dynamic look. You’ll want long strips (about 8 feet), medium strips (around 6 feet), and short strips (approximately 4 feet). If you’re using streamers, follow the same process for varied lengths.
Yes, you can hang your fringe backdrop directly on the wall. Use 3M Command hooks to attach the plastic fencing with the fringes to the wall. This method is suitable if you don’t have a backdrop frame or prefer not to use one.
The time it takes to create a fringe backdrop can vary. It’s a time-consuming process that can take around 10 hours for one person. However, with preparation and extra help, it can be done more quickly.
After your event, carefully fold the fringe backdrop and store it in a dry place, such as a tote or storage box. This will help keep it in good condition for future use. Fringe backdrops can last for several years if stored properly.
To enhance the visual appeal of your fringe backdrop, consider the following tips:
Mix colors: Use a variety of colors that complement your event's theme. Adding sparkly or holographic tablecloths can introduce more texture and shine.
Vary lengths: Cut the fringes into different lengths to make depth and movement.
Layering: Add multiple layers of fringes for a fuller look. If you're making a full-length backdrop, consider adding a lower horizontal bar to layer more tablecloths.
Imperfections: Don't worry about cutting each strip perfectly even. The slight variations will add character to your backdrop.
Custom sections: Feel free to cut your fringed tablecloths into smaller sections for easier handling and a more intricate design.
Wrapping It Up
In conclusion, learning how to make a DIY fringe backdrop can be a fun and creative project that adds a unique touch to any event. By gathering simple materials and following the steps mentioned, you can make your very own DIY fringe backdrop with ease. This project not only enhances your space but also provides a personalized and memorable decoration.


