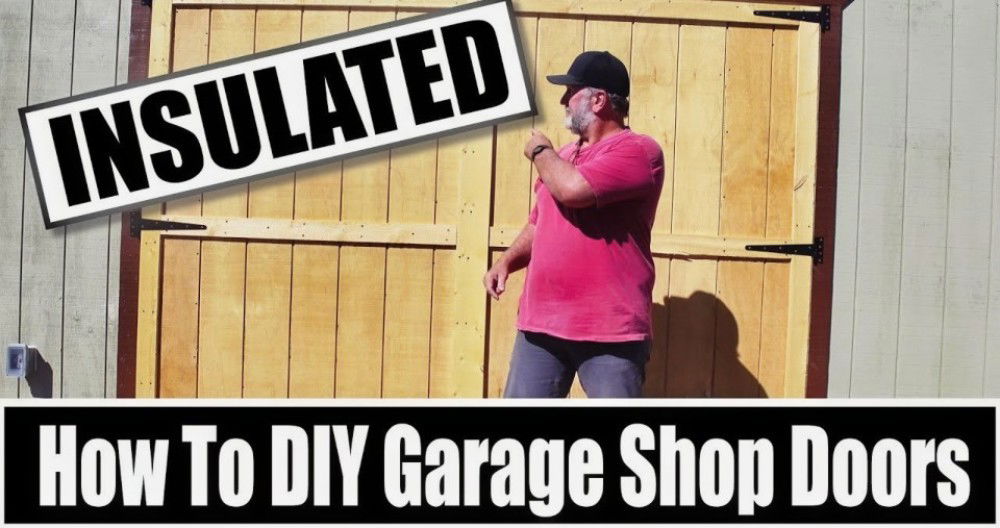
I remember the past winter when the cold seeped through my garage door. It made the space unusable. This bothered me, so I decided to try something. I read about DIY garage door insulation and took it up as a challenge. The process was easier than I thought.
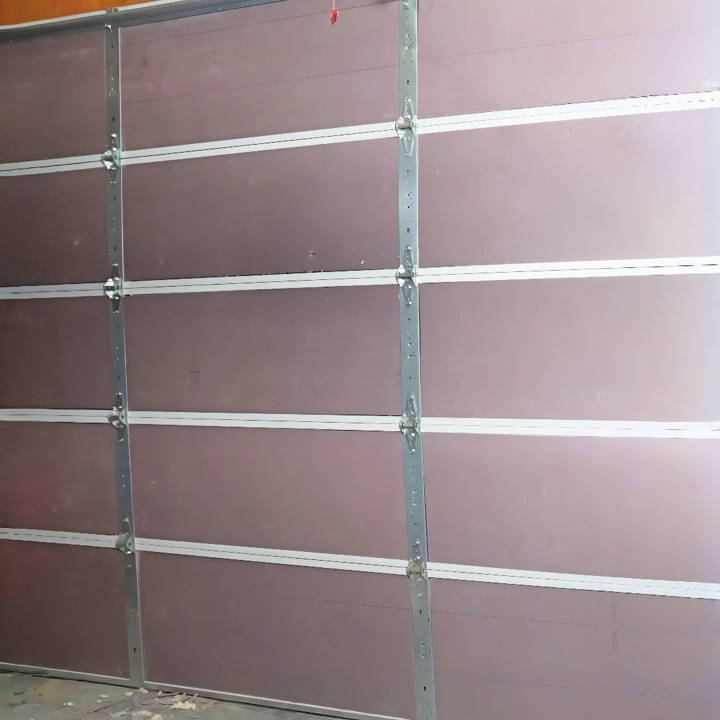
With a few materials from the local store, I got to work. Insulating the door made a huge difference. My garage became warmer and more comfortable. It also helped with energy costs by keeping the cold out. Based on my experience, insulating your garage door can bring warmth and efficiency to your home.
If you're ready to enhance your space, try insulating your garage door. This guide can help you get started.
Understanding Insulation Materials
When it comes to insulating your garage door, choosing the right material is crucial for effective energy conservation and cost savings. Here's a straightforward look at the most common insulation materials:
- Fiberglass: This is a lightweight, inexpensive option that's easy to install. It usually comes in panels that fit between the garage door frames. Fiberglass has a moderate R-value, which measures thermal resistance, typically ranging from R-8 to R-13.
- Polystyrene: Often found in rigid foam boards, polystyrene offers a higher R-value per inch than fiberglass. It's more durable and provides better sound dampening. However, it can be more challenging to cut and fit precisely.
- Polyurethane: If you're looking for the highest R-value and superior insulation, polyurethane is the way to go. It's denser and more effective at blocking heat flow, with R-values that can exceed R-15 for a one-inch thick panel.
- Reflective Insulation: Made from aluminum foil bonded to polyethylene or cardboard, this type reflects radiant heat, keeping your garage cooler in summer and warmer in winter. It's thin and easy to work with, but its R-value is generally lower than other materials.
- Cellulose: Composed of recycled paper fibers, cellulose is an eco-friendly option. It's treated with fire retardants and can be blown into place or installed in sheets. While it has a good R-value, it's not as commonly used for garage doors as other materials.
Higher R-value means better insulation. However, balance this with your budget and garage needs. Proper installation is crucial for effectiveness; ensure a snug fit and seal gaps.
Choosing the Right Insulation Material
The first and arguably most crucial step was deciding on the insulation material. After thorough research and watching countless tutorials, I gravitated towards Owens Corning's 1-inch Formula NGX board. This decision was influenced by its effective R-value—a measure of insulation's ability to resist heat flow—its cost efficiency, and ease of installation.
Why Owens Corning's 1-inch Formula NGX?
- Efficiency: This board offered the best balance in terms of insulation, being neither too thick to handle nor too thin to be ineffective.
- Cost: While there are cheaper materials out there, this struck the right balance between cost and effectiveness.
- Ease of Installation: Its ease of handling and cutting was a significant factor, especially for someone doing this for the first time.
Gathering Materials
Before diving into the insulation process, gathering all necessary materials was essential.
- A sharp utility knife for precise cutting of the insulation board
- A T-square for straight lines
- A marker for clear markings
- Spray foam for sealing gaps
- Safety gear, including gloves and eye protection
Each of these played a crucial role in ensuring a smooth installation process.
Step by Step Instructions
Discover easy DIY garage door insulation with our step-by-step guide, improving energy efficiency and comfort in no time! Perfect for all skill levels.
Measuring and Cutting
The first step was measuring each panel of my garage door to determine the exact size of insulation needed. This step is crucial; one wrong measurement can lead to wasted materials and effort. Once measured, I used the utility knife along with the T-square to cut the insulation board to fit each panel snugly.
Fitting the Insulation Panels
Fitting the panels into each section of the garage door was satisfying. The snug fit was crucial for effective insulation, and to achieve this, precise cutting was key. Some panels required a bit of trimming for a perfect fit, which I did cautiously, ensuring not to undersize them.
Sealing Gaps with Spray Foam
Even with a snug fit, there were small gaps around the panels. I used spray foam to fill these gaps, providing a complete seal that would prevent any heat from escaping or entering. This step was a bit messy but incredibly important for the overall effectiveness of the insulation.
Overcoming Challenges
Despite careful planning, not everything went as smoothly as anticipated. Initially, I made the mistake of assuming all garage door panels were the same size and ended up with panels that were too small. I had to redo several cuts, which was frustrating but a valuable learning experience—to measure each panel individually rather than assuming uniformity.
Final Touches and Considerations
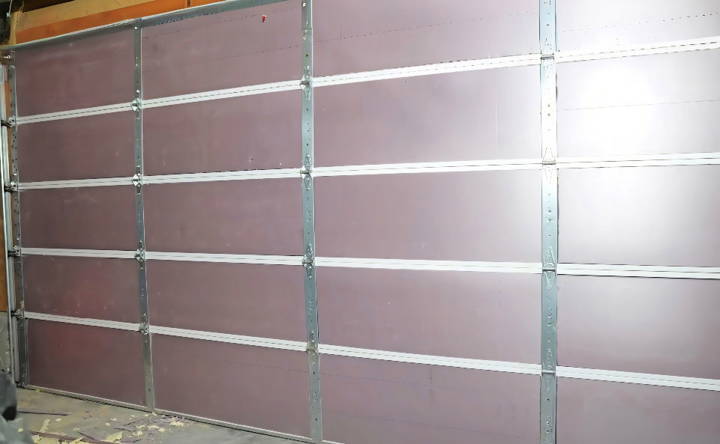
With the panels installed and the gaps sealed, my garage door looked noticeably different. It didn't just insulate the garage but also gave it a cleaner, more finished look.
I realized the insulation's weight could strain the garage door, needing spring tension adjustments. This delicate task is best for professionals or a well-prepared follow-up project.
Troubleshooting Common Garage Door Insulation Issues
When you're insulating your garage door, you might run into a few hiccups along the way. Here's a helpful guide to troubleshoot common issues:
Insulation Doesn't Fit
- Solution: Measure your garage door panels carefully before purchasing insulation. If you've already bought insulation that's too big, trim it down with a sharp utility knife for a snug fit.
Insulation Keeps Falling Off
- Solution: Ensure the adhesive you're using is strong enough for the material. For extra support, you can use mechanical fasteners like screws or nails, but be cautious not to damage the door.
Condensation Forms Behind Insulation
- Solution: This could mean there's a lack of proper ventilation. Consider adding vents to your garage to allow moisture to escape. Also, check that the insulation material is correctly sealed to prevent warm air from meeting cold surfaces.
Insulation Material is Deteriorating
- Solution: Some materials can degrade over time, especially if exposed to moisture. Replace any damaged sections with new insulation, and consider using a moisture-resistant material like closed-cell foam.
Door Becomes Too Heavy
- Solution: Insulation can add weight to your garage door. If the door is hard to open, adjust the tension of the springs or consult a professional to avoid safety risks.
Gaps Around Edges
- Solution: Gaps can let in drafts and reduce the efficiency of your insulation. Use weatherstripping or foam sealant to fill these gaps and build an airtight seal.
Unsure About R-Value
- Solution: The R-value is key to insulation effectiveness. If you're uncertain about the R-value of your material, consult the manufacturer's specifications or seek advice from a hardware store expert.
Keep these tips in mind for a smooth DIY garage door insulation project. Always prioritize safety: wear protective gear and follow the manufacturer's guidelines.
Maintenance and Upkeep
Keeping your garage door insulation in top condition is essential for its longevity and effectiveness. Here's a straightforward guide to maintaining and caring for your insulated garage door:
- Regular Inspections: Every few months, take a close look at your insulation. Check for any signs of wear and tear, such as tears in the material or areas where it has come loose. Catching problems early can save you from bigger issues down the line.
- Cleaning: Dust and debris can accumulate on your insulation, reducing its efficiency. Gently clean the surface with a soft brush or cloth to keep it free from buildup. Avoid using harsh chemicals or water, which can damage some types of insulation.
- Pest Control: Rodents and insects can sometimes nest in insulation materials. Keep an eye out for any signs of infestation, such as droppings or chewed areas. If you find pests, address the issue promptly to prevent damage.
- Seal Checks: The seals around your garage door help prevent drafts. Inspect these regularly and replace any that are cracked or brittle. This will help maintain the temperature in your garage and improve energy efficiency.
- Mechanical Parts: The added weight of insulation can affect the door's mechanics. Lubricate moving parts like springs and hinges annually to ensure smooth operation. If the door seems unusually heavy or difficult to open, consult a professional.
- Update When Necessary: Insulation technology improves over time. Stay informed about new materials or methods that could enhance your garage's insulation. Upgrading can be a cost-effective way to improve energy savings.
Maintain your garage door insulation year-round to control temperature and lower costs. Consult a pro for maintenance concerns.
FAQs About DIY Garage Door Insulation
Discover everything you need to know with our faqs about DIY garage door insulation. Get tips, materials, and expert advice for an energy-efficient garage!
Insulating your garage door can lead to several benefits:
Energy Efficiency: It helps maintain temperature control, reducing energy costs.
Comfort: A well-insulated garage is more comfortable, especially if you use the space for work or leisure.
Noise Reduction: Insulation can dampen street noise and the sound of the door’s operation.
Increased Door Strength: Insulation adds rigidity to the garage door, which can help it withstand impacts and wear.
When choosing insulation, consider the following:
Climate: The type of insulation may depend on whether you need to keep heat in or out.
Door Material: Some insulations adhere better to certain materials.
R-Value: This measures insulation’s thermal resistance. Higher R-values mean better insulation.
Ease of Installation: Some materials are easier to DIY than others.
Yes, many homeowners successfully install garage door insulation themselves. Here’s how:
Measure: Accurately measure your garage door panels.
Cut: Cut the insulation to fit each panel.
Secure: Use adhesive, fasteners, or a kit to secure the insulation.
Balance: After adding weight to the door, it may need rebalancing to operate smoothly.
When insulating your garage door, avoid these common mistakes:
Blocking Vents: Ensure you don’t cover any ventilation that prevents the buildup of harmful fumes.
Ignoring Safety: Wear protective gear and follow safety instructions, especially when using tools.
Adding Too Much Weight: Over-insulating can strain the door’s mechanisms. Balance the door after installation.
Poor Sealing: Make sure the insulation is properly sealed to prevent moisture and air leaks.
Maintaining your garage door insulation is crucial for its effectiveness and longevity. Here's what you can do:
Regular Checks: Inspect the insulation periodically for any damage, sagging, or gaps.
Cleaning: Keep the insulation clean from dust and debris, which can affect its performance.
Pest Control: Look out for signs of pests that may damage the insulation and take appropriate measures to deter them.
Seal Integrity: Check the seals around the door to ensure they're intact, as they complement the insulation in preventing air leaks.
Professional Inspection: If you notice any issues with the door's balance or operation, consult a professional to avoid further damage.
Conclusion
You're capable of doing this. Just one step can make a big difference. Start today and see the amazing results of garage door insulation.


