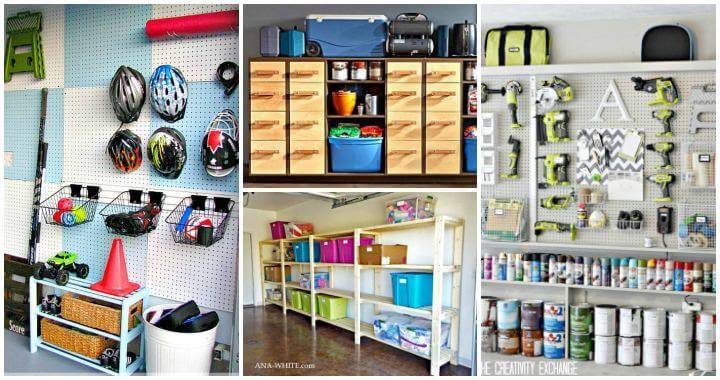
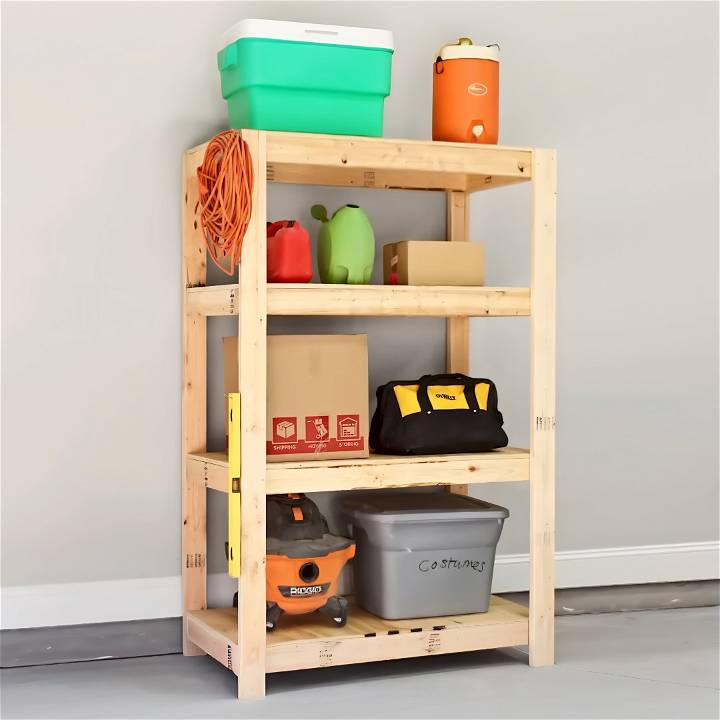
Like many of you, my garage had become a black hole for tools, old paint cans, and a myriad of unsorted objects that "might be useful someday." I realized it was high time to organize this chaos, but the cost of heavy-duty shelving units was off-putting, and finding ones that fit my space perfectly was nearly impossible. So, I decided to build my own—and if I may say, I succeeded spectacularly. Here's a step-by-step guide on how I did it. I hope you'll find it helpful for your garage organization project.
Materials Needed
- Plywood Sheets: Essential for the shelf tops. They're sturdy and provide a large surface area.
- 2x4s: These served as the frame and legs, providing the skeleton for the shelves.
- Circular Saw: Needed for cutting the plywood and 2x4s. It's a versatile tool every DIYer should have.
- Power Drill: Used for drilling holes and screwing the screws in place securely.
- Rigid Foam Insulation: Acts as a cutting surface to protect your floors and allows for smooth cuts.
- Wood Glue: Increases the durability of joints.
- Screws: Holds the wood pieces together firmly.
- Speed Square: For ensuring your cuts are perfectly perpendicular.
I chose these materials because of their affordability and availability. Plus, working with wood means it's easier to customize sizes and add hooks or hangers later.
Step-by-Step Building Process
Learn how to build DIY garage shelves in a step-by-step process, from cutting the wood to standing it up, to make organized storage space.
Cutting the Wood
First, I moved my plywood sheets onto the rigid foam insulation and measured to cut them into four 2-foot by 4-foot panels. Setting the circular saw blade slightly deeper than the plywood's thickness ensured a clean cut without damaging the insulation or the concrete floor below.
Next, I tackled the 2x4s, cutting 21-inch-long sections for the short side rails and the lengths needed for the legs. Marking all my boards at once saved time and reduced measurement errors.
Assembling the Frames
Each shelf consists of a rectangular frame made from 2x4s, covered with a plywood panel. Before screwing everything together, I applied wood glue at the joints to enhance the shelf's strength and longevity. Pre-drilling was critical to avoid splitting the wood, especially at the ends.
Attaching the Legs
I laid out the back two legs and began attaching the shelves from bottom to top, ensuring each shelf was square to the legs. Moving systematically ensured consistency in placement and squareness.
Once the back side was complete, I repeated the process with the front legs, applying wood glue generously before positioning and securing them. Even with self-tapping screws, pre-drilling can save you from the frustration of split wood.
Ensuring Squareness
To ensure everything was perfectly square, I measured diagonally across the top. Matching measurements corner to corner confirmed the unit's squareness.
Standing It Up
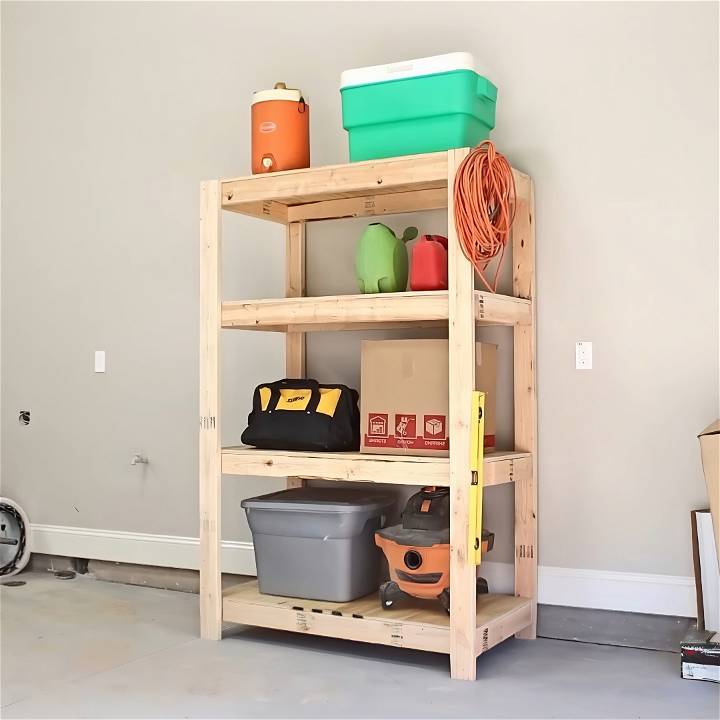
The final product was a bit heavier than anticipated, requiring some help to stand it up. But once in place, it was remarkably sturdy. Loading it up, I was pleased to see that it easily supported all the weight without any issues.
Customization Ideas for DIY Garage Shelves
When it comes to organizing your garage, the shelves you build should not only be sturdy but also reflect your personal needs and style. Here are some creative ways to customize your DIY garage shelves:
Adjustable Heights
- Build a versatile storage space by installing shelves with adjustable brackets. This allows you to change the height of each shelf based on what you need to store, from tall gardening tools to small paint cans.
- Use metal tracks that can be mounted to the wall studs, and attach the brackets at the desired levels.
Modular Designs
- Build modular units that can be easily rearranged or expanded as your storage needs change. Think of each shelf as a separate module that can be stacked or spread out.
- Opt for interlocking components that can be securely joined together without the need for tools.
Built-in Workspaces
- Incorporate a fold-down workbench under the shelves to save space and provide a work area when needed. Ensure it's sturdy enough to handle heavy projects.
- Add pegboards or magnetic strips above the workbench for easy access to tools.
Personal Touches
- Paint the shelves in your favorite color or use stains for a rustic look. This not only adds a personal touch but also helps protect the wood.
- Install LED strip lights underneath the shelves to illuminate your workspace and find items easily.
Smart Storage Solutions
- Attach bins or baskets to the underside of the shelves with hooks for storing small items.
- Use clear storage containers so you can see what's inside without having to label each box.
By customizing your garage shelves, you not only optimize your storage space but also make an area that feels uniquely yours. Remember, the key to a successful DIY project is to plan ahead, be creative, and always prioritize safety and functionality. Happy building!
Maintenance and Upkeep for DIY Garage Shelves
Ensuring your DIY garage shelves remain in top condition is crucial for safety and longevity. Here's a straightforward guide to maintaining your shelves:
Regular Inspections
- Check for stability: Periodically push lightly against your shelves to ensure they don't wobble.
- Examine hardware: Tighten any loose screws or brackets and replace them if they show signs of wear.
Cleaning Routine
- Dust regularly: Use a microfiber cloth or a soft brush to keep shelves free of dust.
- Wipe spills immediately: To prevent stains and damage, clean any spills with a damp cloth and mild cleaner.
Wood Shelf Care
- Reapply finish: If you notice the wood looking dull or the water no longer beads, it's time to reapply a sealant or finish.
- Check for splinters: Sand any rough areas to prevent injuries and to keep your shelves looking neat.
Metal Shelf Care
- Prevent rust: Keep metal shelves dry. If you spot rust, sand it off and apply a rust-inhibiting paint.
- Lubricate moving parts: If your shelves have any, use a silicone-based lubricant for smooth operation.
Load Management
- Avoid overloading: Heed the maximum weight capacity to prevent shelf damage or collapse.
- Distribute weight evenly: Place heavier items on the lower shelves and lighter ones above.
Seasonal Adjustments
- Account for humidity: Wood can warp in high humidity, so consider a dehumidifier if your garage is prone to moisture.
- Prepare for temperature changes: Materials expand and contract with temperature fluctuations. Allow for some space between items to accommodate this.
By following these simple maintenance steps, you can ensure your DIY garage shelves serve you well for years to come. Keep it simple, be diligent, and your shelves will remain a reliable part of your garage organization.
FAQs for DIY Garage Shelves
Discover all you need to know about building DIY garage shelves with our comprehensive FAQ guide. Simplify your storage solutions today!
What materials do I need to build garage shelves?
You'll need lumber or metal shelving, screws or bolts, brackets, and tools like a drill, saw, level, and measuring tape. Choose materials based on your budget, the weight they need to support, and your personal preference for aesthetics.
How do I determine the right size for my shelves?
Consider the items you plan to store and the available space in your garage. Ensure there's enough clearance for parking cars and moving around comfortably. A good rule of thumb is to keep shelves at least 24-36 inches deep and 72 inches high.
Can I build garage shelves if I'm not experienced in woodworking?
Absolutely! Start with a simple design and pre-cut lumber. There are many tutorials available that cater to beginners. Just follow the instructions carefully and always prioritize safety.
How do I ensure my shelves are sturdy?
Secure the shelves to wall studs, not just drywall. Use heavy-duty brackets and hardware. If you're unsure about the stability, consult with a professional or an experienced DIYer.
What's the best way to protect wood shelves from moisture?
Apply a sealant or paint that's suitable for the conditions in your garage. If your garage is prone to high humidity, consider using treated wood or metal shelving as an alternative.
How often should I check my shelves for wear and tear?
Inspect your shelves every six months for any signs of damage or loose hardware. Tighten, repair, or replace parts as necessary to maintain safety and functionality.
Conclusion
I've now built several of these shelving units, not only for my garage but also for my basement. They're incredibly versatile, affordable, and durable. Plus, the added ability to customize dimensions and add small adaptations, like hooks or hangers, makes wood shelving units superior, in my opinion, to pre-made metal options.
For anyone considering this project, I encourage you to give it a go. The satisfaction of building a practical, strong storage solution that meets your specific needs is immensely rewarding. Whether you're a seasoned DIYer or just starting, remember that careful planning, precise measuring, and a bit of elbow grease can result in a project you'll be proud of for years to come.


