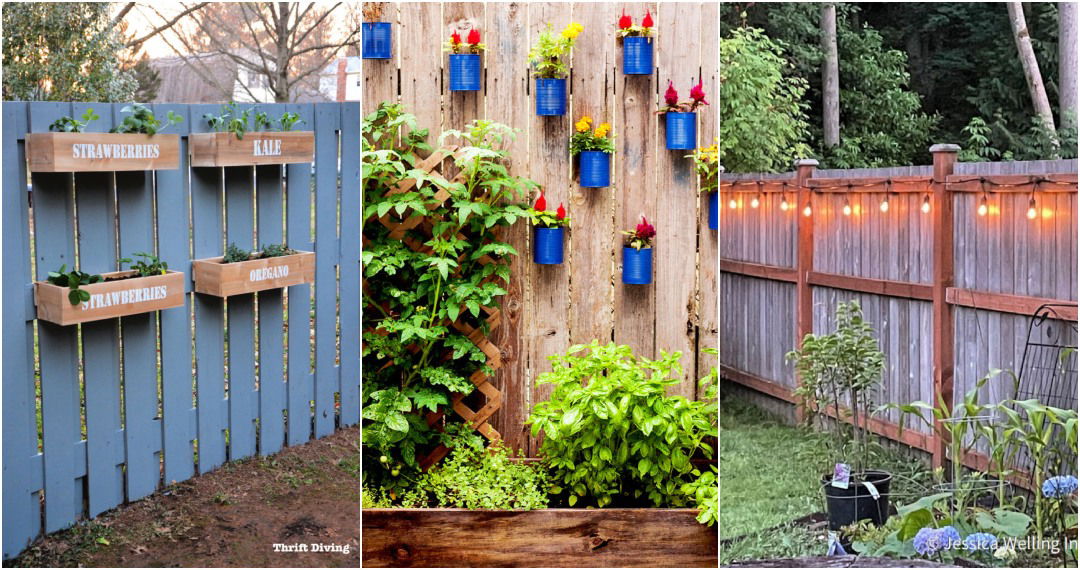
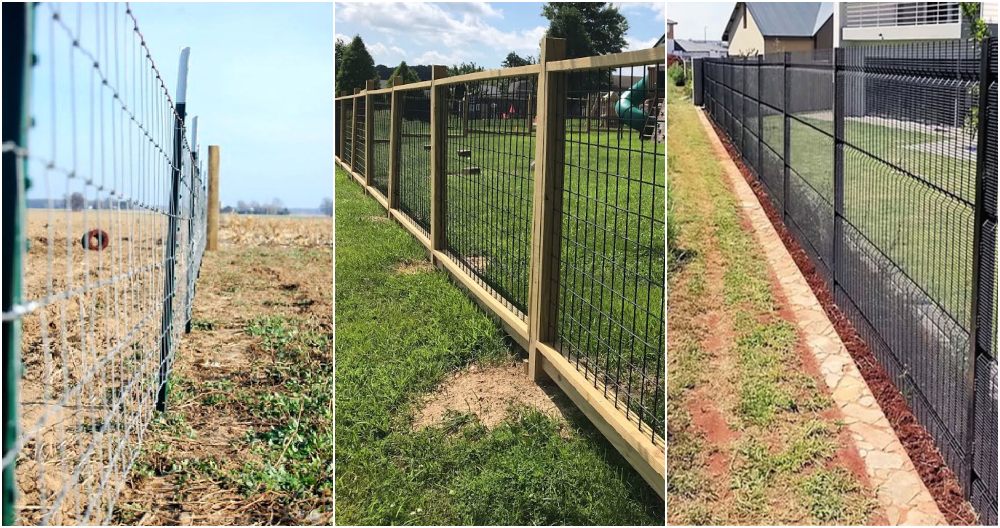
Starting a DIY garden fence project felt overwhelming at first. I had never done anything like this before, but my garden needed protection from animals. So, I did a lot of research on types of fences and materials needed. It was a lot to take in, but I made a list and planned my steps carefully.
Building the fence took time and patience. I measured cut, and placed each piece of wood, checking to make sure everything was secure. There were moments I wanted to give up, but seeing it come together piece by piece was rewarding. Now, my garden was safe, and I learned a new skill along the way.
I hope sharing my experience helps you feel ready to start your own DIY garden fence project. Trust me, if I can do it, so can you!
How to Build a Garden Fence - Step by Step Guide
Learn how to build a garden fence with our step-by-step guide. Get all the tips and instructions you need to build a sturdy and stylish fence for your garden.
Materials and Tools
When embarking on a DIY garden fence project, it's essential to have the right materials and tools. This section provides a comprehensive list of what you'll need.
Materials
The materials you choose can greatly influence the durability, functionality, and aesthetic of your garden fence. Here are some commonly used materials:
- Fence Posts: These provide the structural support for your fence. They can be made from various materials, but wooden posts are commonly used due to their durability and natural look.
- Fencing Panels or Boards: These form the main body of your fence. You can use wooden panels for a traditional look, or vinyl panels for a low-maintenance option.
- Concrete or Post Mix: This is used to secure the fence posts in the ground. Quick-setting concrete is a popular choice.
- Paint or Stain: This is optional but can enhance the look of your fence and provide additional protection against the elements.
- Hardware: This includes nails, screws, brackets, and other items needed to assemble the fence.
Tools
Having the right tools can make the job easier and result in a higher-quality fence. Here are some tools you might need:
- Hammer or Nail Gun: For securing the panels to the posts.
- Saw: To cut the panels and posts to the correct size.
- Post Hole Digger: For digging the holes to place your fence posts.
- Level: To ensure your fence posts are straight.
- Measuring Tape: For accurate measurements.
- Drill: If you're using screws instead of nails.
- Paintbrush or Sprayer: If you're painting or staining your fence.
Safety should always be your top priority when working with tools. Always wear appropriate protective gear, such as gloves and safety glasses.
This list is a good start for your DIY garden fence. Materials and tools may vary based on your design. Plan ahead and prepare before you begin.
Step by Step Instructions
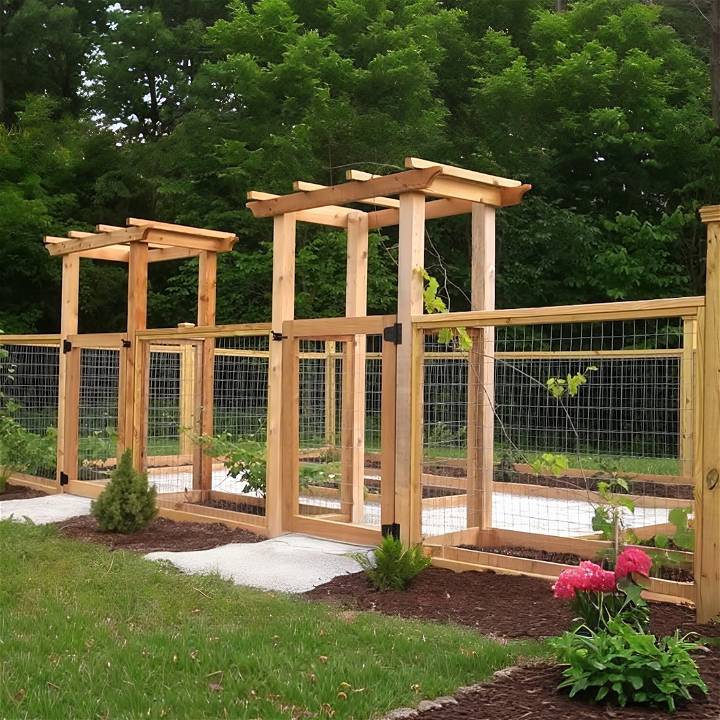
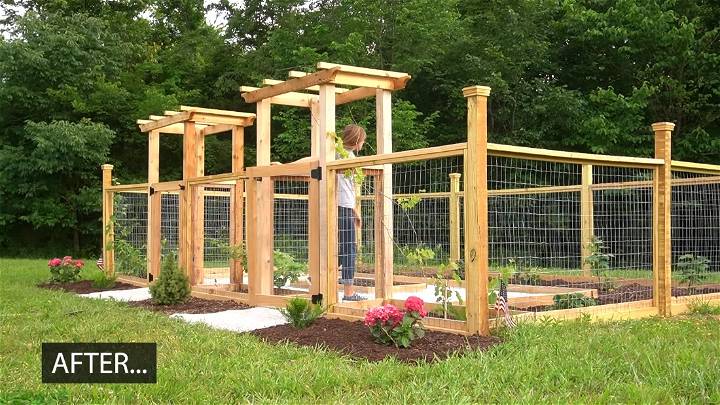
Learn how to build a fenced-in garden with these enclosed garden build plans below:
Planning Your Garden
- Design and Layout: Begin by planning the size and shape of your garden. Consider the types of plants you'd like to grow and ensure there's enough spacing for walkways.
- Materials List: You'll need cedar posts for the arbors, treated wood for the fence framing, exterior pocket hole screws, welded wire fencing, cedar fence pickets for the raised beds (optional), and concrete for setting posts. Gather tools such as a post hole digger, power drill, wire cutters, and a staple gun.
Setting Up the Structure
- Installing Arbors: Place arbors (if using) at your garden's entrance. Level the ground with paver sand to prevent wood rot and use stakes and a string line to ensure everything lines up.
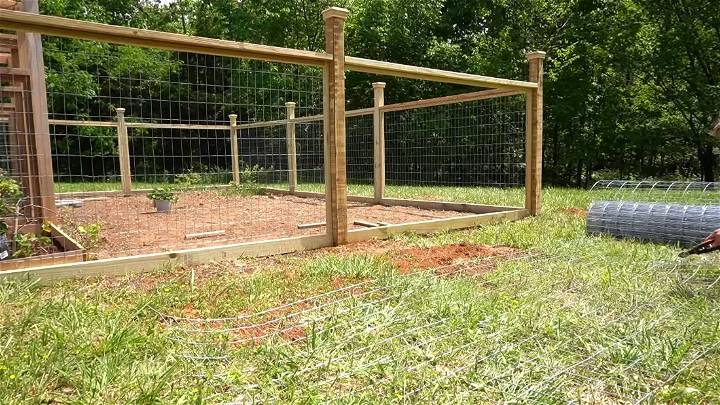
- Digging Post Holes: For the fence's corner posts, dig holes 24 inches deep, setting them straight with concrete.
- Installing Fence Framing: Attach horizontal and vertical 2x4s to connect the arbors and fence posts, maintaining a straight line rather than strictly level.
- Adding Fence and Gate: Cut welded wire fencing and staple it to the interior side of your 2x2 framing. For the garden gate, construct a simple frame from 2x4s and attach using hinges.
Customizing Your Garden
- Raised Beds: If desired, build raised beds using cedar fence pickets. This step can be customized based on your planting plans but is generally done towards the project's end.
- Weed Barrier and Paths: Lay down weed barrier fabric in areas not intended for planting. For paths, consider using paver base and pavers for a clean, walkable garden area.
Finishing Touches
- Staining and Protecting: Once your garden structure is complete and the wood has dried, apply a stain and sealant to protect it from the elements and ensure it lasts for seasons to come.
Video Tutorial
For a step-by-step video tutorial on building your enclosed garden, watch Shara's Fenced Garden Build on YouTube.
This video offers insightful visual support to accompany this written guide, making it easier to visualize each step in the process.
This project not only enhances the beauty of your outdoor space but also protects your garden from animals while providing a satisfying sense of accomplishment. Happy building!
Troubleshooting Guide for DIY Garden Fence
Building a DIY garden fence can sometimes come with unexpected challenges. This troubleshooting guide aims to help you anticipate and solve common problems that might occur during the project.
Problem: Fence Posts Are Not Level
Solution: Use a spirit level to check the alignment of your fence posts. If a post is not level, you may need to adjust the depth of the hole or the amount of concrete used.
Problem: Fence Panels Are Warping
Solution: Warping can occur if the wood used for your fence panels is not properly treated or dried. Make sure to use pressure-treated wood and let it dry out before installation.
Problem: Fence Is Not Sturdy
Solution: If your fence is wobbly or unstable, check the depth of your post holes. They should be deep enough to hold one-third of the total length of the post. Also, ensure that you're using enough concrete to secure the posts.
Problem: Paint or Stain Is Peeling
Solution: Peeling paint or stain can be a sign of poor application or weather damage. Make sure to apply a primer before painting and choose a paint or stain designed for outdoor use.
Problem: Fence Is Rotting
Solution: Rot can occur if your fence is frequently exposed to moisture. Consider using rot-resistant wood species, applying a water-repellent sealant, or installing concrete gravel boards at the base of your fence.
Every DIY project comes with its own set of challenges. Don't be discouraged if things don't go perfectly the first time. With patience and practice, you'll be able to build a beautiful and durable garden fence.
Maintenance Tips for Your DIY Garden Fence
Once your DIY garden fence is up, it's important to maintain it properly to ensure its longevity and keep it looking its best. Here are some maintenance tips:
Regular Inspection
Regularly inspect your fence for any signs of damage or wear. Look out for loose panels, rotting wood, or rusting hardware. Early detection can prevent minor issues from becoming major problems.
Cleaning
Clean your fence at least once a year. For wooden fences, use a mild detergent and a soft brush to avoid damaging the wood. For vinyl fences, a simple hose down is usually sufficient.
Repairs
Repair any damage as soon as you notice it. This might involve replacing a broken panel or post, or tightening loose screws or nails.
Painting and Staining
If your fence is made of wood, consider painting or staining it every 2-3 years. This not only enhances its appearance but also provides a protective layer against the elements.
Pest Control
Keep an eye out for pests that could damage your fence, such as termites or wood-boring beetles. If you notice any signs of pest activity, consider contacting a pest control professional.
A well-maintained fence can last for many years and continue to add beauty and privacy to your garden.
FAQs on DIY Garden Fence
Here are some frequently asked questions about building a DIY garden fence.
What type of wood is best for a garden fence?
The best type of wood for a garden fence depends on your specific needs and preferences. However, cedar, redwood, and pressure-treated pine are commonly used due to their durability and resistance to rot and pests.
How deep should fence posts be?
As a general rule, fence posts should be buried at least one-third of their total length. For example, if your fence post is 9 feet long, it should be buried at least 3 feet deep.
How far apart should fence posts be?
The distance between fence posts typically ranges from 6 to 8 feet. The exact distance can depend on the type of fence and the size of the panels or boards you're using.
How do I keep my wooden fence from rotting?
To prevent your wooden fence from rotting, consider using wood that's been pressure-treated or naturally resistant to rot. Regularly applying a water-repellent sealant can also help.
Can I build a fence without concrete?
Yes, it's possible to build a fence without concrete by using gravel or dirt to secure the posts. However, concrete generally provides a more stable and durable foundation.
How do I make my fence more stable?
To make your fence more stable, ensure that your posts are buried deep enough and secured with concrete. Using high-quality materials and ensuring that all components are securely fastened can also help.
What should I do if my fence posts are not level?
If your fence posts are not level, you may need to adjust the depth of the hole or the amount of concrete used. Using a spirit level can help ensure your posts are straight.
How often should I paint or stain my fence?
How often you should paint or stain your fence can depend on the type of paint or stain used, the local climate, and the type of wood. However, a general guideline is every 2-3 years.
What should I do if my fence is damaged?
If your fence is damaged, it's important to repair it as soon as possible to prevent further damage. This might involve replacing a broken panel or post, or tightening loose screws or nails.
Can I build a fence myself?
Yes, building a fence is a manageable DIY project for many people. However, it requires careful planning, the right materials and tools, and a good understanding of the process. If you're new to DIY projects, you might find it helpful to seek advice from more experienced DIYers or professionals.
Conclusion:
In the end, building a DIY garden fence was not just about protecting my garden; it was about challenging myself and learning something new. I feel proud looking at the work I did with my own two hands. So, if you're thinking about making a fence for your garden, I say go for it! It might take effort, but the result is worth it.


