Building DIY garden hoops to protect and nurture my plants was a project I had long envisioned. As someone who loves gardening, I wanted an affordable solution that didn't require advanced carpentry skills. My journey was enlightening and fun, so I'm here to guide you through a straightforward method of building garden hoops that both beginners and seasoned gardeners can enjoy.
Step by Step Instructions
Make sturdy DIY garden hoops with our step-by-step guide. Perfectly designed to protect your garden with ease. Discover materials and tips now!
Step 1: Gather Your Materials
Starting any project means gathering the right materials. For this garden hoops project, you'll need:
1. PVC Pipes
- Details: Two options are available, either two 10-foot straight PVC pipes or a single coiled 25-foot pipe. The latter is ideal if, like me, you have a small car for transportation.
- Why It's Needed: PVC pipes are the main structure of the hoops. They're flexible, durable, and cost-effective.
2. Tube Straps
- Details: Tube straps should match the diameter of the PVC pipes. In this case, 0.5-inch straps for 0.5-inch pipes.
- Why They're Needed: Tube straps secure the PVC pipes to the garden frame.
3. Rebaral Supplies
- Bird Netting: Keeps pests away from plants.
- Zip Ties: Secure the netting over the hoops.
- Landscape Pins: Fasten the netting to the ground.
- Wood Screws and Nails: For attaching the tube straps to wooden frames.
- Black Spray Paint: Protects the PVC from sun damage.
- Sandpaper & Twine: To smooth the pipes and measure lengths.
- Tools Needed: Hammer, power drill, and a tubing cutter help maintain precision in construction tasks.
Step 2: Prepare Your Workspace
When you're home, it's vital to organize your workspace. Lay out all your materials and tools neatly. Make sure you have ample space in your garden or yard to move around comfortably as you work on your project.
Step 3: Cutting and Preparing PVC Pipes
Preparing the PVC pipes involves measuring and cutting specific lengths. Let me walk you through how I did it.
Measuring and Cutting
- Measure: I began by measuring my garden bed to determine the appropriate height and width for the hoops. Taller plants will require longer pipes.
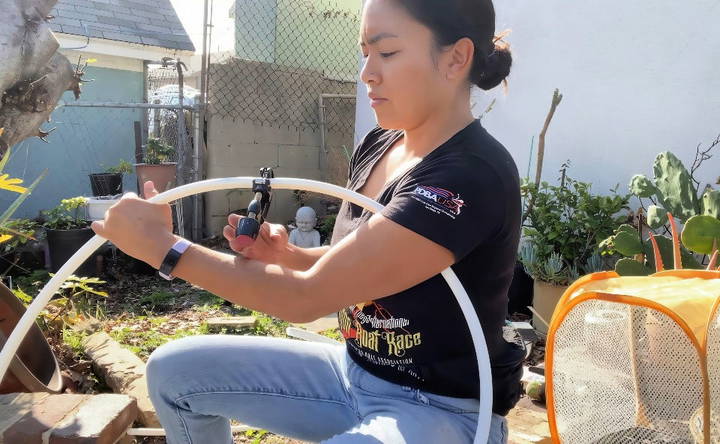
- Cutting with Tubing Cutter: I marked the desired length using a sharpie and used a tubing cutter for a clean and even cut. It's a handy tool for precision, though not strictly necessary.
- Sanding: After cutting, I lightly sanded the edges to get rid of any sharp bits, ensuring safety.
Drying and Painting
Once cut and sanded, I wiped the pipes before painting. Painting them black helps prevent eventual sun damage, extending their lifespan. A simple coat of spray paint sufficed before allowing them to dry thoroughly.
Step 4: Assembling the Garden Hoops
Now comes the fun part — putting it all together!
Install Rebar
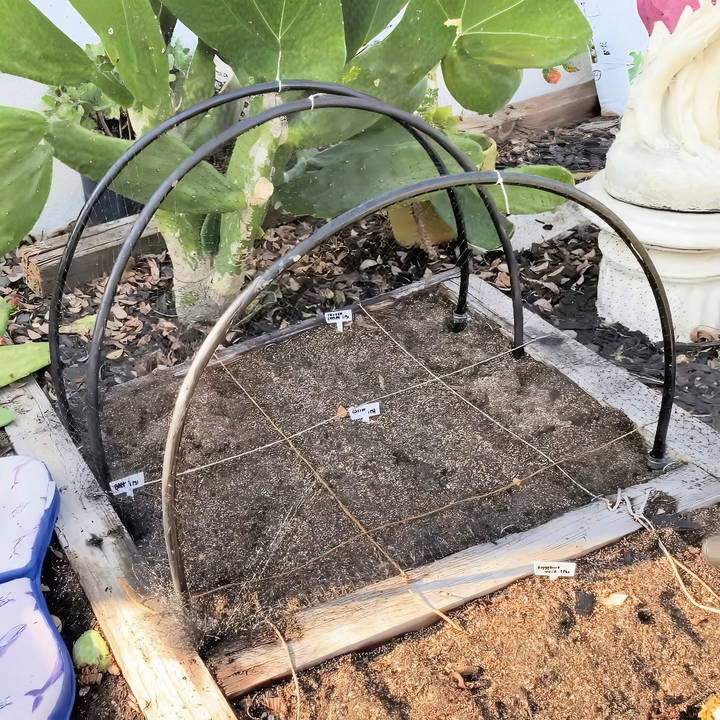
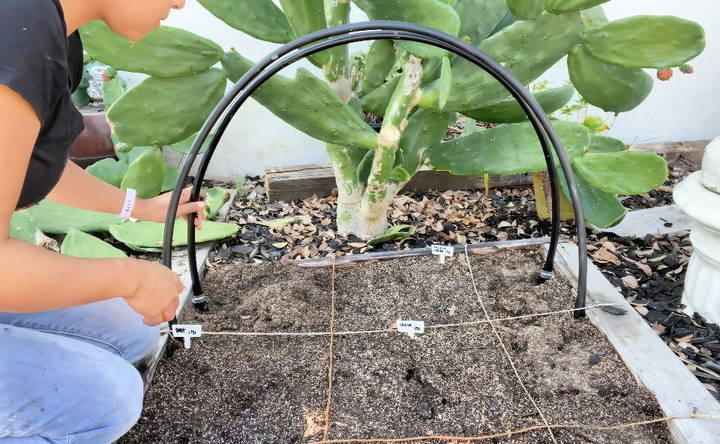
- Positioning: I decided where I wanted each hoop and hammered rebar stakes into the ground, spaced appropriately along my garden beds.
- Why It Matters: Rebar helps keep the hoops in place; thus, having a straight edge facilitates easier insertion of the PVC pipes.
Attach with Tube Straps
- For Wooden Beds: Using a power drill, I secured tube straps onto the wooden ends of my garden beds. This process was smooth since the strap size matched the pipe diameter.
- Alternative Options: If you don't have wooden beds, the rebars directly handle the pipe securing process by simply sliding the pipes over the bars.
Step 5: Installing Bird Netting
With the framework in place, the next task was to install bird netting as a protective layer.
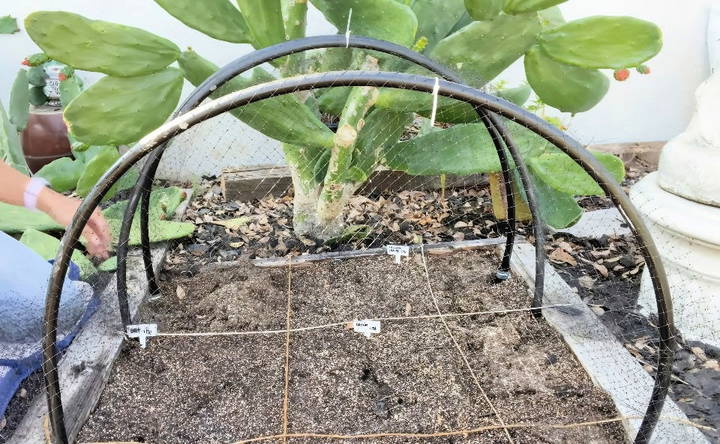
- Draping: Overlay the bird netting evenly across all the hoops, ensuring that it covers the desired planting area.
- Securing with Zip Ties: Carefully tie the netting at intervals along the hoops, tightening to the preferred tension.
- Pinning: Finally, fasten landscape pins through the edges of the netting into the soil, securing it.
Step 6: Final Touches and Maintenance
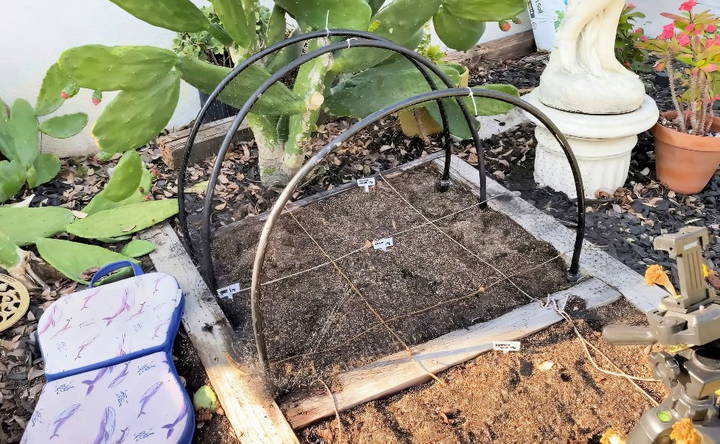
The accessories are in place, the nets secure, and the hoops standing firm — the setup was almost complete.
Regular Inspection
- Purpose: Routine checks help ensure longevity. Look for any wear or structural concern, especially after heavy winds or rain.
Adjustments
- Adapt/Flexibility: As different seasons and plants may require adjustments, having this system means I can easily modify it using longer or shorter PVC pipes or re-tightening netting if necessary.
Additional Tips: An Expert Insight
- Choosing the Site: Selecting an ideal location for your garden hoops is as crucial as their construction. Ensure the spot receives adequate sunlight and is accessible for daily plant care.
- Customization: Tailor your hoops to specific plant needs. Customizing here and there can enhance yield and plant health dramatically.
- Budget-Conscious Choices: You can always find alternatives that might be lying around your home, like reusing old pipes or nets.
- Engage Community: Visit local gardening forums or meet-ups. It's fascinating how diverse ideas and experiences can revolutionize your gardening journey.
- Seasonal Protection: Don't underestimate the importance of covering hoops during off-seasons with more robust materials to prevent damage from weather changes.
Creative Ideas and Customizations
Garden hoops are versatile and can be customized in many ways to suit your gardening needs. Here are some creative ideas and customizations to make your garden hoops more functional and visually appealing:
Add Irrigation Systems
Integrate a drip irrigation system into your garden hoops. This ensures your plants receive consistent watering, especially during dry periods. You can run drip lines along the base of the hoops and connect them to a timer for automated watering.
Use Different Colors
Paint or wrap your garden hoops in different colors to match your garden's aesthetic. Bright colors can make your garden look lively, while neutral tones can blend seamlessly with the natural surroundings. Use weather-resistant paint or tape to ensure durability.
Incorporate Netting for Pest Control
Attach fine mesh netting to your garden hoops to protect your plants from pests. This is particularly useful for keeping out insects like aphids and caterpillars. Ensure the netting is securely fastened to prevent any gaps where pests could enter.
Build a Mini Greenhouse
Cover your garden hoops with clear plastic sheeting to make a mini greenhouse. This helps retain heat and moisture, extending your growing season. It's especially beneficial for starting seeds early in the spring or protecting delicate plants in the fall.
Add Shade Cloth for Hot Weather
In hot climates, use shade cloth over your garden hoops to protect plants from excessive sun. Shade cloth comes in various densities, so choose one that provides the right amount of shade for your plants. This can help prevent sunburn and reduce water evaporation.
Install Support Structures
Attach trellises or stakes to your garden hoops to support climbing plants like tomatoes, cucumbers, and beans. This maximizes vertical space and keeps plants off the ground, reducing the risk of disease and making harvesting easier.
Use Recycled Materials
Get creative by using recycled materials to build your garden hoops. Old PVC pipes, metal rods, or even sturdy branches can be repurposed. This not only saves money but also reduces waste and promotes sustainability.
Integrate with Raised Beds
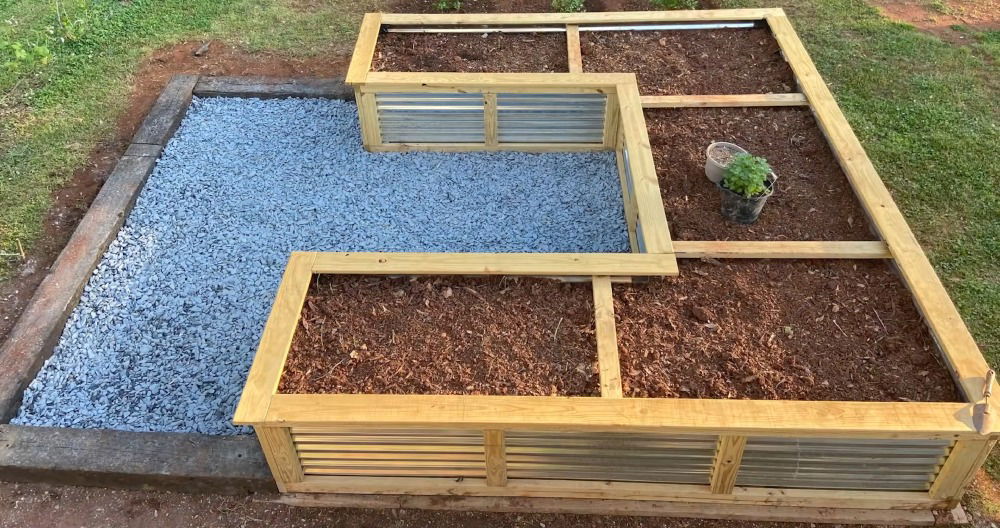
Combine garden hoops with raised beds for a more organized and efficient garden layout. Raised beds provide better soil drainage and can be easier to manage. Secure the hoops to the sides of the raised beds for stability.
Add Decorative Elements
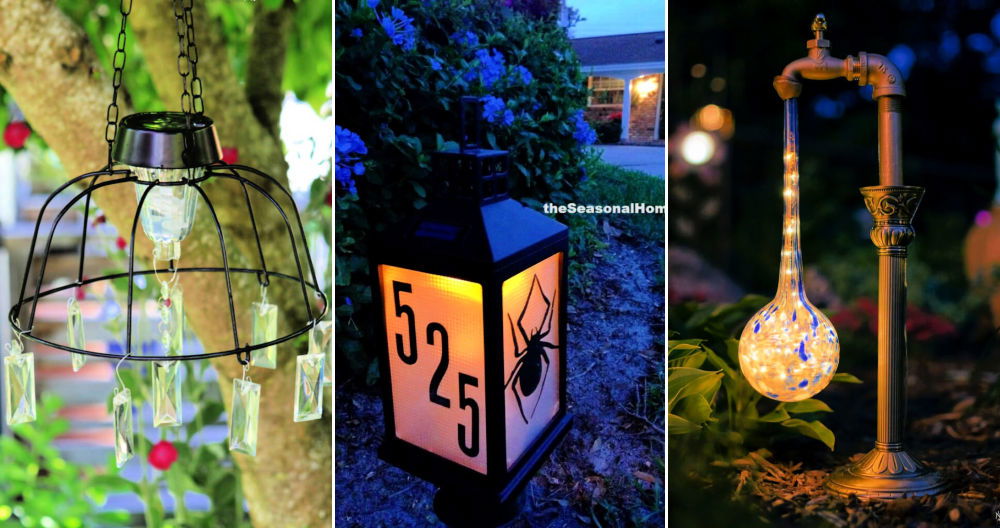
Enhance the visual appeal of your garden hoops by adding decorative elements. You can hang small lanterns, wind chimes, or even plant labels from the hoops. This adds a personal touch and makes your garden a pleasant place to spend time.
Seasonal Decorations
Change the look of your garden hoops with seasonal decorations. For example, you can wrap them with fairy lights during the winter holidays or hang colorful ribbons in the spring. This keeps your garden looking fresh and festive throughout the year.
Enhance your garden hoops with creative ideas to boost functionality and aesthetics. Experiment to find the best fit and make your garden uniquely yours.
Common Mistakes to Avoid
When building and using garden hoops, it's easy to make mistakes that can affect their effectiveness. Here are some common mistakes to avoid to ensure your garden hoops work well and last long:
Using Weak Materials
Choosing flimsy materials for your hoops can lead to them bending or breaking under pressure. Use sturdy materials like PVC pipes, metal rods, or thick bamboo to ensure durability.
Incorrect Measurements
Not measuring your garden bed correctly can result in hoops that are too short or too tall. Always measure the width and height of your garden bed accurately before cutting your materials.
Poorly Secured Hoops
If the hoops are not securely anchored, they can be blown away by strong winds. Use stakes, rebar, or heavy-duty clamps to firmly secure the hoops to the ground or the sides of raised beds.
Improper Covering Attachment
Attaching the covering material loosely can cause it to flap in the wind and tear. Make sure to fasten the covering tightly using clips, clamps, or zip ties. Check regularly to ensure it remains secure.
Ignoring Seasonal Adjustments
Failing to adjust the covering material according to the season can harm your plants. Use plastic sheeting for warmth in winter and shade cloth to protect from the sun in summer. Adjust as needed to suit the weather conditions.
Overcrowding Plants
Planting too many plants under the hoops can lead to poor air circulation and increased risk of disease. Space your plants appropriately to allow for good airflow and healthy growth.
Neglecting Maintenance
Garden hoops require regular maintenance to stay effective. Check for any damage to the hoops or covering material and repair or replace as needed. Clean the covering material to prevent mold and mildew buildup.
Not Considering Pest Control
Simply covering your plants may not be enough to keep pests away. Use fine mesh netting to prevent small insects from getting through. Regularly inspect your plants for signs of pests and take action if needed.
Forgetting to Water
Covered plants may need more frequent watering as the covering can reduce rainfall reaching the soil. Ensure your plants are adequately watered, either manually or by integrating an irrigation system.
Overlooking Flexibility
Building rigid hoops that cannot be easily adjusted can limit their usefulness. Consider using flexible materials or connectors that allow you to adjust the height and width of the hoops as needed.
Avoiding mistakes ensures effective, durable garden hoops. Plan well, maintain regularly, and adjust wisely to maximize their benefits.
FAQs About DIY Garden Hoops
Discover answers to all your questions about DIY garden hoops. Get tips, benefits, and step-by-step guidance to make your own garden hoops easily.
Garden hoops are curved structures made from materials like PVC pipes or metal rods. They are placed over garden beds and covered with fabric, plastic, or netting. Garden hoops protect plants from pests, harsh weather, and extend the growing season by building a mini-greenhouse effect.
Garden hoops offer several benefits:
Protection: Shield plants from pests, birds, and harsh weather.
Extended growing season: Build a warmer environment for plants, allowing for earlier planting and later harvesting.
Versatility: Easily adjust the cover material to suit different seasons and plant needs.
Cost-effective: DIY garden hoops are inexpensive and can be made from readily available materials.
Regular checks: Inspect the hoops and cover regularly for any damage or wear.
Clean the cover: Remove dirt and debris from the cover to ensure maximum light penetration.
Adjust as needed: Change the cover material based on the season and plant requirements.
Store properly: If not in use, store the hoops and cover in a dry place to prolong their lifespan.
Yes, garden hoops are versatile and can be used for various types of plants. They are particularly useful for:
Vegetables: Protects crops like lettuce, spinach, and carrots from pests and weather.
Flowers: Shields delicate blooms from harsh conditions.
Herbs: Maintains a controlled environment for herbs like basil and parsley.
Seedlings: Provides a safe space for young plants to grow before transplanting.
Yes, garden hoops can help with weed control. By covering your garden beds with fabric or plastic, you can make a barrier that prevents weed seeds from reaching the soil. This reduces the need for manual weeding and helps your plants thrive without competition for nutrients and water.
Conclusion: A Worthwhile Investment
Making garden hoops has been more than an improvement to my garden — it has become a testament to the resourcefulness and creativity we all have within us. This project was simple, affordable, and quite rewarding. With these straightforward steps, you can enjoy the fulfillment of nurturing your garden while protecting your plants from environmental stressors and pests. Feel free to share your garden experiences and additional projects with a thriving community over on Instagram at gardenheaux.


