Discover the convenience and creativity of 10 DIY garden hose holder ideas. A DIY hose holder project not only keeps your outdoor space tidy but also adds a touch of personality to your garden. With a variety of DIY garden hose holder ideas and materials to choose from, you can craft a hose holder that perfectly complements your landscaping style.
In this guide, we'll walk you through the step-by-step process of making your own garden hose holder. From selecting the right tools and materials to customizing your design, you'll find all the information you need to create a functional and attractive storage solution for your hose. Let's get started on this rewarding DIY journey!
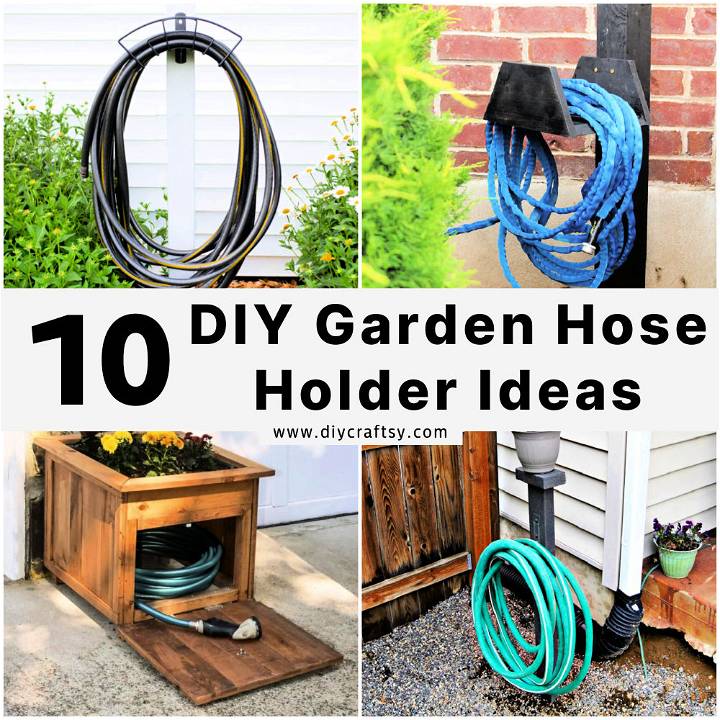
How to Make a Garden Hose Holder - Step by Step
Making a wooden hose holder is a practical and enjoyable woodworking project. This guide will help you build a sturdy and stylish holder for your garden hose, keeping it organized and off the ground. We'll use a 4-foot piece of 5/4" Ipe wood, but you can adapt the design to other types of wood or sizes depending on availability. Remember, when working with Ipe or other hardwoods, it's crucial to pre-drill the screw holes to avoid breaking your screws during assembly.
Materials and Tools Needed
- 4-foot piece of 5/4" Ipe wood (or wood of your choice)
- Screws (suitable for the wood you're using)
- Drill
- Saw
- Measuring tape
- Sandpaper or an electric sander
- Wood finish (optional)
Step 1: Measure and Cut Your Wood
Start by measuring and marking your Ipe wood for cutting. For a simple hose holder, you'll need to cut a piece for the backplate that mounts to the wall and two arms that will hold the hose. A good size for the backplate is 12 inches long, and the arms can be around 6 inches each. Use your saw to carefully cut the wood according to your measurements.
Step 2: Sand the Wood
Once you have your pieces cut, it's time to sand them down. This will not only smooth out any rough edges but also prepare the wood for a finish if you choose to apply one. You can use sandpaper or an electric sander for this job. Sand all sides of each piece until they are smooth to the touch.
Step 3: Pre-drill Screw Holes
Before assembling, pre-drill holes in the wood where the screws will go. This step is particularly important when using hardwoods like Ipe to prevent the wood from splitting. Place the backplate piece on your work surface, and position the arm pieces where you intend to attach them. Mark these spots with a pencil and then drill your holes.
Step 4: Assemble the Hose Holder
Now, align the arm pieces with the pre-drilled holes on the backplate and secure them using your screws. Ensure the arms are firmly attached and the screws are not protruding.
Step 5: Mount the Hose Holder
Choose a suitable location for your hose holder, preferably close to your water source. Mark the spot where you'll be drilling through the backplate to attach it to the wall. Use a drill to mount the backplate securely, making sure it's level.
Step 6: Apply Finish (Optional)
If desired, apply a coat of wood finish to your hose holder to protect it from the elements and enhance its appearance. Let the finish dry completely before hanging your hose.
Video Tutorial
For a step-by-step visual guide on making a wooden hose holder, watch this helpful YouTube video by Jon Peters - Longview Woodworking: How to Make a Wooden Hose Holder - Free Design Plans.
This video tutorial complements our written guide, offering you a visual perspective on the assembly process in a clear and comprehensive manner. It's perfect for visual learners who appreciate seeing each step in action.
By following these straightforward steps, you'll have a functional and attractive wooden hose holder to keep your garden organized and your hose easily accessible. Remember, woodworking is not only about making useful items but also about enjoying the process and learning new skills along the way.
Design Customization for Your DIY Garden Hose Holder
Making a garden hose holder that not only serves its purpose but also enhances the beauty of your garden is a rewarding DIY project. Here's how you can add a personal touch to your garden hose holder:
Choose Your Style
First, think about the overall style of your garden. Is it modern, rustic, or perhaps cottage-style? Your hose holder should reflect this theme. For a modern look, consider clean lines and industrial materials like metal or concrete. For a rustic vibe, repurposed wood or a vintage wheel rim can add character.
Selecting Colors
The color of your hose holder can either make it stand out or blend in with the surroundings. If you want it to be a focal point, go for bold colors that contrast with the greenery. If you prefer subtlety, use shades that complement your garden's palette.
Adding Decorative Elements
Personalize your hose holder with decorations such as:
- Garden charms: Attach small garden-themed ornaments.
- House numbers: Incorporate your home's number for a practical touch.
- Planters: Add a small planter on top or the side for extra greenery.
Material Matters
Choose materials that are durable and weather-resistant. If you're using wood, ensure it's treated or sealed to prevent rot. Metals should be rust-proof or painted with a protective coating.
Final Touches
For the finishing touch, consider these enhancements:
- Hooks and shelves: Add hooks for hanging garden tools and a shelf for gloves or seed packets.
- Lighting: Integrate solar-powered lights for a warm glow in the evening.
- Signage: Craft a sign with a welcoming message or a funny quote about gardening.
Make a unique and functional garden hose holder. Let your creativity shine!
Enhancing the Functionality of DIY Garden Hose Holders
Making your garden hose holder more functional can be a game-changer for your gardening routine. Here are some practical upgrades you can consider:
Mobility and Convenience
Consider adding wheels to your hose holder to make it easy to move around. This is especially useful for large gardens. A retractable hose reel is another great feature that can make winding and unwinding the hose effortless.
Storage Solutions
Adding storage to your hose holder can significantly improve its functionality. Here are a few ideas:
- Built-in compartments: Ideal for storing gardening gloves, nozzles, or other small tools.
- Shelves: A simple shelf above or below the hose reel can hold larger items like watering cans.
- Hooks: Attach hooks to the side of your hose holder to hang garden tools for quick access.
Smart Features
Incorporate smart technology into your hose holder for an even more efficient gardening experience:
- Automatic timers: Set timers to remind you when to water your garden or to automatically start a sprinkler system.
- Sensors: Install moisture sensors that can tell you when your plants need watering.
Durability and Maintenance
Choose materials that are long-lasting and require minimal maintenance. Metal or high-quality plastic can withstand the elements better than untreated wood.
Safety Measures
If you have children or pets, consider adding safety features to your hose holder:
- Lockable reel: Prevents accidental unwinding.
- Smooth edges: Ensures there are no sharp edges that could cause injury.
By incorporating these features, your DIY garden hose holder will not only be a handy tool but also a testament to your ingenuity and care for your garden.
Sustainability Tips for Your Garden Hose Holder
Incorporating sustainability into your DIY projects not only benefits the environment but also can lead to a more satisfying and personal connection with your garden. Here's how you can make your garden hose holder eco-friendly:
Use Recycled Materials
Start by choosing materials that have had a previous life. This could be:
- Old pallets: Dismantle and use the wood to make the structure of your hose holder.
- Repurposed metal: An old barrel or bucket can be transformed into a sturdy base.
Non-Toxic Treatments
When it comes to treating your materials, opt for:
- Natural wood stains: Look for stains made from natural oils and waxes.
- Eco-friendly paints: Select paints that are low in volatile organic compounds (VOCs).
Water Conservation
Your hose holder can play a part in saving water with:
- Rainwater collection system: Attach a funnel to direct rainwater into a storage container.
- Drip irrigation hook-up: Design your holder to connect easily to a drip irrigation system, reducing water waste.
Encourage Biodiversity
Make your garden hose holder a haven for wildlife by:
- Adding a birdhouse: Attach a small birdhouse to the top of your holder.
- Planting native flowers: Use the base of your holder as a planter for local flora that attracts pollinators.
Longevity and Repair
Build your hose holder to last by:
- Choosing durable materials: Hardwoods and galvanized metals resist decay and rust.
- Designing for easy repair: Assemble parts in a way that allows for easy replacement or fixing.
By following these tips, you'll make a garden hose holder that's not only practical and beautiful but also kind to our planet. Every small step towards sustainability makes a difference!
Maintenance and Care for Your DIY Garden Hose Holder
Ensuring your garden hose holder remains in top condition will extend its lifespan and maintain its functionality. Here's how you can take care of your DIY creation:
Regular Cleaning
Keep your hose holder clean to prevent dirt buildup. Simply wiping it down with a damp cloth can do the trick. For metal holders, use a mild soap solution to avoid corrosion.
Weatherproofing
Protect your hose holder from the elements:
- Sealant: Apply a waterproof sealant to wood holders to prevent water damage.
- Cover: Use a cover during harsh weather or when not in use to shield it from rain and sun.
Inspect and Repair
Periodically check for:
- Loose parts: Tighten any screws or bolts that may have loosened over time.
- Wear and tear: Look for signs of wear, such as cracks or rust, and address them promptly.
Proper Storage
During the off-season, store your hose holder properly:
- Drain water: Ensure all water is drained from the hose to prevent freezing and cracking.
- Indoor storage: If possible, store the hose holder indoors to protect it from winter weather.
By maintaining your hose holder, you'll keep it in good shape for a beautiful garden. Care is key!
FAQs About DIY Garden Hose Holders
When it comes to DIY garden hose holders, there are always questions that pop up frequently. Addressing these can help users avoid common pitfalls and ensure a successful project. Here's a helpful section dedicated to answering some of those FAQs:
What is the best material for a garden hose holder?
The best material for a garden hose holder is one that is durable and weather-resistant. Options include:
- Treated wood: Resists rot and insects.
- Metal: Choose rust-proof or coated metals for longevity.
- Recycled plastic: Eco-friendly and resists moisture.
How can I ensure my hose holder is stable?
To ensure stability:
- Anchor it: Secure your hose holder to a wall or fence.
- Use a heavy base: If it's freestanding, a solid base will prevent tipping.
- Check regularly: Tighten any loose parts as needed.
Can I add a decorative touch to my hose holder?
Absolutely! Personalize your hose holder with the following:
- Paint: Choose colors that match your garden theme.
- Ornaments: Add garden-themed decorations or signs.
- Plants: Integrate planters or climbing plants for a natural look.
How do I protect my hose holder from the weather?
Protecting your hose holder involves:
- Sealants: Apply a waterproof sealant to wood holders.
- Covers: Use protective covers during extreme weather.
- Proper storage: Store indoors during the off-season if possible.
What tools will I need to build a hose holder?
The basic tools you'll need are:
- Saw: For cutting materials to size.
- Drill: This is used to make holes and secure parts together.
- Screwdriver: For assembling and tightening screws.
How can I make my hose holder eco-friendly?
To make your hose holder eco-friendly:
- Use recycled materials: Old pallets or metal drums are great options.
- Avoid toxic treatments: Opt for natural stains and sealants.
- Collect rainwater: Incorporate a rainwater collection feature.
By answering these questions, you'll make a great DIY garden hose holder. Plan, be creative, and have fun!
10 DIY Hose Holder Ideas for Garden
Discover 10 creative DIY hose holder ideas for your garden to keep your outdoor space organized and stylish. Upgrade your garden today!
1. Adorable DIY Chunky Garden Hose Holder
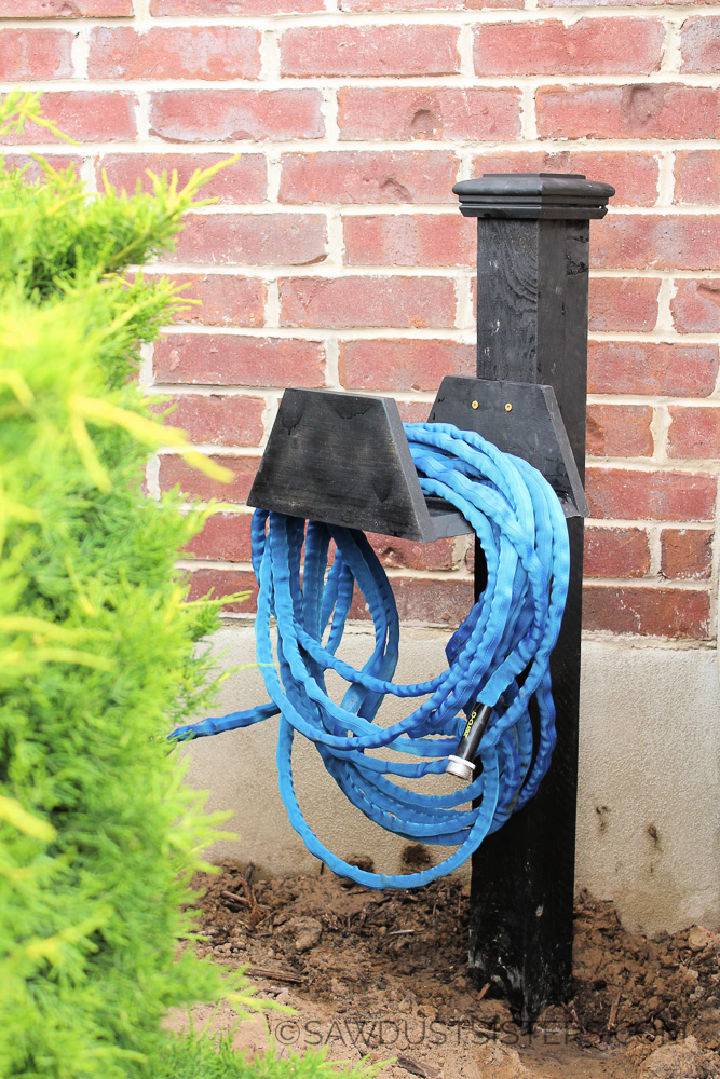
Tackle your garden clutter with this simple and efficient DIY chunky garden hose holder. Say goodbye to the days of tripping over your hose with a homemade solution that's not only budget-friendly but also adds a touch of style to your outdoor space. Using durable cedar wood, basic tools, and a straightforward assembly process, you can secure your garden hose neatly.
This project suits any skill level, making it perfect for weekend DIYers. Detailed steps, including materials and tools required, ensure a smooth creation process. For complete instructions and more project ideas, visit Sawdust Sisters. Enjoy crafting a practical and attractive garden accessory that's sure to simplify your gardening routine.
2. Homemade Hose Holder for The Garden
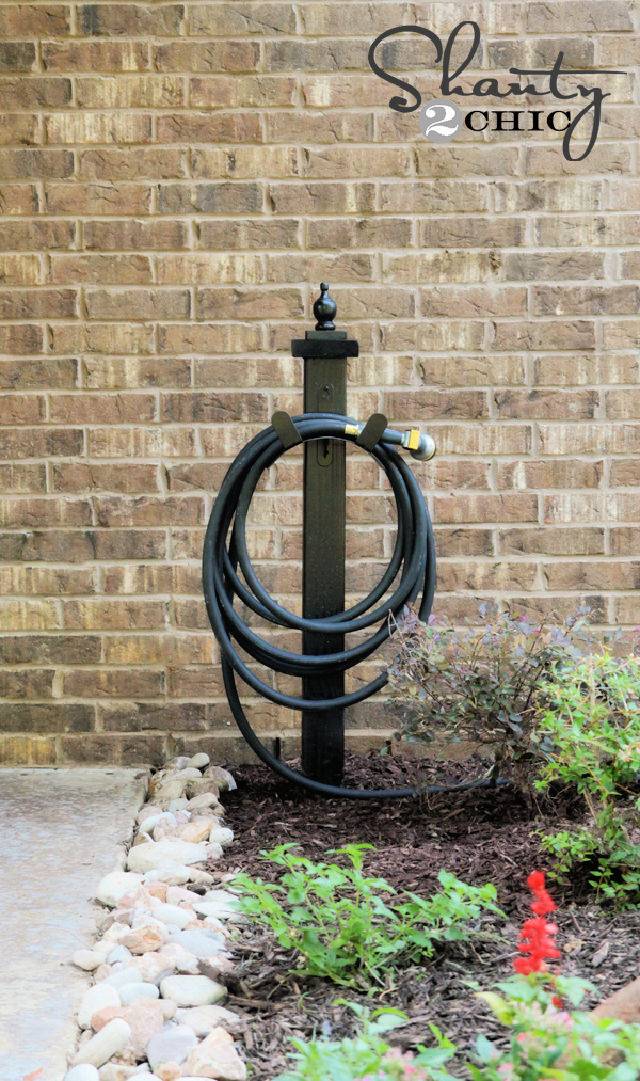
Craft a practical and attractive homemade hose holder using simple materials and our easy-to-follow instructions. Upgrade your garden with a simple yet stylish DIY hose holder, skillfully explained by the experts at Shanty-2-Chic. With a modest budget and minimal time, transform how you store your garden hose.
This handy guide walks you through making a durable and attractive hose holder using straightforward materials like a pine board and a few tools. Ideal for keeping your garden organized, this project not only adds charm but functionality to your outdoor space. Follow the steps for a cost-effective solution to a common garden dilemma.
3. How to Make a Garden Hose Stand
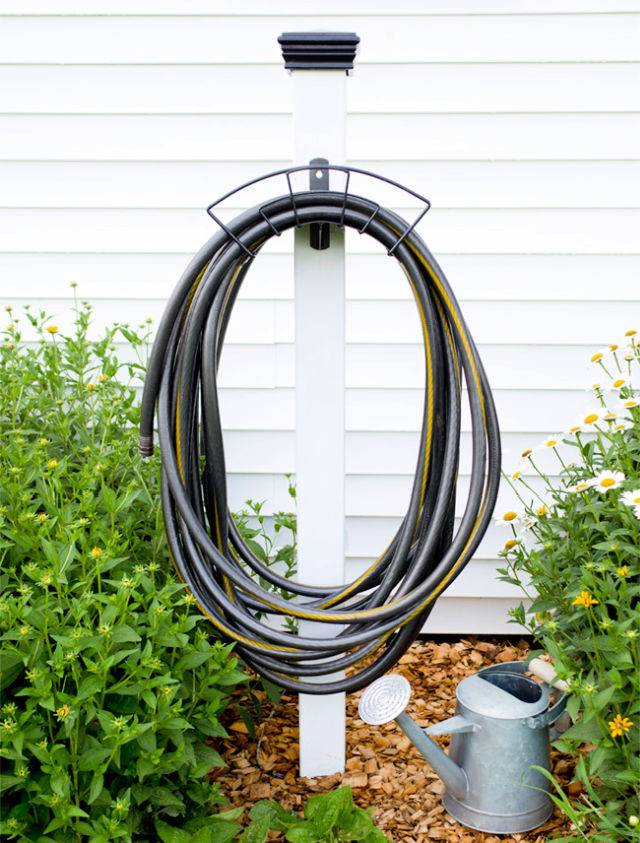
Simplify your garden organization with a charming DIY hose stand, courtesy of Hello Farmhouse. Say goodbye to tangled hoses and hello to a tidy backyard. This straightforward guide walks you through making a functional yet stylish hose stand, combining practicality with farmhouse elegance.
From painting your post for a classic touch to securing it in concrete, each step ensures your hose stays neatly in place. Enhance your outdoor space's appeal while keeping your hose accessible and organized.
4. DIY Wooden Garden Hose Storage
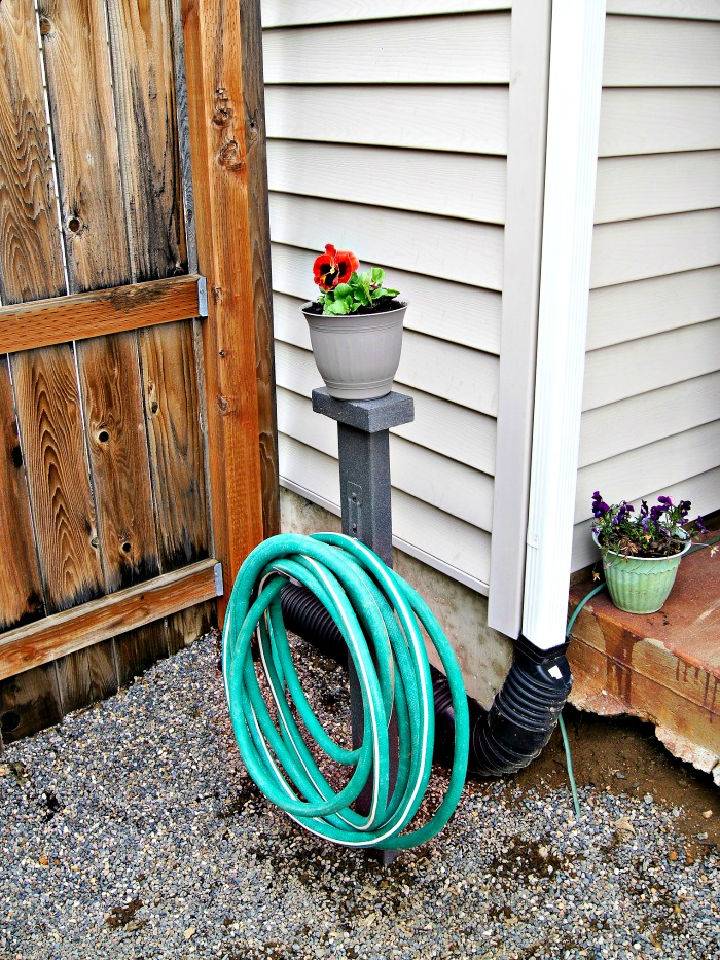
Make a functional and stylish DIY garden hose holder with our step-by-step guide and creative ideas. Transform your garden hose chaos into neat order with a simple DIY storage solution. By utilizing just a 2x4 and a pair of utility hooks, make a sturdy home for your garden hose that doubles as a charming planter. This project not only tidies up your yard but also adds a personal touch to any new homeowner's outdoor space.
Say goodbye to tangled hoses lying around and hello to a more organized and visually appealing garden area. This guide is perfect for those looking to enhance their outdoor organization easily and affordably.
5. Build a Pallet Wood Garden Hose Holder with A Planter
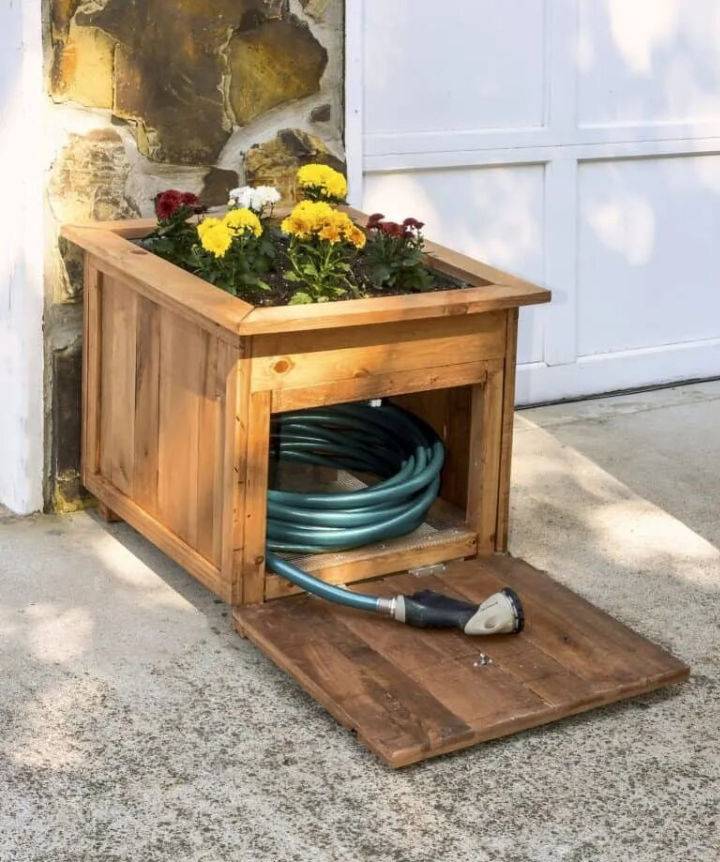
Keep your garden tidy with our innovative DIY hose storage solutions that are both functional and aesthetically pleasing. Build an eye-catching and functional DIY hose holder with pallet wood that doubles as a planter. This creative project is a stylish solution to keep your garden hose neatly stored while showcasing your favorite plants on top.
It's a practical and decorative addition to any outdoor space. For a detailed guide on making this dual-purpose hose holder and planter, visit DIY Candy. This guide ensures a hassle-free process, making it easier than ever to enhance your garden's aesthetic and functionality.
6. How to Build a Garden Hose Holder
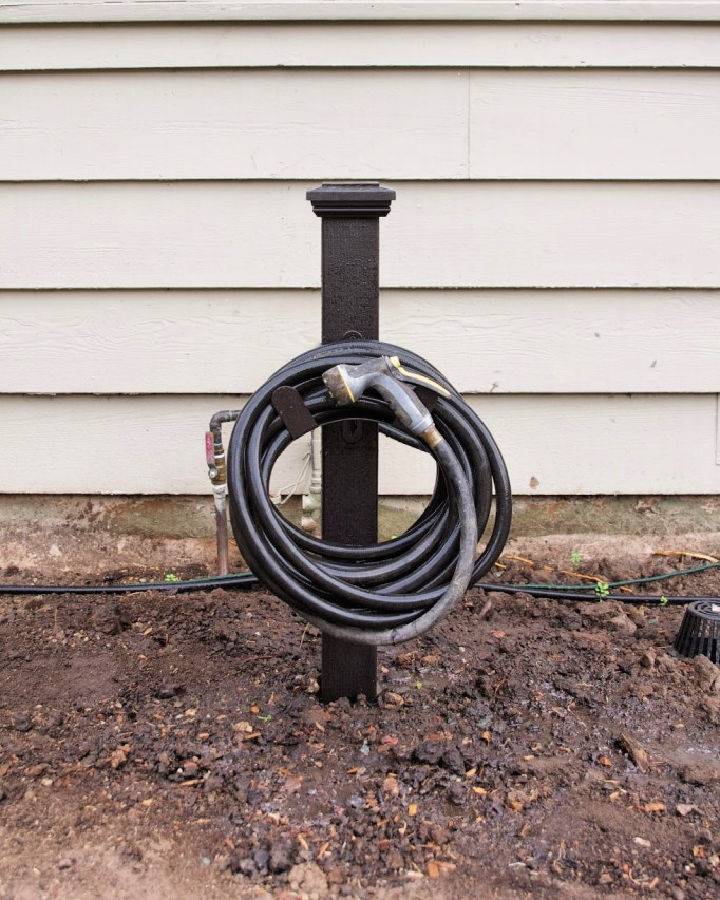
Keep your hoses neatly organized with a simple DIY hose holder project. Eliminate clutter and prevent hoses from lying in the dirt. Simply Organized offers an easy-to-follow guide, perfect for any homeowner aiming to beautify their yard while maintaining functionality.
With just a few materials and a bit of creativity, you can make a neat, cost-effective solution. Say goodbye to messy hoses and hello to a tidy garden. Start this straightforward DIY today for an instantly improved outdoor area.
7. Beginner-Friendly DIY Garden Hose Holder
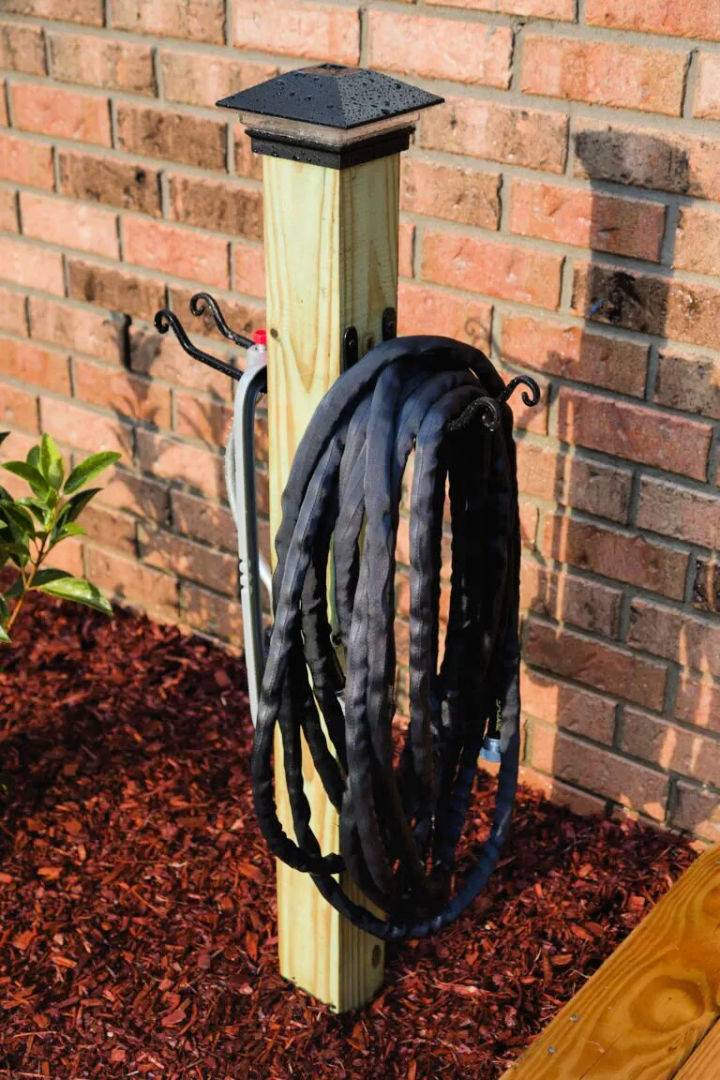
Discover 10 creative DIY hose holder ideas to keep your garden organized and your hose easily accessible. Organize your garden with an elegant solution by building a DIY garden hose holder. Perfect for tidying up outdoor spaces, this straightforward guide at Kippi at Home outlines everything you need from materials to step-by-step instructions.
Not only does it store your hose neatly, but it also adds a decorative touch with a post cap solar light. Ideal for enhancing your home's curb appeal while keeping your gardening essentials organized. This project is easy to undertake and provides functional yet stylish storage for your garden hose.
8. Make a Garden Hose Hanger Post
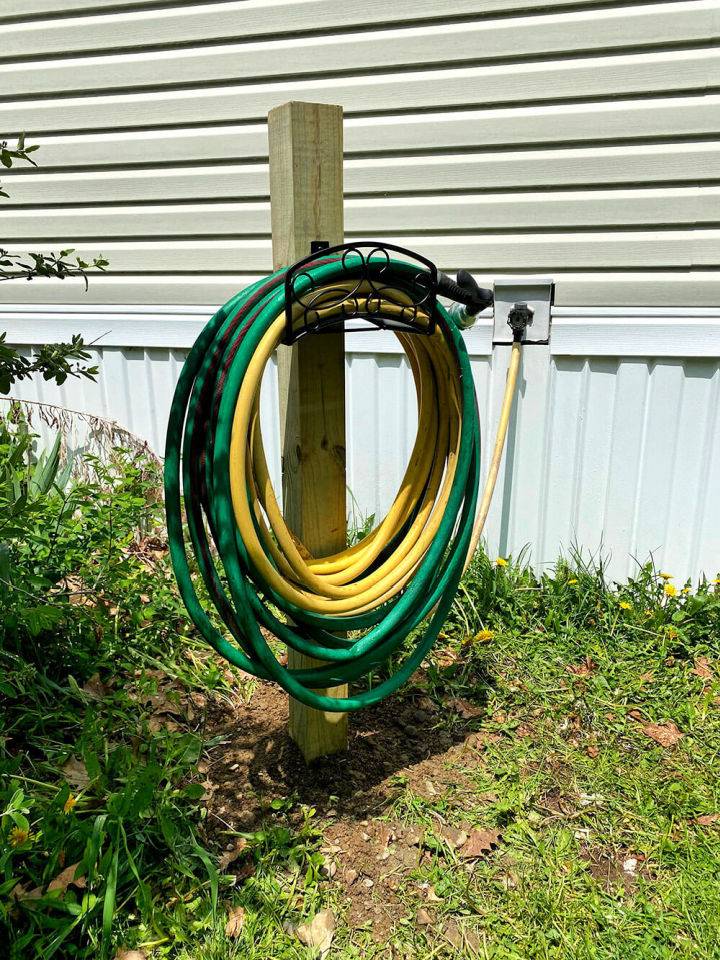
Make your garden neat and functional with a DIY garden hose hanger post. Perfect for keeping your lawn free from hose clutter, this project uses Sika PostFix instead of traditional concrete, making it quicker and easier. You'll need basic tools like a shovel, level, and drill, plus a treated wooden post and Sika PostFix.
In just a few steps, including digging, leveling, mixing, and pouring, you'll have a stable and durable hanger for your hose. Follow the complete guide at Sika to enhance your outdoor space today.
9. Handmade Wooden Hose Holder for The Garden
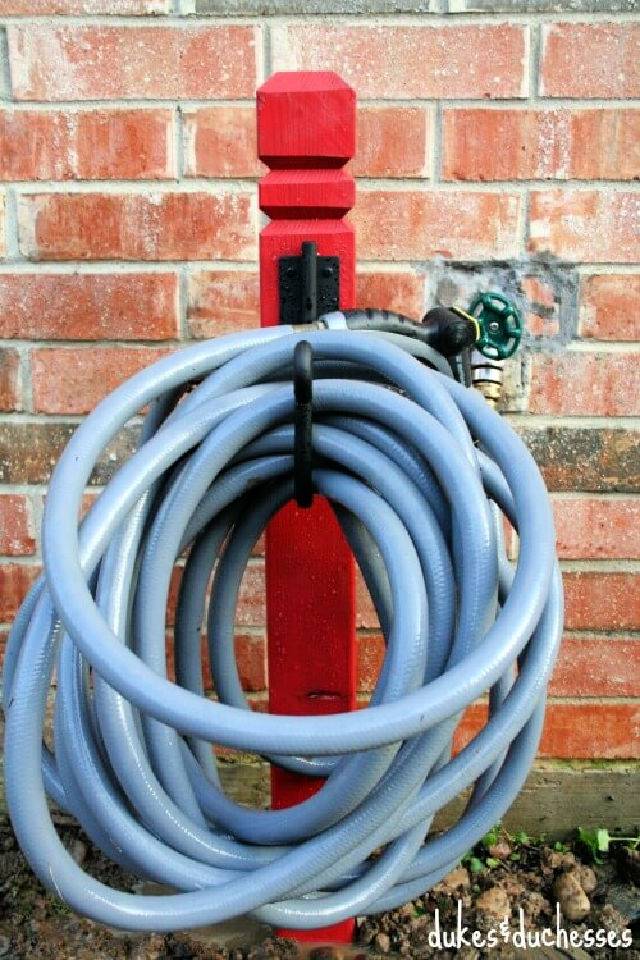
Simplify your garden organization with a homemade hose holder. Visit Dukes and Duchesses for an easy-to-follow DIY guide. This project involves a deck post with a splash of color and a durable hose holder. No need for complex tools; just a bit of drilling and quick setting in the ground.
It's an affordable way to keep your garden tidy and add a pop of personality. Plus, it's sturdy enough to withstand the tugs and pulls of daily use. Streamline your outdoor space today with this simple yet impactful addition.
10. Inexpensive DIY Garden Hose Reel Idea
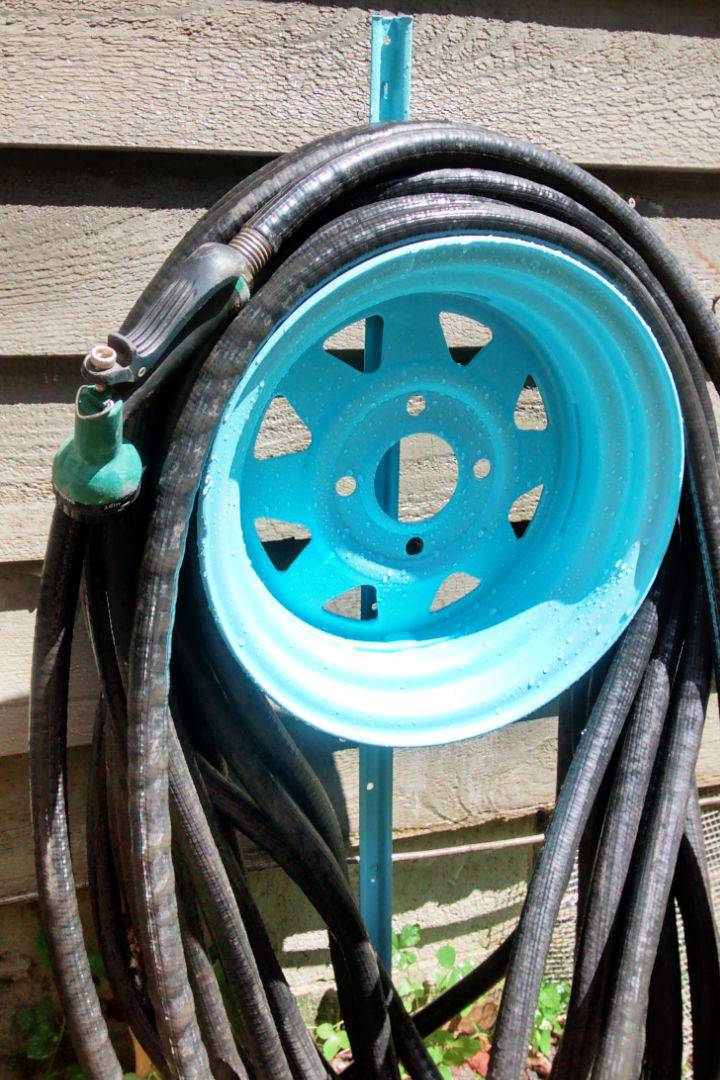
Learn how to make a DIY water hose holder that perfectly complements your outdoor space and landscaping style. Revamp your garden organization with a homemade, sturdy hose reel that doubles as eye-catching yard art! This inventive DIY solution involves repurposing an old tire rim and involves minimal spending, with spray paint being the only purchase required. First, liberate the rim by removing the tread and tube, a task we achieved using a saw.
Next, secure the rim atop a metal T post, a process easily accomplished with welding or, for a simpler alternative, JB weld. Ensure a clean surface for the spray paint by diligently sanding and cleaning the rim. After painting, let it dry, and finally, position this newly crafted hose holder in your garden for an immediate functional and aesthetic upgrade. For a detailed guide on this creative project, visit Homestead Heroine.
Conclusion:
In conclusion, crafting a DIY garden hose holder not only adds a personal touch to your garden but also serves as a testament to your creativity and commitment to sustainability. By following our step-by-step guide, selecting materials that reflect your style, and incorporating functional features, you can make a hose holder that is not only appealing but also durable and eco-friendly.
Whether you decide to use recycled materials, apply non-toxic treatments, or design with convenience in mind, each decision contributes to the uniqueness of your project. Regular maintenance will ensure your hose holder stands the test of time. So, grab your tools, and let's make your garden hose storage solutions both stylish and practical!


