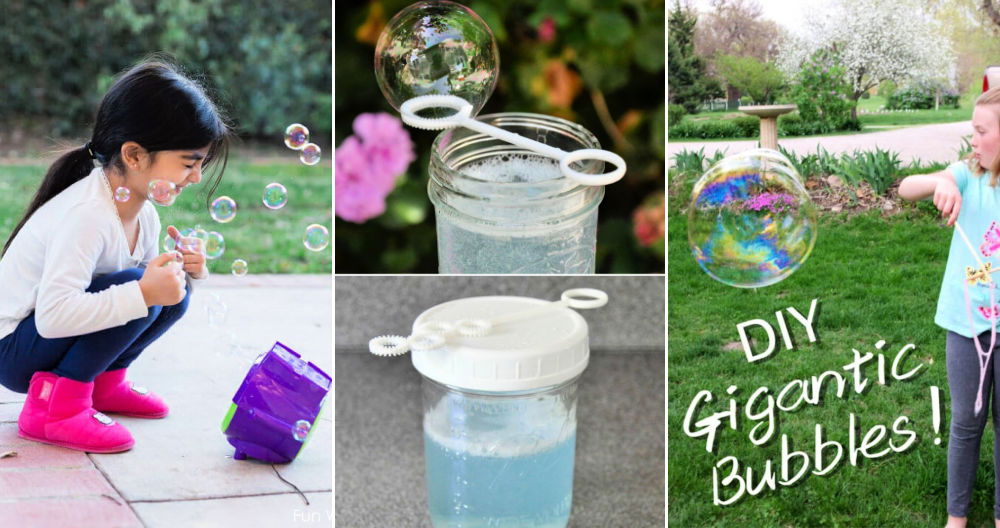
Making fun activities for kids can be really enjoyable. I recently made a giant bubble wand with my kids, and it was a hit. All we needed were some simple materials and a bit of time. Making the bubble wand ourselves made the experience more fun and rewarding.
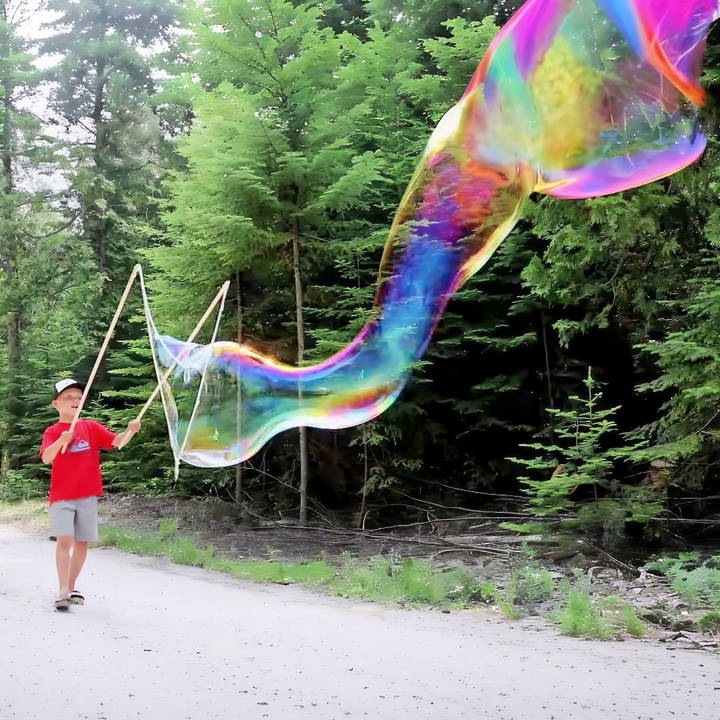
Watching big bubbles float and pop gave us all a thrill. The kids couldn't stop laughing and chasing the bubbles around the yard. This activity not only entertained them but also provided a great outdoor playtime. These DIY giant bubble wands are super easy to make and bring a lot of joy.
Your kids will have a blast building and playing with massive bubbles. Try it out, and enjoy some quality time outdoors.
Materials You'll Need
Gathering the right materials is essential for the success of any DIY project. Here's what you'll need to make a giant bubble wand and why each item is critical:
- 10 feet of cotton rope: Cotton rope is flexible and holds the bubble solution well. Avoid polyester as it doesn't absorb the solution effectively.
- 5/8 inch dowels: These serve as sturdy handles for your wand.
- 2 washers: These help weight the rope for better bubble formation.
- 1 eyelet screw per dowel: Necessary for attaching the rope to the handles.
- Lighter: To singe the ends of the rope and prevent it from fraying.
- Bubble Solution Ingredients:
- 6 cups of water: The base for your bubble solution.
- 1/2 cup of Dawn dish soap: Dawn makes strong bubbles that last longer.
- 1/2 cup of cornstarch: Adds thickness to the solution.
- 1 teaspoon of baking powder: Helps to maintain the right pH level.
- 1 teaspoon of personal lubricant (such as KY Jelly): Improves the flexibility of the bubbles.
Step by Step Instructions
Learn how to make a DIY bubble wand with our easy step-by-step instructions. Perfect for outdoor fun! Follow our guide for perfect bubbles.
Step 1: Preparing Your Rope
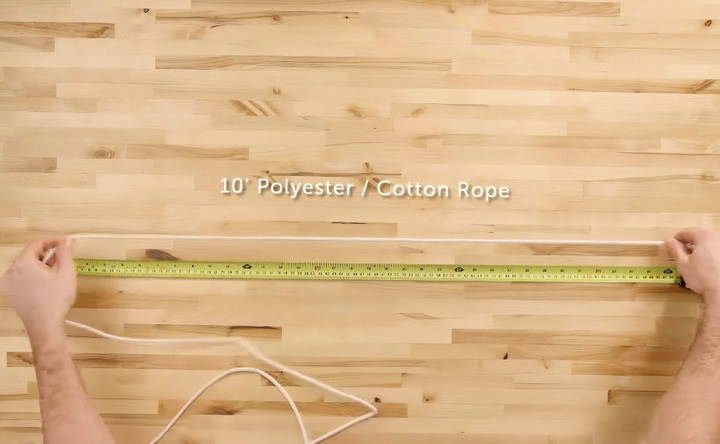
First, measure and cut 10 feet of cotton rope. It's important to use a natural fiber like cotton because it absorbs the bubble solution well, unlike synthetic materials. After cutting, singe the ends of the rope with a lighter. This process prevents the rope from fraying, ensuring it lasts longer.
Step 2: Assembling the Dowels
Next, take your dowels and screw an eyelet into one end of each dowel. This step is straightforward but crucial, as the eyelets will hold the rope securely in place. The dowels should be thick enough to provide a firm grip but light enough to handle easily.
Step 3: Attaching the Rope
Now, it's time to attach the rope to the dowels. Follow these sub-steps:
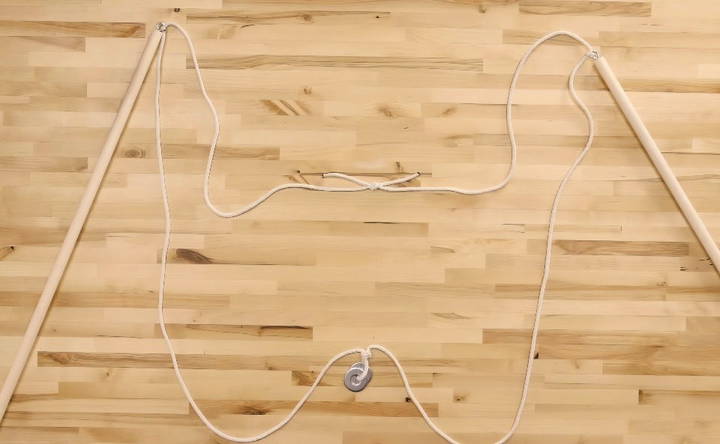
- Tie the washers: Find the center of your 10-foot rope and tie both washers there. The washers add weight, allowing the rope to hang properly and form better bubbles.
- Measure and knot: Measure 3 feet from each end of the rope. At these points, thread the rope through the eyelets and tie a secure knot. This forms the main structure of your bubble wand.
- Centre knot: Finally, tie a small knot in the center between the washers and each eyelet knot. This knot helps keep the shape of the bubble wand steady, building a triangle shape that helps make giant bubbles.
Step 4: Making the Bubble Solution
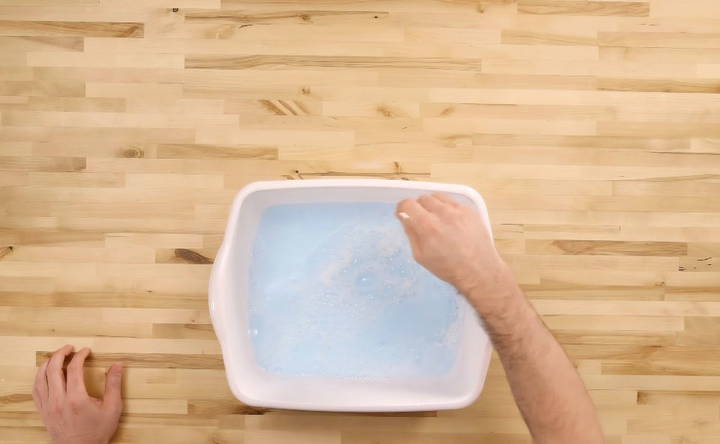
Mixing the bubble solution is crucial for building strong, large bubbles. Here's how to make it:
- Water: In a large container, pour 6 cups of water. Water is the base that carries all the other ingredients.
- Dawn dish soap: Add 1/2 cup of Dawn dish soap. Dawn is well-known for its bubble-making properties and adds to the strength of your bubbles.
- Cornstarch: Stir in 1/2 cup of cornstarch. Cornstarch thickens the solution, which helps the bubbles maintain their shape.
- Baking powder: Add 1 teaspoon of baking powder. It helps to balance the pH, ensuring that the solution is neither too acidic nor too basic.
- Personal lubricant: Finally, include 1 teaspoon of personal lubricant like KY Jelly. This ingredient helps the bubbles become more flexible and less prone to popping.
Make sure to stir the solution lightly to avoid building foam, which can weaken your bubbles.
Testing and Adjusting
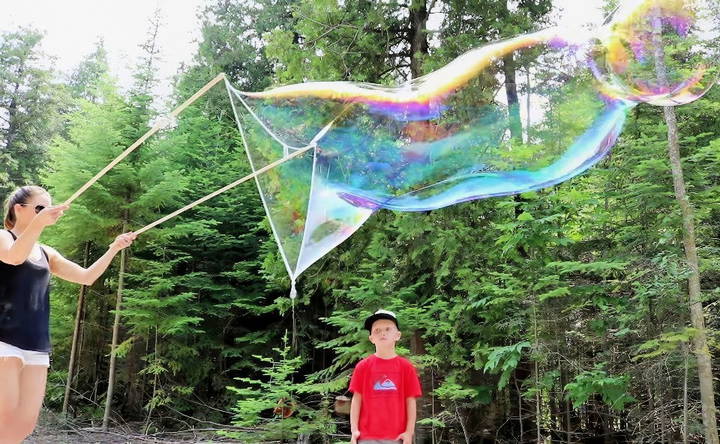
Now that your giant bubble wand and solution are ready, it's time to test them out. Find an open space, dip the rope into the solution, and gently pull it through the air to make giant bubbles.
Tips for Success:
- Wind Conditions: A slight breeze is perfect. Too much wind can break the bubbles, while no wind can make them harder to form.
- Solution Temperature: On a warmer day, the solution tends to work better. However, avoid direct sunlight, as it can dry out the solution quickly.
- Keep it Steady: Move the wand slowly to form larger bubbles. Quick movements usually result in smaller bubbles.
Advanced Techniques for Crafting Bubble Wands
Making a bubble wand that can produce unique and captivating bubbles is an enjoyable challenge for both children and adults. Here's a guide to advanced techniques for making bubble wands that go beyond the basics:
Choosing the Right Material
The material of your wand affects the size and durability of your bubbles. For advanced wands, consider using:
- Metal Wire: Bendable and sturdy, metal wire can make various shapes like stars, circles, or even spirals.
- Plastic Straws: Connect multiple straws to form larger, geometric shapes that produce a stream of bubbles.
Designing Unique Shapes
Experiment with different shapes to see how they change the bubbles. Try these ideas:
- Heart-Shaped Wand: Bend the wire into a heart shape and dip it into the solution to make heart-shaped bubbles.
- Spiral Wand: Twist the wire into a spiral to make a series of small bubbles in a unique formation.
Making a Bubble Solution
The right solution is crucial for strong, long-lasting bubbles. Mix:
- 6 parts water
- 2 parts dish soap
- 1 part glycerin or corn syrup This mixture enhances the strength and longevity of your bubbles.
Wand Handles
For a comfortable grip, attach handles to your wands. Use materials like:
- Wooden Dowels: They provide a sturdy grip and can be decorated for a personalized touch.
- Foam Handles: Foam can be slipped over wire or plastic for a softer, more comfortable hold.
Enhancing Bubble Performance
To make truly impressive bubbles, consider these tips:
- Dip and Swirl: Dip your wand and gently swirl it in the air to encourage larger bubbles.
- Wind Direction: Use the wind to your advantage by facing it when releasing bubbles for added distance.
Safety and Maintenance
Always ensure the safety of your bubble-making:
- Smooth Edges: If using wire, file down any sharp edges to prevent injury.
- Regular Cleaning: Clean your hands after use to prevent residue build-up, which can affect bubble quality.
By incorporating these advanced techniques, you'll be able to make a variety of bubble wands that produce an array of fascinating bubbles.
Troubleshooting Common Issues with DIY Bubble Wands
When crafting your own bubble wands, you might encounter a few hiccups along the way. Here's a helpful guide to troubleshooting common issues, ensuring your bubble-making experience is smooth and enjoyable.
Bubbles Won't Form
If you're struggling to make bubbles, consider these adjustments:
- Check the Solution: Ensure it's not too diluted. The ideal mix is a higher concentration of dish soap to water.
- Solution Temperature: Warm the solution slightly; cold temperatures can make forming bubbles more difficult.
Bubbles Pop Too Quickly
To prevent your bubbles from popping prematurely, try the following:
- Add Glycerin or Corn Syrup: These ingredients increase the viscosity and longevity of your bubbles.
- Avoid Windy Areas: Wind can cause bubbles to pop faster. Find a more sheltered spot.
Wand Doesn't Hold Solution
If the solution slips off the wand:
- Texturize the Wand: Wrap the end of the wand with yarn or cotton string to help it grip the solution better.
- Adjust the Design: Make sure there are closed loops in your wand design; open designs may not hold the solution well.
Difficulty Making Large Bubbles
For those aiming for bigger bubbles:
- Slow Down: Move the wand slower through the air to allow the bubble to form fully.
- Steady Hand: Keep your hand steady as you wave the wand to avoid breaking the bubble film.
Wand Material Corrosion
To maintain the integrity of your wand:
- Choose Rust-Resistant Materials: Stainless steel or plastic are good options that resist corrosion.
- Dry After Use: Always dry your wand completely after use to prevent rust and deterioration.
Uneven Bubble Shapes
If your bubbles aren't the shape you want:
- Check Symmetry: Ensure that your wand's shape is symmetrical. Asymmetry can lead to odd-shaped bubbles.
- Even Coating: Dip the wand evenly into the solution, ensuring all sides are coated equally.
By addressing these common issues, you'll enhance the quality of your DIY bubble wands and the beauty of the bubbles they produce.
FAQs About DIY Bubble Wand
Discover answers to FAQs about DIY bubble wands. Learn tips, tricks, and techniques to make the perfect bubble wand at home.
While distilled water is often recommended for making bubble solutions, tap water can also work. The distilled water is suggested because it is free of impurities that might affect bubble formation.
Dip the entire string of your bubble wand into the solution, gently pull the rods apart to allow the bubble to form, and then bring the rods together to release the bubble. This technique helps make larger and more stable bubbles.
DIY bubble wands are great for older children (about 10 and up) who have the coordination necessary to handle them. For younger children, adults can blow the bubbles, and the kids can enjoy chasing and popping them.
The homemade bubble solution can last for several weeks if stored properly. Keep it in a sealed container and place it in a cool, dry area to maintain its quality. If you notice the solution isn't producing bubbles as well as before, it might be time to make a new batch.
Yes, you can add color to your bubble solution by using non-toxic, water-soluble dyes or food coloring. Just a few drops should be enough to give your bubbles a tint without staining surfaces or clothing. However, be cautious as some dyes may still cause stains.
Conclusion
Making a giant bubble wand at home was an incredibly rewarding project. Not only did I get to enjoy the excitement of making something with my own hands, but the joy of watching giant bubbles float in the air was unmatched.


