Making fun activities for friends and family gatherings is enjoyable. This DIY giant jenga is a great idea to level up your next party. I wanted something unique for my backyard BBQ, so I decided to make a giant Jenga set. It turned out to be the highlight of the day, bringing everyone together for laughter and excitement.
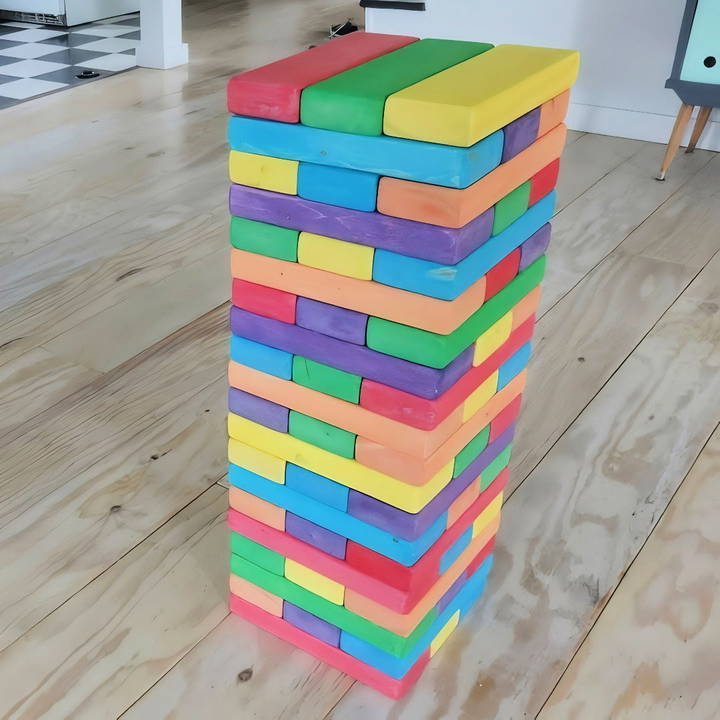
Building the giant Jenga set was simpler than I expected. I gathered the necessary materials and followed a step-by-step guide on how to make giant Jenga. The satisfaction of seeing my project come to life was immense.
Now, I'm sharing this process with you so your event can have the same fun and memorable moments.
Materials You'll Need
Before diving into the process, let's gather the materials needed and understand why each one is essential.
- 2x4 Lumber Boards: These are the building blocks of our Jenga pieces. You'll need at least six 8-foot boards, though I recommend seven to allow for any imperfections or mistakes.
- Measuring Tape: Accuracy is key when cutting your boards.
- Pencil: For marking your measurements.
- Saw (Miter Saw or Circular Saw): To cut the lumber into the appropriate lengths.
- Orbital Sander or Sandpaper: To smooth the edges and surfaces of the Jenga pieces.
- 60, 80, and 120 Grit Sandpaper: For different sanding stages.
- Finishing Wax: To give your pieces a slick, protective finish.
- Optional: Paint or Stain: If you want to add some color or a unique finish to your pieces.
Step by Step Instructions
Learn how to make giant jenga with our step-by-step guide. From selecting lumber to finishing touches, make your own perfect outdoor game!
Step 1: Selecting and Preparing Your Lumber
When you're buying your 2x4s, look for pieces that are:
- Straight with minimal warping.
- Free of major knots or defects.
- Having clean edges without splinters or cracks.
I found that eight-foot 2x4s work best. They are inexpensive (usually around $2.50 to $3.00 each), readily available, and easy to manage. Ensure the boards are made of softwood like pine because it's simpler to cut and sand.
Step 2: Cutting the Pieces
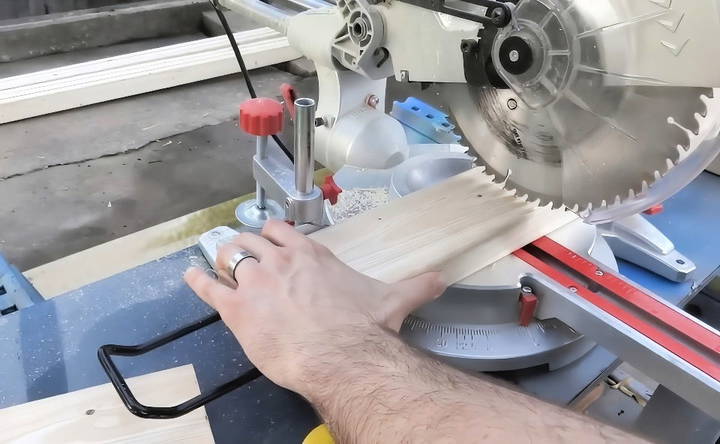
Let's get into cutting the boards. Each Jenga piece needs to be 10.5 inches long. Here's how to do it:
- Measure and Mark: Start by measuring 10.5 inches from one end of your 2x4 and mark the spot with a pencil.
- Setup a Jig (Optional): If you know how to set up a jig with your saw, it will make the cuts faster and more consistent. Position the jig 10.5 inches from the blade.
- Cut: Cut the board at the marked spot. You'll get about nine pieces from one 8-foot board. Repeat this for all your boards until you have about 60-63 pieces.
With six 8-foot 2x4s, you'll get 54 pieces, the minimum for a traditional Jenga set. I recommend cutting a few extra pieces to account for any errors or subpar cuts.
Step 3: Sanding the Pieces
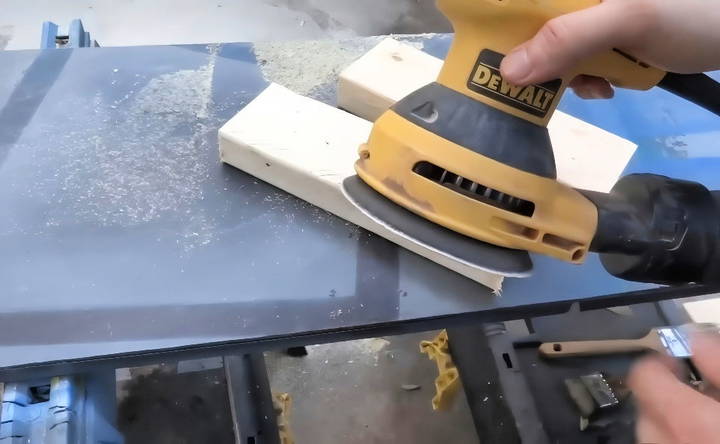
Sanding is crucial for ensuring that your Jenga pieces slide smoothly and are safe to handle without any splinters.
- Start with 60 or 80 Grit: Begin sanding all the edges and surfaces with 60 or 80 grit sandpaper to remove any rough spots. I found that 80 grit works best and saves time by not needing a double pass.
- Finish with 120 Grit: Once all pieces are initially sanded, go over them with 120 grit sandpaper to give them a smooth, final touch.
- Round the Edges: Lightly round the corners and edges so the pieces don't catch on each other when you're playing.
Step 4: Protective and Aesthetic Finishing
Now that the pieces are all cut and sanded, it's time to finish them. You have several options here:
- Leave Natural: If you prefer the natural wood look, you can skip straight to applying a clear coat or finishing wax.
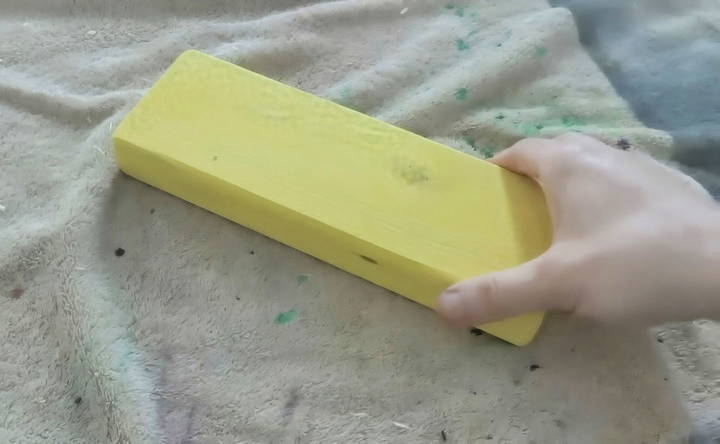
- Stain or Color Wash: I used a color wash to add some vibrant hues while still allowing the wood grain to show through. You could use any water-based color stain for this.
- Clear Coat with Wax: Once your pieces are dry from staining (if you stained them), apply a layer of finishing wax. This finishing wax not only adds a protective layer but also makes the pieces sleek and easier to slide.
Step 5: Assembling and Testing Your Jenga Set
Finally, it's time to assemble your Jenga set and give it a test run.
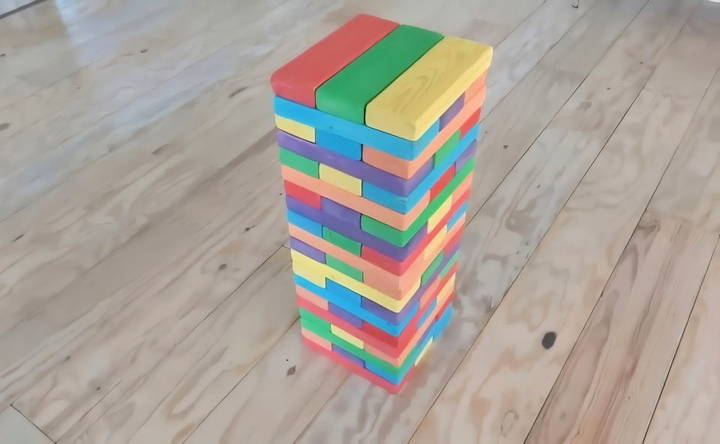
- Stack the Pieces: Start by stacking three pieces side-by-side. Lay the next three pieces on top, positioned perpendicular to the previous layer. Continue this pattern until all pieces are stacked.
- Test for Smoothness: Begin playing a few rounds to ensure all pieces slide out without catching. If any piece feels rough or gets stuck, give it another light sanding or a touch more finishing wax.
Optional: Building a Play Surface and Storage
Your Jenga blocks are ready, but bending down to pick the low pieces might be uncomfortable. Consider making a table that could act as both a playing surface and a storage container.
- Measure and Build: Make a table frame that can hold the Jenga pieces. Make sure it's stable enough to handle the weight.
- Add Storage Feature: Design the table so it can be flipped and used as a storage box when not in use. This ensures your Jenga set remains organized and easy to transport.
Safety Tips
- Play Area: Set up your Jenga game on a soft surface, like grass or carpet, to avoid damaging floors or tiles.
- Supervision for Kids: Due to the weight and height of the stacked pieces, ensure small kids don't play unsupervised around the game as falling blocks could cause injury.
Customization Ideas for Your Giant Jenga
Building a giant Jenga set offers a fantastic opportunity to add a personal touch to this classic game. Here are some customization ideas that can make your set stand out and reflect your personality or the theme of the event where it will be played.
- Choose Your Wood Wisely: Start by selecting the right type of wood. Softwoods like pine are easier to cut and sand but are more prone to dents. Hardwoods like oak are more durable but also heavier. Consider the trade-offs based on where you'll be playing and who will be using the set.
- Color Coding: Painting your blocks in various colors not only adds a vibrant aesthetic but can also serve as a difficulty modifier. Assign different rules to different colors, like ‘pull with one hand' or ‘stand on one foot while pulling', to make the game more challenging and fun.
- Personalized Engravings: Use a wood burner or engraving tool to add names, dates, or special messages to each block. This is especially popular for wedding receptions or anniversary parties, where each block can represent a guest or a special memory.
- Outdoor Protection: If you plan to use your set outdoors, consider weatherproofing your blocks with a sealant that protects against moisture and sun damage. This will ensure your set lasts through many seasons of fun.
- Carry Case: Build or buy a sturdy carry case for your giant Jenga set. This will make transportation easier and keep the blocks clean and organized. Add foam padding inside the case to keep the blocks secure during transit.
- Glow in the Dark: For evening entertainment, use glow-in-the-dark paint or stickers to make your set shine at night. This adds an exciting twist to nighttime gatherings and ensures the fun doesn't stop when the sun goes down.
- Themed Sets: Tailor your set to specific themes, like holidays, sports teams, or corporate branding. This can be done through the choice of colors, logos, or even the shape of the blocks.
The key to great customization is that it reflects the players' interests and enhances the enjoyment of the game. Keep it simple, fun, and personal, and your giant Jenga set will be the highlight of any gathering.
Game Variations for Giant Jenga
Giant Jenga is not only about the size but also about the variety of ways you can play to keep the excitement alive. Here are some game variations that can make your next Giant Jenga experience even more enjoyable:
- Timed Turns: Introduce a timer for each player's turn. This adds pressure and speeds up the game, making it more thrilling. You can start with a 10-second limit and adjust as needed.
- Dice Challenge: Roll a die to determine which block a player must move. Assign numbers to rows or types of blocks. For example, even numbers could mean a block from the bottom half, and odd numbers from the top half.
- Jenga Truth or Dare: Combine the classic game of Jenga with Truth or Dare. Write truths and dares on the blocks, and when a player pulls one, they must answer or perform the dare.
- Reverse Jenga: Start with a dismantled tower and take turns adding pieces without toppling the structure. It's a creative twist that requires a different strategy.
- Team Play: Divide players into teams. Each team decides internally which member will pull the next block, adding a layer of strategy and collaboration to the game.
- One-Handed: Players must use only one hand to remove and place blocks. This rule makes the game more challenging and tests dexterity.
- Blindfolded: For an extra challenge, try playing blindfolded with a partner guiding you verbally. This variation relies on trust and communication.
- Memory Jenga: After studying the tower for a minute, players turn around and play without looking directly at the tower, relying on memory and spatial awareness.
- Category Jenga: Each block corresponds to a category (e.g., movies, animals, countries). When a player pulls a block, they must name something from that category.
- Balance and Build: After pulling a block, the player must place it on top of the tower using only one finger. This tests balance and precision.
These variations can be mixed and matched to suit the players' preferences. The most important thing is to have fun and play safely.
Troubleshooting Common Issues with Giant Jenga
When building and playing with a Giant Jenga set, you might encounter a few common issues. Here's how to troubleshoot them effectively:
Blocks Stick Together
- Solution: If blocks stick, it's often due to rough edges. Sand the edges down smoothly, and if needed, apply a light coat of beeswax or furniture polish to reduce friction.
Tower Leans or Collapses Easily
- Solution: Ensure your playing surface is level. Use a carpenter's level to check. If blocks are uneven, sand them down to the same size. Consistency is key for a stable tower.
Wood Splits or Cracks
- Solution: This can happen if the wood is too dry or the grain is inconsistent. Choose high-quality, kiln-dried wood and cut blocks with the grain, not against it, to prevent splitting.
Difficulty Removing Blocks
- Solution: Blocks should slide out with moderate effort. If they're too tight, they may be too large or the wood may have swelled due to humidity. Sand them down slightly or store your set in a less humid environment.
Paint Peels or Fades
- Solution: Use outdoor-grade paint and apply a clear sealant over the painted blocks to protect them from the elements. Reapply as necessary to maintain the vibrant colors.
Blocks are Too Heavy
- Solution: If the blocks are too heavy, consider using a lighter wood species or hollowing out the center of each block slightly to reduce weight without compromising integrity.
By addressing these common issues, you'll ensure your Giant Jenga set remains in great condition and provides endless fun.
FAQs About How to Make Giant Jenga
Learn how to make giant jenga with our FAQs, offering step-by-step guidance, tips, and tricks for building this oversized classic game.
Cut the 2x3 boards into 54 pieces, each measuring 7.5 inches long. You can use a miter saw and set up a stop block to ensure each piece is the same length. This size mimics the dimensions of traditional Jenga blocks but on a larger scale.
After cutting, sand each block smooth to prevent splinters. If you choose to paint or stain your blocks, apply your chosen finish and allow them to dry completely. For painted blocks, you might want to add a clear coat to prevent sticking, or wait until the paint has fully cured.
Yes, you can make a carrying crate that doubles as a stand for the game. Use the 1"x8"x10' board to make the crate, attaching the pieces with wood screws and glue. Add drawer handles for easy transport. This step is optional but can be handy for storage and gameplay.
Always play Giant Jenga on a soft or grassy surface to reduce the impact when the blocks fall. Be mindful of the weight of the blocks and ensure all players stand clear when the tower is unstable. It’s a fun game, but safety should always come first.
To make your Giant Jenga game even more fun, consider adding a 'Roll ‘n Go' option. This involves painting each block a different color and using a dice to determine which color block the player has to move. For example, if you roll the dice and it lands on red, you must move a red block. This adds an extra layer of challenge and excitement to the game. You can also write funny or sweet messages on some of the blocks with a sharpie to personalize your set.
Conclusion
Making a DIY Giant Jenga set is a rewarding project that anyone can accomplish. It's simple, inexpensive, and customizable to your liking. Whether you stain, paint, or leave them natural, the joy of building and playing this game with family and friends is unmatched.


