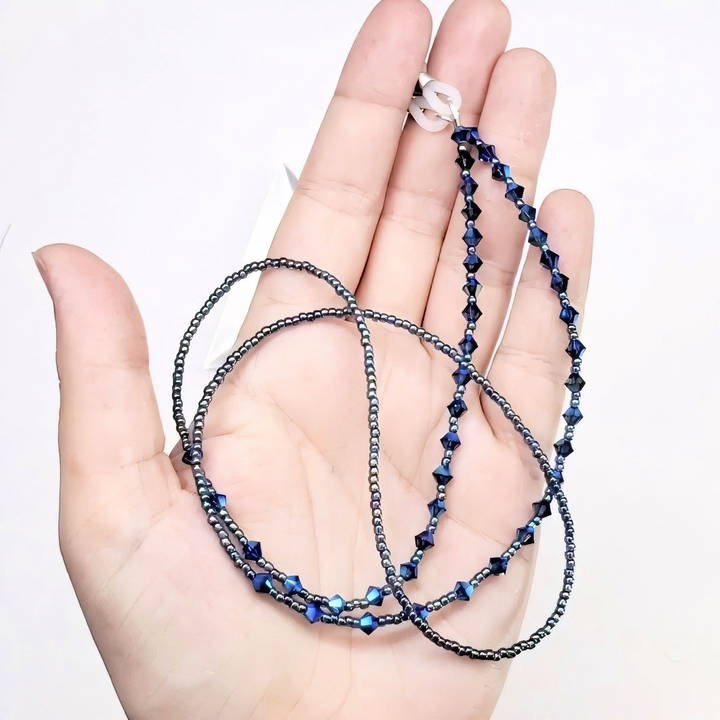
Making a stylish DIY glasses chain is a fun and simple project that adds both functionality and personality to your eyewear. This guide will provide you with all the information needed, from materials and tools to assembly techniques and customization tips, to make a lovely beaded eyeglass chain. Perfect for those who want to add a touch of handmade elegance to their everyday accessories or make thoughtful gifts, this tutorial will get you crafting in no time!
Materials and Tools Needed
To make a stunning and durable glasses chain, it's essential to gather the right materials and tools. Here's a list of everything you'll need for this project:
Materials
- Softflex Beading Wire (0.014 Fine Diameter) - Softflex beading wire is flexible yet strong, ideal for holding beads in place and supporting the structure of the chain.
- Seed Beads - Choose any color that suits your style. Seed beads are small and versatile, perfect for making a long, elegant chain.
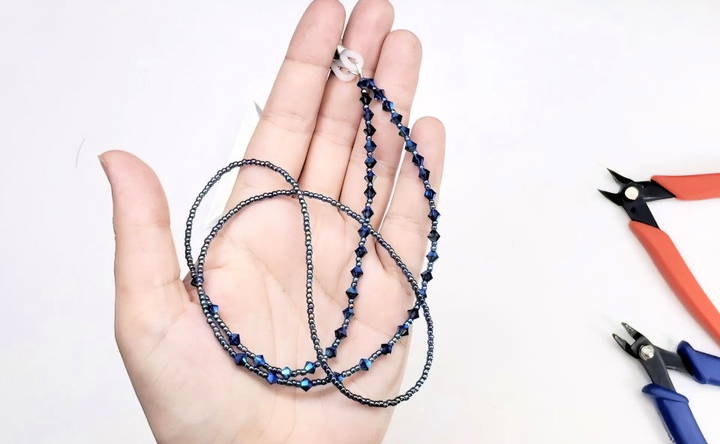
- 3mm Bicone Crystals - Add sparkle and visual interest to the chain with crystal bicones. These crystals come in various colors; for this tutorial, we're using Montana Blue Double AB crystals for a cohesive, monochromatic look.
- Eyeglass Chain Findings - These specialized findings will attach the chain to the arms of your glasses securely.
- Crimp Beads and Crimp Covers - Use 2mm tube crimps to secure the beads, with crimp covers to hide the crimp and give a professional finish.
- French Wire - Also known as gimp wire, this will help cover the exposed beading wire near the crimps, providing a polished look and adding durability to the project.
Tools
- Flexible Wire Cutters - Designed to cut soft beading wire cleanly without dulling the blade.
- Crimping Tool - Essential for securing crimp beads in place. A standard crimper is all you need for this project.
- Scotch Tape (optional) - Useful for preventing beads from sliding off the wire during assembly.
Step by Step Instructions
Learn how to make a DIY glasses chain with step-by-step instructions. Customize your design for a unique look and enjoy the benefits of a personalized accessory.
1. Prepare the Beading Wire
Cut about 30 inches of Softflex beading wire, which will be your working length. This length is standard but can be adjusted depending on your preference for the chain length.
2. Start Beading the Chain
Start from the center of your wire and work outward to make a balanced design. Here's a breakdown of how to bead the chain:
- Seed Beads Section - For the back of the neck area, use only seed beads to ensure comfort. String approximately 13 inches of seed beads.
- Add Bicone Crystals - Begin incorporating 3mm bicone crystals for the next section. Start with one bicone crystal, followed by sections of seed beads. Use this pattern:
- Two sections with five seed beads between each bicone crystal
- Two sections with four seed beads between each crystal
- Two sections with three seed beads
- Eight sections with two seed beads
- Seven sections with one seed bead
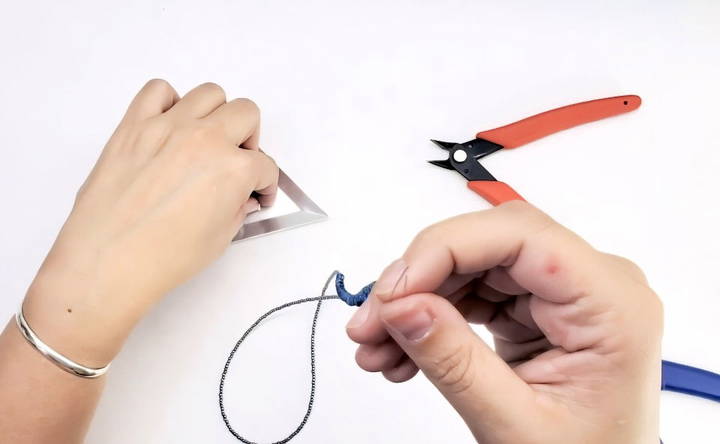
This gradual decrease in seed beads between crystals makes a lovely graduated effect that adds sophistication to the design.
3. Customize the Length and Design
Before securing the ends, try the chain on to ensure it's the right length and sits comfortably. If you prefer a longer or shorter chain, adjust the number of seed beads and crystals accordingly. Remember, if you plan to wear your hair up or have shorter hair, you can add additional decorative beads to the back of the chain for added flair.
4. Secure the Ends with Crimp Beads
- Position the Crimp Bead - Slide a crimp bead onto the end of your beading wire, close to the last bead.
- Attach the French Wire and Finding - Cut a small piece of French wire and thread it onto the wire after the crimp bead. Then, add the eyeglass chain finding by threading the wire through it and looping it back through the crimp bead.
- Crimp the Bead - Use the crimping tool to secure the crimp bead. Place the bead in the “kidney bean” chamber of the tool (the back part of the crimp tool), which will turn the crimp into a shape that can easily fold in half. After making the fold, place the crimp bead in the “oval” chamber at the front of the tool, then squeeze to secure it tightly.
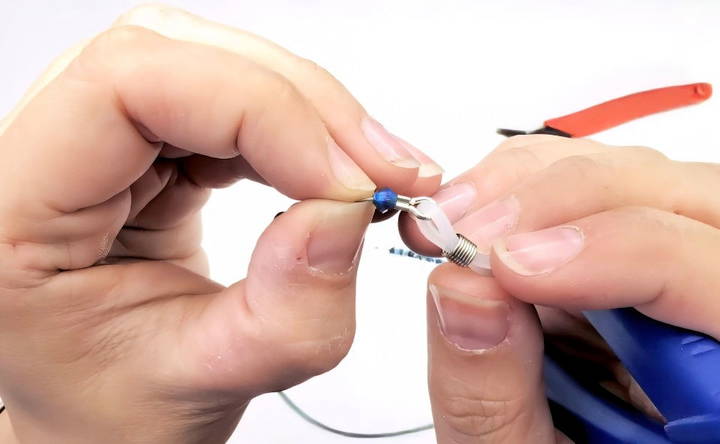
Repeat the process on the other end, ensuring the beads are pulled tightly enough to prevent gaps but loose enough to allow flexibility.
5. Trim and Secure the Ends
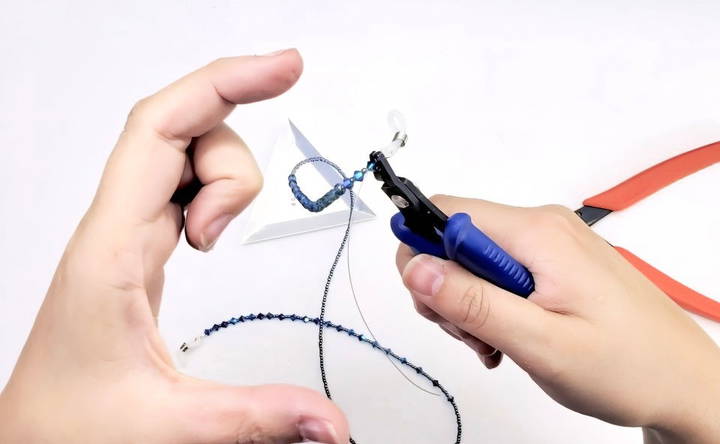
- Trim Excess Wire - After the crimp is secured, use your flexible wire cutters to snip off the excess wire.
- Add Crimp Covers - Place a crimp cover over each crimp bead for a professional look. The cover should resemble a small silver or gold bead once closed.
Tips for Achieving a Professional Finish
- Use High-Quality Beads and Crystals - Opt for good-quality seed beads and bicones to ensure they have a consistent shape and color.
- Match the Metal Elements - Select crimp covers, findings, and French wire that match the metal tones on your glasses for a cohesive look.
- Practice Crimping - If you're new to crimping, practice on a scrap piece of wire first. Properly secured crimps are key to a sturdy, professional-looking chain.
Customization Ideas for Your Glasses Chain
One of the best parts of this DIY project is the endless customization options. Here are some creative ideas to make your glasses chain uniquely yours:
- Mix Bead Colors and Shapes - For a fun and eclectic look, mix different colored seed beads or add accent beads like pearls or gemstone chips.
- Add Charms or Pendants - Attach small charms or pendants to the chain for extra personality.
- Use a Bead Mix - Pre-made bead mixes simplify the process and add visual interest with minimal effort.
- Seasonal Themes - Use beads in seasonal colors or motifs (like autumn leaves, winter snowflakes, etc.) for festive vibes.
- Make It a Multi-Purpose Chain - Add clasps on either end, and you can use the chain for both eyeglasses and face masks.
Benefits of Making Your Own Glasses Chain
Making a glasses chain not only lets you showcase your style but also offers several practical benefits:
- Personalization - With so many design options, you can make a chain that perfectly matches your personality or style.
- Cost-Effective - Making your own chain can be more affordable than purchasing a custom-made one.
- Handmade Gifts - DIY glasses chains make wonderful, thoughtful gifts, especially for anyone who regularly wears glasses or reading spectacles.
- Eco-Friendly - Handmade accessories can reduce reliance on mass-produced, less sustainable fashion items.
- Skill Development - Learning to bead and crimp introduces you to fundamental jewelry-making skills that can be applied to other projects.
Troubleshooting Common Issues
While making your glasses chain, you may encounter a few minor issues. Here are some quick solutions:
- Beads Slip Off the Wire - To prevent beads from sliding off, place a piece of scotch tape at the ends while working on the other side.
- Crimp Beads Not Securing Properly - Ensure your crimp tool is fully pressing the crimp into the kidney bean shape before folding. Practicing a few times will help improve your technique.
- Wire Too Tight or Loose - Make sure to pull the wire just tight enough to keep the beads snug, without causing the chain to feel stiff.
Caring for Your Beaded Glasses Chain
To keep your DIY glasses chain looking beautiful:
- Avoid Prolonged Water Exposure - Water can damage certain beads and degrade the wire over time. Remove your glasses chain before showering or swimming.
- Store Carefully - Keep the chain in a safe, dry place when not in use. A soft jewelry bag works well for this.
- Clean Gently - Use a soft, lint-free cloth to clean any smudges or dust. Avoid harsh chemicals, as these can damage the beads and wire.
Conclusion
Making your own beaded glasses chain is an enjoyable and rewarding DIY project that's practical, stylish, and customizable. With a few simple materials and tools, you can make a beautiful accessory that's both functional and fashionable. Plus, the techniques you learn in this project—from beading and crimping to using wire—are fundamental skills in jewelry-making, opening doors to more complex designs and projects in the future.
Whether you're making one for yourself or as a thoughtful gift for a loved one, a DIY glasses chain is a versatile accessory that elevates any look. So gather your beads, follow this guide, and start making a beaded glasses chain that's uniquely yours!
FAQs About DIY Glasses Chain
Discover answers to FAQs about DIY glasses chains. Learn how to make stylish, personalized chains for your eyewear with ease.
If you don't have French wire, you can use wire guards as an alternative. These provide similar protection for the wire and look professional. If the guard's ends are too wide, gently pinch them closer with pliers for a secure fit.
French wire, or “bullion,” is a thin coiled wire that protects the ends of jewelry wires from fraying. In glasses chains, it covers the exposed ends near the crimp beads for a clean, durable finish.
If your rubber grips wear out or loosen, try replacing them with new silicone ends available at craft stores. In cases where the chain cannot be repaired, you may need to rebuild the chain using fresh holders.
While Softflex beading wire is recommended due to its durability and flexibility, other materials like nylon-coated beading wire can work. Avoid stretchy cords, as they may not hold the weight of beads well over time.
For 2mm crimps, use 3mm or 4mm crimp covers to ensure a snug fit that hides the crimp and provides a polished finish.
If watching a video tutorial, slow down the playback speed to 0.75x. This can be done in video settings and allows for clearer viewing of detailed steps, especially when working with small components.
Experiment with different bead types and patterns, such as adding charms, mixing bead shapes, or using seasonal colors. Bead mixes are a convenient way to add complexity and visual interest without extensive planning.


