Glycol chillers are an essential tool for homebrewers, especially for those looking to venture into lager fermentations. These systems help maintain precise temperature control during the brewing process, ensuring optimal conditions for fermentation and cold-crashing. Though professional glycol chillers can be expensive, this guide details how to construct a DIY glycol chiller for under $100. We'll cover all the necessary materials, tools, and steps to help you build a functional and efficient system, even if you're working with a tight budget.
What Is a Glycol Chiller?
A glycol chiller is essentially a cooling system that uses a mixture of glycol and water to regulate the temperature of fermenters. It consists of an insulated box with cooling coils that cool the glycol. A pump then circulates the chilled glycol through the fermenter's cooling jacket or coils, maintaining a steady temperature. This is particularly useful for lager fermentations, which require lower temperatures, and for cold-crashing beers after fermentation.
Why Build a DIY Glycol Chiller?
- Cost-Effectiveness: Commercial glycol chillers can be expensive, with prices often reaching several hundred dollars. Building one yourself can save you a significant amount of money.
- Customization: A DIY setup allows you to tailor the design to your specific needs and space constraints.
- Satisfaction: Building your own equipment can be a rewarding project, offering a deeper understanding of the brewing process and your tools.
Materials Needed
The total cost of this build can be kept under $100, especially if you can repurpose some of the materials. Here's what you'll need:
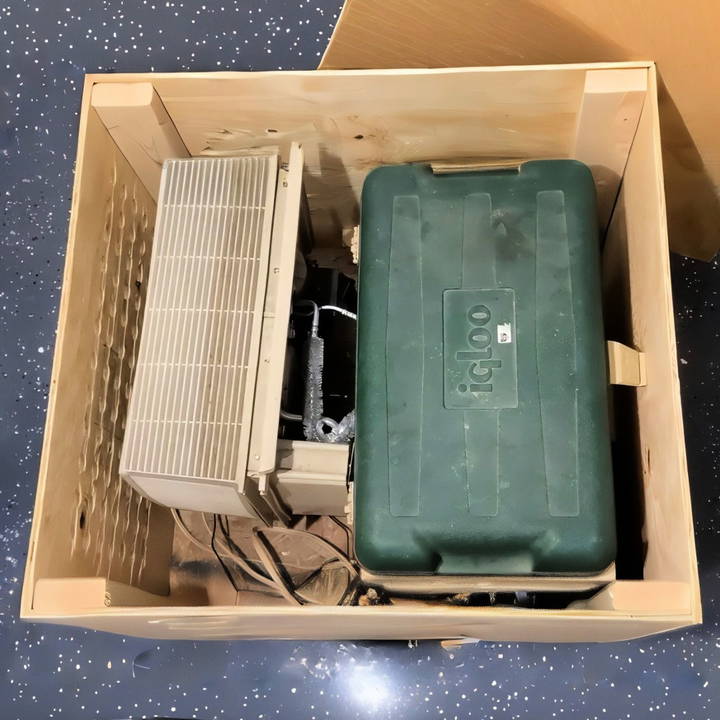
- Window Air Conditioner: This will serve as the cooling unit. Look for a used or old unit through Facebook Marketplace, Craigslist, or even ask friends or family. Age is not a major concern as long as it functions.
- Cooler: Any cooler can work for this project, as it will hold the glycol and evaporation coils. A free or second-hand one works perfectly.
- Plywood and Scrap Wood: Used for building a platform and enclosing the setup.
- Caster Wheels: These allow for easy mobility of the chiller.
- Inkbird Temperature Controllers: One for controlling the air conditioner and another for regulating the fermenter's temperature.
- Submersible Pump: Needed to circulate the chilled glycol through the fermenter.
- Plastic Tubing: For the inlet and return lines of the glycol.
- Screws and Glue: For assembling the structure.
Step by Step Instructions
Learn how to build a DIY glycol chiller with step-by-step instructions. Cut costs with our easy guide from preparation to final testing and maintenance tips.
Step 1: Preparing the Air Conditioner
The air conditioner is the heart of the glycol chiller. Follow these steps to prepare it:
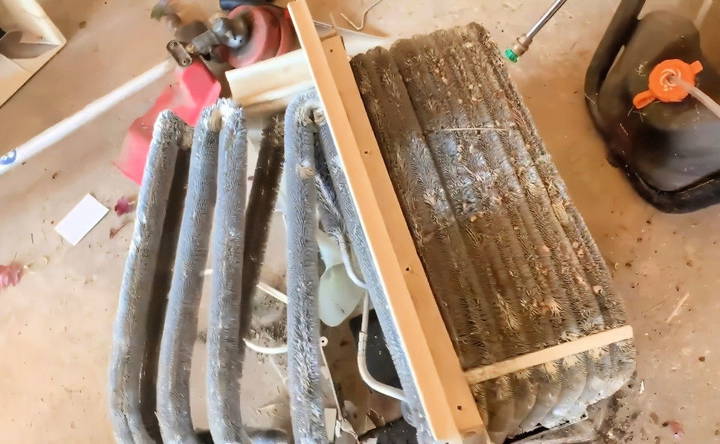
- Open the Casing: Start by locating the front of the AC unit and carefully removing the casing. This process can be tricky since AC units aren't designed to be opened. Take your time to avoid damaging the components.
- Locate the Evaporation Coils: These coils are what cool the air. Your goal is to bend these coils into the cooler without breaking the coolant line. Be gentle, as excessive bending can break the line and release the coolant, rendering the AC unit useless.
- Adjust the Fan: If possible, remove the front-facing fan or set it to a low speed to minimize noise. Adjust the cooling settings to medium for balanced cooling.
Step 2: Modifying the Cooler
- Remove the Lid: Take off the cooler's lid, as you'll be modifying the top for better access and airflow.
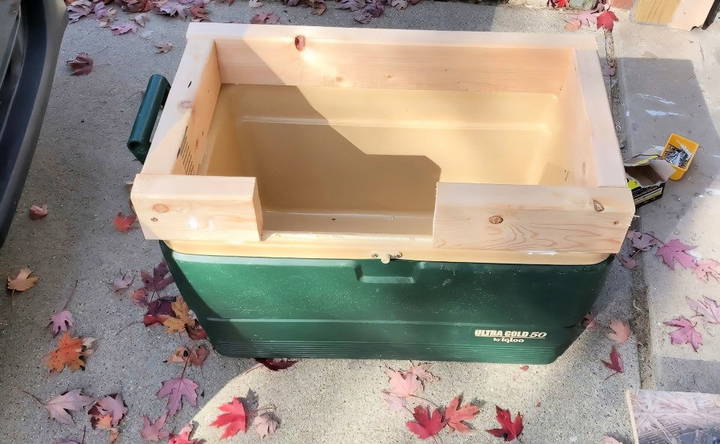
- Build a Wooden Collar: Use 2x4 pieces to build a collar around the cooler's opening. This helps to support the weight of the AC coils and provides a structure for the coils to rest on.
- Cut an Opening: Leave an open section in the collar to allow the evaporation coils to sit inside the cooler. Make sure it is snug to prevent any air leaks.
Step 3: Fitting the Evaporation Coils
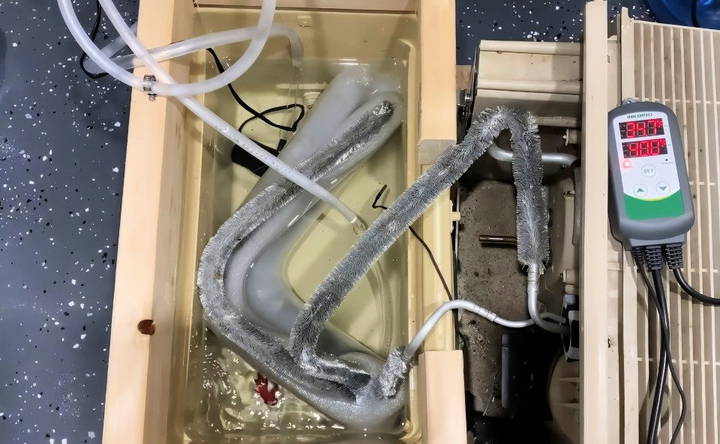
- Carefully Bend the Coils: Slowly bend the evaporation coils into the cooler. Try to minimize the number of bends to reduce the risk of breaking the coolant line.
- Test the System: Pour some water into the cooler and turn on the air conditioner. After about 30 minutes, check if ice begins to form in the cooler. This indicates that the coils are working correctly, and there are no leaks in the coolant line.
Step 4: Building the Platform and Housing
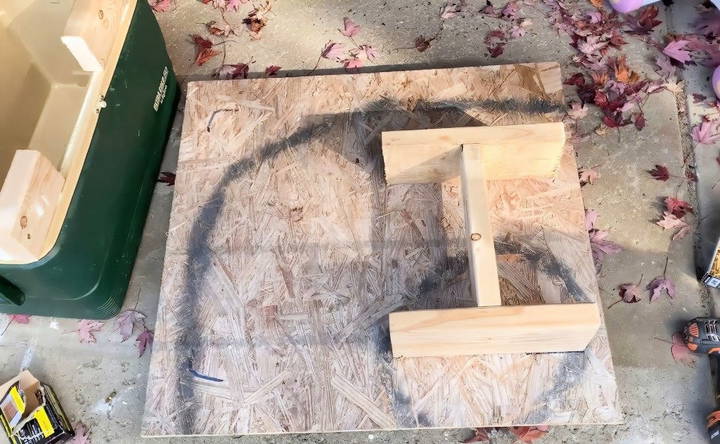
- Construct a Base Platform: Measure the space your equipment will occupy and cut a piece of plywood to size. Attach caster wheels to the corners to make the setup mobile.
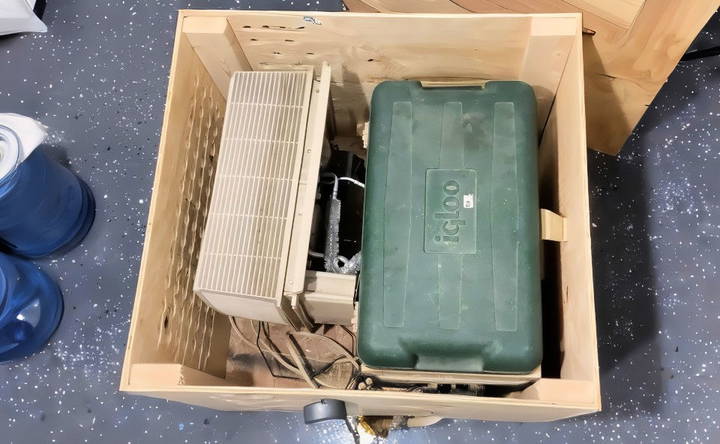
- Enclose the Unit: Using additional plywood, build a box around the setup. This enclosure makes the chiller look more presentable and can help with insulation. Make sure to leave ventilation holes for the air conditioner to cool properly.
- Make a Lid: Build a lid that fits snugly over the cooler. This will help retain the cold air inside the cooler.
Step 5: Setting Up the Temperature Control
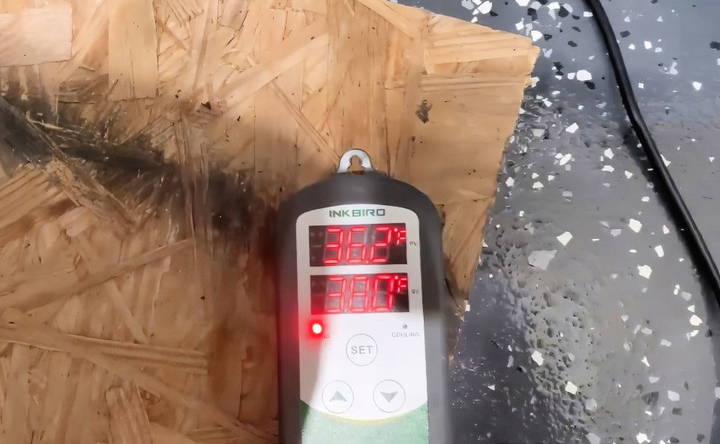
- Inkbird Controller for the AC Unit: Use an Inkbird temperature controller to regulate the air conditioner. Set it to maintain a temperature of around 38-40°F.
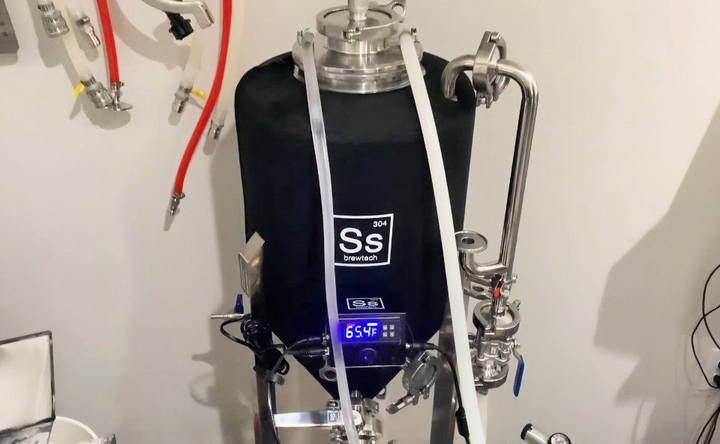
- Inkbird Controller for the Pump: Connect a second Inkbird controller to the submersible pump, which will circulate the chilled glycol through the fermenter's cooling coils. This controller should be set to monitor the temperature of your fermenter and activate the pump when the temperature rises above the set point.
Step 6: Running the Final Tests
- Fill the Cooler with Water or Glycol: Initially, you can use water to test the system. Fill the cooler, making sure the evaporation coils are submerged.
- Run the System: Plug the air conditioner into the temperature controller and let the system run for a few hours. Monitor the temperature of the cooler and the fermenter.
- Check for Leaks and Adjustments: Ensure that all tubing connections are secure and there are no leaks. Make any necessary adjustments to the setup for optimal performance.
Step 7: Using the Submersible Pump
- Connect the Pump: Attach the submersible pump to the inlet line that runs to the fermenter's cooling coils. The outlet line will return the warm glycol back to the cooler.
- Test Circulation: Turn on the pump and ensure that glycol is circulating through the fermenter. Adjust the temperature controller settings as needed for your fermentation needs.
Tips for Maintaining Your DIY Glycol Chiller
- Use Glycol for Lower Temperatures: While water is suitable for initial tests, using a glycol-water mix is better for achieving temperatures below freezing.
- Clean the Cooler Regularly: If using water, change it frequently to prevent algae growth and other contaminants. For glycol, check the concentration levels periodically.
- Monitor for Airflow: Ensure that the AC unit has enough airflow to prevent overheating. Proper ventilation is crucial for maintaining efficiency.
Potential Challenges and How to Solve Them
- Bending the Coils: This is the most delicate part of the build. Go slowly and use minimal force to avoid breaking the coolant line.
- Maintaining a Tight Seal: Make sure the cooler and its lid are well-sealed to prevent cold air loss. Use weather stripping or foam tape around the lid if needed.
- Finding Materials: Sourcing an old AC unit or cooler can be challenging, but online marketplaces or local classifieds are great places to start.
Final Thoughts
Building a DIY glycol chiller can seem intimidating, but with patience and a bit of creativity, you can build an efficient cooling system that meets your brewing needs. Not only does this project save money, but it also allows you to customize the setup to your specific requirements. By following the steps outlined in this guide, you'll be well on your way to controlling fermentation temperatures like a pro without breaking the bank. Happy brewing, and enjoy the process of crafting your own DIY glycol chiller!
FAQs About DIY Glycol Chiller
Get answers to common questions about DIY glycol chillers, including setup, maintenance, and troubleshooting tips for optimal performance.
If window AC units are unavailable in your area, you can consider using a portable AC unit, though it may be less ideal. Alternatively, a more complex option is repurposing a spare compressor or condenser from a car refrigerator unit.
Yes, two separate Inkbird temperature controllers are recommended. One controls the air conditioner's cooling cycle, while the other manages the submersible pump to maintain the fermenter's temperature.
Alcohol might work as a substitute for glycol to achieve lower temperatures, but it's important to verify its compatibility with the system components, as alcohol could damage certain materials.
Typically, the pump's weight is sufficient to keep it at the bottom of the cooler. However, if your pump tends to float, consider adding a small weight or using a suction cup base to stabilize it.
The Inkbird temperature probe is not inherently waterproof. To extend its lifespan when submerged, wrap it in a plastic bag or use a waterproof enclosure.
While it's possible to use this system for chilling wort, the air conditioner may struggle to keep up with the heat load during recirculation. Testing is recommended to determine its efficiency in this scenario.
If you're using water, it's crucial to change it frequently to avoid bacterial growth. Consider adding a simple drain valve for easy water replacement and maintenance.


