Making a DIY golf hitting mat can save you money and provide a fun project. My first step was finding a suitable piece of astro turf and a thick rubber mat. I carefully measured and cut the turf to fit the rubber base, ensuring it was secure with strong adhesive spray. This process took some patience, but it was straightforward and enjoyable.
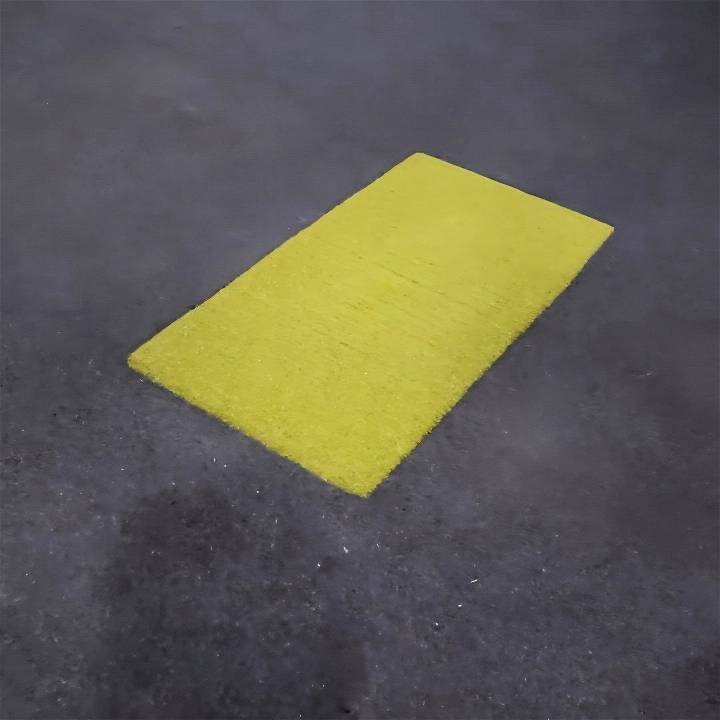
Next, I added foam padding underneath the rubber mat to mimic the feel of real turf. This padding helped absorb the impact from hitting golf balls. I secured everything tightly and tested it out in my backyard. The final result was a durable and functional golf hitting mat that improved my practice sessions. You can easily build one too with these steps— I believe in your potential!
By trying to build your own mat, you not only save money, but also gain a custom practice tool. Get started today with this simple guide on how to make a DIY golf hitting mat!
Why This Turf?
First things first, let's talk about the turf. The turf I chose is what makes this hitting mat ultra-realistic. It's an inch thick and grabs your club perfectly while holding up really well under repeated use. Trust me, I've tried several types, and this one outshines them all. I even preferred it over divot action mats, rating it a solid 10 out of 10 for realism.
Materials You'll Need:
- T-line Turf (1-inch thick): Essential for a realistic feel and durability.
- Polycarbonate Board (2 feet wide by 3 feet long): Offers a sturdy base that prevents damage to the turf around the hitting area.
- Clear Construction Adhesive: Ensures the turf stays firmly attached to the board.
- Utility Blade: For cutting the turf to the correct size.
- Weight: To press the turf down while the adhesive dries.
Each of these materials plays a critical role. The turf and the polycarbonate board are the core components, providing the realistic feel and sturdiness respectively. The adhesive secures everything together, the utility blade cuts the turf to size, and the weight ensures a strong bond.
Step by Step Instructions
Learn how to make your own golf mat at home with our step-by-step instructions. Perfect your swing with a DIY golf mat today!
Step 1: Preparing the Polycarbonate Board
Start with your polycarbonate board. I chose a board two feet wide and three feet long to provide ample space for practice swings without damaging the surrounding turf. This size is also ideal for accommodating golfers with higher handicaps who might strike the mat more roughly.
Step 2: Applying the Adhesive
Using clear construction adhesive, apply it to the board in lines or “S” shapes. Don't be afraid to use a little extra adhesive; it's better to have too much than too little. The goal is to ensure that the mat lasts longer and withstands constant use.
Here's how to do it:
- Apply the adhesive in a consistent pattern.
- Make sure all areas that will be covered by the turf have some adhesive.
Step 3: Laying Down the Turf
Carefully lay the turf onto the adhesive-covered board. Press it down firmly to ensure a strong bond. This step is crucial for realism and durability.
- Place the turf gently over the adhesive.
- Press down on all areas to secure it properly.
Step 4: Adding Weight and Drying Time
Once the turf is laid down, place some weight on it to ensure the adhesive sets well. Let it sit for at least two hours, though overnight is preferable.
Step 5: Cutting the Turf
With the turf securely in place, use a utility blade to trim any excess. Ensure your blade is sharp; a new blade makes cutting through the thick turf much easier.
- Carefully cut around the edges.
- Remove any excess turf.
Step 6: Final Touches
After trimming, your mat is ready to use. However, it's also a good idea to add some aesthetic touches. If you like, you can glue blue turf on the other side of the board for an attractive appearance when hosting guests.
Practical Tips and Additional Insights
Discover practical tips and additional insights on durability, maintenance, cost, versatility, and storage. Make informed decisions for optimal results!
Durability and Maintenance
This mat is expected to last for several years. While I can't guarantee the five years some manufacturers claim, I'm confident it will endure at least a year, even with heavy use. One additional tip: ensure you use a clear adhesive to maintain the neat appearance of your hitting mat.
Cost Considerations
Opting for high-quality materials may seem a bit pricey initially, but the cost is justified by the enhanced realism and longevity of the mat. I found the investment worthwhile, especially when compared to the frequent replacement of cheaper alternatives.
Versatility
This mat's realistic feel makes it highly versatile and suitable for both serious practice sessions and casual play with friends. It accommodates all types of golfers, from beginners to advanced players.
Storage
When not in use, store the mat in a dry place to ensure it remains in good condition. This simple step can significantly extend its lifespan.
Customization Ideas for Your DIY Golf Mat
Making a DIY golf mat gives you the freedom to tailor it to your specific needs and preferences. Here are some customization ideas that can enhance your golf practice experience:
- Choose the Right Size: Not everyone has the same space available for a golf mat. Measure the area where you plan to use the mat and adjust the dimensions accordingly. Whether you have a spacious backyard or a small indoor area, ensure the mat fits well in the space.
- Selecting the Turf Material: The turf is the heart of your golf mat. You can opt for nylon, polyethylene, or polypropylene materials. Nylon offers a realistic feel but can be more expensive, while polyethylene and polypropylene are durable and affordable.
- Thickness for Comfort: The base layer of your mat affects comfort and durability. A thicker base can simulate the feel of an actual golf course and is gentler on your joints. Consider using foam or rubber padding that's at least 1/2 inch thick.
- Stance Area Customization: Some golfers prefer a stance area on the same level as the ball, while others like it lower. Customize this area to match the feel you're most comfortable with during your swing.
- Tee Holes for Practice: If you use tees, incorporate multiple tee holes into your design. This allows you to practice with various clubs and tee heights, which is essential for driving practice.
- Aesthetic Touches: Add a personal touch to your golf mat. You can paint alignment aids or yardage markers directly onto the mat or even add your initials or a logo for a professional look.
- Portable or Permanent: Decide if you want your mat to be portable or permanent. A portable mat can be rolled up and stored away, while a permanent mat can be secured to the ground with stakes or adhesive.
Consider these ideas to build a golf mat that enhances your game and shows your style. Plan carefully and take your time for a mat you'll be proud of.
Advanced Techniques for Your DIY Golf Mat
Enhancing your DIY golf mat with advanced techniques can significantly improve your practice experience. Here are some sophisticated tips to elevate your golf mat's functionality:
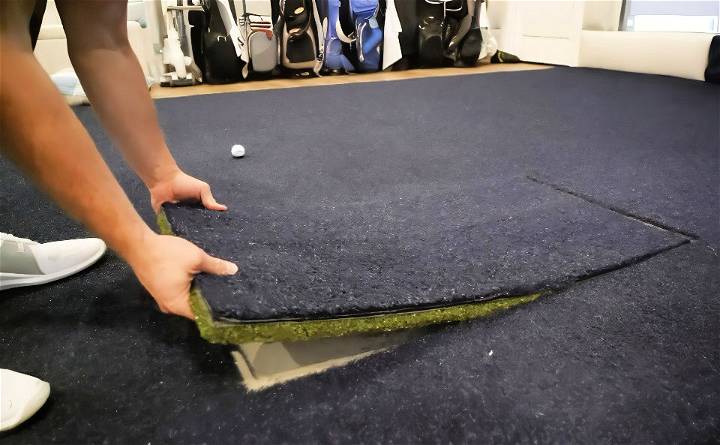
- Layering for Realistic Feel: Use multiple layers of different materials to mimic the feel of various terrains. For example, combine a firmer layer for the fairway with a softer layer for the rough. This variation can help you practice shots from different lies.
- Shock Absorption: To reduce the risk of injury and fatigue, integrate a shock-absorbent layer beneath the turf. Materials like gel foam or memory foam can provide a cushioning effect that protects your joints during long practice sessions.
- Incline and Decline Options: Practice uphill and downhill lies by making adjustable wedges that can be placed under the mat. This will help you train for the varied conditions you'll encounter on a real course.
- Ball Return System: Install a ball return feature using a slight incline and gravity to roll the ball back to you after each shot. This saves time and allows for rapid-fire practice.
- Sensor Integration: For the tech-savvy golfer, embed sensors to track ball speed, launch angle, and spin rate. This data can be invaluable for fine-tuning your swing and understanding the mechanics of your shots.
- Weather Resistance: If you plan to use your mat outdoors, ensure it's weather-resistant. Treat the materials with UV protectants and water repellents to prevent damage from sun and rain.
- Interchangeable Turf: Make sections of turf that can be swapped out. This allows you to replace worn areas without rebuilding the entire mat, and you can also switch between different turf types for varied practice.
By incorporating these advanced techniques, you'll build a golf mat that not only challenges and improves your game but also stands the test of time.
Troubleshooting Common Issues
When crafting a DIY golf mat, you might encounter a few hiccups along the way. Here's a guide to troubleshooting common issues, ensuring your golf mat is top-notch:
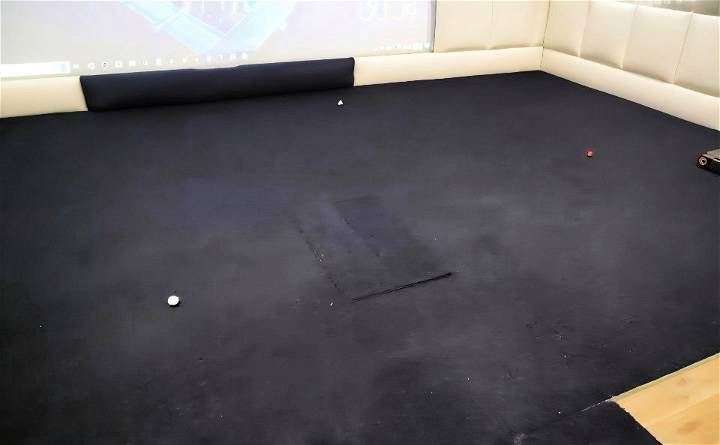
- Uneven Surface: If your mat isn't lying flat, check the surface underneath. It must be smooth and even. Use a level to confirm and adjust as necessary.
- Material Fraying: Turf edges may fray over time. To prevent this, seal the edges with a waterproof adhesive or binding tape designed for outdoor use.
- Poor Ball Roll: Inconsistent ball roll can be due to uneven turf fibers. Brush the turf in one direction with a stiff broom to align the fibers.
- Mat Slipping: A mat that moves during swings is unsafe. Secure it with double-sided tape or a non-slip backing.
- Too Much Bounce: If the ball bounces too much, the padding may be too soft. Replace it with a firmer underlay or add a layer of denser material.
- Wear and Tear: High-traffic areas might wear out faster. Rotate the mat periodically to distribute wear evenly.
- Odor from Materials: Some materials can emit a smell. Air out the mat before use, and consider using odor-neutralizing sprays if necessary.
- Difficulty Inserting Tees: If inserting tees is tough, the base may be too hard. Soften the area with a drill or choose a base material that allows for easier tee placement.
By addressing these issues, you'll ensure your DIY golf mat remains a reliable and enjoyable practice area for years to come.
FAQs About DIY Golf Mat
Find answers to common questions about DIY golf mats, including materials, costs, and installation tips. Optimize your practice with our comprehensive faqs.
Absolutely! One of the benefits of a DIY golf mat is the ability to customize its size and features to your liking. You can adjust the dimensions to fit your space and choose materials that suit your preferences for feel and performance.
To ensure durability, use high-quality materials and construct your mat with care. Consider using a hitting insert, which can be replaced when worn out, to prolong the life of your mat. Additionally, proper maintenance, like keeping it clean and storing it properly, will help it last longer.
Selecting the right turf is crucial for a realistic feel. Look for synthetic turf that mimics the feel of real grass. You can often find synthetic turf at local installers or distributors, sometimes even for free or at a low cost. Ensure the turf is durable and suitable for golf clubs to strike without damage.
To maintain your golf mat, regularly clean it with a brush or vacuum to remove debris. If you've used adhesive, check periodically to ensure the turf is still securely attached to the foam. Store the mat in a dry area away from direct sunlight to prevent wear and fading.
Yes, you can build a portable golf mat by using lightweight materials and constructing it in sections that can be easily assembled and disassembled. This allows you to practice your swing anywhere, whether indoors or outdoors. Just make sure the sections securely interlock to provide a stable surface while playing.


