Ground tamping is an essential part of various landscaping and construction tasks, ensuring that the soil or gravel you're working on is firm, level, and compact. Whether you're preparing a surface for paving, laying a foundation, or just working on a project around the house, using a tamper can make the job more efficient. However, a commercial tamper can cost you $40 to $50 or more. If you're like many homeowners who only need to use a tamper occasionally, spending that much on a tool you'll rarely use may not seem worth it.
Fortunately, with just a few inexpensive materials and tools, you can build a DIY ground tamper that will get the job done without breaking the bank. In this comprehensive guide, we'll walk you through the steps to build your own ground tamper using basic materials, with a focus on ease, speed, and affordability.
What is a Ground Tamper?
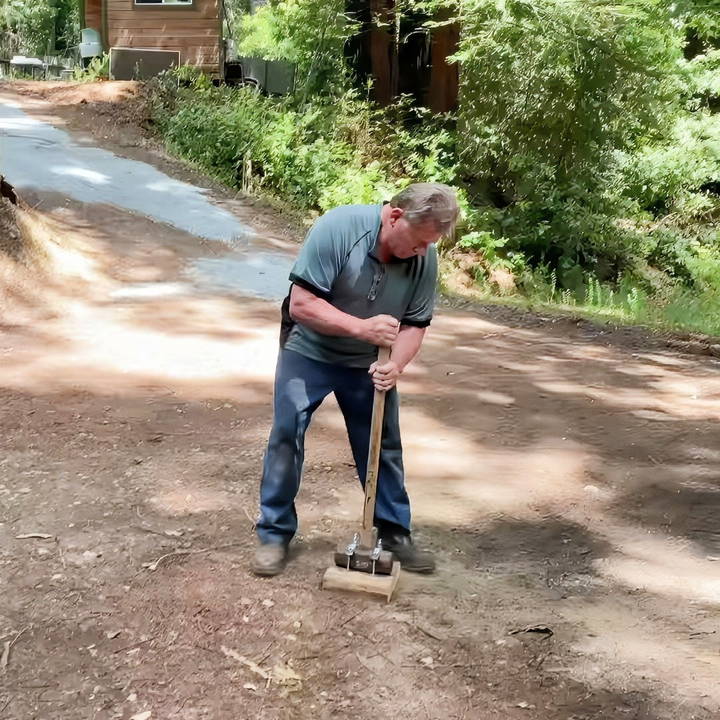
A ground tamper is a tool used to compact soil, gravel, or similar materials, making the surface more stable. This process is critical for ensuring that the base layers of projects like driveways, patios, and footings remain solid and don't shift over time. Commercial tampers typically consist of a heavy metal or steel plate attached to a handle, which is pounded repeatedly into the ground to achieve compaction.
While effective, commercial tampers can be heavy, bulky, and costly. For many DIYers, it's hard to justify purchasing one for occasional use. This is where making your own tamper becomes a practical alternative.
Why Build Your Own Ground Tamper?
- Cost Savings: A store-bought tamper costs anywhere between $40 and $50. A DIY tamper costs a fraction of that, utilizing materials you may already have around the house.
- Customizability: You can adjust the weight of your DIY tamper to suit the task at hand. For lighter jobs, you can swap out the sledgehammer used in the design, making it more versatile than a fixed-weight commercial tamper.
- Space-Saving: Since you're using a sledgehammer as the base, your DIY tamper can be disassembled and stored away easily when not in use.
Materials and Tools You'll Need
Building a DIY ground tamper is a straightforward project that requires only a few basic materials:
Materials:
- Sledgehammer (8–12 lbs) – This will serve as the primary weight for your tamper. If you already own a sledgehammer, you're halfway there!
- Plywood (3/4 inch or thicker) – This will form the baseplate of the tamper. You'll need two or three layers of plywood cut to the size of the tamper base.
- U-bolts (2) – These will be used to attach the plywood base to the sledgehammer head.
- Screws – For securing the plywood pieces together.
- Lock washers and nuts – These will prevent the U-bolts from loosening over time.
Tools:
- Drill – For drilling holes in the plywood and for the U-bolts.
- Chisel – For notching the plywood to fit the sledgehammer head securely.
- Screwdriver – To secure the screws.
- Wrench – For tightening the nuts onto the U-bolts.
Step by Step Instructions
Learn how to build a DIY tamper with our step-by-step guide. Follow easy instructions for a cost-effective solution to compact soil and gravel.
Step 1: Prepare the Plywood Base
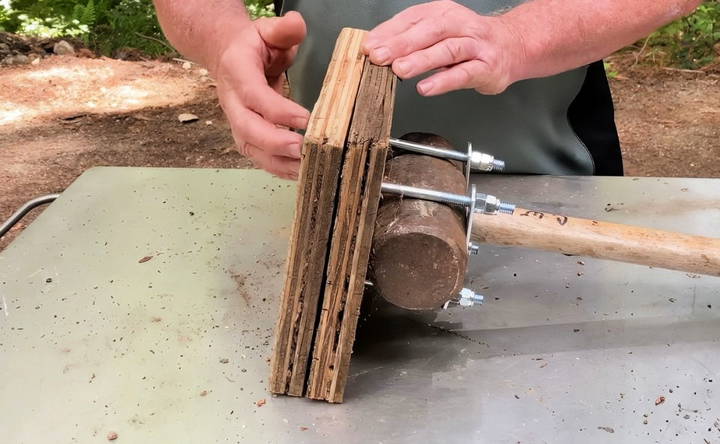
Start by cutting two or three pieces of plywood to form the base of your tamper. The size of the plywood pieces will determine the size of the area you can tamp at once, so aim for a square about 8 inches by 8 inches. If you're using thinner plywood (less than 3/4 inch thick), consider using three layers to ensure the base is sturdy and doesn't flex when you're tamping.
Step 2: Drill Holes for the U-bolts
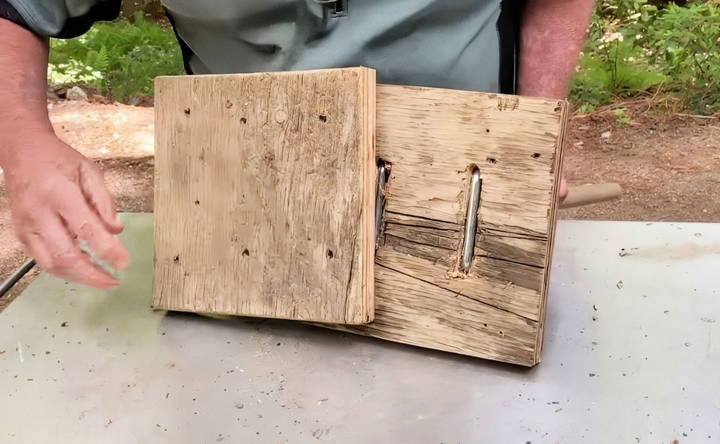
Next, you'll need to drill holes in the plywood for the U-bolts. These will secure the plywood base to the sledgehammer head. Place the sledgehammer head on top of the plywood and mark the positions where the U-bolts will go. Then, drill holes large enough to fit the U-bolts through.
Step 3: Notch the Plywood for a Snug Fit
Using a chisel, notch out a small groove in the plywood where the sledgehammer head will rest. This groove will help keep the sledgehammer in place and prevent it from shifting while you're using the tamper.
Step 4: Attach the Sledgehammer to the Base
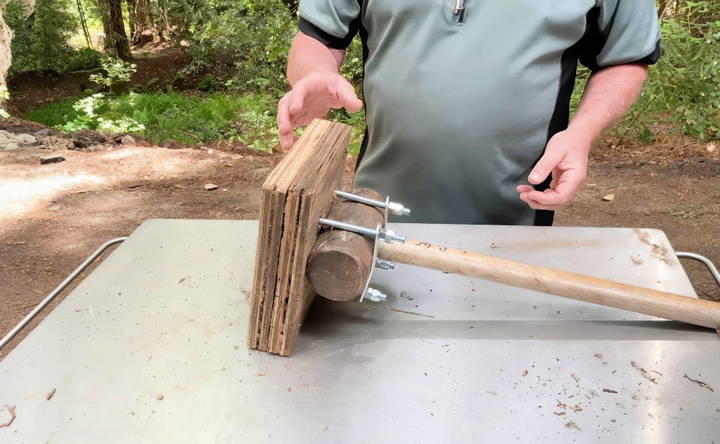
Now, it's time to attach the sledgehammer to the plywood. Slide the U-bolts through the holes you drilled earlier, securing the sledgehammer to the plywood base. Be sure to use lock washers and nuts to keep everything tight and secure. The lock washers will prevent the nuts from loosening during use, ensuring that the tamper remains sturdy.
Step 5: Secure the Plywood Layers
If you're using multiple layers of plywood, screw them together to form a solid base. Be sure to drive the screws from the top layer through to the bottom. It's a good idea to drive the screws from the side that doesn't face the ground, as screws facing downward could get clogged with dirt, making the tamper harder to clean or disassemble.
Using the DIY Tamper
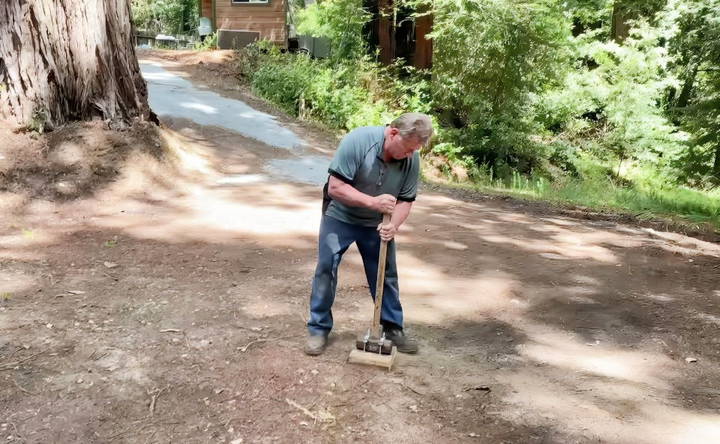
Your DIY ground tamper is now ready for use! Simply hold the sledgehammer handle and lift the tamper, letting its weight do the work as you bring it down on the surface you want to compact. Since the sledgehammer is detachable, you can adjust its weight by using different sledgehammers for different tasks. For example, an 8-pound sledgehammer will be easier to handle for lighter work, while a 12-pound sledgehammer will provide more compaction force for tougher jobs.
Tips for Using Your DIY Ground Tamper
- Start slow: If you're new to tamping, start with a few light taps and gradually increase the force you apply.
- Adjust weight as needed: If you find that the tamper is too heavy to use comfortably, consider switching to a lighter sledgehammer.
- Avoid over-tamping: While compacting is essential, over-tamping can sometimes cause materials like gravel to shift or become uneven. Tamp until the surface is firm and level, but avoid going overboard.
Maintenance and Storage
One of the best things about this DIY tamper design is how easy it is to disassemble and store. Simply remove the U-bolts, and the plywood base separates from the sledgehammer, allowing you to store the sledgehammer as usual. The plywood base can be stacked or stored flat in your garage or shed.
To keep your DIY tamper in good condition, follow these maintenance tips:
- Inspect U-bolts regularly: After each use, check that the U-bolts, nuts, and lock washers remain secure. Tighten as needed to ensure the tamper is always stable during use.
- Clean after each use: Remove any dirt, gravel, or debris that may have accumulated on the base or the screws. This will prevent buildup and prolong the life of your DIY tamper.
- Store in a dry place: Since the plywood base is made from wood, store it in a dry location to avoid warping or water damage.
Final Thoughts
Making your own ground tamper is a simple, cost-effective solution that can save you money and space. By using materials you likely already have on hand, like a sledgehammer and plywood, you can build a fully functional tamper in less than an hour. Not only does this DIY solution work as well as a store-bought tamper, but it's also customizable and easy to disassemble and store.
Whether you're working on a new patio, leveling gravel in your driveway, or preparing soil for a garden bed, your DIY tamper will help you get the job done efficiently. Best of all, you'll feel the satisfaction of completing the project with a tool you made yourself.
If you found this guide helpful, try building your own DIY tamper for your next landscaping or construction project. You'll save money, reduce clutter, and have a reliable tool ready for action whenever you need it!
FAQs About DIY Tamper
Get answers to frequently asked questions about DIY tamper. Learn tips, tools, and techniques for successful home projects.
If you don’t have a large sledgehammer, you can use a smaller one, like a mini sledgehammer. It may take more effort, but for small jobs, it will still work effectively.
Yes, other materials like metal strapping or old brake rotors can be used for the base. Just ensure the material is sturdy enough to withstand repeated impacts on the ground.
For added durability, use thicker plywood (e.g., 3/4 inch) and consider reinforcing the tamper with additional layers. Using lock washers and high-quality screws also ensures the tamper stays securely assembled.
If your sledgehammer has an uneven head (one side domed), you’ll need to chisel out more of the plywood to ensure a stable fit. This will help the tamper sit flat and perform better.
To avoid dirt build-up, insert screws from the top of the plywood rather than the bottom. This way, the screw heads won’t be exposed to the ground, making it easier to disassemble the tamper later.
While the DIY tamper works well on soil, it may not be as effective on harder surfaces like stone. For gravel or stone, a commercial tamper or one with a metal base might be more suitable.
The DIY tamper can be easily disassembled by removing the U-bolts, allowing you to store the sledgehammer and base separately. This reduces space and prevents clutter.
If you don't have U-bolts, you can use similar hardware like muffler clamps or even thick string to attach the base to the sledgehammer. Just ensure it's securely fastened before use.


