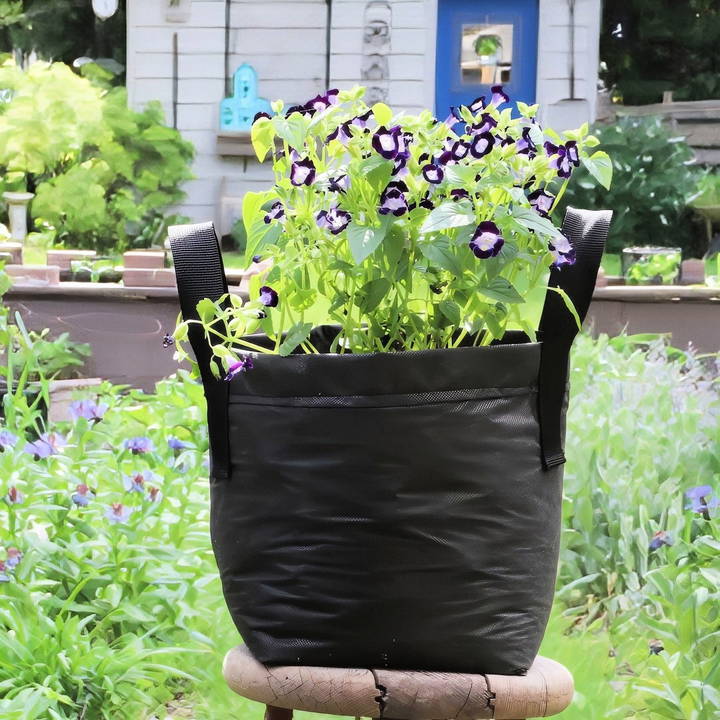
Fabric grow bags have become a game-changer for gardening enthusiasts, providing an affordable, lightweight, and versatile option for growing plants. Whether you're looking to maximize space on a small balcony or improve drainage and aeration for your plants, making your own grow bags is an excellent solution. This guide will show you how to make DIY grow bags in any size using landscape fabric—no advanced sewing skills needed!
Why Choose DIY Grow Bags?
Discover the benefits of DIY grow bags for healthier plants, cost savings, and customizable gardening solutions. Perfect for any gardener.
Benefits of Grow Bags
- Cost-Effective: Making grow bags at home can cost as little as $1.50 per bag, even with added handles.
- Lightweight and Portable: Unlike clay or ceramic pots, grow bags are easy to move, making them ideal for small spaces or changing layouts.
- Improved Drainage and Aeration: Landscape fabric is porous and breathable, which prevents waterlogging and encourages healthy root growth.
- Customizable: Make bags in any size to suit your gardening needs.
- Easy Storage: These bags can be folded and stored compactly during the off-season.
Materials for Durability and Functionality
DIY grow bags are made from landscape fabric, often referred to as weed barrier fabric. This material is strong, lightweight, and weather-resistant. By layering the fabric, you can enhance moisture retention without compromising breathability.
Supplies You'll Need
Before diving into the sewing process, gather the following supplies:
- Landscape Fabric: Opt for a heavy-duty, 7-year variety. Two layers provide optimal durability.
- Outdoor Sewing Thread: Designed to withstand exposure to sunlight and moisture.
- Denim Sewing Needles: Strong needles ideal for working with tough fabrics like landscape fabric.
- Webbing (Optional): For handles, use 1-inch-wide webbing. Repurpose old materials like straps from bags to save costs.
- Basic Sewing Supplies: Scissors, pins, and a sewing machine.
Cost Considerations
Each medium-sized grow bag (approximately 12 inches in diameter and height) requires:
- Four 18 x 18-inch pieces of fabric.
- Two 18-inch pieces of webbing (optional for handles).
At approximately $1.50 per bag, this project is budget-friendly, especially when compared to store-bought alternatives.
Step by Step Instructions
Learn how to make DIY grow bags with step-by-step instructions, plus tips for success, versatile uses, and eco-friendly gardening ideas.
Step 1: Cutting the Fabric
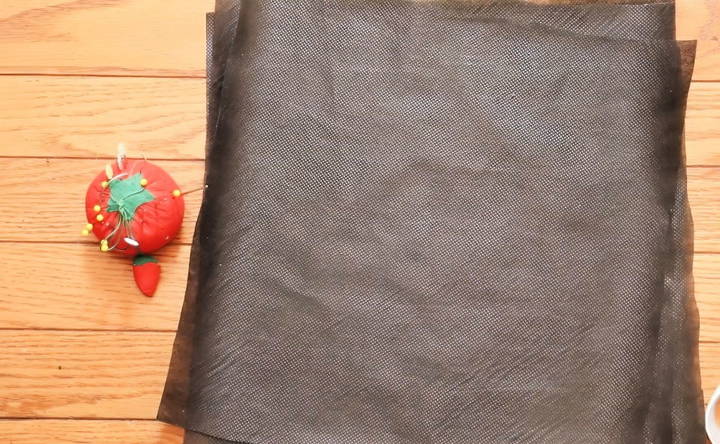
- Decide on the Size: Choose dimensions based on your needs. For a medium bag, cut four pieces of fabric, each measuring 18 x 18 inches.
- Prepare the Fabric: Ensure all pieces are the same size for even stitching.
Step 2: Stitching the Sides
- Align and Pin: Take two pieces of fabric and align them along one side (Side A). Pin them in place.
- Sew Side A: Use a ¼-inch or ½-inch seam allowance. Both are acceptable, but consistency is key.
- Repeat for Side B: Stitch the second side to form a tube-like structure.
Step 3: Making the Base
- Flatten and Align Seams: Lay the fabric flat, ensuring seams A and B are aligned at the center.
- Pin and Sew the Bottom: Pin the bottom edge of the tube and sew across to close it.
Step 4: Forming the Shape
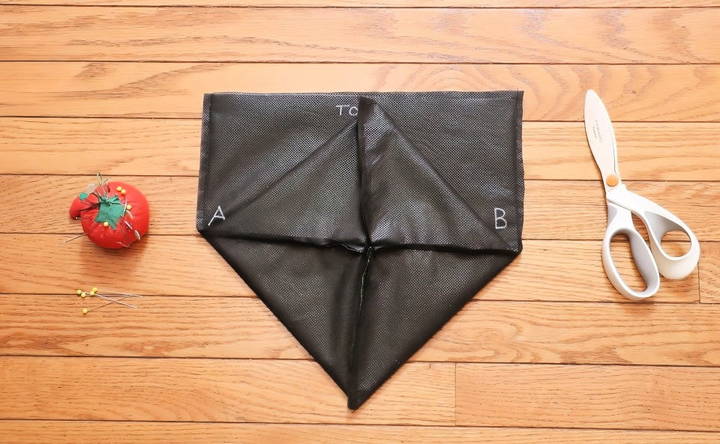
- Position the Seams: Shift seam A to the left and seam B to the right, making a box-like shape.
- Pin the Center Points: Center the top and bottom points between the side seams and pin them in place.
- Stitch the Round Base: Find the center points on the edges and draw stitching lines to form a round shape. Sew along these lines.
Step 5: Finishing Touches
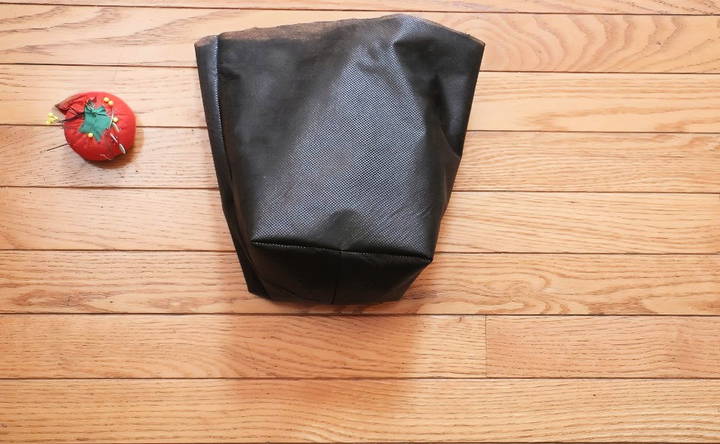
- Turn the Bag Right Side Out: Once the main structure is complete, invert the bag to hide the seams.
- Hem the Top Edge: Fold the top edge down to make a smooth finish and stitch it in place.
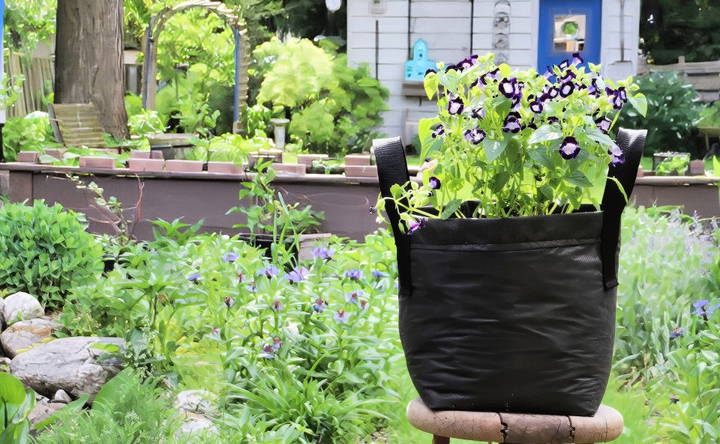
- Add Handles (Optional): For added portability, sew webbing handles onto medium and large bags. Position the handles evenly for balance.
Tips for Success
- Consistency in Seams: Always use the same seam allowance throughout the project to maintain uniformity.
- Reinforce Handles: If adding handles, double-stitch them to ensure they can withstand the weight of the soil and plants.
- Repurpose Materials: Save money by sourcing webbing from old bags or other reusable items.
- Customize for Your Needs: Experiment with sizes to make grow bags for different plant types.
Versatile Applications for Grow Bags
DIY grow bags aren't just for gardens. Here are some creative uses:
- Urban Gardening: Ideal for patios, balconies, and small spaces.
- Seasonal Planting: Use them to grow herbs, vegetables, and flowers.
- Hanging Planters: Add handles to make hanging grow bags for walls or fences.
- Temporary Containers: Use them to start seedlings or transport plants.
Storing and Maintaining Grow Bags
Proper care ensures your grow bags last for multiple seasons:
- Cleaning: Empty the soil and rinse the bags with water. Let them air dry before storing.
- Storage: Fold and store the bags in a dry place during winter to prevent mildew.
- Repairs: If seams come undone, patch them with a quick stitch using outdoor thread.
Eco-Friendly and Sustainable Gardening
Making your own grow bags promotes sustainability:
- Reduced Plastic Waste: Landscape fabric is more environmentally friendly compared to disposable plastic pots.
- Longevity: High-quality materials ensure durability, reducing the need for replacements.
- Recyclable Materials: Fabric and thread can often be repurposed or recycled after use.
Conclusion:
DIY grow bags are an excellent addition to any gardener's toolkit. With minimal supplies and basic sewing skills, you can make durable, reusable containers tailored to your needs. Not only are they cost-effective, but they also improve plant health by providing superior drainage and aeration. Whether you're gardening on a balcony or managing a large garden, these versatile bags offer endless possibilities.
So, grab your materials, follow this guide, and enjoy the satisfaction of crafting your own grow bags. Happy gardening!
FAQs About DIY Grow Bags
Get answers to common FAQs about DIY grow bags, including benefits, materials, and tips for successful gardening. Perfect for all skill levels.
You can experiment with materials like felt, cotton, canvas, or duck cloth. However, natural fabrics like cotton and canvas may retain less water, stain, and rot faster than synthetic options. Felt is a viable alternative, but ensure your sewing machine can handle it.
Yes, you can use staples or adhesive alternatives instead of stitching. If you fold the fabric strategically, you may reduce the amount of sewing or eliminate the need for sewing altogether.
Yes, landscape fabric is breathable and porous, allowing air to reach plant roots and excess water to drain effectively.
While it’s not a common use case, you can try using them for aquatic plants. However, fabric grow bags are not typically designed for underwater use, and their longevity in such conditions may vary.
If you're using 15-year or similarly heavy-duty fabric, doubling may not be necessary. However, thinner fabrics benefit from doubling to retain water better.
Yes, you can make large grow bags (e.g., 40 gallons or more). Ensure the stitching is strong, and consider reinforcing the handles to bear the weight.
Look for landscape fabric labeled as non-toxic or chemical-free. Research products thoroughly to ensure they are safe for food-grade gardening.
Yes, old clothing like denim or work pants can be repurposed into grow bags. This method is cost-effective and eco-friendly, though durability may vary.
Reinforce handles by sewing them between fabric layers. This ensures they can handle the weight of soil and plants without tearing.
Small bags: Herbs or seedlings.
Medium bags: Tomatoes or peppers.
Large bags: Root vegetables like potatoes or carrots.


