Gardening enthusiasts often face challenges when growing plants indoors, especially when it comes to controlling environmental factors like light, temperature, and humidity. A grow box is an excellent solution to these problems, offering a controlled environment that helps plants thrive. Learn how to make a cheap and easy DIY grow box at home with this step-by-step guide, perfect for beginners and budget-friendly gardening.
What is a Grow Box?
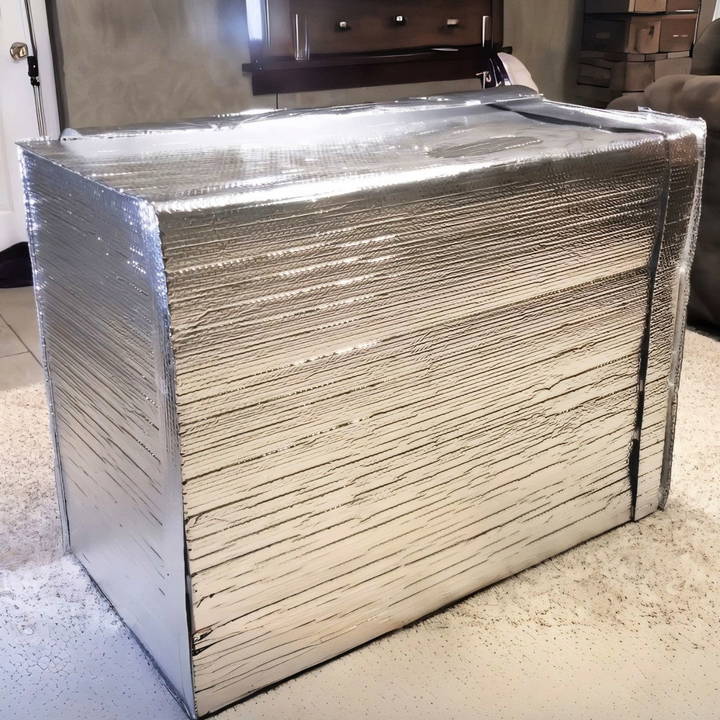
A grow box is a self-contained unit designed to provide the perfect environment for indoor plants. By controlling factors like lighting, airflow, and reflective surfaces, a grow box maximizes the potential for plant growth. It is particularly useful for individuals who want to grow plants in confined spaces, such as apartments or areas with limited sunlight.
Materials You Will Need
Before starting the build, gather the following materials, all of which are easy to find at your local hardware store:
- PVC pipes (three-quarter inch or one-inch)
- PVC pipe connectors (Corners and T-shaped connectors)
- Reflectix (Reflective bubble wrap)
- Velcro strips
- PVC cutters
- Scissors
- Measuring tape
- LED grow lights
Note: If you can't find all the necessary materials for one-inch PVC pipes, three-quarter-inch pipes will work just as well. For this guide, the builder opted for the three-quarter-inch version.
Step by Step Instructions
Learn how to build a DIY grow box with our step-by-step guide. Save money and grow your own plants with these expert cost-saving tips!
Step 1: Design and Plan the Structure
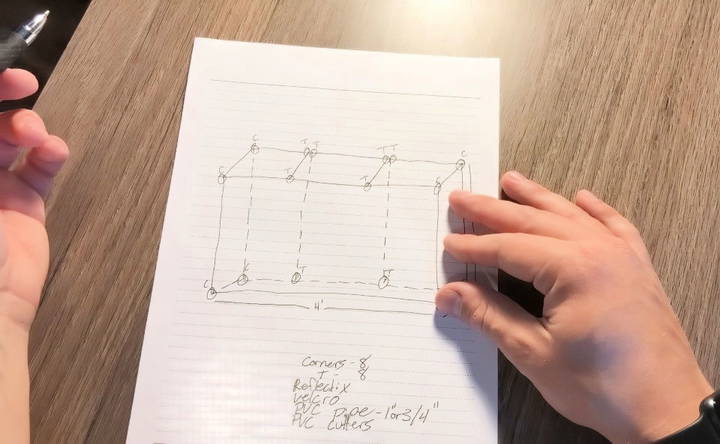
Before purchasing any materials, draw up a rough sketch of your grow box. This doesn't need to be a work of art—just a simple diagram that helps you visualize the structure. The example in this guide uses dimensions of 4 feet wide, 2 feet deep, and 3 feet tall, but you can adjust these according to your available space. Make sure to plan for adequate height, especially if you're growing tall plants.
In your sketch, identify where you'll need pipe connectors. Corners and T-shaped connectors will be necessary for supporting the frame and hanging lights. Here's a quick breakdown:
- Corners: For the box's four corners at the top and bottom.
- T-shaped connectors: For additional support across the sides and top, especially where you'll hang the lights.
Step 2: Cut the PVC Pipes
Once you have your sketch, measure and cut the PVC pipes. The cuts will vary depending on your chosen dimensions. For a 4x2x3 feet grow box, cut the following lengths:
- Four 4-foot pipes for the top and bottom frames (front and back).
- Four 3-foot pipes for the vertical supports (sides).
- Additional shorter pipes for interior cross beams that will support lights and other equipment.
Use PVC cutters to make precise cuts. If you don't have PVC cutters, you can also use a hacksaw, though it may take a little longer.
- Tip: When cutting the PVC, remember that any pipes connected to a T-joint will need to be slightly shorter to accommodate the connector's width.
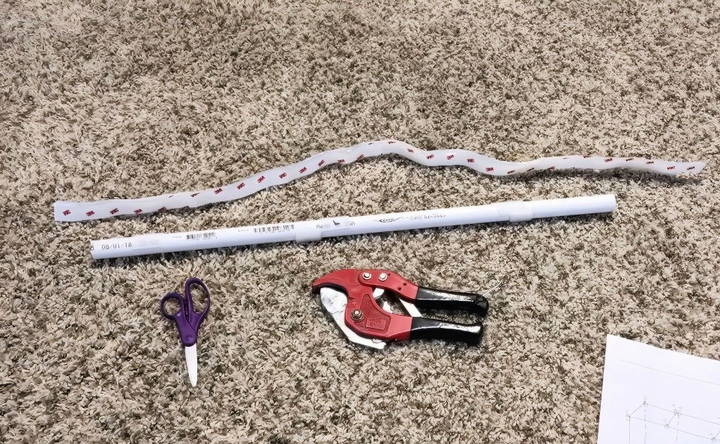
Step 3: Assemble the Frame
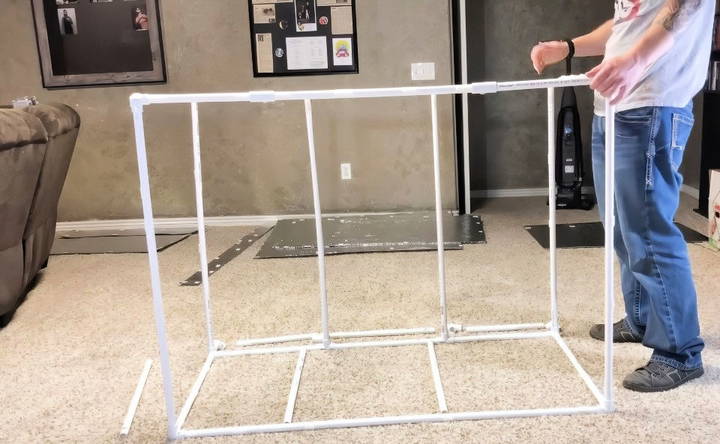
Now that you have all the pipes cut, it's time to assemble the frame. Start by putting together the rectangular base and top. Use the corner connectors to attach the pipes at each corner, and add T-shaped connectors wherever you'll need cross beams for added support.
Once you have the top and bottom frames completed, attach the vertical pipes to each corner, connecting the top and bottom frames. This will give you the basic structure of the grow box.
As you're assembling, double-check the sturdiness of the frame. PVC is generally lightweight but strong enough to hold LED grow lights and light plants. If you plan to use heavy lighting or equipment, consider reinforcing the frame by adding extra T-joints and horizontal support beams.
Step 4: Adding Reflectix
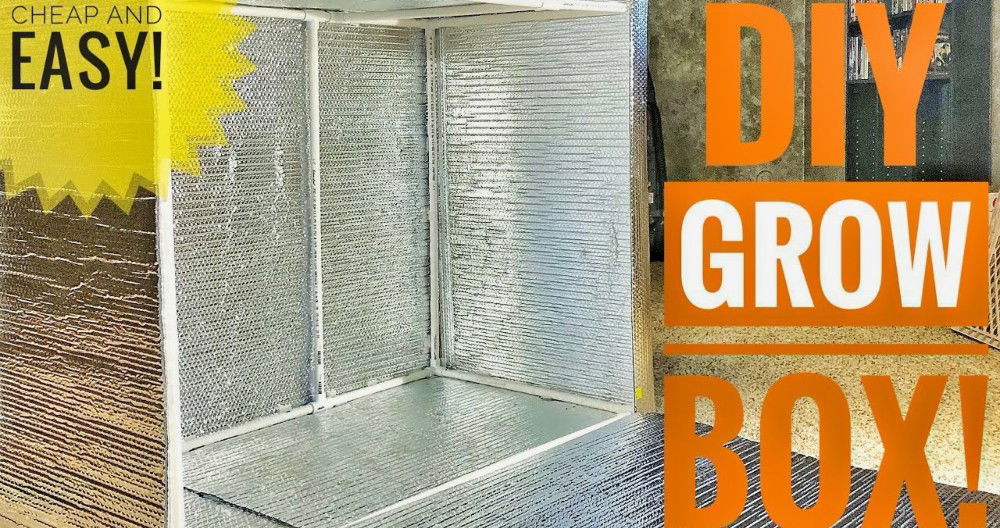
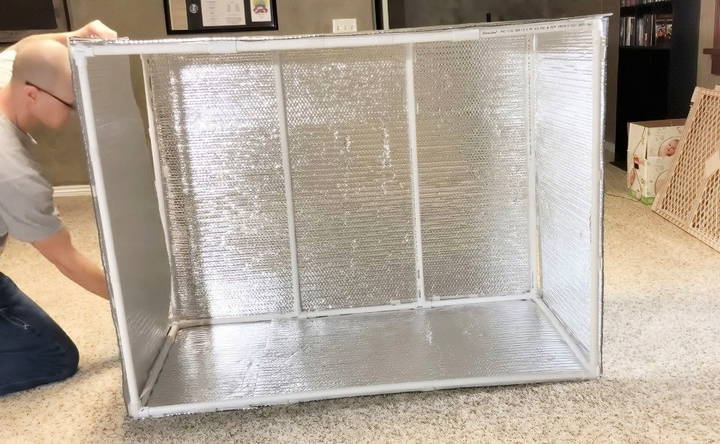
Reflectix is a reflective, bubble-wrap-like material that helps distribute light evenly within your grow box. It maximizes the light your plants receive, ensuring optimal growth conditions.
- Measure the Reflectix: Cut pieces of Reflectix according to the dimensions of your frame. Be sure to measure carefully so the material fits snugly around the frame. Cut panels for each side, as well as the front and back.
- Attach Reflectix to Frame: Use Velcro strips to attach the Reflectix to the PVC frame. Apply Velcro along the edges of the PVC pipes, and then attach corresponding Velcro strips to the Reflectix. This method allows you to remove or adjust the Reflectix panels easily if necessary.
- Ensure Full Coverage: Make sure the Reflectix covers all surfaces of the grow box's interior, especially the walls. This will reflect the maximum amount of light back onto your plants.
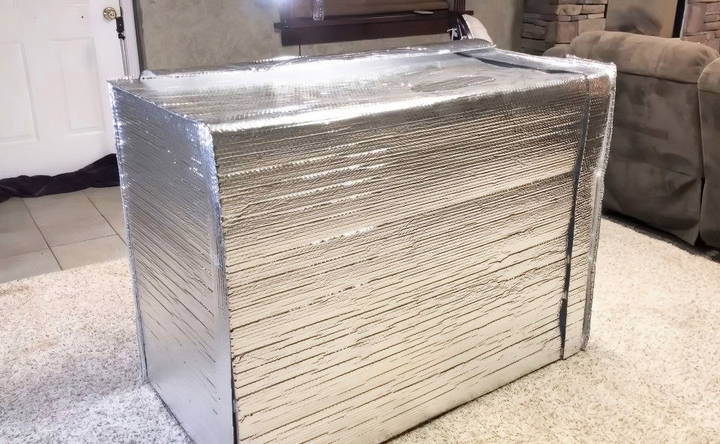
For the front of the grow box, you can make a Velcro-fastened flap that allows easy access while still sealing in light when closed.
Step 5: Install Grow Lights
LED grow lights are ideal for indoor gardens because they emit the right spectrum of light that plants need for photosynthesis while being energy-efficient. In this grow box design, the lights are suspended from the top support beams using simple hooks or hangers.
- Install hooks: Attach small hooks to the top PVC cross beams where you plan to hang the lights.
- Hang lights: Attach your LED grow lights to the hooks, ensuring they are centered and positioned to cover as much of the grow box as possible.
Tip: Choose adjustable LED lights, allowing you to raise or lower the light as your plants grow.
Step 6: Set Up Ventilation (Optional)
Although this basic DIY grow box doesn't include built-in ventilation, adding a fan can greatly improve airflow, helping to control temperature and humidity inside the box.
You can cut small holes in the Reflectix panels for ventilation fans, or simply place a small fan inside the box. Ensure the fan provides gentle air circulation without disrupting your plants' growth.
Step 7: Test and Adjust
With the grow box now fully assembled, it's time to test the setup.
- Lighting: Turn on the LED lights and check for any dark spots in the grow box. The Reflectix should ensure that light is distributed evenly, but you may need to adjust the position of the lights or add additional ones.
- Temperature and Humidity: If you're growing plants that require specific temperature or humidity levels, monitor the environment inside the box using a thermometer or hygrometer. Adjust lighting, and ventilation, or add a small humidifier as needed.
Step 8: Start Growing
Your DIY grow box is now complete and ready for use! Fill it with the plants of your choice, keeping in mind the following best practices for success:
- Monitor Growth: Keep an eye on your plants' development, adjusting the light height as they grow.
- Maintain the Environment: Ensure proper airflow and consistent lighting for optimal plant growth.
- Regular Cleaning: Occasionally clean the inside of the grow box to prevent mold or other contaminants from affecting your plants.
Cost-Saving Tips
If you want to cut costs even further, consider the following alternatives:
- Use Space Blankets or Tin Foil: Instead of Reflectix, you can use inexpensive reflective materials like space blankets or tin foil to line your grow box.
- Repurpose Materials: Check your home or local recycling center for spare PVC pipes or connectors. This can save you a significant amount of money on materials.
Conclusion
Building a DIY grow box is an affordable and rewarding project that can help you grow plants indoors year-round. By following this step-by-step guide, you can make a grow box tailored to your space and needs, ensuring your plants receive the optimal growing environment. With a bit of planning and effort, you'll be on your way to a flourishing indoor garden!
FAQs About DIY Grow Box
Explore common questions and answers about DIY grow boxes. learn how to build, maintain, and optimize your indoor garden efficiently.
For small-scale projects like this, a simple desk fan can help circulate air. Attach the fan to the PVC frame using zip ties or place it on the ground. If you need better ventilation, cut intake and exhaust holes in the Reflectix, and install small fans for airflow.
Yes, you can use cheaper options like emergency blankets, car windshield shades, or even aluminum foil. These materials will reflect light well but may be less durable than Reflectix.
Three-quarter-inch PVC is recommended for most projects, as it provides adequate support for lights and other accessories. If you're planning on hanging heavier equipment, consider using one-inch pipes for added stability.
To reduce light leaks, use full-length Velcro strips or even double-sided tape along the seams. Make sure to seal the edges well, and you can also use metal tape or duct tape in areas prone to gaps.
Yes, you can place the grow box in colder areas, but you'll need to monitor the temperature closely. Adding insulation and ensuring proper ventilation can help maintain a stable growing environment.
Building a DIY grow box typically costs around $40-$70, depending on materials used. While a budget grow tent may be found for $80 online, this DIY option allows for custom dimensions and space optimization.
For basic garden starts, smell may not be an issue. However, for plants with strong odors, you can add a carbon filter or seal the grow box better to reduce any unwanted smells.
Yes, as long as you reinforce the top cross beams properly. A three-quarter-inch PVC frame should be sufficient for most LED grow lights, but for heavier equipment, you might need to upgrade to one-inch pipes.


