Starting seeds indoors can be a game-changer for gardeners, especially those in regions with long winters or unpredictable weather. The challenge, however, is that grow light setups can be expensive, bulky, and difficult to store when not in use. Fortunately, building your own DIY grow light stand is a practical, budget-friendly solution that offers flexibility and easy storage. It's a quick and easy project that anyone can complete with basic hand tools. Let's dive into the details, so you can start your seedlings indoors with confidence!
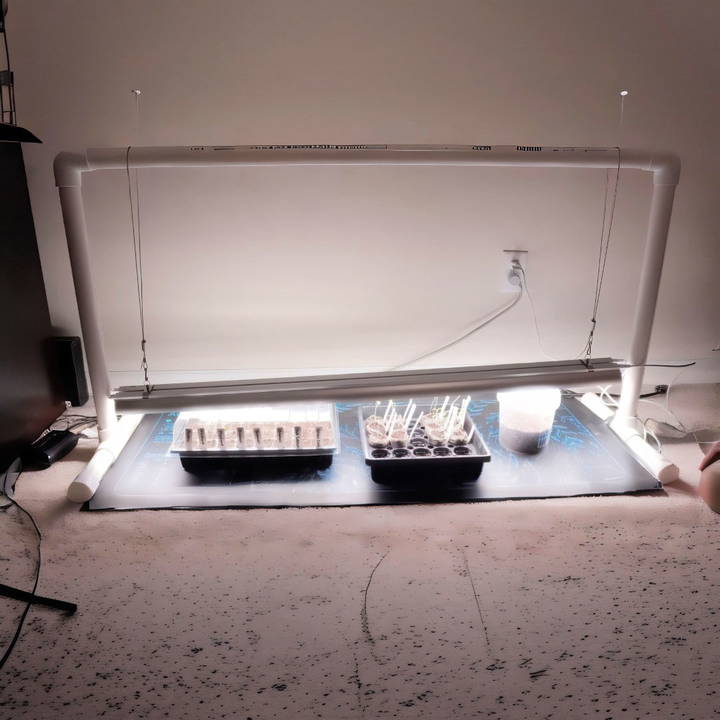
Why Use a DIY Grow Light Stand?
Starting seeds indoors offers gardeners the ability to grow plants year-round without being limited by seasonal weather. However, grow lights are essential for providing the necessary light spectrum that helps seedlings grow strong and healthy. Without enough light, seedlings tend to become “leggy” or stretched, as they reach toward available light sources.
Here are a few reasons why a DIY grow light stand is worth considering:
- Cost-effective: Traditional grow light setups can be pricey, but building your own stand with PVC pipe can save you money.
- Compact: This DIY stand is easy to disassemble and store when not in use, solving the problem of bulky, permanent setups.
- Customizable: By using PVC pipe, you can easily modify the stand's height or width to suit your grow space and the size of your seedlings.
- Beginner-friendly: You don't need advanced skills or tools to complete this project—just a few materials and some basic hand tools.
Let's move on to what you need to get started.
Materials List
To build this simple and effective grow light stand, you'll need the following materials, most of which are available at any local hardware store:
- One PVC pipe (1¼ inch x 10 feet): This single pipe will be cut into sections to form the entire frame of the stand.
- 2 PVC T-fittings (1¼ inch): These will be used to build the structure that holds the grow light.
- 2 PVC 90° elbow fittings (1¼ inch): These are for the top corners of the stand.
- 4 PVC end caps (1¼ inch): These cap off the legs of the stand to provide stability.
- PVC glue (optional): While the stand can be assembled without glue, using PVC cement can ensure a more permanent structure if you're using heavier lights.
- Fine-tooth hacksaw or PVC cutter: This will be used to cut the PVC pipe into the required sections.
- Sander or sandpaper: For smoothing the edges of the PVC after cutting.
- Rubber mallet (or hammer with padding): To tap the fittings into place securely.
Optional:
- LED grow lights: These are lightweight, energy-efficient lights that are ideal for this stand design.
- Seedling heat mat: A heat mat helps regulate soil temperature, promoting faster and more consistent germination.
Estimated Cost:
Building this stand should cost around $25-$30, depending on local prices for PVC pipe and fittings. The grow lights and seedling mats are additional costs.
Step by Step Instructions
Learn how to build a DIY grow light stand with our step-by-step guide. Mark, cut, and assemble your own plant stand for optimal indoor gardening.
Step 1: Mark and Cut the PVC Pipe
The first step in building your DIY grow light stand is to cut the PVC pipe into the necessary sections. Using a measuring tape and marker, mark the following measurements on the pipe:
- 1 section of 4 feet (for the top horizontal piece)
- 2 sections of 2 feet (for the vertical supports)
- 4 sections of 6 inches (for the legs)
These measurements will allow you to build a stand that is about 2 feet tall and 4 feet wide, which is perfect for fitting multiple seed trays.
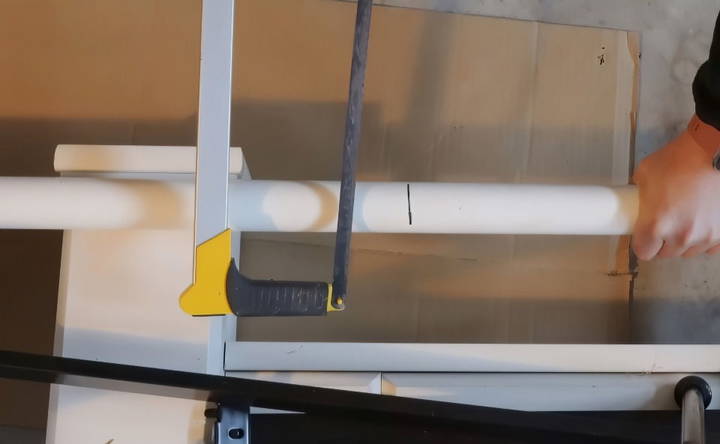
Once the pipe is marked, use a fine-tooth hacksaw or PVC cutter to cut at the marked points. Lay down a tarp or cardboard to catch the plastic shavings and make cleanup easier. After cutting, use sandpaper or a sander to smooth the edges of the PVC, so the fittings slide on easily.
Step 2: Assemble the Frame
Now that all the pieces are cut and prepped, it's time to assemble the stand. Start by assembling the top of the frame:
- Attach the 90° elbows to both ends of the 4-foot section. These elbows will serve as the top corners of the frame.
- Insert the two 2-foot sections into the 90° elbows to form the vertical supports.
Next, attach the legs:
- Attach the T-fittings to the bottom of each 2-foot vertical support.
- Insert the 6-inch sections of PVC into the bottom of each T-fitting to form the legs of the stand.
- Cap off each leg with the PVC end caps to provide stability.
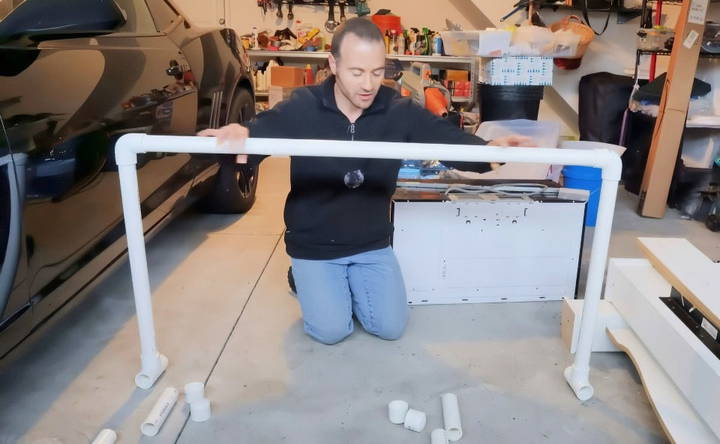
This basic structure is enough to support most lightweight LED grow lights. If you're using heavier lights, like fluorescent shop lights, you might want to glue the fittings in place with PVC cement for added stability.
Step 3: Secure the Frame
Once the frame is assembled, ensure all the pieces are securely connected. A rubber mallet is ideal for gently tapping the fittings together to ensure a snug fit. Avoid using a regular hammer directly on the PVC, as it could crack the pipe. If you don't have a rubber mallet, you can use a hammer with a padded surface, such as a folded towel, to cushion the blows.
If you plan to disassemble the stand later for storage, don't glue the pieces together. The friction fit should be strong enough to hold the structure in place while in use.
Step 4: Install the Grow Lights
Now that the stand is built, it's time to set up your grow lights. If you're using lightweight LED grow lights, they can be easily attached to the top bar of the stand.
Many LED grow lights come with adjustable cables or chains that allow you to hang them from the top of the stand. Thread the cables or chains over the PVC pipe and adjust the height so that the lights are a few inches above the tops of your seedlings.
- Tip: Seedlings need light to be very close—just a few inches away from the leaves—since grow lights are much weaker than sunlight. As the plants grow taller, adjust the height of the lights accordingly.
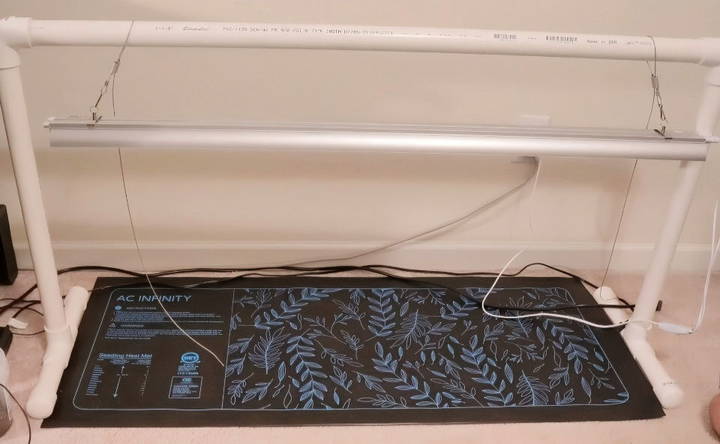
Step 5: Add Seed Trays and Heat Mats
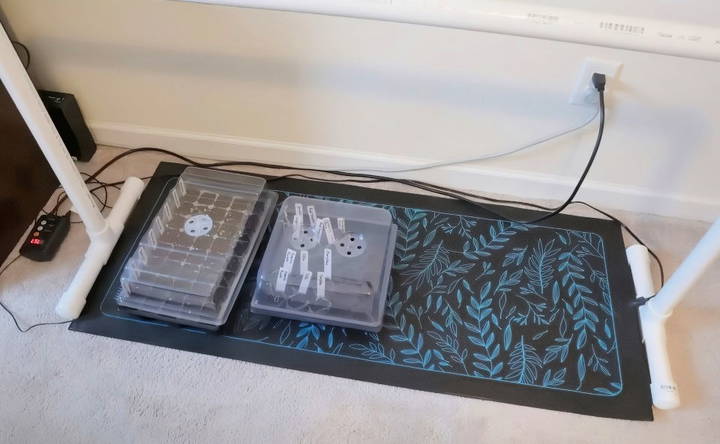
Place your seed trays under the grow lights, and if you're using a seedling heat mat, position it underneath the trays. The heat mat will help maintain an optimal temperature for germination, especially for warm-weather crops like tomatoes and peppers.
For plants that prefer cooler temperatures, such as brassicas, you can adjust the temperature settings on the heat mat to suit their needs.
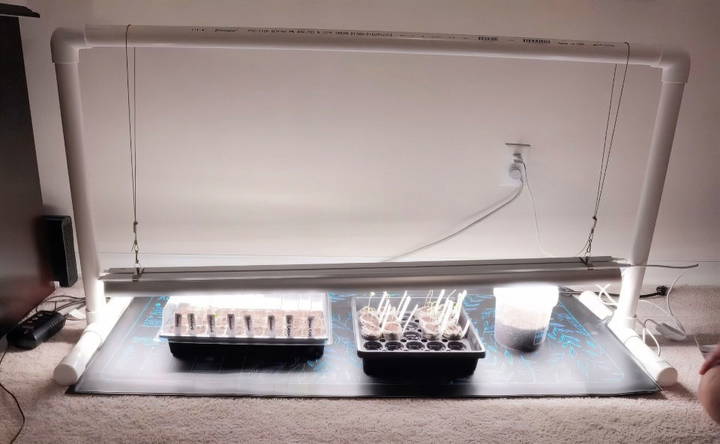
Tips for Using Your DIY Grow Light Stand
Now that you have your grow light stand set up, here are a few tips to ensure your seedlings thrive:
- Light Duration: Seedlings typically need 12-16 hours of light per day. Use a timer to automate your lights and provide consistent lighting.
- Air Circulation: Place a small oscillating fan near the seedlings to help them grow strong stems. Gentle air movement mimics outdoor conditions and prevents plants from becoming too leggy.
- Monitor Temperature: Some seeds require specific temperature ranges to germinate successfully. Use a thermostat to control the temperature of the heat mat for best results.
Modifications and Expansion
One of the advantages of building your grow light stand with PVC pipe is its flexibility. You can easily modify the design to suit your needs:
- Double the Lights: If you need more light coverage, consider building a wider stand using additional pieces of PVC. You can add extra T-fittings and use two pipes at the top to support multiple lights.
- Adjustable Height: For more advanced gardeners, you can modify the stand to include adjustable height settings. By adding additional fittings or longer vertical sections, you can raise or lower the lights to accommodate different stages of plant growth.
Conclusion
Building your own grow light stand with PVC pipe is an affordable, beginner-friendly project that can significantly improve your indoor gardening experience. With just one piece of PVC pipe and a few fittings, you can build a sturdy, easy-to-store stand that supports your seedlings through every stage of growth.
By customizing the design and using energy-efficient LED grow lights, you'll be well on your way to starting healthy, robust seedlings year-round. So why wait? Head to your local hardware store, gather the materials, and get started on this practical DIY project today!
FAQs About DIY Grow Light Stand
Discover answers to common questions about DIY grow light stands, including setup tips, materials, and best practices for optimal plant growth.
A fine-tooth hacksaw works well for cutting PVC pipe. Alternatively, you can use a ratcheting PVC cutter, which makes cutting faster and easier. It's a simple tool that cuts the pipe with a few squeezes, making the process much quicker and cleaner than a hacksaw.
The grow lights should be placed only a few inches above the seedlings, typically around 3 inches. As the seedlings grow, raise the lights accordingly to prevent the plants from becoming leggy due to insufficient light intensity.
LED grow lights are recommended because they are energy-efficient, lightweight, and generate minimal heat. Full-spectrum LED lights mimic natural sunlight, but warm white LEDs work well for eye comfort, especially if the setup is in a living space.
No, gluing the PVC isn't necessary for lightweight LED grow lights. The stand is sturdy enough without glue and can easily be disassembled for storage. However, if you're using heavier lights, like fluorescent fixtures, you might want to glue the joints for added strength.
You can adjust the height of your lights using adjustable rope hangers, which allow for easy raising and lowering. Alternatively, you can use boxes or books to elevate smaller trays to match the height of taller plants under the same lights.
Yes, you can increase the height of the stand by using longer vertical PVC sections. Some users also place a small table or platform underneath the stand to raise it higher, making it easier to work with without bending over.
Leggy seedlings are usually a sign that the grow lights are too far away or they aren't getting enough light. Keep the lights just a few inches above the plants and ensure they are on for 12-16 hours a day. An oscillating fan can also help strengthen the stems.
Yes, the end caps are needed for stability. The Tee fittings used for the legs are slightly thicker than the pipe, so without the end caps, the stand may not balance properly. The caps ensure that the legs are level and provide a stable base.
Seedlings typically need 12-16 hours of light daily. You can automate this by using a programmable timer, which ensures consistent light exposure without the need for manual switching. Too little light can lead to weak, leggy plants.
Yes, you can modify the stand to hold additional lights by using extra T-fittings and PVC sections. This will allow you to build a wider frame that can support multiple light fixtures for larger seedling trays or a more extensive growing setup.


