Starting a DIY grow tent project was one of the most rewarding experiences I've ever had. It began with a simple idea to grow my own herbs and vegetables indoors, as I didn't have space for a garden outside. The first steps involved researching the basics: what materials I would need and the ideal conditions for the plants I wanted to cultivate. It felt like a big task, but I was determined to make it work.
As I gathered the materials – PVC pipes, reflective material, lights, and fans – I realized this project was more than just making a space for plants. It was about learning new skills and understanding the growing process. Putting the tent together piece by piece was like solving a puzzle. With every problem I encountered, I found a solution. My little green world began to take shape, and the satisfaction of watching my plants thrive was unmatched.
DIY grow tents are a great start for anyone wanting to grow plants indoors. I hope sharing my journey encourages you to try building your own. It's not just about the end result but the learning and satisfaction during the process. Remember, I started from scratch, and if I can do it, so can you. Let's begin this green adventure together.
Why Build a DIY Grow Tent?
Building a DIY Grow Tent can be a rewarding project for several reasons. It not only allows you to build a controlled environment for your plants, but it also offers several other benefits.
Cost-Effective
One of the primary reasons people opt for a DIY grow tent is the cost-effectiveness. Pre-made grow tents can be expensive, especially if you're looking for a specific size or feature. By building your own, you can save money and tailor the tent to your budget.
Customizable
A DIY grow tent gives you the freedom to customize the design according to your needs. Whether you have a small space or specific plant requirements, you can adjust the size, shape, and features of your grow tent accordingly.
Control Over the Growing Environment
With a DIY grow tent, you have complete control over the growing environment. You can regulate factors like temperature, humidity, and light, which are crucial for plant growth. This control can lead to healthier plants and better yields.
Learning Experience
Building a DIY grow tent can be a great learning experience. It can help you understand the needs of your plants better and make you a more skilled gardener. Plus, the satisfaction of building something with your own hands can be quite fulfilling.
The key to a successful DIY grow tent is planning and patience. Take your time to research, gather your materials, and don't rush the building process.
Key Requirements for a Successful Grow Tent
A successful grow tent requires careful planning and the right materials. Here are some key features that your DIY grow tent should have:
Lightproof Material
Your grow tent should be made of lightproof material. This is crucial because it prevents light from escaping, which can disrupt your plants' growth cycle. It also helps to maintain the temperature inside the tent.
Waterproof Material
The material should also be waterproof. This is important because it prevents water from leaking out and damaging your floor or other items in your home. It also helps to maintain the humidity level inside the tent.
Proper Sealing for Airflow Control
Proper sealing is another key feature of a successful grow tent. It allows you to control the airflow inside the tent, which is essential for maintaining the right temperature and humidity levels. It also helps to keep pests out.
Reflective Material
The interior of your grow tent should be lined with reflective material. This helps to maximize the efficiency of your grow lights by reflecting the light back onto your plants, which can lead to better growth and higher yields.
The success of your DIY grow tent largely depends on these key features. So, take your time to choose the right materials and design your tent carefully.
How to Make a Grow Tent - Step by Step Guide
Building a grow box at home doesn't have to break the bank or require advanced DIY skills. With a simple plan and some basic supplies, you can build a functional grow box perfect for indoor planting. Let's dive into the steps.
Materials You Will Need:
- PVC pipes (3/4 inch or 1 inch, depending on availability)
- PVC corners and T-joints (8 of each)
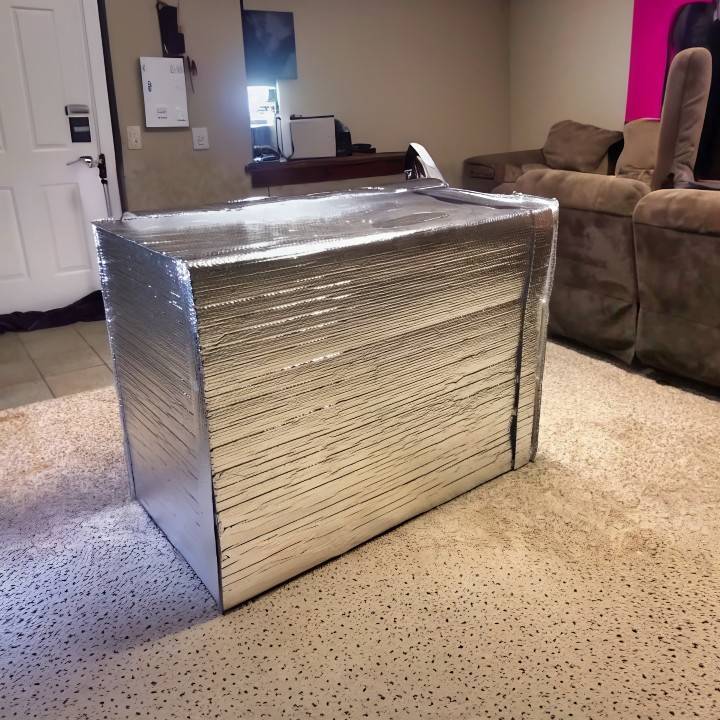
- Reflectix (reflective bubble wrap)
- Velcro
- PVC cutter
- Scissors (for cutting Velcro)
Step by Step Instructions
Discover how to build your own Easy DIY Grow Box with step-by-step instructions.
Step 1: Design Your Grow Box
Begin by sketching a basic layout of your grow box. Don't worry if you're not an artist; a simple drawing with measurements works fine. Your sketch should include dimensions; a 4 feet by 2 feet by 3 feet box works well for most, but customize according to your space.
Step 2: Gather Your Supplies
Based on your design, list the corners and T-joints needed for the PVC frame. Remember, the grow box in this guide uses 8 corners and 8 T-joints. Procure Reflectix for insulation and Velcro for easy access. When choosing PVC pipe diameter, remember that 3/4 inch can save cost and is reliable enough for hanging grow lights.
Step 3: Cut and Assemble PVC Frame
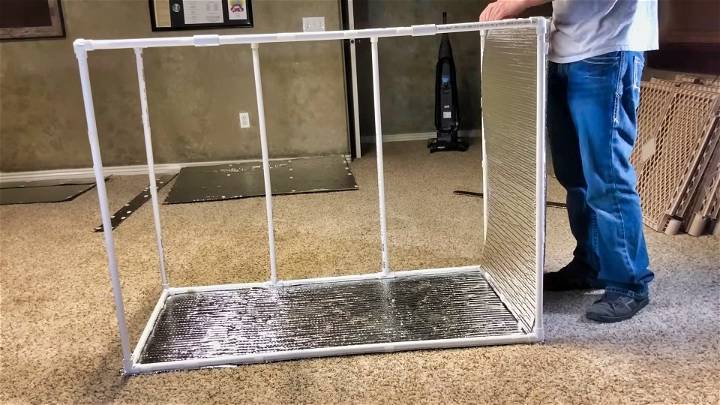
Start cutting your PVC pipe according to the lengths outlined in your design. Assemble the frame by connecting the pipes with the corners and T-joints. Remember that parts of the frame that connect to a T-joint might be shorter than the main lengths due to the addition of the T-joint itself.
Step 4: Add Support Beams
Install any necessary cross beams and back support by cutting small PVC pieces that fit into the T-joints. This step is crucial for making a sturdy frame that can support the weight of lights and plants.
Step 5: Apply Velcro
Cut small strips of Velcro and attach them around the outside of your frame. Ensure both sides of the Velcro are stuck together before cutting. Stick one side to the frame while leaving the cover on the other side. This method simplifies adding the Reflectix later.
Step 6: Attach Reflectix
With the Velcro in place, cut your Reflectix according to the sides and top of your frame. Attach the Reflectix by removing the Velcro covers and pressing the material onto the Velcro strips around the frame. This material will help reflect light back onto your plants, maximizing growth.
Step 7: Final Adjustments
After assembling, you might need to make slight adjustments to ensure the Velcro and Reflectix align well. Don't hesitate to cut additional Velcro strips for any spots you might have missed.
Tips for an Even Cheaper Project
If you're looking to cut costs further, consider using alternatives like space blankets instead of Reflectix. They're cheaper and still offer reflective benefits to boost plant growth.
Video Tutorial
For a step-by-step video tutorial, watch this YouTube guide on building a cheap and easy DIY grow box.
It pairs well with this written guide, making the DIY process easier by providing a visual representation of each step.
This guide and video are great for making an affordable grow box, perfect for any gardener.
Tips for Gardening in DIY Grow Tents
Gardening in a DIY grow tent can be a rewarding experience. Here are some tips to help you get the most out of your indoor gardening adventure.
Regular Checks
Regular checks are crucial for maintaining the health of your plants. Look for signs of stress, nutrient deficiencies, or pests. Early detection can help you address issues before they become serious problems.
Adjusting Light Heights
The height of your lights can have a significant impact on your plants' growth. As a rule of thumb, lights should be kept close enough to provide sufficient light, but not so close that they cause heat stress. Adjust the light heights as your plants grow.
Ventilation
Proper ventilation is essential in a grow tent. It helps to control temperature and humidity levels, and it provides fresh air for your plants. Make sure your grow tent has adequate ventilation and adjust it as needed.
Watering Schedule
Watering is a critical aspect of indoor gardening. However, it's important not to overwater or underwater your plants. Establish a watering schedule based on the needs of your plants and stick to it.
Nutrient Management
Plants in a grow tent may require additional nutrients, especially if you're using a soilless growing medium. Use a high-quality nutrient solution and follow the manufacturer's instructions for the best results.
Every plant is unique and may require different care. Always do your research and don't be afraid to experiment to find what works best for your plants.
Common Mistakes and How to Avoid Them
When building and using a DIY grow tent, it's easy to make mistakes, especially if you're new to indoor gardening. Here are some common mistakes and tips on how to avoid them.
Overwatering or Underwatering
Overwatering or underwatering is a common mistake. It's important to understand the watering needs of your specific plants. Overwatering can lead to root rot, while underwatering can cause your plants to dry out and wilt.
Tip: Establish a regular watering schedule and adjust it based on the needs of your plants and the humidity level inside your grow tent.
Inadequate Lighting
Another common mistake is providing inadequate lighting. Plants need sufficient light for photosynthesis. Too little light can lead to weak, leggy plants, while too much light can cause light burn.
Tip: Use grow lights that are suitable for your plants and adjust the height of the lights as your plants grow.
Poor Ventilation
Poor ventilation can lead to a host of problems, including mold, pests, and poor plant growth. It's important to ensure that fresh air can circulate in and out of your grow tent.
Tip: Install a fan or ventilation system in your grow tent and adjust it based on the temperature and humidity levels.
Ignoring Signs of Pests or Disease
Ignoring signs of pests or disease can lead to significant damage to your plants. It's important to regularly check your plants for signs of pests or disease and to take action at the first sign of trouble.
Tip: Learn about common pests and diseases that can affect your plants and how to treat them. If you notice any signs of pests or disease, take action immediately.
Everyone makes mistakes, especially when starting something new. The key is to learn from these mistakes and to continually improve.
FAQs About DIY Grow Tents
Here are some frequently asked questions about DIY grow tents:
What is a Grow Tent?
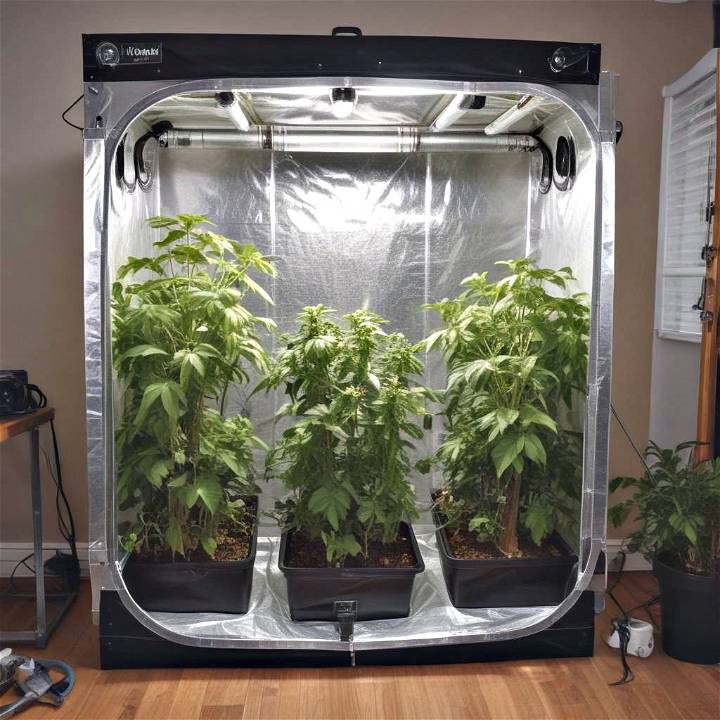
A grow tent is a portable, reusable grow room made of a sturdy canvas exterior and an interior layer of highly reflective material. It provides an enclosed space for indoor gardening.
Why Should I Use a Grow Tent?
Grow tents offer several benefits. They help control the growing environment, maximize the effectiveness of grow lights, and can be customized to fit your specific needs.
What Material is Used in Grow Tents?
Grow tents are typically made of a sturdy canvas exterior and an interior layer of highly reflective material. The reflective material helps maximize light exposure, while the canvas exterior prevents light leaks.
How Do I Start a Grow Tent?
Starting a grow tent involves choosing the right size and location, setting up the frame, installing the lights and ventilation system, and preparing the growing medium.
How Do I Control Temperature and Humidity in My Grow Tent?
Temperature and humidity can be controlled through proper ventilation, using heaters or air conditioners, and using humidifiers or dehumidifiers as needed.
Conclusion:
Starting my own DIY grow tent was a challenge, but it taught me so much about patience, care, and the beauty of growth. If you're thinking about making your own indoor garden, I say go for it! It's a rewarding experience that connects you more deeply to the food you eat or the beauty you build. Plus, knowing you built it all by yourself adds a special touch to every leaf and flower. Get started, and watch your garden – and your skills – grow.


