If you're a musician looking to display your guitars safely on the wall without breaking the bank, making your own DIY guitar wall mount is an ideal solution. This guide will show the process of building a durable and visually pleasing guitar wall mount for under $3 using simple materials. This project is easy, affordable, and can be completed in just a few minutes, making it a perfect weekend DIY for any guitar enthusiast.
Let's dive into the details and steps needed to make this sturdy wall mount for your guitar!
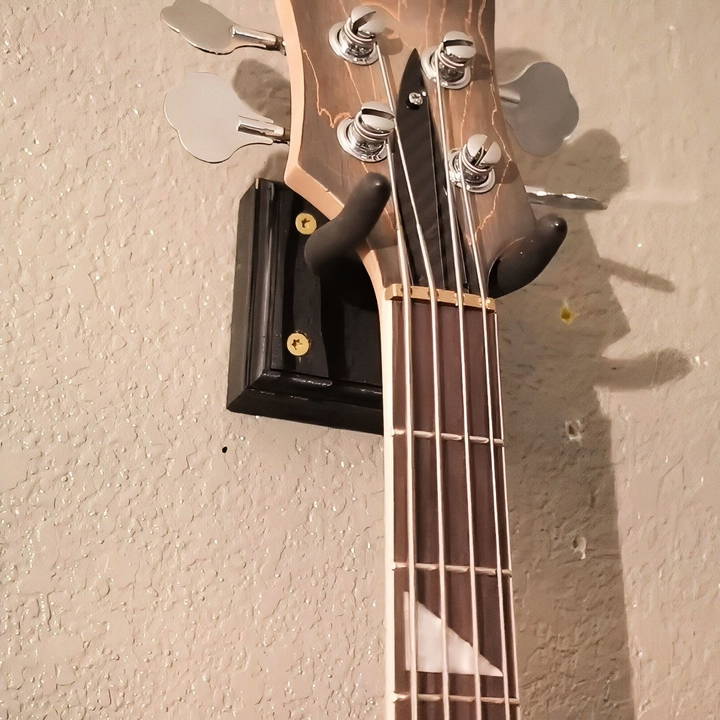
Why Choose a DIY Guitar Wall Mount?
While plenty of premade guitar mounts are available online, the DIY option offers several benefits:
- Cost-Effective: Premade mounts can range in price, but this DIY method keeps costs below $3 per mount.
- Customization: You can paint or stain the wood to match your room decor or personal style.
- Sturdiness: This design uses four drywall anchors and heavy-duty materials to ensure your guitar stays securely in place.
- Quick and Simple: It takes less than five minutes to make each mount.
By building your own mount, you can enjoy peace of mind knowing your guitar is securely fastened to the wall and won't fall unexpectedly.
Materials You'll Need
The materials for this project are inexpensive and may already be available in your home. Here's what you need to get started:
- Heavy-Duty Utility Hook: These hooks are widely available at hardware stores for around $1.50 each.
- Scrap 2x4: If you don't have one, a small piece can be purchased for minimal cost.
- Four 3-Inch Screws: These screws provide additional stability by securing the mount into the wall.
- Drywall Anchors: These ensure the mount stays securely in place.
- Paint or Stain: Optional, but recommended if you want the mount to blend with your decor.
If you already have the screws, drywall anchors, and 2x4, the total cost of each mount will be under $3. Even if you need to purchase all the materials, you'll still keep costs to about $15 for multiple mounts.
Step by Step Instructions
Learn how to make a secure DIY guitar wall mount with step-by-step instructions. Avoid common mistakes and customize your mount easily.
1. Prepare the Wood Base
- Cut the 2x4: Cut your scrap 2x4 into a square piece. This piece will serve as the base for the mount.
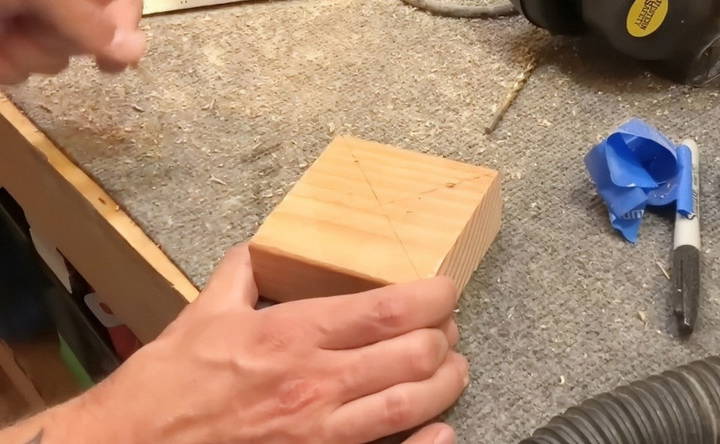
- Measure and Mark the Center: To ensure the mount is properly aligned, use a ruler to draw an "X" from corner to corner on the wood. The center of this “X” will be where your utility hook attaches.
- Mark Mounting Points: Measure about one inch from each corner to mark where you'll place the four wall-mount screws. This spacing provides balanced support, which is crucial for securing the guitar's weight.
2. Drill Pilot Holes
- Make Holes for Screws and Hook: Drill pilot holes where you marked the corners and in the center for the hook. Pilot holes prevent wood splitting and make it easier to drive in the screws later.
- Fit the Utility Hook: Make sure the hook sits securely in its hole. This will hold the guitar, so it's important that the hole matches the hook's size.
3. Customize the Wood (Optional)
- Sand and Paint: Use sandpaper to smooth the edges, which gives the mount a polished look and removes splinters.
- Route the Edges: If you have a router, adding a decorative edge enhances the mount's aesthetic.
- Apply Paint or Stain: Choose a color that complements your space. Staining adds a classic finish, while paint can provide a pop of color.
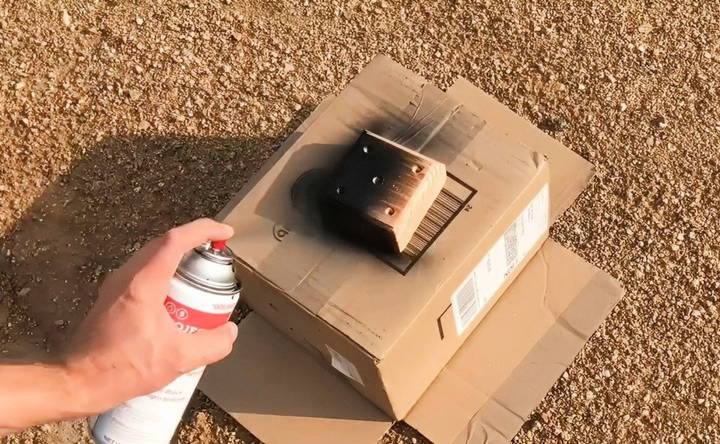
This step is optional but recommended if you want the mount to be as stylish as it is functional.
4. Mount the Wood to the Wall
Now that the wood base is ready, it's time to attach it to the wall securely.
- Position the Mount: Choose the wall location where you want to mount your guitar. Make sure it's high enough to clear any obstacles and within reach.
- Mark Pilot Holes: Press the mount against the wall and use a drill to mark each of the four screw locations.
- Install Drywall Anchors: For each mark, drill a slightly smaller hole. If you encounter a stud, you won't need an anchor; otherwise, insert a drywall anchor into each hole. This step ensures the mount can handle the guitar's weight.
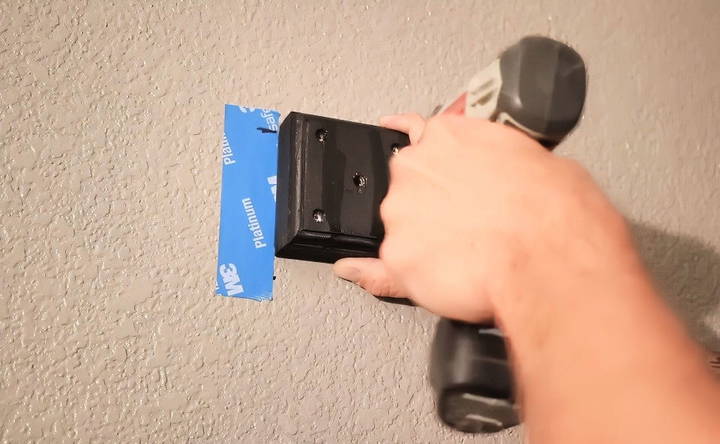
5. Secure the Mount to the Wall
With the drywall anchors in place, you're ready to attach the mount securely.
- Attach the Screws: Align the mount with the anchors and use your 3-inch screws to secure it to the wall. Tighten each screw until the mount is flush against the wall.
- Install the Utility Hook: Once the wood is firmly in place, screw in the utility hook. Double-check that it's sturdy, as this hook will bear the guitar's weight.
After following these steps, your DIY guitar wall mount is ready for use!
Why This DIY Solution is More Secure
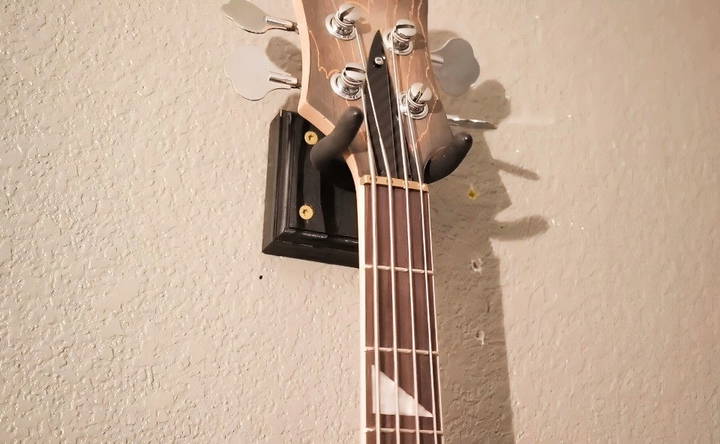
The design of this DIY wall mount is robust, ensuring your instrument stays safely on display. Here's why it's preferable to some commercial options:
- Sturdy Anchor Points: Using four drywall anchors instead of two adds stability, preventing the mount from becoming loose over time.
- Durable Utility Hook: Unlike some flimsy commercial mounts, the heavy-duty utility hook provides reliable support.
- Customizable Design: With commercial mounts, you often have limited style options. A DIY mount can be tailored to fit your decor.
Common Mistakes to Avoid
Building a guitar wall mount may seem straightforward, but some common pitfalls can affect its durability and appearance. Here are a few tips to ensure success:
- Skipping the Pilot Holes: Drill pilot holes in the wood and wall to avoid splitting the wood and prevent the screws from stripping.
- Forgetting the Anchors: Drywall alone won't support the weight of a guitar. Always use drywall anchors unless you're drilling into a stud.
- Over-Tightening Screws: This can crack the wood or weaken the drywall. Tighten screws firmly but avoid excessive force.
- Not Testing Stability: Before hanging your guitar, give the mount a few light tugs to ensure it's secure.
Maintaining and Adjusting Your DIY Mount
Once your mount is up, keeping it in good shape and making adjustments if necessary is essential. Here's how to ensure long-term use:
- Regularly Check Screws: Over time, screws may loosen. Periodically check and tighten them if needed.
- Inspect for Wear: Keep an eye on the mount's condition. Wood can wear down if exposed to changes in temperature and humidity, especially if left untreated.
- Adjust for Different Instruments: If you have multiple guitars, you may need to adjust the position or height of the mount. Making a few mounts at once can save time and ensure each instrument has its own dedicated space.
Final Thoughts
Building a DIY guitar wall mount is a practical, affordable, and rewarding project for any guitarist. By following these steps, you'll have a secure, visually appealing mount that keeps your instrument safe. Not only does this DIY option offer a cost-effective alternative to store-bought mounts, but it also provides peace of mind, knowing your guitar is displayed safely.
This project takes just a few minutes but makes a lasting impact on your room's aesthetics and guitar's safety. So grab your tools, and let's get your guitar mounted securely on the wall!
FAQs for DIY Guitar Wall Mount
Discover the ultimate DIY guitar wall mount guide. Find answers to FAQs, tips, and step-by-step instructions for safe and stylish guitar storage.
Yes, mounting directly into a stud provides the best support. Use a stud finder to locate studs and attach the mount using 3-inch screws for maximum stability. However, keep in mind that this limits your placement options to where the studs are located.
For drywall installations, high-quality, heavy-duty drywall anchors rated for at least 50 pounds are recommended. Avoid standard plastic anchors, as they may not hold under the guitar’s weight. Toggle bolt or metal screw-in anchors are stronger options for non-stud walls.
Yes, wrapping the hook with soft felt or velvet protects the guitar's finish, especially important for instruments with delicate finishes like nitrocellulose lacquer. You can attach the fabric with a hot glue gun to cover the contact points of the hook.
If the mount pulls out, it could be due to insufficient anchors or over-tightening. Reinstall using larger or stronger drywall anchors. Consider adding a base plate, such as a 1x4 or 2x4, for added support across multiple wall studs.
A long 2x4 can be attached horizontally across multiple studs to make a multi-guitar mount. Attach individual hooks along this board, allowing for even weight distribution and customization of guitar placement.
Yes, this mount can support heavier instruments, provided you use robust anchors and hooks. Ensure that the anchors and hooks are rated to handle the extra weight, especially if mounting on drywall without studs.
For guitars with angled or asymmetrical headstocks, adjust the hook angle by twisting it slightly to align with the headstock shape. This provides a secure fit for various headstock designs, including angled or single-sided headstocks.


