Building a DIY gun cabinet was one of the most satisfying projects I've taken on. It all started when I realized my firearms needed a safe and organized place. The project seemed intimidating at first, but with clear gun cabinet plans, it became a fun and educational experience. I found that breaking down the whole task into six easy steps was very effective.
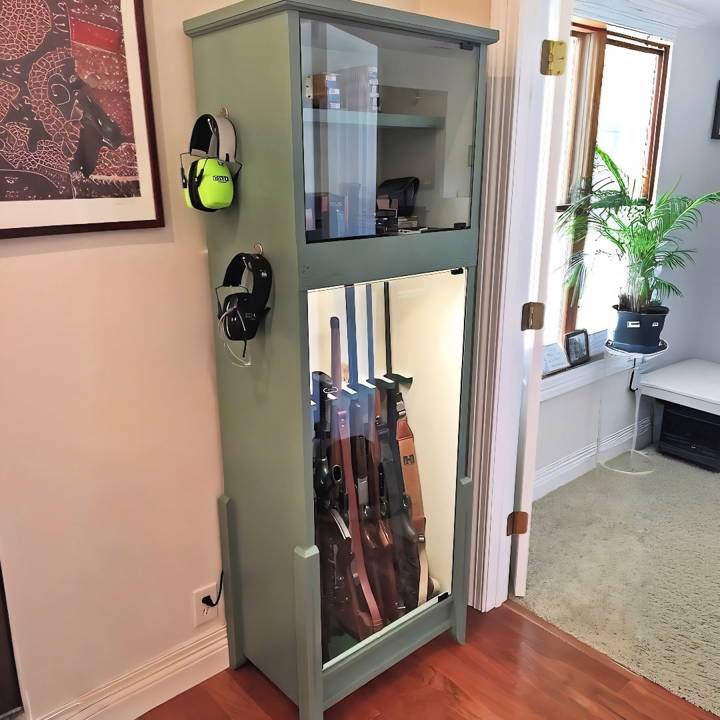
Gathering materials and tools was the first step. I made sure I had quality wood, screws, and a reliable drill. The effort was worth it, and with each step, I saw my skills and confidence improve. The process of crafting something with my hands was truly rewarding. If you have been considering organizing your firearms safely, these plans will help you get started.
You can begin your own journey now with the provided steps below, which are simple and clear.
Step by Step Instructions
Learn how to build a DIY gun cabinet with our step-by-step instructions. Perfect for secure firearm storage and organization. Follow our guide now!
Step 1: Gather Your Materials and Tools
Gather materials and tools for your project. Learn what you need and why, including essential tools for a seamless start.
Materials Needed
- Plywood: Choosing a nicer grade ensures your cabinet is not only sturdy but looks good, too. I opted for plywood because of its versatility and affordability.
- Glue (Type III): Waterproof and with enough working time for adjustments, perfect for both indoor and outdoor projects.
- Screws and nails: Essential for joining pieces firmly together.
- Paint or Stain: This is where your personal preference comes into play. I went with a subdued green that fit the room's aesthetics.
Why These Materials?
Each material was selected for its ability to contribute to the cabinet's durability, appearance, and my personal preference for a natural, somewhat rustic look.
Tools Required
- Table Saw and Band Saw: Crucial for making precise cuts and shaping the wood.
- Miter Saw: Needed for angled cuts, especially for the legs.
- Router: This added a professional touch to the edges.
- Various hand tools: Screwdrivers, hammers, sandpaper, and more for the finer details.
- Air Nail Gun: This was a game-changer for me, significantly speeding up the assembly process.
Step 2: Starting with a Basic Box
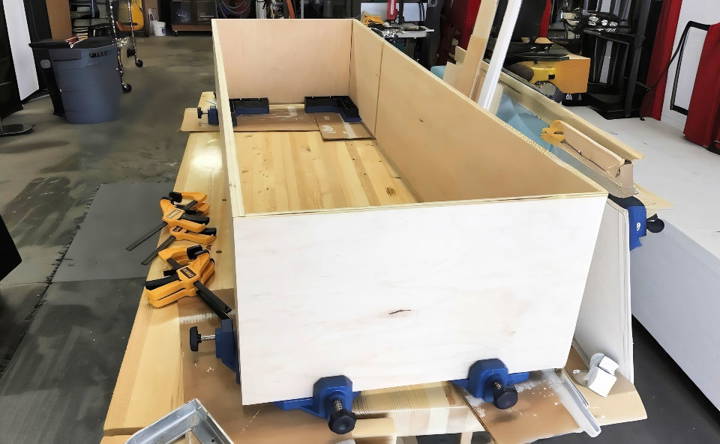
The foundation of any cabinet, mine included, starts with building a simple box. It's essential to get this right because it sets the tone for the rest of the build. I used rabid joints for durability, and a dado blade on my table saw for precise cuts.
Step 3: Assembling the Frame
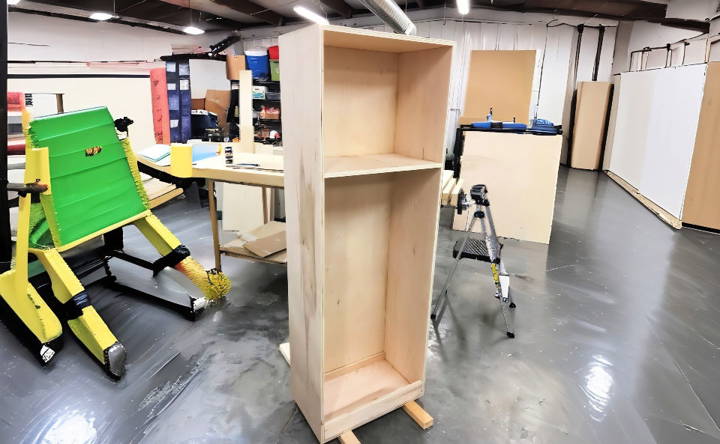
Using the table saw, I cut grooves for the shelves and ensured everything was perfectly aligned. This may seem like a minor step, but it makes a big difference in the cabinet's overall stability and aesthetics. Gluing and screwing the joints added additional strength.
Step 4: Back Panel and Legs
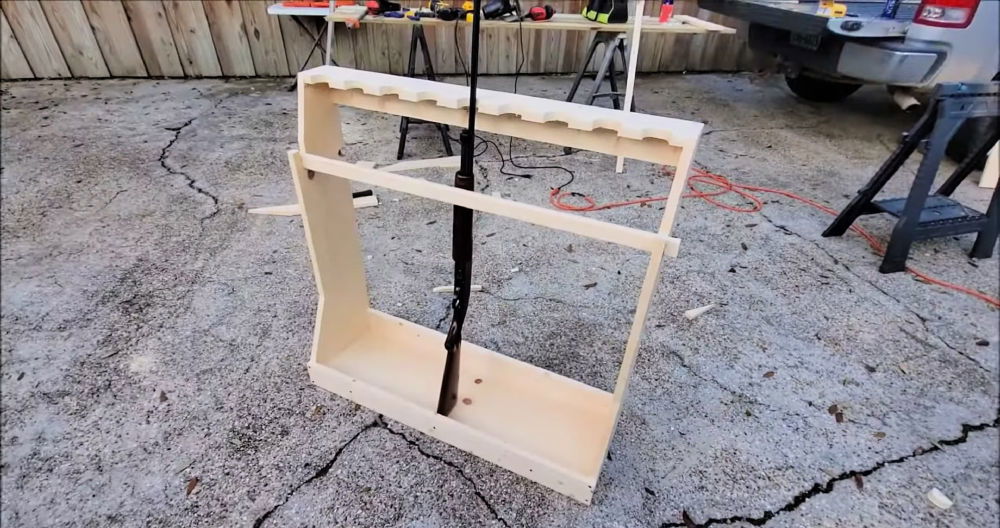
The back panel adds rigidity to the cabinet - I split mine into two for a perfect fit. The legs, cut at an angle, raised the cabinet off the floor, giving it a more refined look. This step required some creativity but resulted in a product that was both functional and visually appealing.
Step 5: Sanding, Priming, and Painting
No amount of high-quality material can substitute the need for meticulous sanding, priming, and painting. These steps transformed the raw wood into a polished piece of furniture. The colors chosen reflected my personal taste and the room's decor. This part of the process was as rewarding as it was essential.
Step 6: Final Touches
Including a rifle rest for the barrels and additional decorative touches such as routed edges and a simple carving, personalized the cabinet further. These details might seem small, but they significantly impact the overall look and functionality.
Lessons Learned and Tips
- Take Your Time: Rushing can lead to mistakes. Measure twice, cut once.
- Be Patient With Yourself: Not everything will go as planned. There were moments of frustration, but the key is to keep moving forward.
- Customize: Make it yours. From the material selection to the final paint color, every choice reflects your unique style and needs.
Customization Ideas for Your DIY Gun Cabinet
When it comes to building a DIY gun cabinet, customization is key to making a piece that not only serves its functional purpose but also reflects your personal style. Here are some ideas to inspire your project:
Choose Your Wood Wisely
Selecting the right type of wood can make all the difference. Consider using oak for its durability or cherry for its rich color. For a more budget-friendly option, pine can be a great choice and can be stained to look more expensive.
Add a Personal Touch with Carvings
Wood carvings can add a unique flair to your gun cabinet. Whether it's a simple geometric pattern or something more intricate like wildlife scenes, carvings can turn your cabinet into a work of art.
Paint It Up
Painting your gun cabinet can give it a fresh, modern look. Choose a color that complements your room, or go bold with a contrasting shade. Use high-quality paint for a finish that will last.
Hardware That Stands Out
The hardware on your gun cabinet is like the jewelry of the piece. Opt for brass or antique-style knobs and handles to add character. For a sleeker look, consider brushed nickel or chrome.
Interior Lighting
Install LED lights inside your cabinet to showcase your firearms. This not only adds an aesthetic touch but also makes it easier to see inside.
Soft Touches
Line the interior of your cabinet with felt or leather to protect your guns from scratches. Choose a color that contrasts with the wood for a striking effect.
Make It Smart
Integrate technology by installing a digital lock or a biometric scanner for added security. You can also add a humidity monitor to ensure your firearms are stored in optimal conditions.
Customize your gun cabinet to be practical and reflect your personality and craftsmanship. Make it yours by mixing and matching these ideas to suit your taste and needs.
Advanced Techniques for Your DIY Gun Cabinet
When you're ready to take your DIY gun cabinet to the next level, advanced woodworking techniques can elevate both its functionality and aesthetic appeal. Here's how you can apply some sophisticated methods to your project:
Dovetail Joints for Durability
Dovetail joints are renowned for their strength and resistance to being pulled apart. Use this technique for the corners of your cabinet for a build that will last for years.
Router Inlays for Decoration
A router can be used to build intricate inlays, adding a decorative touch to your cabinet. Choose a design that has personal significance or simply enhances the beauty of the wood.
Hidden Compartments for Extra Security
Incorporate hidden compartments into your cabinet design. These can be used to store ammunition or valuable items, adding an extra layer of security.
Sanding and Finishing for a Professional Look
Proper sanding is crucial for a smooth finish. Use progressively finer grits to sand the wood. Finish with a sealant or varnish to protect the wood and bring out its natural beauty.
Adjustable Shelving for Flexibility
Build adjustable shelving within your cabinet to accommodate different sizes of firearms. Use shelf pins for easy adjustment.
Soundproofing for Discretion
If noise is a concern, consider soundproofing the interior of your cabinet. This can be particularly useful if you plan to work on your firearms within the cabinet.
Using these advanced techniques will enhance your DIY gun cabinet and let you master new skills. Take your time, measure twice, cut once, and always prioritize workshop safety.
Security Features for Your DIY Gun Cabinet
Ensuring the security of your firearms is paramount when designing a DIY gun cabinet. Here are some security features you can incorporate to keep your guns safe and secure:
Robust Locking Mechanisms
Invest in high-quality locks for your cabinet. Deadbolts or cam locks are reliable choices. For added security, use two locks on the door instead of one.
Tamper Alerts
Consider installing a tamper alert system. This can be as simple as a loud alarm that sounds if someone tries to force the cabinet open or a silent alert that notifies you on your phone.
Reinforced Construction
Reinforced metal plates are used in the cabinet's construction to resist drilling or cutting. Pay special attention to the areas around the locks and hinges.
Keyless Entry Options
Keyless entry systems, like numeric keypads or biometric scanners, offer convenience and reduce the risk of lost keys. Ensure they have a backup power source.
Visibility Control
Install frosted glass or apply a tinted film to the cabinet's glass to prevent outsiders from seeing inside, maintaining privacy and deterring theft.
Anchor It Down
Secure your cabinet to the floor or wall with bolts. This prevents thieves from simply carrying the entire cabinet away.
Add security features to enhance your DIY gun cabinet's safety. Aim to secure firearms from unauthorized access while keeping them accessible. Make it simple, effective, and user-friendly.
Safety and Legal Considerations
Building a DIY gun cabinet is not just about craftsmanship; it's also about ensuring the safety of everyone around you and complying with the law. Here are some key points to consider:
Know the Law
Before you start, understand the legal requirements for gun storage in your area. Laws vary widely, so check with local authorities to ensure your cabinet meets all legal criteria.
Secure Storage
Your cabinet must be able to lock securely. This prevents unauthorized access, especially by children or visitors who may not understand the potential danger of firearms.
Accessibility
While security is crucial, you also need to be able to access your firearms quickly in an emergency. Balance these needs carefully when designing your locking mechanism.
Visibility
Consider who can see into your cabinet. If it's visible from a window, you might be advertising the presence of guns to potential thieves. Position your cabinet out of sight from outside your home.
Fire Safety
Materials used in your cabinet should be fire-resistant. This helps protect your firearms in case of a fire and prevents them from becoming additional hazards.
Ammunition Storage
Store ammunition separately from firearms, if possible. This reduces the risk of accidental discharge during handling.
Regular Checks
Periodically inspect your cabinet for signs of wear or damage. Ensure that it remains a safe and secure storage solution.
By following these guidelines, you'll build a gun cabinet that is not only a testament to your DIY skills but also a responsible way to store your firearms.
FAQs About DIY Gun Cabinet
Discover answers to common questions about DIY gun cabinets, including materials, safety tips, and essential tools for your project.
Yes, you can build a gun cabinet yourself if you have basic woodworking and DIY skills. There are many plans available that guide you through the process, ranging from simple designs to more advanced ones.
The best wood for a gun cabinet is one that is sturdy and complements your home decor. Common choices include oak, pine, or plywood, depending on whether you prioritize appearance, cost, or both.
To ensure your gun cabinet is secure, use quality locks and consider bolting it to the wall or floor for added stability. Some plans also offer hidden storage options for enhanced security.
Yes, proper ventilation is important to protect your guns from humidity and temperature changes. Also, make sure the cabinet is organized in a way that prevents scratching or damage to the firearms, and always follow local laws and regulations regarding firearm storage.
To maintain your gun cabinet, regularly clean it with a soft cloth and appropriate wood cleaner. Check the locks and hinges periodically for wear and tear, and oil them if necessary. If your cabinet has a glass front, keep it streak-free with a glass cleaner. For wooden parts, consider using furniture polish to keep the wood nourished and prevent it from drying out.
Conclusion
Seeing my finished DIY gun cabinet filled me with pride and a sense of accomplishment. Trust me, these steps are straightforward and will guide you in making your own solid and safe storage.


