Starting a DIY project can be really fun and fulfilling. Last weekend, I decided to build a DIY hall tree from scratch. I had always wanted a neat spot to hang my coats and scarves. With a few basic tools and some wood, I was ready to take on the challenge.
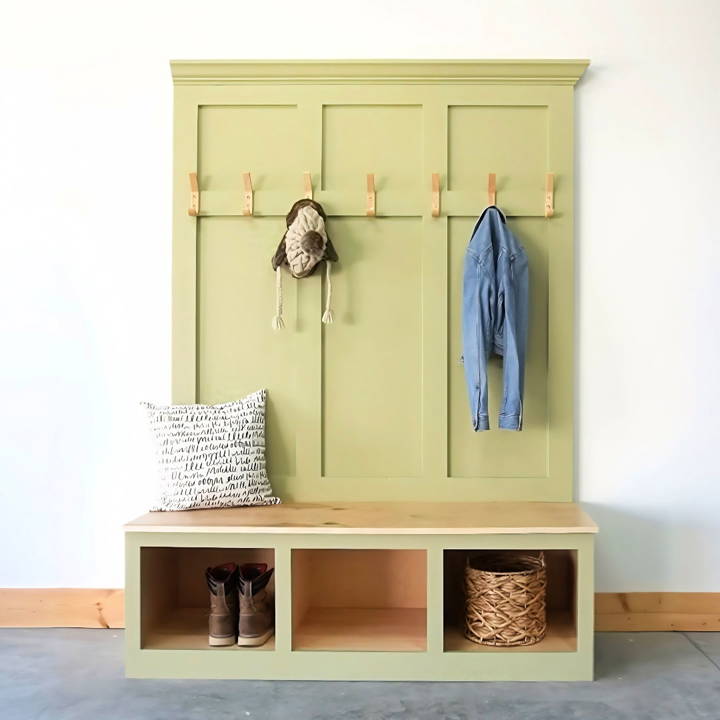
I followed some simple hall tree plans I found online. They provided clear steps and measurements, which made things a lot easier. The process was straightforward, and I managed to assemble the frame in a few hours. Now, I have a wonderful hall tree that looks great in my entryway. I hope by sharing my experience, you feel inspired to start your own project.
Building your own DIY hall tree can surely bring a sense of accomplishment. The best part is you can customize it to fit your needs and style. So, grab your tools and get started – I'm sure you'll find this project both useful and rewarding.
Materials Needed and Their Importance
- Plywood: The core structure of the bench and hall tree. It's durable and easy to work with.
- 1x3s and 1x4s: These were used for the face frame and trim, adding stability and aesthetics to the piece.
- Pocket Hole Jig: Essential for building strong, hidden joints.
- Screws: Various sizes were needed for different parts of the assembly.
- Paint and Primer: For aesthetics and protection against wear.
- Clear Coat: To protect the paint job and wood.
- Sandpaper: For prepping the wood before painting, ensuring a smooth finish.
- Edge Banding: To give the plywood edges a finished look.
- Wooden Hooks: For hanging coats or hats on the hall tree.
Step by Step Instructions
Learn how to build a DIY hall tree with our step-by-step guide, including cutting plywood, sanding, assembly, face frames, back panels, trimming, painting, and clear coating.
Cutting the Plywood
The first step involved cutting all pieces of plywood to size. I followed a diagram to maximize the use of the material, ensuring minimal waste. I ripped 18-inch wide strips from the plywood sheets and then cut them into 18-inch square panels, which would form the sides and dividers of the bench.
Sanding
Before assembly, I sanded every piece. This step is crucial for a smooth finish, especially when painting.
Assembly Using Pocket Holes
I drilled pocket holes in the ends of the top support strips and three of the square panels. Pocket holes would allow for a clean, sturdy assembly with screws hidden from view. I used a line marking 3 and 3/8 inches up from the bottom edge of the side panels to align the bottom panel correctly before attaching it with screws.
Face Frame Construction
Using 1x3s and a 1x4, I constructed a face frame for the bench, which adds both strength and visual appeal to the bench. The face frame was assembled using pocket screws, ensuring it was snug and aligned with the front of the bench.
Adding the Back Panel
This part was a bit tricky since the bench's width exceeded a standard plywood sheet. I had to join two pieces to cover the back, using pocket holes and screws. Keeping the seam covered with trim would later mask this join.
Trim and Crown Molding
Adding trim to the back panel and crown molding at the top provided an elegant finish to the bench. The trim was straightforward, but crown molding needed precise cuts to fit perfectly. This aesthetic touch truly transformed the piece.
Painting
After priming and lightly sanding the bench to eliminate any roughness, I moved on to painting. It required patience and attention to details, ensuring all nooks and crannies were covered. Between coats, a light sanding made sure each layer adhered well and left a smooth finish.
Clear Coating
Once the paint dried, I applied a clear coat to all painted surfaces, providing extra protection against daily wear and tear. This step is vital for maintaining the bench's look over time.
Final Touches
After everything dried, I installed the bench seat, secured it from the inside, and applied edge banding to the exposed plywood edges for a finished look. The wooden hooks were the final touch, turning the bench into a functional hall tree.
Customization Ideas for Your DIY Hall Tree
Building a DIY hall tree is not just about adding a functional piece to your home; it's also an opportunity to inject your personality and style into your space. Here are some customization ideas to make your hall tree uniquely yours:
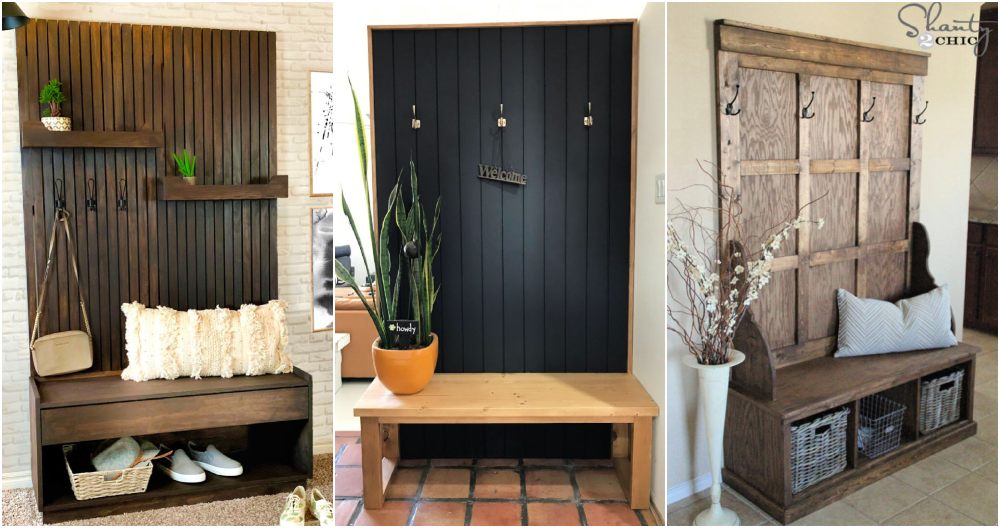
- Choose Your Style: Whether you prefer a modern look, a rustic charm, or a vintage feel, select a design that reflects your taste. For a modern touch, consider clean lines and a minimalist approach. If rustic is more your style, use reclaimed wood and add iron hooks. For a vintage flair, repurpose old doors or headboards as the back panel of your hall tree.
- Pick the Perfect Color: The color of your hall tree can set the tone for your entryway. Bright colors can make a bold statement, while neutral tones can blend seamlessly with your existing decor. Don't be afraid to experiment with unexpected hues or patterns that can turn your hall tree into a focal point.
- Functional Features: Think about what you need from your hall tree. Do you need extra shoe storage? Would a bench for seating be helpful? Perhaps you need multiple hooks for a large family or a mirror for last-minute check-ups before you head out. Tailor these features to your lifestyle.
- Personal Touches: Add elements that showcase your interests or memories. This could be as simple as decorative knobs that you love, picture frames, or a small chalkboard for notes and reminders. These details make the piece feel more personal and homey.
- Light It Up: Good lighting can enhance the functionality and ambiance of your hall tree. Consider adding LED strip lights underneath the shelves or a small lamp on the bench area. This not only helps in finding things during the evening but also builds a warm welcome for guests.
- Accessorize: Accessories can change the look of your hall tree without much effort. Seasonal decorations, woven baskets for storage, or a soft cushion for the bench are all ways to refresh the piece throughout the year.
The goal is to build a hall tree that not only serves its purpose but also delights you every time you walk through the door.
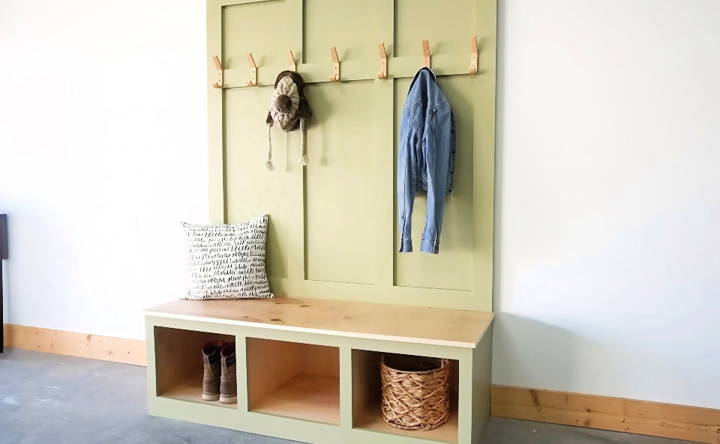
Storage Solutions for Your DIY Hall Tree
When designing a DIY hall tree, smart storage solutions are key to keeping your entryway tidy and functional. Here's how you can maximize the storage potential of your hall tree:
- Incorporate Varied Hooks: Use a mix of hook sizes to hang different items like coats, scarves, and hats. Large hooks are great for bulky items, while smaller hooks can hold keys or dog leashes.
- Add a Bench with Storage: A bench seat that lifts up can provide a hidden area for storing shoes, bags, or seasonal items. This keeps clutter out of sight and maintains a clean look.
- Utilize Baskets and Bins: Baskets and bins on shelves or underneath the bench are perfect for organizing smaller items. Label them for easy identification and to encourage everyone to put things back in their place.
- Shelves Are Your Friend: Install shelves at different heights to store items you use regularly. The top shelf can hold less frequently used items, while lower shelves are great for everyday things.
- Consider a Cubby System: Cubbies are excellent for storing personal items by family members. Assign one cubby per person to help keep everyone's belongings organized.
- Don't Forget the Footwear: If shoes are a major source of clutter, consider adding a shoe rack beneath the bench or dedicate a section of the hall tree for shoe storage.
- Make It Mobile: Adding casters to your hall tree can make it easy to move for cleaning or rearranging your space. Just ensure they lock to keep the hall tree stable when in use.
With these storage solutions, your DIY hall tree will be both beautiful and functional. Keep it simple, stay organized, and enjoy your well-planned entryway.
Troubleshooting Common Issues
Building a DIY hall tree can come with its set of challenges. Here are some common issues you might encounter and how to solve them:
- Stability Concerns: If your hall tree wobbles, check that the floor is level and that all joints are properly secured. Adding a wider base or attaching the hall tree to the wall can increase stability.
- Wood Splitting: When screwing into wood, pre-drill holes to prevent splitting. Choose the correct screw length and ensure it's not too long for the wood's thickness.
- Uneven Paint or Stain: Apply a primer before painting and sand the wood between coats for a smooth finish. When staining, use a pre-stain wood conditioner to ensure even color absorption.
- Misaligned Hooks or Shelves: Measure twice before drilling any holes. Use a level to ensure hooks and shelves are straight.
- Difficulty Assembling: Lay out all pieces and hardware before starting. Follow the instructions step by step, and don't tighten all screws until the entire hall tree is assembled.
- Scratches or Dents: Fill minor scratches with wood filler and sand the area before touching it with paint or stain. For dents, use a wood steamer to raise the grain.
By anticipating these issues and knowing how to address them, you'll be better prepared to build a beautiful and functional hall tree. Patience and careful planning are your best tools.
Maintenance and Care Tips for Your DIY Hall Tree
To ensure your DIY hall tree remains a beautiful and functional part of your home for years to come, proper maintenance and care are essential. Here are some straightforward tips to help you keep your hall tree in top condition:
- Regular Cleaning: Dust and wipe down your hall tree regularly with a soft, damp cloth. For wood surfaces, use a cleaner specifically designed for wood. Avoid harsh chemicals that can damage the finish.
- Immediate Spill Cleanup: If spills occur, clean them up immediately to prevent stains or water damage. Use a dry cloth to absorb liquids and a mild cleaner for any residue.
- Protect from Moisture: If your hall tree is near the door, it might be exposed to rain or snow. Consider adding a clear varnish to protect the wood from moisture or place a mat underneath to catch any drips.
- Check for Loose Parts: Periodically check for any loose screws or wobbly parts and tighten them as needed. This will help maintain the stability and integrity of your hall tree.
- Avoid Overloading: Be mindful of how much weight you hang on the hooks or place on the shelves. Overloading can cause strain and may lead to damage.
- Touch-Up Paint or Stain: If you notice any chips or scratches in the paint or stain, touch them up promptly to prevent further wear and to keep your hall tree looking fresh.
- Seasonal Adjustments: Wood can expand or contract with changes in humidity and temperature. If you notice any sticking drawers or doors, adjust them during the season so they fit best.
By following these simple maintenance and care tips, you can enjoy a welcoming and orderly entryway with your DIY hall tree for many years. Keep it clean, keep it safe, and it will serve you well.
FAQs About DIY Hall Tree
Discover answers to common questions about DIY hall trees. Learn tips, materials needed, and step-by-step guidance for your project.
A DIY hall tree is a custom, home-built piece of furniture designed to organize and store items commonly used in an entryway, such as coats, hats, and shoes. It typically includes hooks for hanging, shelves or cubbies for storage, and sometimes a bench for seating.
Consider the space you have available and your storage needs. Look for designs that complement your home's decor. Whether you prefer a modern look with clean lines or a rustic farmhouse style, there are many plans available that offer step-by-step guidance.
Customization can include choosing a unique finish, adding a chalkboard or mirror, or incorporating baskets for additional storage. You can also adjust the dimensions to fit your space perfectly.
To ensure your hall tree is stable, use sturdy materials and make sure all connections are tight. Consider adding a wider base or anchoring it to the wall if necessary. Always follow the specific instructions provided in your chosen plan for the best results.
Common mistakes include not measuring accurately, skipping steps, or using inadequate tools. Take your time to measure twice and cut once, follow the plan step by step, and use the recommended tools and materials to avoid any mishaps.
Conclusion
The joy of building something from scratch is unmatched. Start your own DIY hall tree project now; it's easier than you think!
Additional Tips
- Always wear protective gear when working with power tools.
- Customize the bench to fit your space or needs by adjusting the measurements.
- Choose a paint color that complements your room's decor for a cohesive look.


