Building a DIY hamster cage was easier than I thought. One day, I decided my hamster, Nibbles, needed a larger home. I researched and found many simple ideas. I gathered some basic materials and spent an afternoon building. The result was a spacious, secure cage that Nibbles loved. It was satisfying to see him more active and happy in his new home.
If you're considering a homemade hamster cage, let me help you get started. The process can be quick, cost-effective, and fun. You don't need special skills or expensive tools. This guide will walk you through each step.
Building your own hamster cage is a fulfilling project that benefits both you and your pet. Get started with this content – it will make the process easier and enjoyable!
Hamster Behavior and Habitat Needs
When making a home for your hamster, it's essential to understand their natural behaviors and needs to ensure they lead a happy and healthy life. Here's a guide to help you build a habitat that caters to these requirements.
Understanding Hamster Behavior
Hamsters are active and curious creatures that need space to explore and exercise. They are primarily nocturnal, meaning they are most active at night. In the wild, hamsters travel several miles in search of food, so in captivity, they require ample space to mimic this activity.
Space to Roam
Ensure your DIY cage is spacious enough for your hamster to move around freely. A good rule of thumb is a minimum of 450 square inches of floor space for one hamster. This space does not include the levels or tunnels you might add.
Burrowing Instincts
Hamsters have a strong instinct to burrow. Provide a deep layer of bedding—at least 2 inches thick—so they can dig and build tunnels. Paper-based or aspen bedding is safe and comfortable for them.
Climbing and Exploring
Incorporate platforms, ladders, or safe climbing structures to satisfy their climbing instincts. However, make sure these are not too high to prevent falls, as hamsters can be clumsy.
Chewing Needs
Hamsters need to chew to keep their constantly growing teeth at a manageable length. Offer a variety of chew toys made from safe, untreated wood, cardboard, or special hamster chews available in pet stores.
Quiet and Secure Environment
Hamsters can get stressed by loud noises or sudden movements. Place the cage in a quiet part of your home where there is a consistent light-dark cycle that mimics natural conditions.
Temperature and Humidity
Keep the cage in an area where the temperature is between 65°F and 75°F (18°C to 24°C) and the humidity is moderate. Extreme temperatures or high humidity can be harmful to your hamster.
Cleanliness
Clean the cage regularly to prevent the buildup of harmful ammonia from urine. Replace the bedding weekly and spot-clean daily to remove food waste and soiled bedding.
Consider these hamster behavior and habitat needs to build a comfortable, stimulating environment. A happy hamster is active and playful, so observe them to ensure their contentment.
Step by Step Instructions
Learn how to build a DIY hamster cage with step-by-step instructions. Make a safe, non-toxic home for your pet from start to finish.
Attaching the Wheels
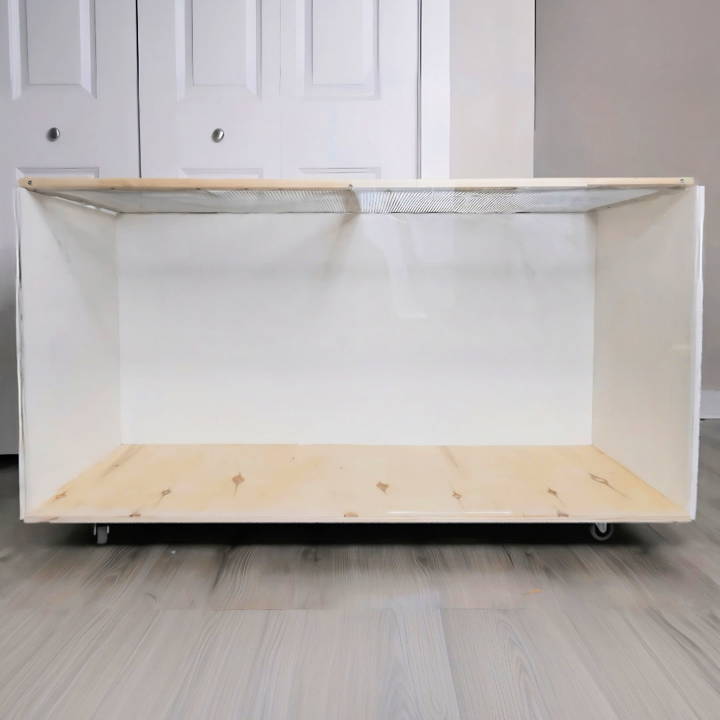
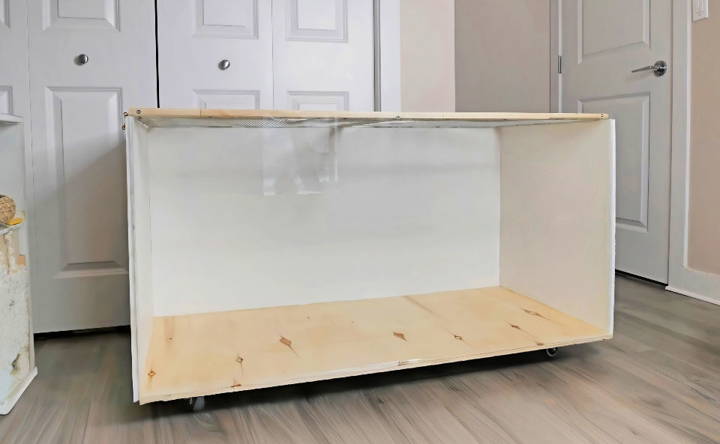
The first step was to make the cage mobile by attaching caster wheels to the base. This way, moving the cage for cleaning or rearrangement became a breeze. Trust me, the convenience of mobility cannot be overstated, especially after you've set up the habitat with all the bedding, toys, and accessories.
Drilling Pilot Holes and Assembling the Frame
Drilling pilot holes was next on my agenda to prevent the wood from splitting when attaching the back to the base. This step required a bit of muscle and patience. Initially, I encountered a hiccup with the plywood cracking due to the screws. It taught me an important lesson: the length of the screws matters. Switching to shorter screws helped mitigate this issue.
Applying Non-toxic Varnish
To protect the wood and make it urine-resistant, I coated the base with natural, non-toxic varnish. This varnish, which oddly smelled like mouthwash, was both a protective layer and peace of mind, knowing it was safe for my hamster. Remember, anything used within the cage must be pet-safe.
Adding the Glass Front
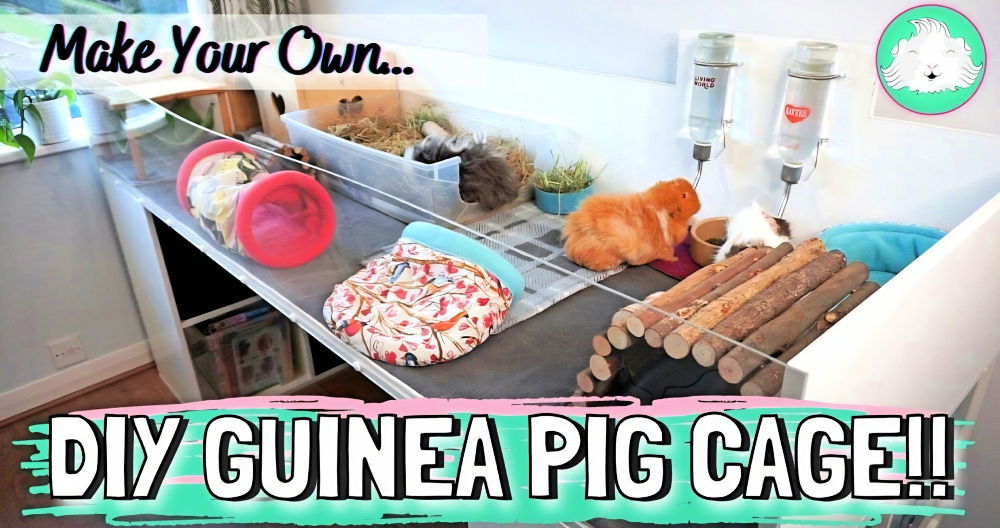
The most visually appealing part for me was adding the glass front. Opting for a 2x4 foot, 3mm thick pane from Speedy Glass provided a clear view into my hamster's daily life while being sturdy and more affordable than other options. Installation involved 100% pure silicone to ensure no harmful substances would leach into the enclosure. Warning: cutting the tip of the silicone tube can be tricky, and I learned that the hard way with a minor hand injury.
Building the Lid
For ventilation and to ensure security, constructing a solid lid was crucial. Unlike my past projects where I made two separate pieces, I opted for a single large frame using 1x2x8 inch wood. This decision simplified the construction process significantly. My approach involved using screws for assembly, a deviation from my usual method of glue and staples, which proved equally effective but with added durability.
Finishing Touches and Installation
After painting the back and sides with non-toxic white paint and lining them with white contact paper for a cleaner look, the final aesthetic was even better than I had imagined. The glass provided a modern touch, while the white backdrop made the colorful hamster toys pop.
Installing the cage in my room was nerve-wracking. I had to carefully navigate it through doorways without causing any damage. Once in place, I focused on securing the lid with simple door hinges and gate hooks, a method tested and true from my previous DIY endeavors.
Customization Ideas
Building your own hamster cage allows for personal touches, ensuring it's both fun for your hamster and a charming home addition. Here are safe and easy customization ideas.
Theme Your Cage
Choose a theme that you love and carry it throughout the cage design. Whether it's a natural woodland, a colorful playground, or a miniature cityscape, ensure all materials are safe for hamsters.
DIY Toys and Accessories
Handcraft toys and accessories like tunnels, bridges, and hideouts using safe materials like untreated wood, cardboard, or hard paper. Always smooth out any sharp edges.
Interactive Play Areas
Set up areas within the cage where your hamster can interact with different toys. You can build a digging box filled with pet-safe sand or a foraging area with hidden treats.
Changeable Layout
Design the cage so you can easily change the layout. This keeps the environment stimulating for your hamster, as they enjoy exploring new setups.
Personalized Sleeping Quarters
Build a cozy sleeping area using pet-safe fabrics. Add a small, soft blanket or hammock that you can change regularly to keep it clean and fresh.
Safe Painting and Decorating
If you want to add color to the cage, use pet-safe paints or dyes. Always check the labels to ensure they are non-toxic, and let any paint dry completely before introducing your hamster to the cage.
Easy-to-Clean Design
Make sure your custom additions are easy to remove and clean. Hygiene is crucial, so avoid complex structures that are difficult to dismantle and wash.
Visibility
Consider your viewing pleasure without disturbing your pet. Use clear, ventilated areas where you can watch your hamster play without feeling exposed or stressed.
Incorporate these ideas to build a unique, engaging environment for your hamster that reflects your style. Prioritize safety and comfort to ensure your hamster feels secure and happy.
Troubleshooting Common Issues
Building a DIY hamster cage can be a rewarding project, but sometimes, you might encounter issues along the way. Here's a helpful guide to troubleshooting common problems you may face.
Unstable Structure
If your cage feels wobbly or unstable, check all connections and joints. Reinforce any weak points with additional fasteners or brackets. Ensure that the base is sturdy and flat.
Sharp Edges
Hamsters are delicate creatures, and sharp edges can cause injuries. Inspect the cage thoroughly and sand down any sharp corners or edges. Cover exposed wire ends with caps or pliable tape.
Escaping Hamster
Hamsters are escape artists. If your hamster is finding ways out, examine the cage for gaps or holes. Make sure all doors and openings close securely and consider a finer mesh or additional latches.
Inadequate Ventilation
Good airflow is crucial. If the cage lacks ventilation, add more wire mesh sections or drill additional air holes, ensuring they are too small for your hamster to squeeze through.
Chewing on Unsafe Materials
Hamsters chew to maintain their teeth. If they're chewing on plastic or painted surfaces, replace these with natural, untreated wood or safe chew toys.
Difficulty Cleaning
A DIY cage should be easy to clean. If you're struggling, build larger access points or modular sections that can be removed and cleaned separately.
Moisture Buildup
To prevent dampness, ensure the bedding is absorbent and change it regularly. Avoid placing water bottles where they can leak onto the bedding.
Overheating
Hamsters can overheat easily. Keep the cage away from direct sunlight and radiators. Consider a cooler room or a safe, low-level fan to circulate air.
By addressing these common issues, you'll ensure your DIY hamster cage is a safe and comfortable home for your pet.
Safety Checks
Ensuring the safety of your DIY hamster cage is paramount. Regular safety checks are necessary to keep your furry friend secure and healthy. Here's a detailed section on how to conduct these checks effectively.
Check for Escape Routes
Hamsters are natural escape artists. Inspect the cage for any small openings or loose parts where a hamster might squeeze through or chew its way out. Ensure all doors and lids fit snugly.
Secure All Fastenings
Verify that all screws, nails, or other fastenings are tight and secure. Loose fastenings can not only lead to structural failure but also pose serious risks if ingested.
Examine for Sharp Objects
Feel around the interior and exterior of the cage for any sharp edges or points. If you find any, file them down or cover them with safe materials to prevent injuries.
Test Stability of Accessories
Shake and test all platforms, wheels, and attached items to ensure they are stable and won't collapse under your hamster's weight.
Non-toxic Materials
Make sure all materials used in the cage, including paints and finishes, are non-toxic and safe for hamsters. If in doubt, consult with a pet supply store or a veterinarian.
Proper Ventilation
Good airflow is essential for your hamster's health. Check that the cage has adequate ventilation to prevent respiratory issues.
Avoid Choking Hazards
Regularly inspect toys and accessories for small parts that could become detached and pose a choking hazard. Replace any items that are worn or broken apart.
Monitor Wire Spacing
If your cage has wire sections, ensure the spacing is narrow enough to prevent your hamster from getting stuck or escaping.
Temperature and Humidity
Use a thermometer and hygrometer to check that the cage's environment stays within a safe temperature range (65°F to 75°F) and humidity level.
Emergency Preparedness
Have a plan in place in case your hamster escapes or if there is an emergency situation, like a broken cage. Keep a spare, secure enclosure on hand just in case.
Regular safety checks ensure your DIY hamster cage is secure. Your hamster's well-being relies on your careful maintenance.
FAQs About DIY Hamster Cage
Discover answers to common questions about DIY hamster cages, including safety tips, materials, and design ideas for a perfect hamster habitat.
The minimum recommended size for a hamster cage is 10 gallons, but larger is always better to ensure your hamster has plenty of space to explore and exercise. For Syrian hamsters, a larger space is especially important. Aim for a cage that’s at least 24 inches long and 12 inches wide, with enough height for bedding and accessories.
Yes, an old aquarium can make an excellent hamster cage. It’s important to clean it thoroughly before use and ensure it’s free of cracks or sharp edges. Add a secure top made of wire mesh to prevent escapes and provide ventilation. Customize the inside with platforms, tunnels, and toys for your hamster to enjoy.
Safety is paramount when building a DIY hamster cage. Avoid materials that can be toxic if chewed, like certain plastics or treated woods. Ensure all openings are small enough to prevent your hamster from squeezing through. Check for sharp edges or points that could injure your pet, and make sure the cage is escape-proof.
To make cleaning easier, design your cage with a removable bottom tray lined with bedding that you can slide out and replace. Use materials that are easy to wipe down, like smooth plastics or glass. Consider a design that allows you to access all areas of the cage easily, and avoid intricate designs that might trap waste or food.
Proper ventilation is crucial for your hamster's health. If you're using a plastic bin, you can build a ventilated lid by cutting a large opening in the top and covering it with wire mesh, securing it with zip ties. For aquariums, a mesh screen top is ideal. Ensure that the mesh is fine enough to prevent escapes but allows for adequate air flow. Additionally, avoid placing the cage in direct sunlight or drafty areas to maintain a comfortable environment for your hamster.
Reflection and Advice
Building a DIY hamster cage yourself can be simple and rewarding. You'll enjoy the process and provide your hamster with a better home. With these tips and instructions, I hope to make your DIY hamster cage project a breeze!


